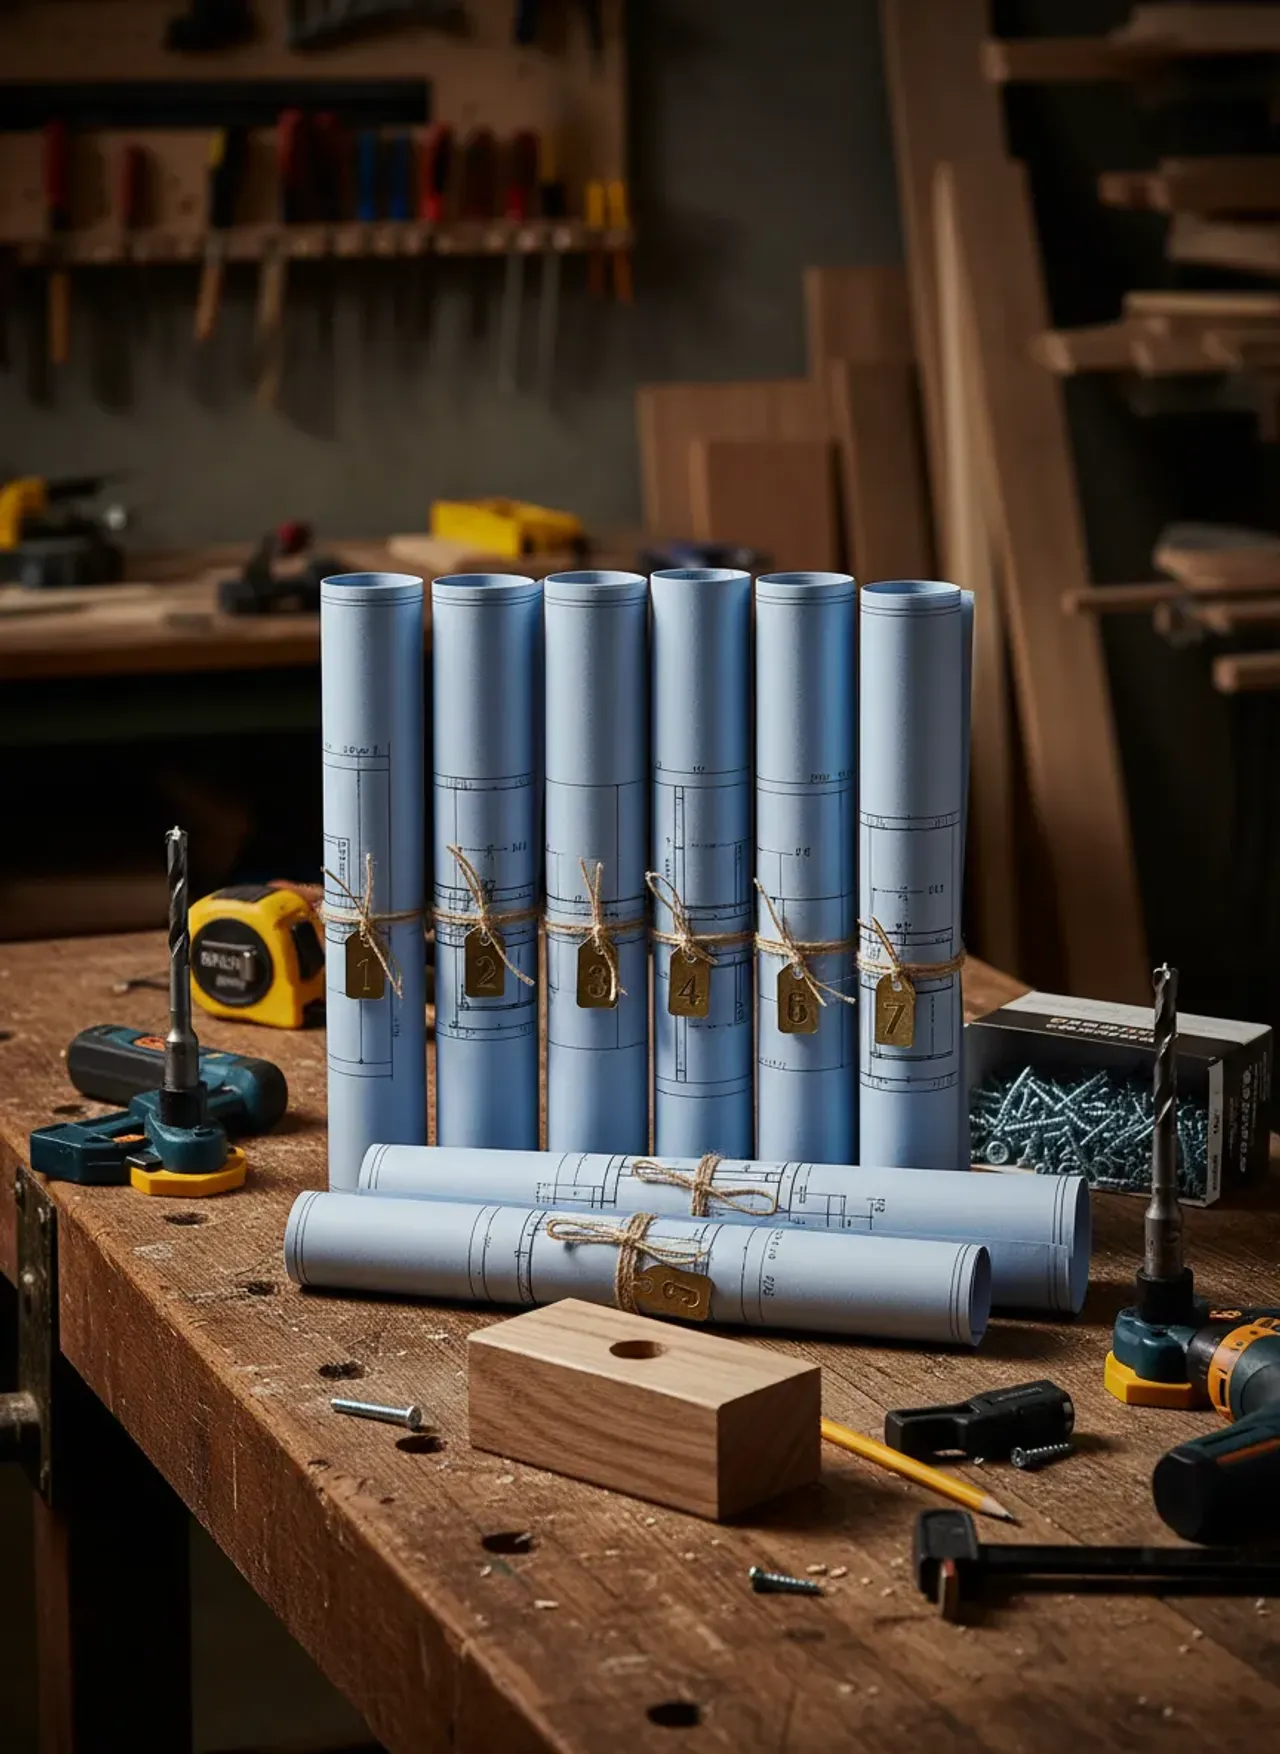
7 Easy Pocket Hole Workbench Plans for a Rock-Solid Shop
Discover 7 incredibly sturdy pocket hole workbench plans designed for real-world shops. Master assembly, avoid racking, and build your ultimate workspace.
Mar 22, 2026 - Written by: Linda Wise
I’ve personally found that the true beating heart of any functional woodshop isn’t the shiny cabinet saw or the expensive helical-head planer. It’s the workbench. If your primary assembly surface wiggles like a wet noodle the second you apply lateral force with a hand plane, your precision goes straight out the window.
Years ago, I used to think a “proper” workbench required weeks of chopping massive mortises and fitting complex wedged tenons. Then reality hit. Shop time is precious. You need a dead-flat, bomb-proof surface, and you need it this weekend. Enter the brilliantly pragmatic world of pocket hole joinery. When engineered correctly, pocket screws combined with modern wood glue create shop fixtures that can literally hold up a truck.
Let’s strip away the woodworking snobbery. You can build a rock-solid shop foundation using dimensional lumber, sheet goods, and a pocket hole jig.
Quick Comparison: Top Picks
| Product | Rating | Check Price |
|---|---|---|
| Kreg Pocket-Hole Jig 720PRO | ⭐⭐⭐⭐⭐ | View on Amazon |
| Titebond III Ultimate Wood Glue | ⭐⭐⭐⭐⭐ | View on Amazon |
| POWERTEC Heavy Duty Workbench Casters | ⭐⭐⭐⭐½ | View on Amazon |
The Mechanics of a Rock-Solid Pocket Hole Bench
Before we dive into the specific builds, we need to address the elephant in the room: racking. Racking is the side-to-side or front-to-back parallelogramming effect that happens when you push against a poorly braced table.
Pocket holes are incredibly strong in tension (pulling the joint together), but they rely heavily on the mechanical shear strength of the screw and the bonding power of the glue to resist racking. To make these workbenches bulletproof, we don’t just butt two 2x4s together and fire in a pair of screws. We use wide aprons, strategic cross-bracing, and laminated tops to distribute the sheer forces.
Pro Tip: Never skip the glue on a workbench build. The pocket screws act as internal clamps, holding the joint perfectly tight while the PVA glue cures. Once that glue dries, the wood fibers will tear before the joint breaks.
Essential Hardware and Lumber Prep
You’ll notice that most of these plans rely on construction-grade pine or Douglas Fir. The trick to making a flat bench out of big-box store lumber is the milling process. If you have a jointer and planer, shave down those rounded edges to create crisp 90-degree corners. If you don’t, carefully rip the rounded factory edges off using your table saw. Square stock yields square frames.
You will also need the right fasteners. For 1.5-inch thick material (standard 2x4s), you must use 2.5-inch coarse-thread pocket screws. Fine-thread screws are strictly for hardwoods; driving them into pine will cause them to strip out immediately, leaving you with a dangerously weak joint.
7 Easy Pocket Hole Workbench Plans for a Rock-Solid Shop
Here are seven distinct approaches to building your shop’s command center. Choose the one that fits your specific workflow, footprint, and budget.
1. The Weekend Warrior Basic Box Frame
If you need a surface to work on by tomorrow morning, this is your blueprint. It’s a classic, no-nonsense design relying on an upper and lower rectangular frame connected by four stout legs.
Structural Breakdown
The legs are crafted by laminating two 2x4s face-to-face, creating a 3x3.5-inch post. The magic happens in the aprons. Instead of using 2x4s for the horizontal supports, step up to 2x6s.
Assembly Sequence
- Laminate your leg blanks and let the glue cure overnight.
- Cut your 2x6 aprons to length.
- Drill three pocket holes at the end of each apron piece.
- Assemble the two short sides first (creating two “H” shapes).
- Stand the assemblies up and connect them with the long aprons.
- Drop a layer of 3/4-inch MDF on top, screwing it from underneath using pocket holes drilled along the inside of the upper aprons.
This massive apron width drastically reduces racking. If you’ve ever dreamt of building a stunning bench using traditional techniques but lack the time, this rugged box frame mimics that visual heft without the agonizing joinery.
2. The Mobile Assembly Station
A static shop is a dead shop. If you’re working in a two-car garage where the cars actually need to park at night, mobility is non-negotiable. This plan modifies the basic box frame to accommodate heavy-duty locking casters.
The Caster Conundrum
Mounting casters directly to the end grain of a 2x4 leg is a recipe for disaster. The end grain won’t hold the lag bolts, and the wheel will eventually snap off when you roll it over an extension cord.
The Pocket Hole Fix
Build your base frame with a lower shelf that sits exactly 3/4 of an inch off the ground. You will use pocket screws to attach a solid 3/4-inch plywood bottom plate across the entire footprint of the bench.
You then mount your heavy-duty casters to the corners of this plywood plate, bolting entirely through the plywood and into the lower 2x4 aprons. This distributes the weight of a 300-pound bench across the entire lower frame rather than isolating it on four fragile end-grain points.
3. The Heavy-Duty Plywood Behemoth
Here’s the real kicker: dimensional lumber warps. Even if you mill it perfectly square, changes in shop humidity can cause pine to twist, throwing your carefully constructed flat top completely out of whack.
If you demand absolute stability, build your entire workbench out of high-quality 3/4-inch Baltic Birch or cabinet-grade plywood. Plywood is dimensionally stable; it will not cup or bow with seasonal changes.
Engineering Plywood Legs
To make legs out of plywood, you rip strips at 3.5 inches wide and laminate three pieces together to create incredibly stiff, perfectly straight posts.
For the aprons, cut 5-inch wide strips of plywood. Because plywood is only 3/4-inch thick, set your pocket hole jig for 3/4-inch material and use 1 1/4-inch coarse screws. To maintain racking resistance, use double aprons—an outer apron flush with the legs, and an inner apron set behind it, glued and pocket-screwed together for an I-beam effect.
4. The Space-Saving Folding Bench
Not everyone has the luxury of a dedicated 400-square-foot shop. For tight quarters, a wall-mounted folding bench provides a rock-solid surface that vanishes when not in use.
Wall Cleat Integration
The secret to this plan is the massive wall cleat. Take a 2x8 piece of lumber and secure it directly to your garage wall studs using 4-inch structural screws. This cleat acts as the permanent anchor.
Hinge and Leg Design
Your main workbench top is framed out of 2x4s laid flat, joined with pocket holes to form a rigid grid. A solid core door or double-layer 3/4-inch plywood serves as the skin.
You attach this top to the wall cleat using heavy-duty piano hinges. The front legs are hinged to drop down automatically when the bench is raised. Use pocket screws to build a secondary “locking brace” that swings out from the wall to prevent the legs from kicking inward if you bump them. It’s a prime example of built-to-last, rugged DIY engineering that maximizes minimal space.
5. The Miter Saw Station Integration
A standalone workbench is great, but a continuous workstation that houses your miter saw changes the entire dynamic of how you process lumber.
The Dropped Center Bay
This plan requires building three distinct modular boxes. Two tall boxes serve as the left and right support wings, and one short box serves as the center well for the miter saw.
- Measure the exact height of your miter saw deck.
- Build the left and right wing frames using pocket holes, ensuring they are identical in height.
- Build the center frame shorter by the exact height of your saw deck.
- Bolt the three frames together.
By utilizing pocket holes, you can easily adjust the height of the center shelf during assembly. Simply drill pocket holes on the inside of the center legs, clamp the shelf exactly where it needs to be to make your saw flush with the wings, and drive the screws home.
6. The Outfeed Table Hybrid
Table saws are notoriously dangerous when ripping long, heavy sheets of plywood without proper outfeed support. Why build a separate outfeed table when your primary workbench can pull double duty?
Height Matching
The critical element here is matching the height of your table saw perfectly. In fact, aim to build the bench about 1/16th of an inch lower than the saw’s cast iron top to ensure wood never catches on the edge of your bench.
Routing Miter Slots
Because you’ll be pushing material across this bench from the table saw, you must account for your miter gauge.
- Build the frame using standard 2x4 pocket hole construction.
- Top it with a double layer of MDF.
- Once assembled, use a router with a straight bit to carve out two channels in the MDF top that perfectly align with your table saw’s miter slots.
This allows your crosscut sled to pass seamlessly over the blade and onto the workbench without binding.
7. The Ultimate Modular Shop Hub
When you’re ready to tackle projects that demand absolute precision—like crafting excellence when you build heirloom-quality furniture—you need a bench that adapts to your clamping needs.
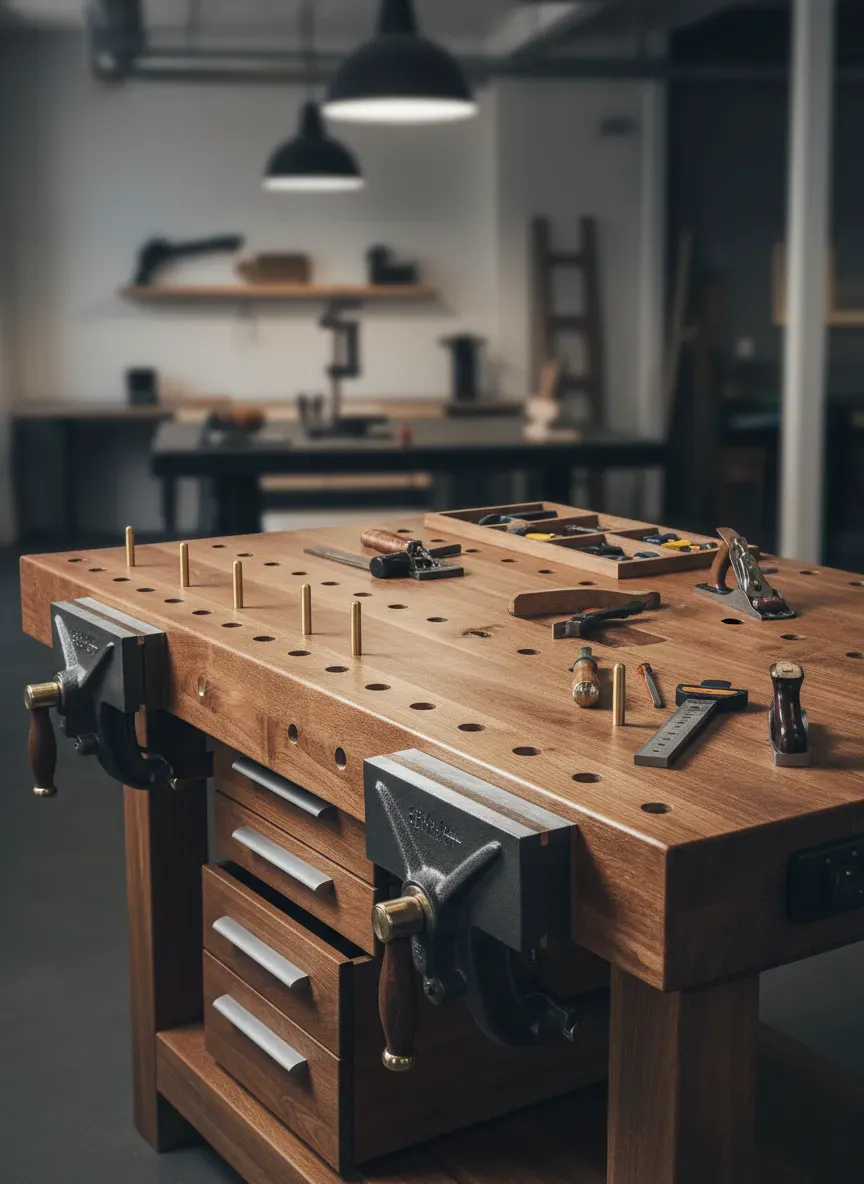
Incorporating Dog Holes and Vises
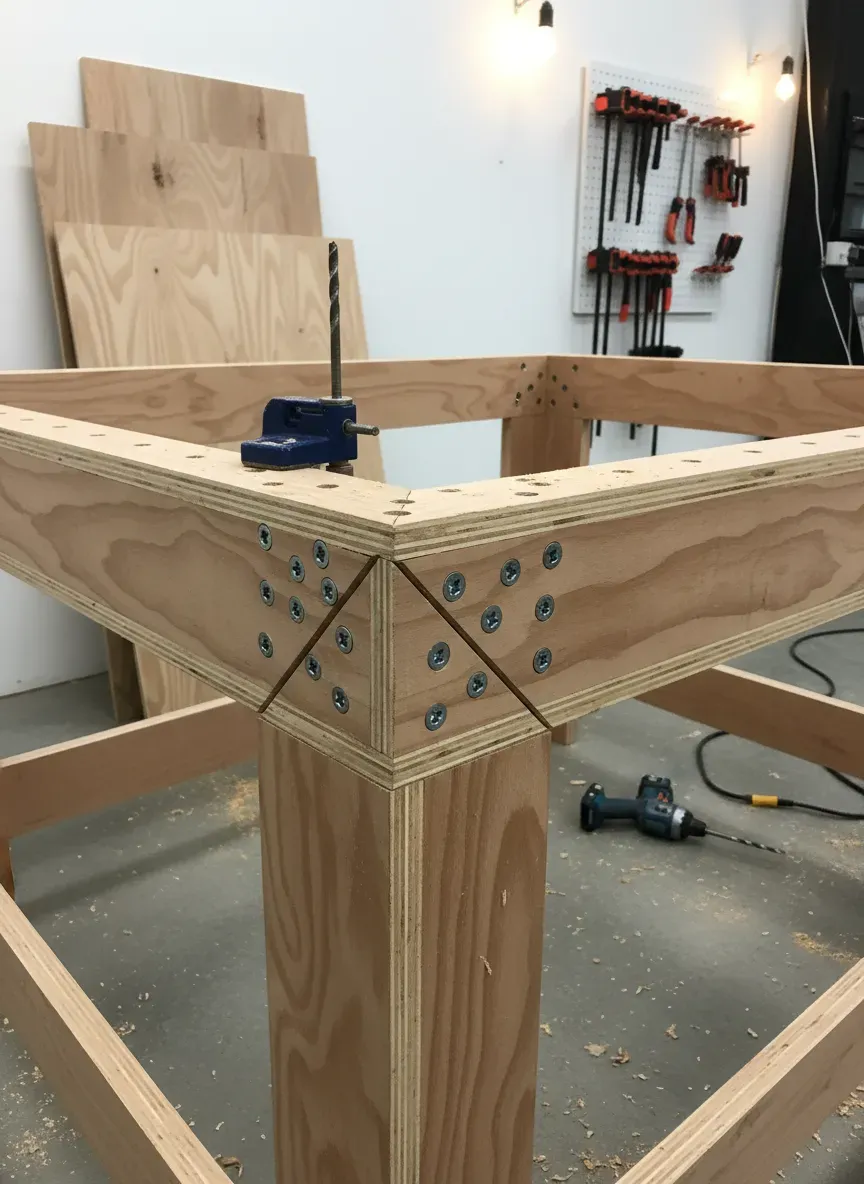
This is the pinnacle of pocket hole bench design. The base is an over-engineered fortress: 4x4 posts for legs (requiring the heavy-duty Kreg XL jig, or laminating 2x4s to wrap around the joints) and massive 2x8 aprons.
The top is where the magic happens. Instead of a solid sheet of MDF, the top is constructed of multiple strips of 2x4s turned on their edge.
- Drill pocket holes along the face of every single 2x4 strip.
- Apply a heavy bead of glue.
- Screw them together, face-to-face, one by one.
This creates a 3.5-inch thick, solid wood slab. Because the grain is oriented vertically, it is virtually indestructible. Once the glue dries, you can drill a matrix of 3/4-inch dog holes across the entire surface for hold-downs, and securely mount a heavy cast-iron face vise to the thick front apron.
Common Pocket Hole Pitfalls (And How to Dodge Them)
I’ve wrecked enough lumber to know that while pocket holes are easy, they aren’t foolproof. If your bench feels weak or your joints look sloppy, you’re likely falling into one of these traps.
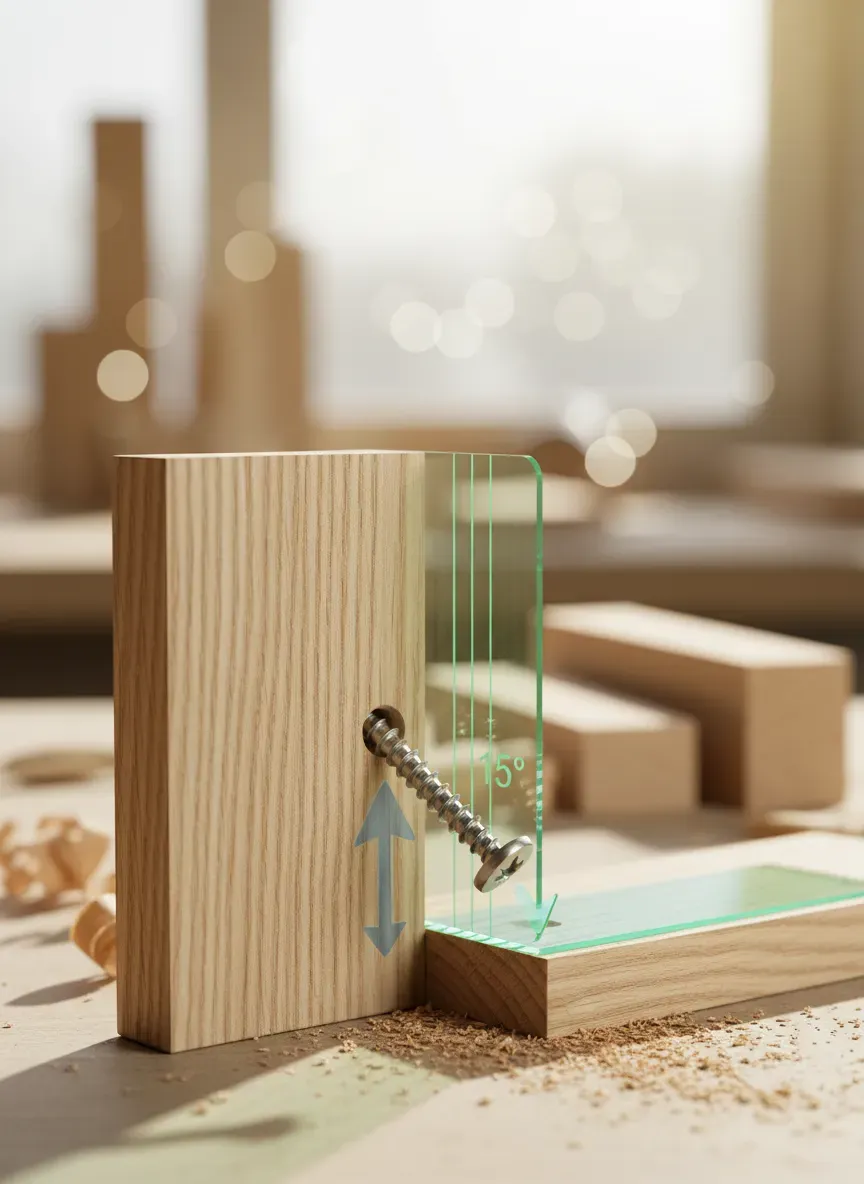
The Registration Slip
When you drive a pocket screw into an angled hole, the screw exerts a forward pulling force as it exits the first piece of wood and enters the second. This almost always causes the two pieces to shift out of alignment right before they clamp tight. The Fix: You must use a specialized right-angle clamp or aggressively clamp the two pieces to a flat reference surface before driving the screw. Never try to hold the joint together by hand.
Over-Torquing the Screws
Modern impact drivers are beasts. It is incredibly easy to drive a pocket screw completely through the bottom of the hole, stripping out the wood and rendering the joint completely useless. The Fix: Set your drill’s clutch to a medium setting. Let the clutch slip once the screw pulls the joint tight. If you strip a hole, remove the screw, pack the hole with wood glue and toothpicks, let it dry, and try again.
Ignoring Wood Orientation
Wood expands and contracts across the grain, not along its length. If you use pocket holes to tightly bind a solid wood slab top to a rigid 2x4 frame across the entire width, the top will eventually crack as seasonal humidity changes force the wood to move. The Fix: Only rigidly attach the top along the front apron. For the back apron, use elongated slots and pan-head screws, or figure-8 fasteners, allowing the top to expand and contract freely from front to back. (Note: If you use MDF or plywood for the top, ignore this rule—sheet goods don’t expand directionally).
Key Takeaways for Your Build
- Dimensional Lumber Needs Milling: Knock off the rounded edges of your 2x4s for tight, flush joints.
- Glue is Mandatory: The screws are the clamps; the glue provides the permanent structural integrity.
- Wider Aprons = Less Racking: Swap 2x4 aprons for 2x6s or 2x8s to massively increase stability.
- Match Your Fasteners: Coarse threads for softwoods (pine, fir), fine threads for hardwoods (oak, maple).
- Plan for Expansion: If using a solid wood top, account for seasonal wood movement to prevent catastrophic splitting.
The Bottom Line: You don’t need a degree in traditional joinery to build a shop environment that allows you to do elite-level work. A well-planned pocket hole workbench, assembled with care, ample glue, and an understanding of structural forces, will outlast almost every tool you place on top of it.
Now, if you want to take these fundamentals and explode your project potential, you need a vast library of proven blueprints. I highly recommend checking out Ted’s Woodworking. I’ve dug through this collection myself, and it gives you instant access to over 16,000 incredibly detailed woodworking plans. Whether you are expanding your shop furniture, building an intricate gazebo, or diving into fine cabinetry, the step-by-step instructions and exact cut lists take all the guesswork out of the process. Right now, they are offering a massive 75% discount, which makes it an absolute steal for the sheer volume of plans you get. Don’t waste time trying to reverse-engineer dimensions—grab the plans and get back to making sawdust.