7 Space-Saving Workbench Plans for Tiny Workshops and Tight Spaces
Discover 7 genius, space-saving workbench plans designed for tiny workshops. Maximize your garage or basement layout with these expert, highly functional builds.

Mar 25, 2026 - Written by: Linda Wise

I’ve personally found that the true test of a woodworker isn’t what they can build in a massive, climate-controlled, 2,000-square-foot shop. The real crucible is the one-car garage. The basement alcove. The shared laundry room where your table saw aggressively competes for territory with winter coats and stacked storage bins.
When you operate in a micro-shop, every square inch of floor space demands justification. You cannot afford the luxury of a static, monolithic eight-foot Roubo bench that eats half your workable footprint. You need utility, mobility, and transformable architecture. You need a surface that handles heavy mallet blows during dovetailing but gracefully disappears when you need to park the sedan.
If you are tired of tripping over extension cords and balancing your glue-ups on rickety folding tables, you are in exactly the right place. I’m breaking down seven highly engineered, space-saving workbench plans tailored specifically for tight quarters. We will dissect the kinematics of folding mechanics, the physics of caster load capacities, and the structural integrity of modular builds.
Before we tear into the blueprints, here is a quick look at the core hardware upgrades I consider mandatory for these compact builds.
Quick Comparison: Top Picks for Compact Workbench Hardware
| Product | Rating | Check Price |
|---|---|---|
| POWERTEC Heavy Duty Workbench Caster Kit | ⭐⭐⭐⭐⭐ | View on Amazon |
| Kreg Multi-Purpose Shop Stand | ⭐⭐⭐⭐½ | View on Amazon |
| Bora Centipede Portable Workstand | ⭐⭐⭐⭐⭐ | View on Amazon |
The Philosophy of the Micro-Shop
Working in tight spaces fundamentally alters your relationship with your tools. You quickly realize that horizontal surfaces are magnets for clutter. A massive, permanent bench in a tiny room simply becomes an expensive shelving unit for half-finished projects and misplaced tape measures.
To thrive in a small footprint, your workbench must adhere to three non-negotiable laws:
- Dynamic Footprint: It must either fold, roll, or break down when not actively bearing weight.
- Multi-Axis Utility: A compact bench needs to serve as an assembly table, an outfeed support, and a clamping station simultaneously.
- Absolute Rigidity: Space-saving cannot equate to flimsy. If your bench racks or shimmies while you are hand-planing a slab of hard maple, it is functionally useless.
Think of your shop the same way a cabinetmaker looks at high-traffic interior design. The principles behind building custom hall trees and mudroom lockers—where verticality, compartmentalization, and seamless hardware integration maximize utility in narrow corridors—translate directly to workshop layout. You must exploit vertical wall space and engineer your footprint for maximum efficiency.
Plan 1: The Heavy-Duty Murphy Bench
The fold-down wall bench is the quintessential solution for the shared garage. But forget those flimsy, chain-supported shelves. A true woodworking Murphy bench requires serious structural engineering to handle the downward force of heavy assembly and chisel work.
The Anatomy of the Build
You’ll notice that standard 2x4 framing often twists over time. For a fold-down bench, I highly recommend constructing a torsion box top. A torsion box utilizes a honeycomb grid of MDF or plywood sandwiched between two thin skins. This creates an incredibly rigid, perfectly flat surface that weighs significantly less than a solid butcher block.
The mounting mechanism is the critical failure point here. Never rely on standard door hinges. You want heavy-duty strap hinges or a continuous piano hinge rated for at least 300 pounds, anchored directly into the wall studs with lag screws.
Leg Deployment
For the legs, utilize a hinged, fold-out frame that locks into place with angled braces. When the bench is raised flat against the wall, the legs should fold flush against the bottom of the torsion box.
Pro Tip: Mount a sheet of 1/4” pegboard or a French cleat system on the underside of the bench. When the bench is folded up against the wall, its underside becomes instant vertical storage for hand tools.
Key Takeaways for the Murphy Bench:
- Construct a torsion box to prevent mid-span sagging.
- Anchor the ledger board directly into studs using 3-inch lag bolts.
- Design locking leg braces to prevent accidental collapse during lateral planing.
Plan 2: The Rolling Cabinet Hybrid
If you cannot attach anything to your walls—perhaps you are renting—the mobile tool cabinet is your ultimate ally. This design takes the traditional stationary workbench and crossbreeds it with a high-capacity mechanic’s chest.
Maximizing the Under-Bench Void
Most traditional workbenches waste the massive volumetric space beneath the top slab. The rolling cabinet hybrid solves this by replacing standard legs with a dense grid of full-extension drawers.
You can house your entire collection of routers, sanders, hardware, and measuring tools directly beneath your work surface. The sheer weight of the loaded drawers actually works to your advantage, drastically lowering the bench’s center of gravity. This added mass neutralizes vibrations and prevents the bench from skidding across the floor when you lean into a cut.
The Caster Conundrum
Mobility is useless if the bench rolls away while you are trying to cut a tenon. You must invest in premium, dual-locking urethane casters.
A high-quality POWERTEC Heavy Duty Workbench Caster Kit allows you to engage a foot pedal that physically lifts the bench legs slightly off the ground onto the wheels. When disengaged, the bench rests squarely on its solid wooden legs, providing the unyielding stability of a stationary bench.
The Bottom Line: A rolling cabinet bench doubles as both your primary workspace and your primary tool storage, effectively cutting your required floor space in half.
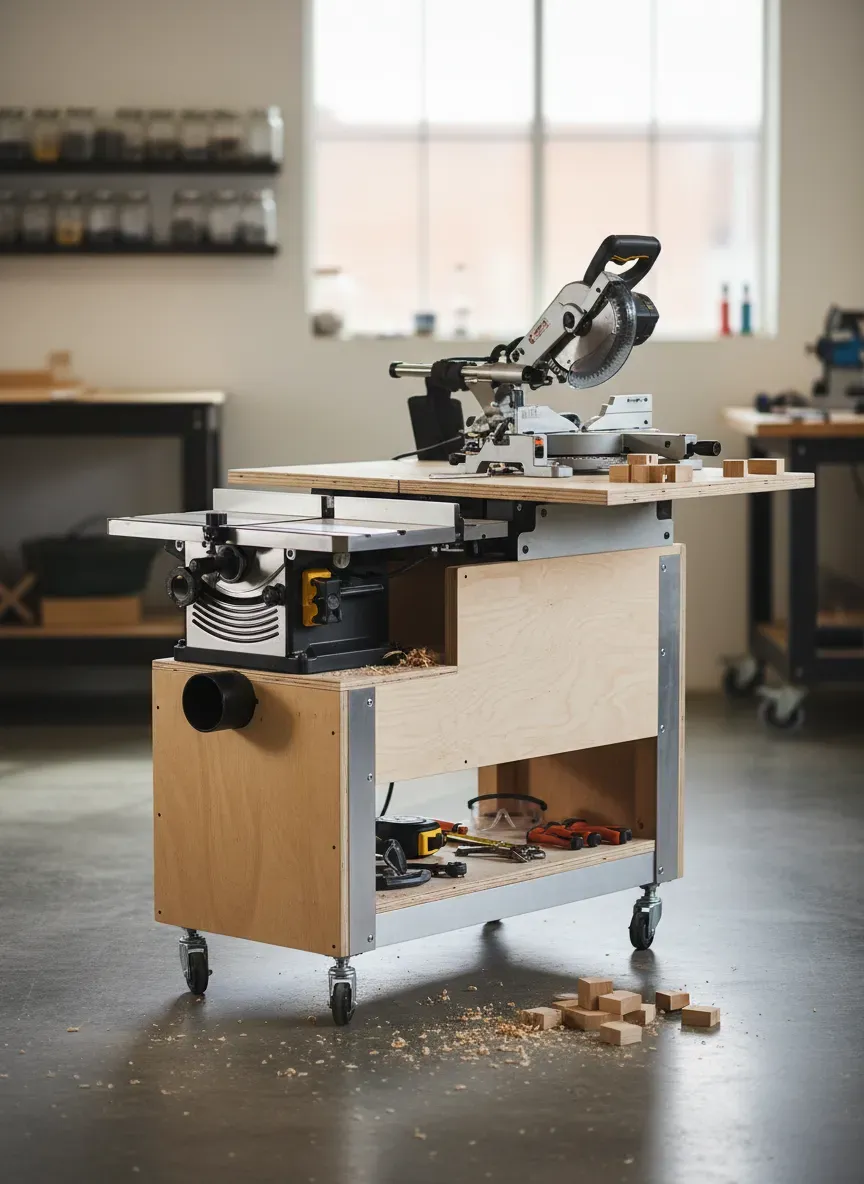
Plan 3: The Kinematic Flip-Top Station
Benchtop tools like thickness planers, oscillating spindle sanders, and miter saws are notorious space hogs. They demand massive clearance when in use but sit idle 90% of the time. The flip-top station is a brilliant feat of workshop geometry that houses two bulky tools in the footprint of one.
The Pivot Mechanism
The core of this plan is a central pivoting tabletop mounted inside a sturdy outer frame. You mount Tool A (e.g., a 13-inch planer) on the top side, and Tool B (e.g., a belt sander) on the bottom side upside down.
When you need the sander, you pull a pair of locking barrel bolts, spin the entire tabletop 180 degrees, and lock it back into place.
Building this requires precise alignment. I use a 3/4-inch steel threaded rod running completely through the center of the rotating platform, acting as an axle. The rod passes through heavy-duty flange bearings mounted on the outer frame.
Weight Distribution
Here’s the real kicker: you have to balance the tools. If you mount an 80-pound planer opposite a 15-pound grinder, the top will swing violently the moment you pull the locking pins. Try to pair tools of roughly equal weight, or add lead counterweights to the lighter side’s internal framing to ensure a smooth, controlled rotation.
Plan 4: The Nesting Workbench System
Have you ever found yourself needing a secondary table for glue-ups while your main bench is occupied by a complex assembly? The nesting system borrows its concept from classic Matryoshka dolls.
Multi-Tiered Functionality
This plan consists of two (or even three) separate workbenches built at staggered heights and widths.
- Bench One (The Master): Built at a standard 34-inch to 36-inch height. This is your heavy-duty, thick-topped primary bench for planing and joinery.
- Bench Two (The Assembly Table): Built at 30 inches high and slightly narrower, mounted on heavy-duty casters.
When not in use, Bench Two rolls perfectly underneath Bench One. This gives you massive expandable surface area on demand without permanently sacrificing your floor space.
You can also design the lower nesting table to serve double-duty as a dedicated outfeed table for your portable table saw. By matching the height of the nesting table precisely to your saw’s cast-iron top, you instantly create a safe, seamless material support system.
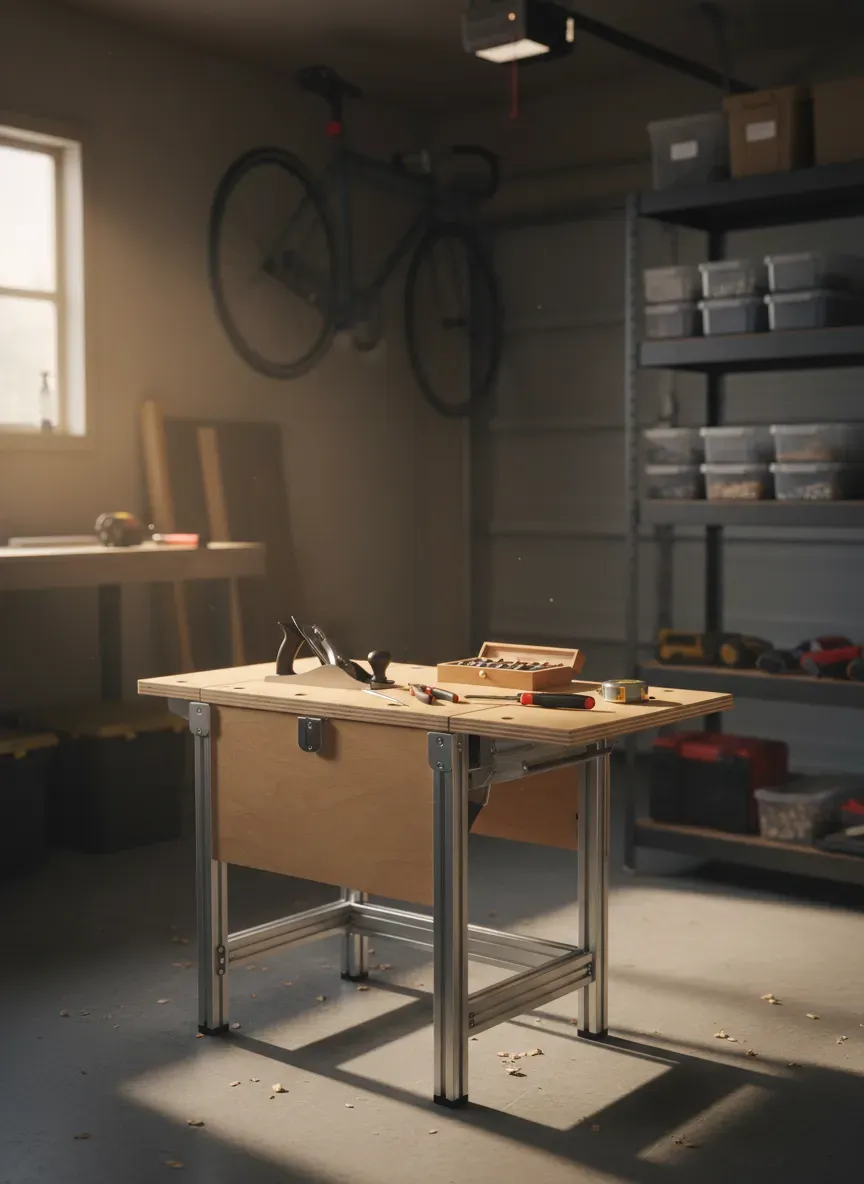
Plan 5: The Drop-Leaf Space Maximizer
Sometimes you don’t need a whole second bench; you just need an extra twelve inches of width to balance a large sheet of plywood. The drop-leaf workbench borrows from classic dining room furniture design to give you a dynamic, expanding footprint.
Hinge and Bracket Selection
A drop-leaf extension on a workbench faces significantly more abuse than a dining table. A standard piano hinge will shear under the weight of an assembled cabinet carcass.
Instead, construct the leaf from a solid sheet of 3/4-inch Baltic Birch and secure it to the main bench using heavy-duty, locking folding shelf brackets. These steel brackets snap into a rigid 90-degree angle and feature a quick-release trigger for collapsing the wing.
Pro Tip: Drill a grid of 3/4-inch dog holes across both the main bench and the drop leaf. When the leaf is extended, you can use long bench dogs or surface clamps to span the gap, seamlessly integrating the extension into your primary clamping workflow.
The Bottom Line: Drop leaves are incredibly effective when mounted on the rear of a table saw station or the end of a miter saw stand, giving you temporary support exactly when the cut demands it.
Plan 6: The Closet Conversion Bench
If you are operating out of a spare bedroom or a basement utility space, you might have access to a standard bi-fold closet. Ripping out the clothing rod and converting that 24-inch deep alcove into a highly specialized workbench is a masterclass in spatial efficiency.
Built-In Bracing and Lighting
Because you are building into an existing architectural pocket, you don’t necessarily need freestanding legs. You can mount heavy 2x4 cleats directly to the back and side wall studs of the closet, resting a thick MDF or butcher block slab right on top. This “floating” design creates a completely unobstructed void underneath the bench for shop vacs and air compressors.
When organizing the internal space of the closet, apply the same logic used in modern smart shoe storage solutions. Utilize pull-out trays, narrow vertical cubbies for clamps, and angled shelving to maximize the tight depth.
Lighting is the primary challenge here. The ceiling of a closet casts terrible shadows over your hands. You must install high-CRI (Color Rendering Index) LED strip lights directly under the first shelf above the bench to illuminate your workspace brilliantly without generating excess heat.
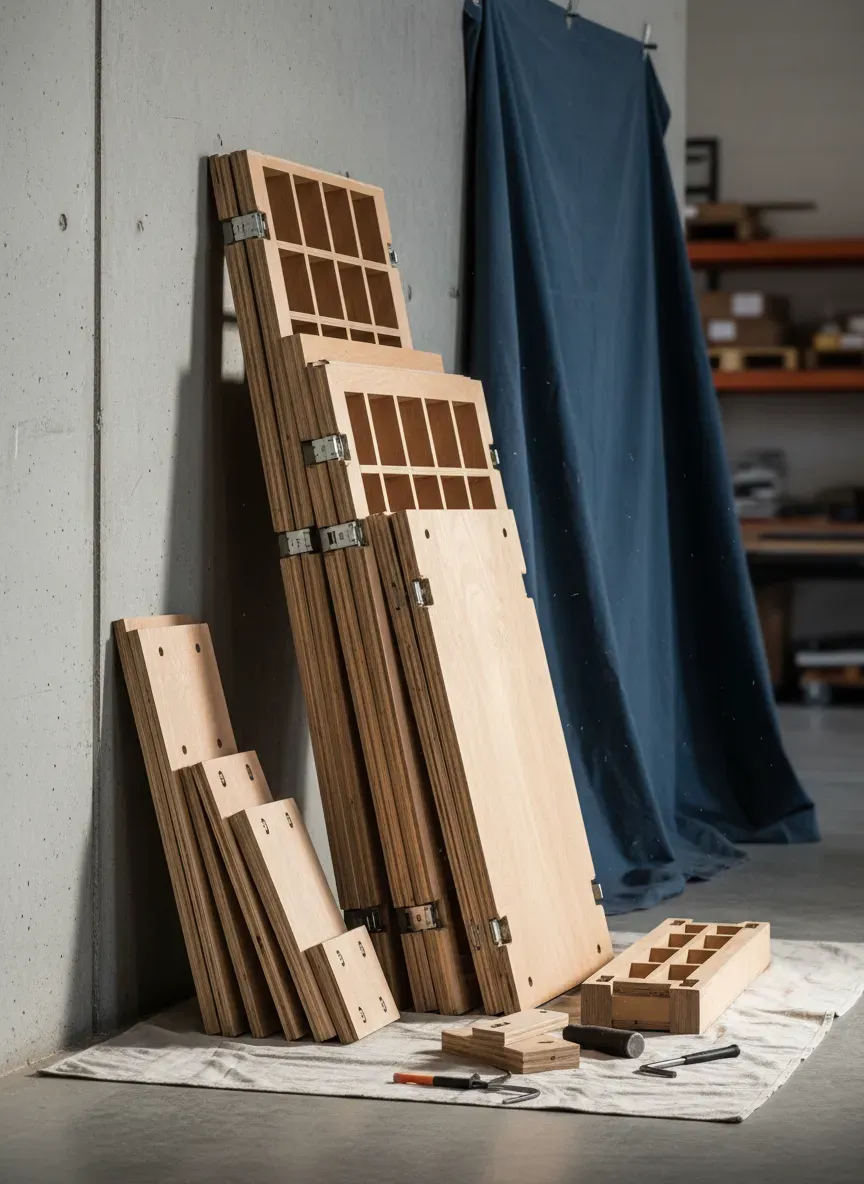
Plan 7: The Knock-Down Sawhorse Matrix
For the woodworker who truly has zero permanent space—perhaps you have to park two cars in a two-car garage every single night—the knock-down system is the only viable path.
Engineering the Torsion Top
We are not talking about throwing a flimsy piece of OSB across two plastic sawhorses. A professional knock-down bench requires a rigid, engineered top. Build a lightweight torsion box out of 1/2-inch plywood. It will be rigid enough to stay dead flat but light enough to lift on and off the supports by yourself.
For the base, you can build custom folding wooden sawhorses with deep, locking notches that cradle the torsion box top. Alternatively, utilizing a modern expandable base like the Bora Centipede Portable Workstand offers an astonishing weight capacity (often up to 3,000 pounds) while collapsing into a tiny canvas bag the size of a folding camp chair.
When you finish working, the base folds up, the torsion box leans flat against the garage wall, and your shop completely vanishes in under three minutes.
Essential Hardware Upgrades for Compact Benches
Designing a small workbench means you have less physical mass to hold your workpieces steady. You must compensate for this lack of mass with superior work-holding technology.
Integrated T-Tracks
Routing channels into your benchtop to accept aluminum T-tracks is a game-changer for small benches. These tracks allow you to slide heavy-duty hold-down clamps, stop blocks, and custom jigs anywhere across the surface. Instead of wrestling with bulky F-clamps on the edges of your tiny table, you can secure a workpiece dead center.
The Power of Bench Dogs
Drilling a uniform grid of 3/4-inch or 20mm holes across your benchtop opens up an entirely new ecosystem of accessories. Using bench dogs in tandem with a surface vise allows you to pinch boards securely for routing or sanding. The beauty of dog holes is that they provide immense utility while taking up zero vertical space when not in use.
Key Takeaways for Work-Holding:
- Install flush-mount T-tracks to avoid interrupting a flat work surface.
- Use low-profile inline clamps to hold boards flat without obstructing your router base.
- Consider mounting your primary woodworking vise on a removable plywood base that clamps to the bench only when needed.
Workflow Optimization in Tight Quarters
A great space-saving workbench is only part of the equation. How you operate around it dictates your ultimate success in a micro-shop.
Dust collection becomes a critical safety and operational issue in tight spaces. A small room fills with fine particulate matter in seconds. If your bench features enclosed storage, ensure your tools are sealed away from airborne dust, or you will spend half your shop time cleaning off your routers.
Prioritize verticality. Keep the perimeter of your small bench completely clear by utilizing French cleats on the surrounding walls. If you can reach out and grab your square, your marking knife, and your block plane without taking a single step away from your compact bench, you have successfully hacked your workflow.
The Ultimate Blueprint Resource for Your Next Build
I’ve personally spent hundreds of hours staring at blank graph paper, trying to calculate hinge clearances and caster heights for small shop builds. The trial and error is exhausting, and making a mathematical mistake on a complex flip-top tool stand means wasting expensive hardwood and starting over.
You do not have to reinvent the wheel.
If you are ready to build a rock-solid, space-saving workbench that transforms your cramped garage into a highly efficient production space, you need access to proven, step-by-step schematics. I highly recommend checking out Ted’s Woodworking.
This comprehensive archive contains over 16,000 meticulously detailed woodworking plans, including dozens of highly engineered, space-saving workbench designs, folding tool stands, and mobile assembly tables. Every blueprint comes with exact cut lists, 3D diagrams, and step-by-step instructions that remove all the guesswork from the build.
Right now, you can grab the entire 16,000-plan collection at a massive 75% discount. Stop struggling with inadequate workspaces and start building the shop infrastructure you actually deserve.
Click here to unlock your 75% discount and get instant access to 16,000 woodworking plans today!