Board Jack Basics: How to Effortlessly Support Wide Stock at the Bench
A human-crafted, high-CTR meta description.
Apr 14, 2026 - Written by: Linda Wise

Picture this scenario. You’ve just spent a premium on a flawless, eight-foot slab of rough-sawn walnut. You drag it to your workbench, muscle it into your front vise to joint the edge, and tighten the handle down hard. You grab your No. 7 jointer plane, take that first satisfying step forward, and push.
Instead of a whispering shaving of end-to-end perfection, the far end of the board dips. Your vise groans under the extreme torsional strain, the wood chatters against the blade, and your perfectly square edge is instantly compromised.
I’ve ruined perfectly good lumber exactly this way, and you probably have too. When dealing with long, wide, or cumbersome stock, a single point of contact at the vise simply isn’t enough to counteract the massive cantilevered weight hanging off the end of your bench. The solution isn’t a bigger vise or tighter clamping pressure. The solution is a board jack.
Often referred to as a sliding deadman, this unsung hero of the traditional workbench transforms a frustrating wrestling match into a stable, highly controlled woodworking experience. Today, I am breaking down the mechanics, the setup, and the subtle nuances of using a board jack to tame unruly stock.
Quick Comparison: Top Picks
Before we get into the heavy theory, you’ll need the right hardware to make your board jack functional. Here are the components I personally rely on when outfitting a bench support system.
| Product | Rating | Check Price |
|---|---|---|
| Kreg KKS1020 Bench Dogs | ⭐⭐⭐⭐⭐ | View on Amazon |
| Sjobergs Holdfast | ⭐⭐⭐⭐½ | View on Amazon |
| POWERTEC 71083 T-Track | ⭐⭐⭐⭐⭐ | View on Amazon |
The Physics of Edge Work: Why Vises Fail Wide Stock
To truly appreciate the board jack, you have to understand the physical forces at play when you lock a board into a vise.
When you clamp a six-foot board in a standard nine-inch face vise, you are creating a massive lever. The fulcrum is the edge of your vise jaw. The weight of the board extending past that jaw exerts a downward force that actively twists the vise racking mechanisms. Over time, this torsional strain will destroy the guide rods and threading of even the most expensive cast-iron hardware.
But it’s not just about protecting your tools; it’s about the quality of your work. Hand planing requires continuous, uninterrupted forward momentum. If the board vibrates—a phenomenon woodworkers call “chatter”—the plane blade skips across the grain, leaving behind a washboard texture that takes hours of scraping and sanding to remove.
A board jack completely neutralizes this cantilever effect. By providing a secondary, adjustable point of vertical support near the far end of the board, the jack turns a precarious balancing act into a rock-solid, coplanar surface. The downward pressure of your plane is absorbed directly into the rigid frame of the workbench, rather than twisting the vise.
Pro Tip: Never rely on clamping pressure alone to hold wide stock. Wood is compressible. If you tighten your vise enough to stop a heavy board from pivoting downward, you are likely crushing the wood fibers and leaving permanent indentations in your workpiece.
Anatomy of a Proper Setup
The beauty of the board jack lies in its brutal simplicity. Whether you are using a centuries-old Roubo design or a modern T-track system, the anatomy consists of three core elements.
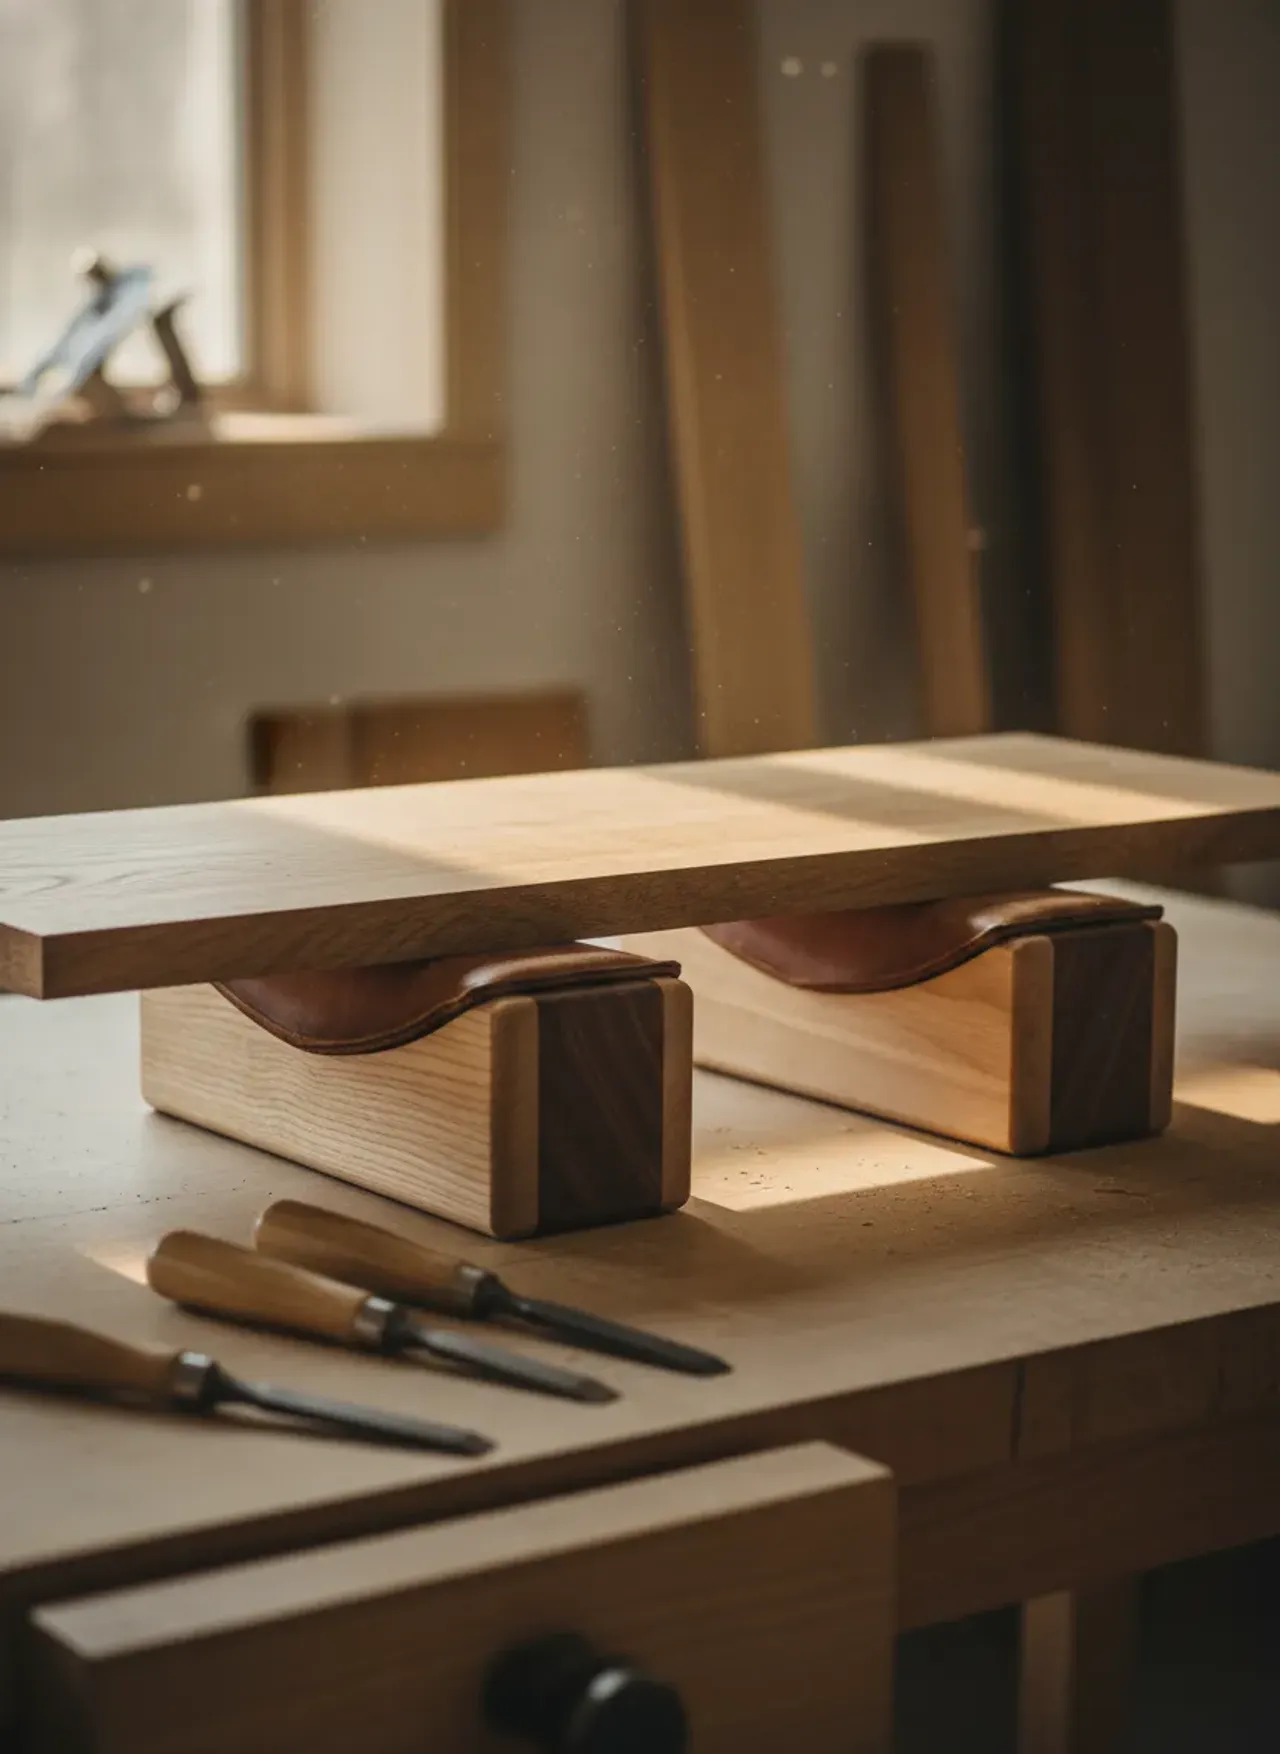
The Vertical Stanchion
This is the body of the jack itself. Typically made from a dense, heavy hardwood like maple, ash, or white oak, the stanchion stands vertically between the benchtop and the lower stretcher. Its primary job is to hold the support pegs. It needs to be thick enough to resist bowing under pressure—usually a minimum of 6/4 (1.5 inches) thick, though a full 8/4 (2 inches) is preferable.
The Glide Mechanism
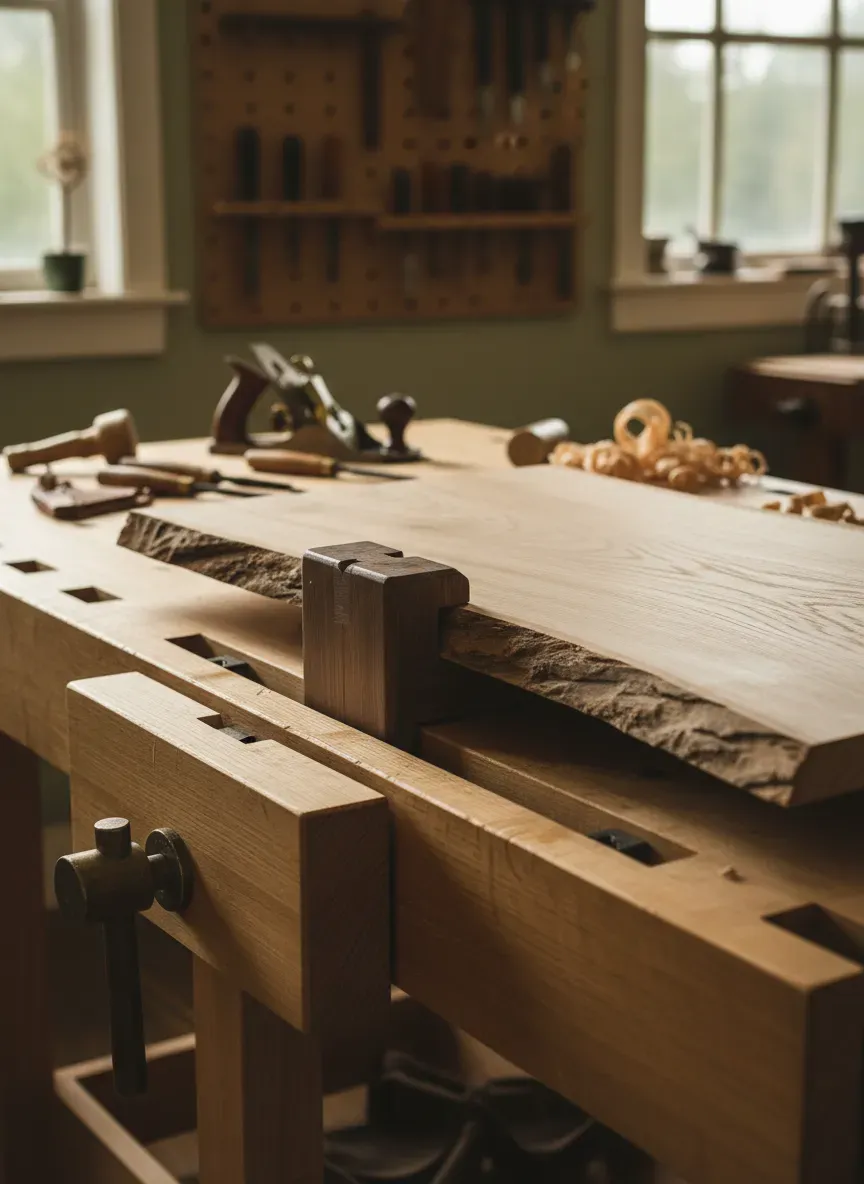
A stationary jack is somewhat useful, but a sliding deadman is a game-changer. The ability to slide the vertical support left or right means you can position it precisely under the sweet spot of whatever board length you happen to be working with. Traditional benches utilize a V-groove track cut into the bottom stretcher, with a matching V-shaped keel on the bottom of the jack. The top of the jack features a tongue that loosely rides in a groove cut into the underside of the benchtop.
The Peg Matrix
The face of the board jack is peppered with a series of holes, usually drilled at 3/4-inch or 1-inch diameters to match standard bench dogs. These holes are typically spaced closely together—often staggered in two columns—to give you incredibly granular control over the height of your support peg.
Types of Board Jacks You’ll Encounter
Woodworking is nothing if not adaptable, and over the centuries, several distinct variations of the board jack have emerged. Let’s look at the primary styles you might build or buy.
The Classic Sliding Deadman
This is the gold standard for heavy hand-tool work. Found predominantly on French Roubo-style workbenches, the sliding deadman travels the entire length of the bench. It sits flush with the front edge of the benchtop, ensuring that when you clamp a board in your leg vise, the back face of the board rests perfectly flat against both the bench edge and the face of the deadman. This coplanar alignment is critical for preventing the board from bowing inward when you apply lateral pressure.
The Leg-Mounted Jack
If you have an English Nicholson-style bench, or if you simply don’t have the lower stretchers required to support a sliding deadman, the leg-mounted jack is your next best option. This involves drilling a vertical series of peg holes directly into the right front leg of your workbench. While you lose the horizontal adjustability, you still gain a solid vertical resting point. Some woodworkers enhance this by attaching a wide, pivoting wooden arm to the leg, giving them a few extra inches of horizontal reach.
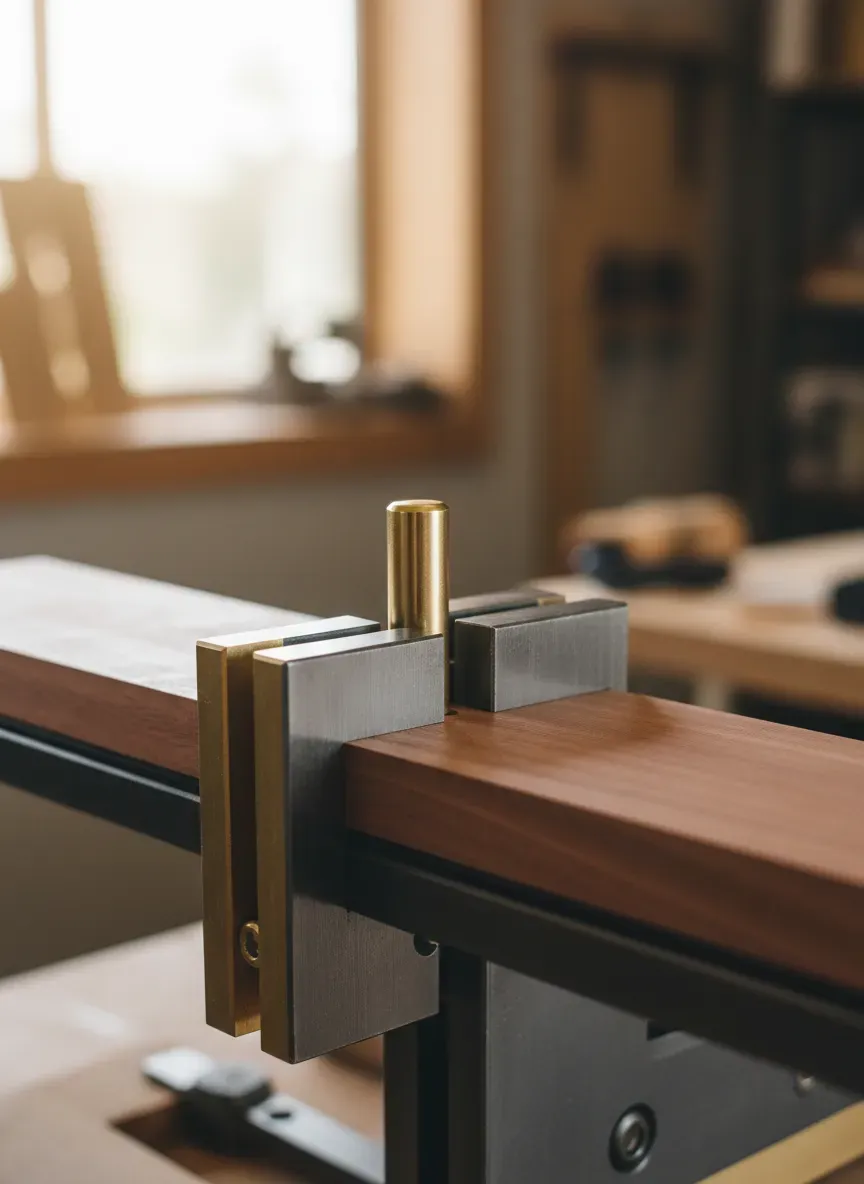
Modern T-Track Implementations
For hybrid woodworkers who utilize a mix of hand and power tools, modern hardware offers some brilliant shortcuts. By embedding a heavy-duty aluminum track, like the POWERTEC 71083 T-Track, into the edge of the bench, you can create a highly modular board jack. Instead of a massive wooden stanchion, you can use T-bolts to attach a smaller, adjustable support block exactly where you need it. It lacks the historic romance of a wooden deadman, but the utilitarian efficiency is hard to argue with.
Step-by-Step: Effortlessly Supporting Wide Stock
Having the hardware is one thing; knowing the subtle choreography of using it is another. Here is my exact process for locking down a heavy, cumbersome slab for edge jointing.
Step 1: The Initial Vise Grip
Bring your board to the bench. Open your front vise (or leg vise) just wide enough to accept the stock. Rest the bottom edge of the board lightly on your toe to take the weight off your arms, and guide the front end of the board into the vise. Tighten the vise just enough to grip the board, but leave it loose enough that you can still pivot the back end up and down.
Step 2: Positioning the Jack
With your left hand holding the back end of the board, use your right foot to slide the board jack along the lower track until it sits roughly a foot away from the far end of the board. You want the jack positioned far enough out to maximize leverage, but not so far out that it interferes with your body positioning as you finish your plane stroke.
Step 3: Dialing in the Peg Height
This is where the staggered holes of a well-built jack pay off. Pivot your board up until the top edge is perfectly parallel with your benchtop. Look at where the bottom edge of the board intersects the deadman. Find the hole sitting just below that line. Insert a durable peg, such as the Kreg KKS1020 Bench Dogs.
Now, lower the board onto the peg. If the board sags slightly below parallel, don’t sweat it. You can slide a small wooden wedge between the peg and the board to dial in the exact height, ensuring the edge remains perfectly horizontal.
Step 4: Securing the Workpiece
Once the board is resting securely on the peg, go back and firmly tighten your vise. At this point, the board is locked in vertically, but we still need to manage lateral vibration. If you are doing heavy planing, the board might still slap against the face of the deadman.
Here’s the real kicker: use a holdfast. By dropping a Sjobergs Holdfast into one of the holes located just above the board on your deadman, you can trap the wood firmly against the stanchion. A single mallet tap locks the holdfast, pinning the board tight. Now you have a piece of stock that is entirely immobilized, ready for the heaviest stock removal you can throw at it.
Advanced Techniques and Common Pitfalls
Once you master the basic horizontal setup, you’ll start realizing just how versatile this system can be. Let’s look at a few advanced applications, as well as the traps that catch beginners off guard.
Dealing with Tapered or Irregular Stock
Not every board has parallel edges. When working with live-edge slabs or heavily tapered table legs, setting the board perfectly horizontal is impossible if you rely on a single peg.
The trick here is to establish your jointing line first. Mark your cut line on the face of the board. Clamp the board in the vise so that the line is parallel to the benchtop, regardless of what the bottom edge is doing. Because the bottom edge might now be sitting at a weird angle across the face of the deadman, a single round peg won’t provide a stable seat. Instead, insert two pegs into adjacent holes and bridge them with a small scrap of wood to create a custom angled shelf.
The Double-Peg Trick for Angled Cuts
If you are cutting tenons on the end of a long, heavy rail, you often need the board sticking straight up in the air. A face vise alone will struggle to hold a tall board vertically without it twisting.
Slide your deadman directly next to the vise. Insert two pegs into the deadman—one high, one low. Trap the vertical board between the screw of your vise and the pegs on the deadman. This creates a massive, multi-point frictional fulcrum that absolutely eliminates racking.
Pro Tip: If you build your own sliding deadman, always chamfer the edges of your peg holes. When you constantly insert and remove metal or hard plastic pegs, the sharp, 90-degree wood fibers around the hole will eventually splinter and tear out. A quick pass with a countersink bit prevents this entirely.
Pitfall: Neglecting the Track Lubrication
A sliding deadman should glide with the gentle push of a boot. If you find yourself having to bend down and wrestle it into position, your workflow is going to suffer. The friction between the V-groove and the track can become immense, especially in humid months when the wood swells.
Make it a habit to clean out the lower track with a stiff brush once a month. Sawdust and plane shavings love to pack into that groove. Once clean, apply a heavy coat of paste wax to both the track and the keel of the deadman. The difference in mobility will be night and day.
Pitfall: Non-Coplanar Alignment
I see this happen on DIY bench builds all the time. The woodworker installs a beautiful sliding deadman, but the face of the deadman sits a half-inch further back than the front jaw of the vise.
When you clamp a board in the vise and pin it against the recessed deadman, you are actively bowing the wood. When you plane a bowed board straight, it will spring back into a curve the second you unclamp it. Your vise jaw, the edge of your benchtop, and the face of your board jack must be perfectly coplanar. Check it with a long straightedge during your build process.
Material Considerations for DIY Jacks
If you decide to fabricate your own board jack rather than bolting on aftermarket hardware, material selection dictates the lifespan of the tool.
Pine or fir might be cheap and easy to work with, but they lack the compressive strength required for a heavy-duty stanchion. The constant pressure of bench dogs levering inside the holes will slowly crush the softwood fibers, leading to sloppy, drooping pegs over time.
Hard maple is the undisputed champion here. Its dense, tight grain structure resists wear remarkably well, and it holds a crisp edge inside drilled holes. If maple isn’t available, white oak or ash are excellent secondary choices. Just be aware that the open grain of oak can occasionally lead to splintering if your hole chamfers aren’t generous enough.
For the peg itself, avoid using cheap dowels from the big box store. They are almost always undersized and prone to snapping under heavy shear loads. If you don’t want to buy manufactured bench dogs, turn your own pegs from riven oak or hickory, leaving them a few thousandths of an inch oversized so they friction-fit tightly into the deadman holes.
Key Takeaways
- Eliminate Cantilever Strain: The primary function of a board jack is to prevent long boards from sagging, which protects your vise hardware from destructive racking.
- Prevent Tool Chatter: A fully supported board won’t vibrate, allowing hand planes and routers to cut smoothly without skipping across the grain.
- Coplanar Alignment is Mandatory: Ensure the face of your jack is perfectly flush with the clamping face of your vise to prevent bowing the workpiece.
- Combine with Holdfasts: Resting a board on a peg prevents downward movement, but adding a holdfast locks the board laterally against the stanchion for ultimate stability.
- Maintain the Glide: Keep your lower tracks clear of debris and heavily waxed to ensure the deadman slides effortlessly with a nudge of your foot.
The Bottom Line: Wrestling with wide, heavy stock shouldn’t be a test of your physical endurance. By integrating a board jack into your bench setup, you shift the mechanical burden from your body—and your vise—directly into the unyielding frame of the workbench. It is a deceptively simple piece of hardware that instantly elevates the precision of your edge jointing, layout work, and joinery.
Before I head back to the shop to finish up a batch of white oak cabinets, I want to share something that completely changed how I source my shop projects. If you’re looking to build your own ultimate workbench, or if you need precise schematics for outfitting your shop with custom jigs, board jacks, and storage solutions, you need to check out Ted’s Woodworking. I’ve personally found their database to be an absolute goldmine. They offer an incredible archive of over 16,000 step-by-step woodworking plans that take all the guesswork out of the process. Right now, you can grab the entire collection at a massive 75% discount. You’ll notice that having professional blueprints at your fingertips makes even the most complex builds feel entirely manageable. Click here to get your hands on all 16,000 plans and claim your 75% discount today!