How to Build a Roubo Workbench: The Ultimate Step-by-Step Guide
Master the art of traditional woodworking by building a massive, immovable Roubo workbench. Discover lumber selection, complex joinery, and expert hardware installation.
Mar 23, 2026 - Written by: Linda Wise
There is a distinct, visceral moment in woodworking when you push a heavy No. 7 jointer plane across a rough slab of hardwood, and the bench underneath you doesn’t budge a single millimeter. It doesn’t rack, it doesn’t shimmy, and it certainly doesn’t complain. That unwavering foundation is the hallmark of the Roubo workbench.
I’ve spent countless hours wrestling with flimsy, lightweight benches that danced across the shop floor the second I applied serious lateral force. If you are serious about hand tool woodworking—or even if you just want a rock-solid assembly table for power tool work—graduating to a Roubo is a rite of passage. Named after the 18th-century French cabinetmaker André-Jacob Roubo, this design relies on sheer, unadulterated mass and flush, coplanar surfaces to act as a colossal three-dimensional clamp.
Here is the real kicker: building one isn’t just about assembling a piece of shop furniture. It’s a masterclass in milling, heavy-timber joinery, and precision flattening. By the time you drive the final drawbored peg into the base, your skills as a craftsman will have leveled up significantly.
Before we dive into the sawdust, here are the hardware and supplies I rely on to make this monumental build a success.
Quick Comparison: Top Picks
| Product | Rating | Check Price |
|---|---|---|
| Benchcrafted Classic Leg Vise Hardware | ⭐⭐⭐⭐⭐ | View on Amazon |
| Gramercy Tools Holdfasts | ⭐⭐⭐⭐⭐ | View on Amazon |
| Titebond III Ultimate Wood Glue (1 Gallon) | ⭐⭐⭐⭐½ | View on Amazon |
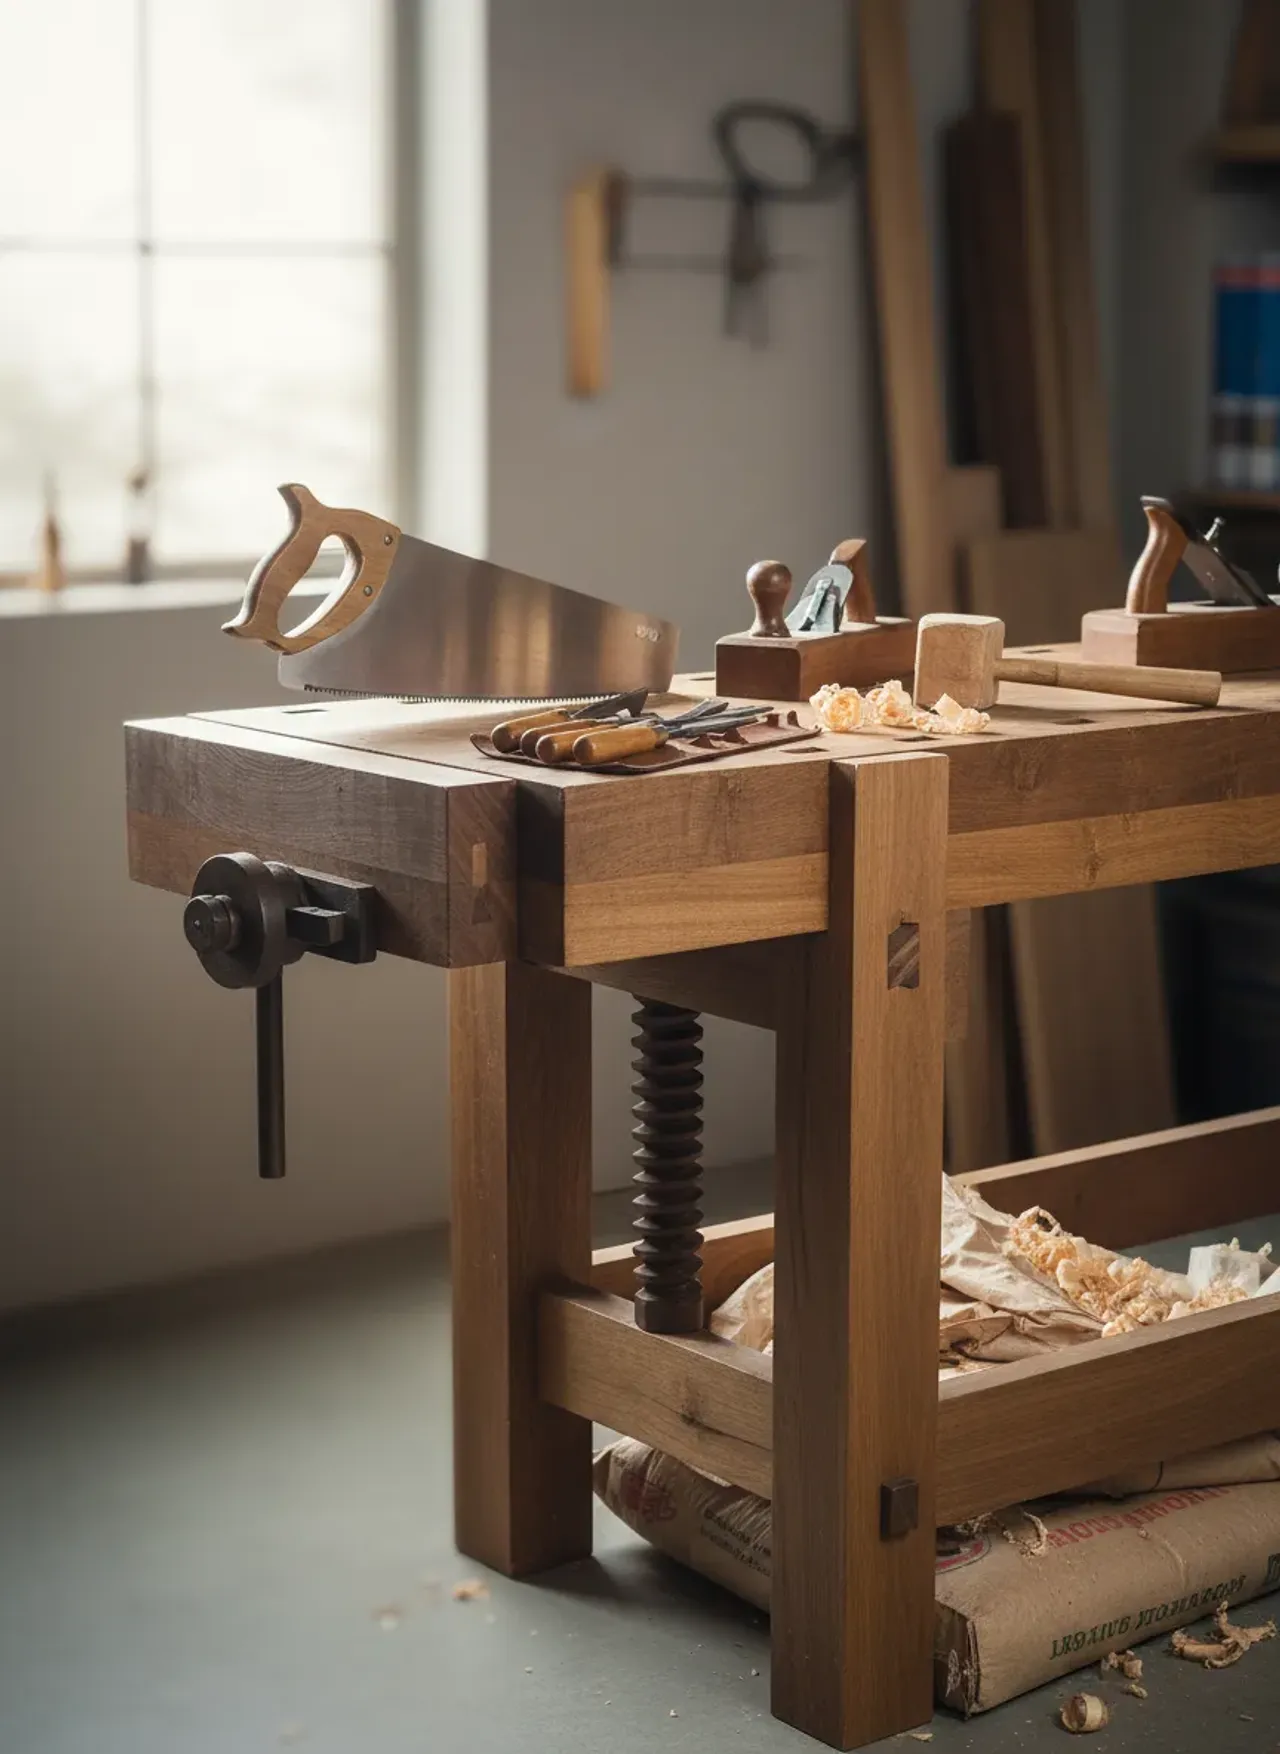
The Anatomy of a Roubo: Why It Dominates the Shop
A Roubo isn’t just a heavy table. Its power lies in its geometry. The front of the bench—from the top edge of the slab straight down the front legs—is entirely flush. This allows you to clamp a wide board or a door directly to the front of the bench using a leg vise and a holdfast. You have a massive, uninterrupted referencing face.
Key Characteristics You Must Understand
- The Massive Top: Typically 4 to 6 inches thick, offering unparalleled dead-weight and resisting the concussive force of heavy mortising.
- The Flush Front: The legs are mortised directly into the top, flush with the front edge.
- Workholding Mastery: The integration of a massive leg vise, sliding deadman (or peg holes in the right leg), and an army of dog holes across the top.
- Drawbored Joinery: No metal fasteners hold the structural base together. It relies entirely on massive mortise and tenon joints locked tight by offset wooden pegs.
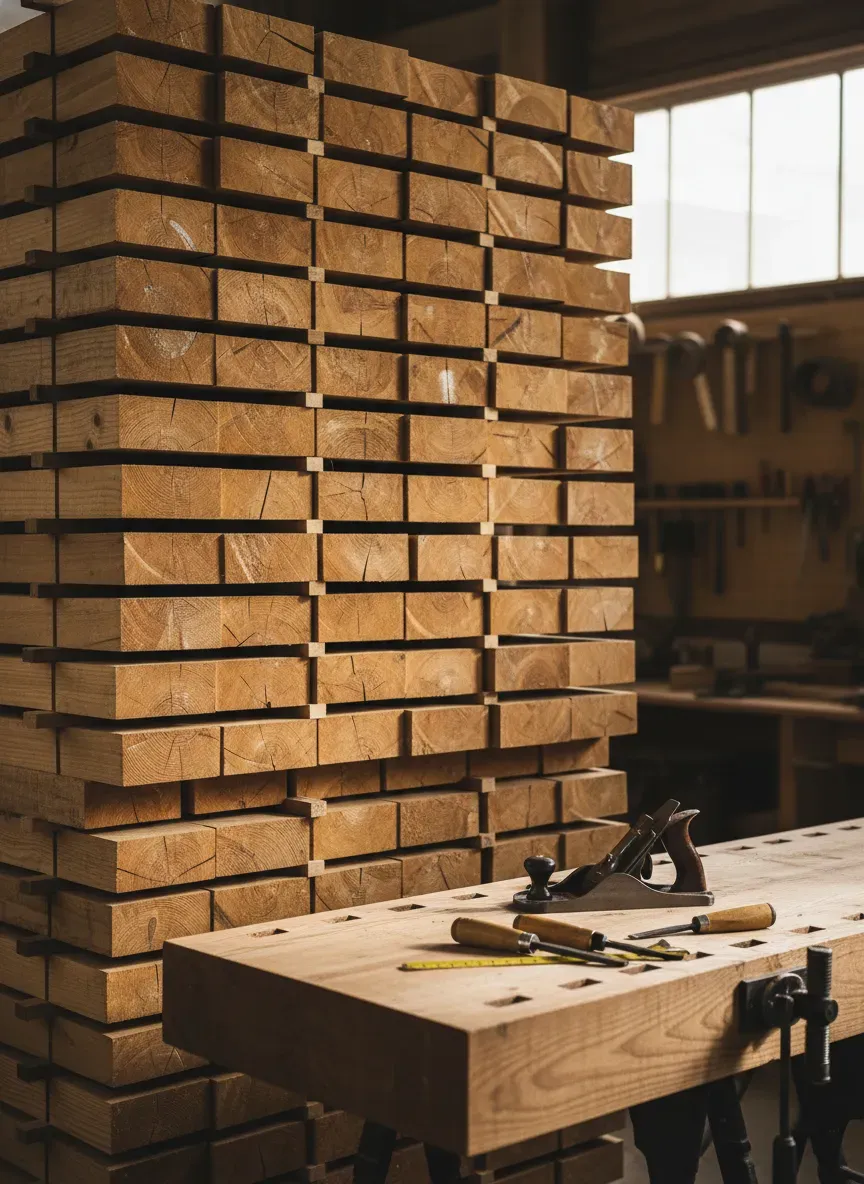
Selecting Your Lumber: Mass is Non-Negotiable
You’ll notice that modern woodworkers obsess over using exotic or expensive hardwoods for their benches. I’ll level with you: André-Jacob Roubo used whatever was cheap, heavy, and available.
Southern Yellow Pine (SYP)
For North American builders, Southern Yellow Pine is often the holy grail of workbench materials. It is incredibly dense for a softwood, highly shock-absorbent, and surprisingly cheap. You can buy 2x10 or 2x12 construction lumber, rip it down, and laminate it to create a top that will easily top 300 pounds.
Hard Maple and Ash
If budget allows and you want a bench that doubles as an heirloom piece, Hard Maple is spectacular. Ash is another phenomenal choice—it shares similar density and workability to oak but tends to be significantly cheaper.
Pro Tip: Never buy lumber for your bench and mill it the same day. Bring it into your shop, sticker it (stack it with small spacers between boards), and let it acclimate for at least a month. Construction-grade SYP is notorious for high moisture content. If you laminate wet wood, your bench top will warp into a potato chip within a year.
Step 1: Milling and Laminating the Slab
Building the top is an exercise in logistics. You are going to be gluing up a massive amount of surface area, and panic is the enemy of a tight glue line.
Rough Milling
Start by crosscutting your boards about 4 inches longer than your final desired bench length (a typical Roubo is 7 to 8 feet long). Rip them slightly wider than your final thickness (e.g., if you want a 4-inch thick top, rip them to 4.5 inches).
Run one face and one edge over the jointer, then plane them flat. Do not rush this step. If your boards have a twist, that twist will compound during the glue-up, forcing you to plane away an inch of thickness later just to get it flat.
The Phased Glue-Up
Do not attempt to glue all 15 or 20 boards at once. That is a recipe for disaster.
Instead, glue them up in manageable slabs of 3 or 4 boards. This gives you time to properly apply the glue, align the edges, and set your clamps without the adhesive tacking up. I rely heavily on Titebond III Ultimate Wood Glue (1 Gallon) for this exact process. Titebond III has a generous open assembly time, giving you those crucial extra minutes to wrestle heavy, slippery slabs into submission.
Once you have your sub-slabs cured, run them through your thickness planer (if they fit) to ensure they are perfectly parallel. Finally, glue these sub-slabs together to form the monolithic top.
- Key Takeaways for Laminating:
- Grain Orientation: Pay attention to the grain direction on the edges facing up. Try to orient them all so the grain runs in the same direction. When you flatten the top later with a hand plane, you won’t be tearing out reversing grain.
- Clamping Pressure: Alternate clamps over and under the slab to prevent the massive pressure from bowing the assembly.
- Cauls: Use heavy, waxed wooden cauls clamped vertically across the boards to keep the faces flush during the squeeze.
Step 2: Forging the Base and Through-Tenons
The base of a Roubo consists of four massive legs and four heavy stretchers. The joinery is what separates this bench from standard tables.
Sizing the Legs
Your legs should be at least 5x5 inches thick. Laminate them from your stock just like you did the top. The sheer width of these legs prevents the bench from racking front-to-back.
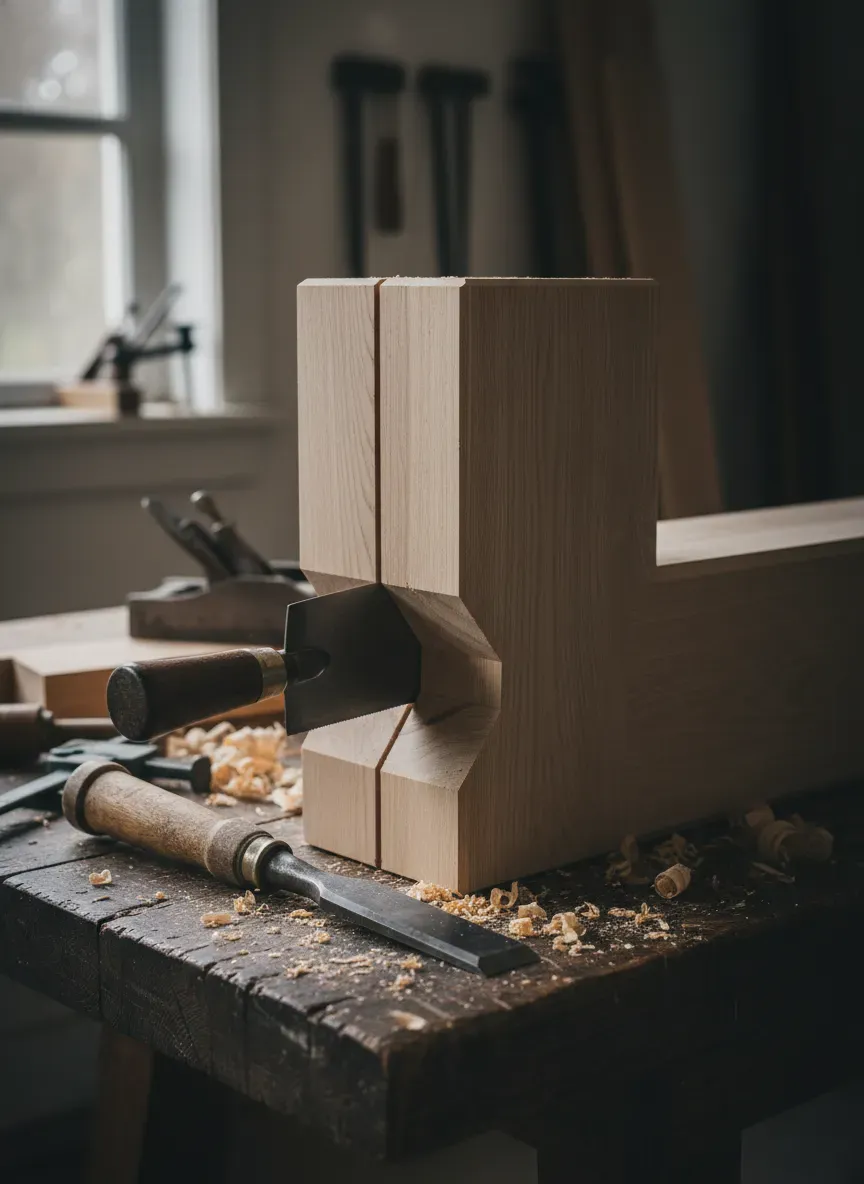
The Double Tenon
The connection between the top of the legs and the underside of the massive slab is historically a double-tenon joint, often featuring a sliding dovetail on the front edge to mechanically lock the leg into the top. Cutting this joint is incredibly intimidating, but immensely rewarding.
You must lay out the mortises on the underside of the heavy slab with razor precision. Use a sharp marking knife, not a pencil. Bore out the waste using a heavy brace and auger bit, or a plunge router if you prefer electrons over sweat. Chop the remaining waste square with a heavy mortising chisel.
Drawboring: The Ancient Lock
The stretchers connect to the legs using blind mortise and tenons, but they are secured via drawboring. This is a technique where you drill a hole through the mortise, insert the tenon, and mark the hole’s location on the tenon. You then remove the tenon, drill the hole slightly closer to the shoulder (about 1/16th to 3/32nds of an inch), reassemble, and drive a hardwood peg through.
As the tapered peg snakes its way through the offset holes, it pulls the shoulder of the tenon into the leg with hundreds of pounds of mechanical force. It requires no clamps to assemble and will never, ever loosen, regardless of seasonal wood movement.
Pro Tip: Rive your own drawbore pegs from straight-grained white oak or ash. Riving (splitting the wood along the grain) ensures continuous fibers run the entire length of the peg, making it virtually impossible to snap when driving it into a tight, offset hole.
Step 3: Integrating the Workholding Hardware
A workbench is only as good as its ability to grip your work. The Roubo excels here through the use of a leg vise and surface holdfasts.
The Leg Vise
The leg vise is the defining feature of the Roubo front face. It consists of a massive wooden chop, a threaded screw, and a mechanism to keep the chop parallel to the leg to prevent racking.
Historically, this required a parallel guide with a pin you had to constantly adjust based on the thickness of the workpiece. I’ve personally found this incredibly tedious. Modern hardware has solved this gracefully. I highly recommend installing Benchcrafted Classic Leg Vise Hardware.
Benchcrafted utilizes a “Crisscross” mechanism—a massive cast-iron St. Andrew’s cross buried within mortises inside the leg and the chop. It completely eliminates the need for a parallel guide pin. You spin the massive cast iron wheel, and the vise glides effortlessly in and out, maintaining perfect parallel alignment. It’s a game-changer for workflow efficiency.
Dog Holes and Holdfasts
Drill a row of 3/4-inch dog holes along the front edge of the bench, starting right at the leg vise and continuing to the tail vise (if you opt for one). Then, drill scattered holes across the middle of the slab.
These holes accept holdfasts—L-shaped pieces of iron that lock down workpieces with a simple whack from a mallet. Do not buy cheap, cast holdfasts; they will shatter. You need forged steel or high-quality cast ductile iron. Gramercy Tools Holdfasts are the undisputed champions here. They grip with terrifying strength and release with a gentle tap on the backside.
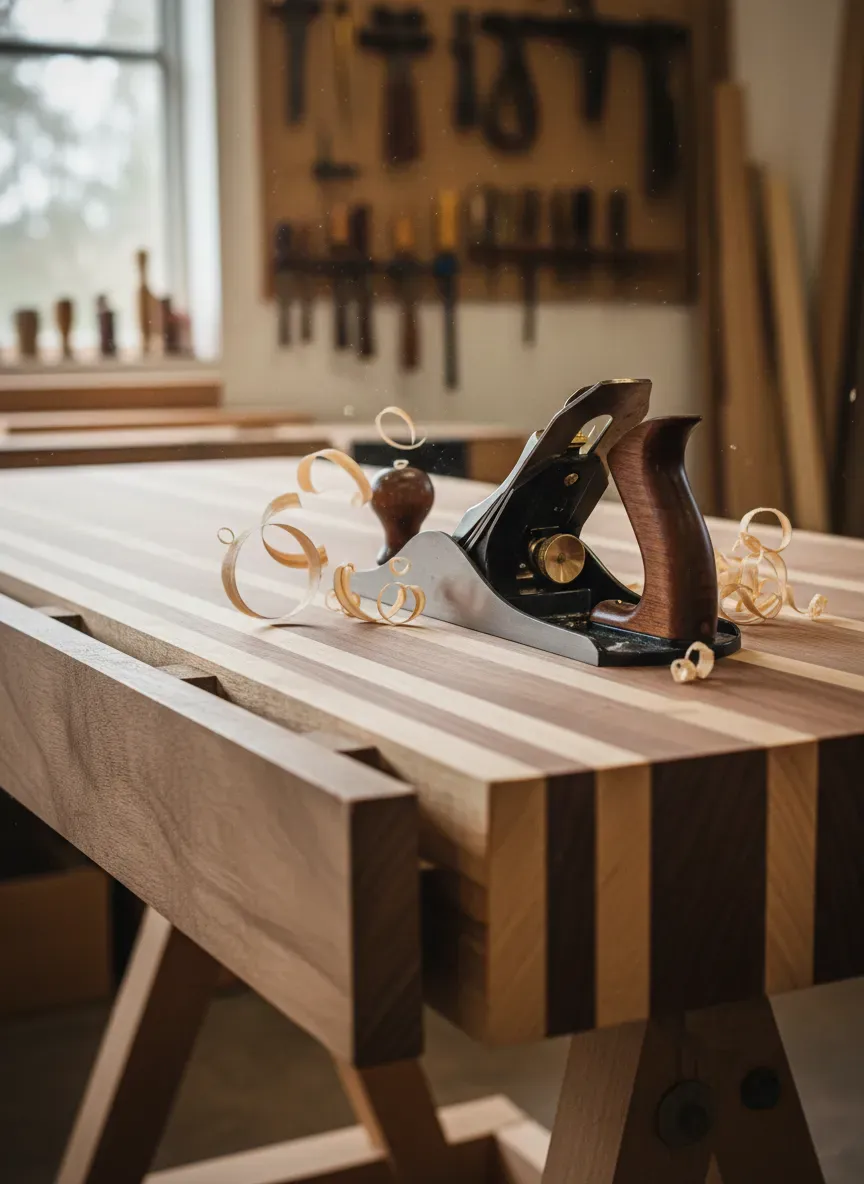
Step 4: Flattening the Top and Final Assembly
Once the base is assembled and the massive top is lowered onto the tenons, you face the final, most physically demanding task: flattening the slab.
The Hand Plane Method
This is traditional and deeply satisfying. You will need winding sticks (two perfectly straight, contrasting pieces of wood) to check for twist across the length of the bench.
- Traverse: Start by planing aggressively across the grain (perpendicular to the length) with a heavily cambered jack plane. This removes the major high spots.
- Diagonal Passes: Switch to a No. 7 or No. 8 jointer plane. Work diagonally across the top from corner to corner, then from the opposite corners.
- With the Grain: Finally, take long, continuous shavings with the grain to remove the diagonal tracks and leave a glass-smooth surface.
The Router Sled Alternative
If the thought of pushing a jointer plane for six hours makes your back ache, build a simple router sled. Suspend a plunge router on two perfectly straight MDF rails running alongside the bench. Using a heavy flattening bit, slowly sweep back and forth across the slab. It creates an incredible amount of dust, but it guarantees a mathematically flat surface with minimal physical effort.
Choosing the Right Finish
Do not ruin your beautiful new bench by slathering it in polyurethane. A workbench needs stiction. It needs to grip the wood you place on it. Film finishes like poly, varnish, or lacquer make the surface slick and slippery.
Instead, flood the surface with a penetrating oil. Boiled Linseed Oil (BLO) thinned 50/50 with mineral spirits, or a standard Danish Oil, works perfectly. It seals the wood, repels glue drips (dried glue will pop right off an oiled surface), and leaves a matte, grippy texture. Reapply a fresh coat once a year to keep it looking fresh.
Avoiding the Rookie Mistakes: Pitfalls to Dodge
Even seasoned woodworkers can fall victim to a few specific traps when tackling a Roubo build. Keep these in mind:
- Ignoring Wood Movement: Your massive top will expand and shrink across its width with seasonal humidity changes. If you bolt the top rigidly to the stretchers, the wood will literally tear itself apart. Only the front tenons should be pinned tight. The rear tenons should be left unglued or secured with slotted holes to allow the top to breathe.
- Making It Too Tall: A workbench is not a kitchen counter. If it’s too high, you won’t be able to get your body weight over your hand planes. A good rule of thumb: stand up straight with your arms relaxed at your sides. The top of the bench should brush your wrist crease or the knuckles of a closed fist.
- Over-Complicating the Tail Vise: Many builders get bogged down trying to install complex wagon vises. Start simple. You can accomplish 95% of all workholding with a solid leg vise, a few bench dogs, and a pair of holdfasts. You can always retrofit a tail vise later if you truly find you need it.
The Bottom Line: Building a Roubo workbench is a monumental commitment of time, energy, and heavy lifting. Yet, the reward is an unparalleled foundation for your craft. Every dovetail you cut, every board you dimension, and every project you assemble will be infinitely easier when your bench is a silent, immovable partner rather than a wobbly adversary.
Now that you possess the undisputed king of workbenches, you are going to need projects worthy of its surface. I’ve personally found that the biggest hurdle after building out a shop isn’t a lack of tools, but a lack of precise, reliable plans to execute your vision. That’s why you need to look into Ted’s Woodworking.
Instead of scouring the internet for half-baked sketches, Ted’s gives you instant access to over 16,000 meticulously detailed woodworking plans. Whether you want to build heirloom furniture, outdoor structures, or intricate shop jigs to complement your new Roubo, it is all mapped out with step-by-step instructions and cut lists. Right now, they are offering a massive 75% discount, making it the smartest investment you can make for your newly upgraded shop. Grab your plans, fire up your tools, and put that new bench to work!