Built to Last: Rugged DIY Benches for Your Garage or Workshop
Discover expert-level strategies, structural joinery techniques, and material selections for building an indestructible DIY workbench for your garage.

Mar 21, 2026 - Written by: Linda Wise
I’ll be blunt: most DIY workbenches are little more than glorified tables waiting to fail. I’ve personally found that the moment you try to plane a piece of rough hardwood, or hammer out a seized automotive bearing, those flimsy 2x4 constructions screwed together with cheap drywall screws will wobble, rack, and ultimately collapse. A real workbench isn’t just a surface to set your coffee on while you look at tools. It is a workholding device. It is the literal foundation of your workshop.
If you are tired of chasing your bench across the garage floor every time you push a hand saw, you are in the right place. We are going to tear down the myths of lightweight, quick-build benches and dive deep into the structural engineering, material science, and joinery required to build a rugged, heirloom-quality workbench that can withstand decades of serious abuse.
Before we dive into the heavy lifting of structural theory and joinery, here is a quick look at the hardware that I consider absolutely non-negotiable for a high-performance shop bench.
Quick Comparison: Top Picks
The Physics of a Bulletproof Foundation
When you build a workbench, you are fighting two primary forces: vibration and racking. Understanding how to defeat these physical forces dictates every material choice and design parameter you will make.
Mass and Rigidity: The Uncompromising Core
Mass is king. Period. A heavy bench absorbs the kinetic energy from mallet strikes and resists the horizontal thrust of hand planing. A light bench bounces and slides. You want your bench to feel like it is bolted to the earth’s crust.
To achieve this, you need dense materials. While exotic hardwoods like hard maple or beech are the historical gold standards for European-style benches, they are prohibitively expensive for most weekend garage warriors. Here’s the real kicker: Southern Yellow Pine (SYP) or Douglas Fir construction lumber can yield a bench every bit as rigid and heavy as maple, provided you laminate the top properly and select your boards with rigorous scrutiny.
When picking construction lumber, ignore the wet, warped boards at the top of the stack at your local big-box store. Dig deep. Look for boards with tight growth rings. The closer the rings, the older and denser the wood. I highly recommend buying 2x10s or 2x12s and ripping them down to width. The wood from wider boards is typically cut from larger, older trees, yielding better dimensional stability and fewer knots than standard 2x4s.
Racking Forces and Structural Geometry
Racking is the side-to-side or front-to-back parallelogramming of a structure. If you lean against your current bench and it shifts laterally, it is racking. Over time, racking forces will wallow out screw holes and tear apart glued joints.
Defeating racking requires one of two things: massive, deeply housed joinery (like a mortise and tenon), or triangulation. Because most standard garage benches rely on simple square framing, they naturally want to fold under pressure. Incorporating a wide lower stretcher, gussets, or even a sheet of 3/4-inch plywood fastened securely across the back legs acts as a shear panel, instantly neutralizing lateral movement.
Designing for Your Specific Discipline
Your workbench must serve your specific workflow. A mechanic rebuilding a carburetor needs an entirely different surface than a luthier carving a guitar neck.
The Automotive and Heavy Metal Manipulator
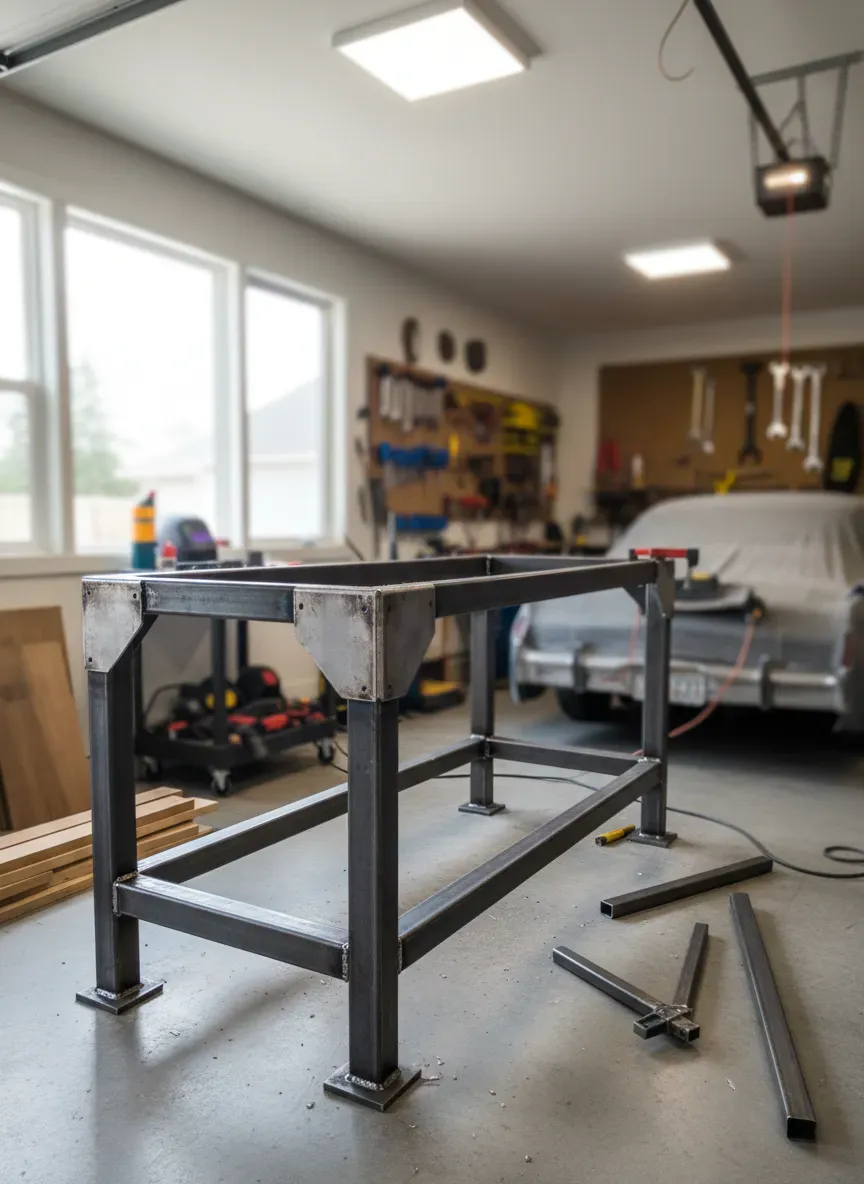
If your weekends involve welding, grinding, and engine fluids, a solid wood top will be destroyed in a month. For this environment, a composite or hybrid approach is vastly superior.
I’ve personally found that building a robust dimensional lumber base, capped with a double layer of 3/4-inch MDF, and topped with a sacrificial sheet of 1/8-inch hardboard, creates an indestructible, dead-flat surface. The hardboard is the secret weapon here. You secure it with countersunk brass screws or double-sided tape. When it gets soaked in motor oil or gouged by a dropped transmission casing, you simply rip it off and slap a new one down for fifteen bucks.
For the welding crowd, consider surfacing a portion of your bench with a 1/4-inch or 3/8-inch steel plate. You can drill and tap this plate to accept custom hold-downs, creating a dedicated, heat-proof zone for heavy fabrication.
The Precision Woodworker’s Haven
Woodworkers require a bench that functions as a 360-degree clamping surface. The top must be thick—ideally between 2.5 and 4 inches—so that it can accommodate holdfasts. Holdfasts are traditional iron or steel hooks that drop into 3/4-inch holes (dog holes) drilled through the top of the bench. A quick tap with a mallet wedges them tight, securing your workpiece instantly. If your benchtop is thinner than 2 inches, a traditional holdfast won’t wedge properly and will slip under pressure.
Just as you would engineer durable components for professional entryway storage to withstand daily family chaos, your garage bench requires an infrastructure designed for abuse. Woodworking benches demand absolute coplanar flatness. If your bench has a twist or a cup, every piece of furniture you build on it will inherit that exact same twist. We’ll touch on how to flatten the top later, but the design phase must allow for a thick enough top to be repeatedly planed flat over its lifespan.
Critical Construction Techniques and Joinery
Throw away the drywall screws. Drywall screws are brittle; they are designed to hold lightweight gypsum board to studs, not to resist the dynamic shear forces of a 300-pound bench.
Beyond Screws: Why Joinery Matters Even in the Garage
If you want a bench built to last, you must rely on mechanical wood joints, reinforced by modern adhesives and heavy-duty hardware. Wood glue, specifically modern PVA formulations like Titebond II or III, creates a bond that is literally stronger than the lignin fibers of the wood itself. But glue requires surface area, and end-grain glued to long-grain is a notoriously weak joint.
This is where joinery comes into play.
The Undefeated Half-Lap Joint
For the DIYer who might not have a dedicated mortiser or the time to chop massive tenons by hand, the half-lap joint is an absolute game-changer. A half-lap involves removing half the thickness of two crossing members so they interlock perfectly flush.
When you use a half-lap to join your leg stretchers to your vertical posts, you create a massive amount of long-grain to long-grain glue surface. Furthermore, the physical shoulder of the joint rests directly on the wood, transferring the downward load through the lumber rather than relying on the shear strength of a metal fastener.
Pro Tip: When cutting half-laps in construction lumber, use a circular saw with a speed square to establish your shoulder lines, then make multiple passes 1/8-inch apart. Knock out the waste with a hammer, and pare the bottom flat with a sharp chisel. It is incredibly fast and immensely strong.
Heavy-Duty Structural Hardware
Once your joints are glued and clamped, you need to lock them in place permanently. Instead of standard deck screws, upgrade to structural screws (often called timber screws or lag screws). Simpson Strong-Tie Structural Wood Screws are engineered to flex slightly under extreme load without snapping. They feature a built-in washer head that pulls joints incredibly tight, eliminating the need to counter-bore for traditional lag bolts.

Crafting the Top: Laminations and Substrates
The top of the bench is your stage. It must be resilient, flat, and heavy.
The Glued-Up Slab
Laminating 2x4s face-to-face is the most cost-effective way to build a massive, traditional benchtop. However, you cannot just slap glue on rounded-over construction lumber and clamp it together. The rounded edges of factory 2x4s will create deep V-grooves in your finished top, which collect dust, screws, and debris.
You’ll notice that professional bench builders take the time to rip the rounded factory edges off their boards on a table saw before lamination. By ripping a standard 2x4 down to roughly 3 inches in width, you ensure square edges that mate perfectly.
When doing a massive glue-up, do not try to glue twenty boards at once. The glue will begin to tack up (skin over) before you get the clamps on, resulting in a weak, starved joint. Instead, glue up manageable sections of three or four boards. Once those cure, run them through a planer (if you have one) or hand plane them flat, and then glue those larger sub-assemblies together.
The Plywood and MDF Torsion Box
If you lack the heavy machinery to mill rough lumber, a torsion box or laminated sheet goods top is your best alternative. Gluing three sheets of 3/4-inch MDF together yields a 2.25-inch thick slab that is incredibly dense and perfectly flat right out of the gate.
Wrap the edges of the MDF with a hardwood skirt (like oak or maple) to protect the fragile edges from impact. MDF is basically dense cardboard; if you smack the edge with a hammer, it will crush and flake. A solid wood border absorbs the impact and gives you a durable surface to mount vises.
Modding Your Bench: Vises, Dogs, and Anchors
A bench is just a table until you add workholding. The ability to lock a workpiece in place quickly and securely separates the amateur setups from the professional shops.
The Front Vise: Your Primary Gripper
Every rugged bench needs a heavy front vise. This is mounted on the left side of the bench (for right-handed users) and is used for crosscutting, dovetailing, and holding boards on edge.
Cast iron is your friend here. A high-quality unit like the Yost Vises 9-Inch Heavy-Duty Woodworking Vise provides immense clamping pressure. When installing a front vise, ensure the rear jaw is perfectly flush with the front apron of your bench. This allows you to clamp long boards securely by letting the bench leg absorb the pressure, rather than relying solely on the vise mechanism.
Always add custom wooden jaw pads to your cast iron vise. Metal jaws will instantly mar and crush softer woods. Line your wooden pads with adhesive-backed leather or crubber (a cork/rubber composite) for an unrelenting grip that treats your workpieces like royalty.
The Dog Hole Matrix
Drilling dog holes into your benchtop transforms the entire surface into a clamping matrix. The standard size for dog holes is 3/4-inch. You want to drill these holes in a line leading directly toward your tail vise, spaced slightly closer together than the maximum travel of your vise.
For general assembly and clamping, many modern builders incorporate the “MFT” (Multifunction Table) grid system, popularized by Festool. This is a grid of 20mm holes spaced exactly 96mm apart. Utilizing track saw clamps and specialized bench dogs in this grid guarantees perfectly square cuts and highly versatile clamping angles.
Mobility vs. Stability
This is a fierce debate in the shop community. Mobility is great for small, two-car garages where the bench must be tucked away so the minivan can park. But casters introduce play, vibration, and height issues.
If you absolutely must have a mobile bench, standard locking casters are not enough. Even when locked, the wheels have a slight amount of polyurethane flex, and the swivel bearings have micro-movements. You will feel this when hand planing.
The superior solution is a retractable caster system. Products like the SPACECARE Heavy Duty Retractable Workbench Casters bolt to the outside of the bench legs. When you step on the levers, the casters cam down, lifting the bench an inch off the ground. When you reach your destination, you flip the levers up, the wheels retract, and the wooden legs plant firmly onto the concrete. You get the uncompromised stability of a stationary bench with the convenience of a mobile cart.

Common Pitfalls and Structural Failures to Avoid
Even the most enthusiastic builders make critical errors in their first bench design. Avoid these traps to ensure your build stands the test of time.
The Ergonomic Disaster: Bench Height
Building a bench at the wrong height will destroy your lower back. There is no universal “standard” height because every human is built differently.
A common rule of thumb for hand-tool woodworkers is the “pinky knuckle” rule. Stand straight, arms relaxed at your sides. The top of the bench should align with your pinky knuckle. This lower height allows you to use your body weight and legs to push a hand plane, rather than relying strictly on your arms and shoulders.
Conversely, if you do mostly detail work, soldering, or router work, you want the bench much higher—closer to your elbow height—so you don’t have to hunch over to see fine details. Take the time to mock up a surface with sawhorses and scrap wood to test the height before committing the saw to your expensive lumber.
Moisture, Cupping, and Environmental Hazards
Wood is anisotropic, meaning it moves in different directions depending on moisture changes. It expands and contracts across its width, but barely moves along its length. If you build your benchtop out of wet construction lumber and immediately bolt it tightly to a rigid cross-grain frame, the top will inevitably shrink as it dries. Because it is bolted down, it cannot move, and it will violently crack straight down the middle.
Always let your lumber acclimate to your shop environment for at least a few weeks before milling and gluing. When attaching a solid wood top to the base frame, use elongated slots for your fasteners, or heavy-duty figure-eight fasteners. This allows the top to expand and contract seasonally while remaining securely attached to the legs.
The “Too Wide” Temptation
It is incredibly tempting to make a workbench 36 inches deep or more, mimicking a massive dining table. This is a mistake. A workbench only needs to be between 20 and 24 inches deep.
Why? Because you need to be able to reach across it. If your bench is too deep, the back half simply becomes a cluttered shelf for tools, coffee cups, and dust. A narrower bench is structurally stiffer, easier to reach across, and forces you to keep your workspace clean and organized. If you are dealing with a massive assembly project, that is what lightweight folding sawhorses are for.
- Key Takeaways for Workbench Design:
- Over-engineer the base with half-lap joinery and structural screws to eliminate racking.
- Choose heavy materials: glued-up SYP or multiple layers of MDF.
- Invest in heavy-duty retractable casters if mobility is required; avoid standard swivel casters.
- Customize the height to your specific physical dimensions and workflow.
- Incorporate a robust cast-iron front vise and a 3/4-inch dog hole grid for ultimate workholding.
Final Finishing and Maintenance Rituals
A workbench is a tool, not a piece of fine furniture. You are going to spill glue on it, drop chisels into it, and drag rough cast iron across it.
Do not finish your benchtop with a film-building finish like polyurethane, varnish, or epoxy. Film finishes look great on day one, but they are slick. You want friction on a workbench so your parts don’t slide around. Furthermore, when you inevitably gouge a polyurethane finish, it cracks and peels, looking terrible and requiring intense sanding to repair.
The absolute best finish for a workbench is a simple, penetrating oil mixture. A traditional blend is equal parts Boiled Linseed Oil (BLO), mineral spirits, and polyurethane. Wipe it on heavily, let it soak in for twenty minutes, and wipe off the excess. Apply two or three coats over a weekend.
This finish sinks into the wood fibers, offering moderate protection against glue spills (wood glue pops right off dried oil finishes with a bench scraper) without creating a slippery surface. When the bench gets beat up after a few years of hard use, you don’t have to strip it. Just give it a light sanding and wipe on another coat of oil.
Pro Tip: Keep a block of paraffin wax or a tin of paste wax in the shop. Periodically rub it on the threads of your vises to keep them spinning smoothly, and lightly buff it onto your benchtop to make heavy assemblies easier to slide into position without sacrificing overall grip.
Flattening the Beast
If you opted for a solid wood top, it will eventually shift and warp slightly as it ages and as the seasons change. Once a year, you should check your top for flatness using a pair of winding sticks and a long straight edge.
If the bench has cupped or twisted, you have two options. The traditional method is to use a heavy #7 or #8 jointer hand plane to aggressively scrub the high spots down until the top is coplanar. This is an incredible workout and a rite of passage for traditional woodworkers.
The modern method is to build a router sled. You create two perfectly flat, parallel rails on either side of the bench, and suspend a router on a rigid carriage across them. Using a wide flattening bit, you sweep the router back and forth across the bench, perfectly machining the top flat relative to the rails. It creates a massive mess of sawdust, but it leaves the top as flat as a cast-iron table saw wing.
The Bottom Line: Building a rugged, heirloom-quality workbench is an investment in your sanity and the quality of every future project you undertake. By prioritizing mass, relying on robust mechanical joinery, and integrating smart workholding solutions, you elevate your garage from a parking spot into a true craftsman’s sanctuary. Stop fighting your flimsy table, take the time to engineer a proper foundation, and watch how dramatically your efficiency and accuracy improve.
Now, if you are fired up to start building your ultimate workbench but want exact, step-by-step blueprints rather than guessing at the dimensions, I highly recommend checking out Ted’s Woodworking. I’ve personally used these plans to eliminate the frustrating trial-and-error phase of shop builds. You get instant access to over 16,000 professional woodworking plans—including dozens of heavily detailed workbench designs, shop storage solutions, and furniture pieces. Right now, you can grab the entire archive at a massive 75% discount. Stop staring at blank lumber and start building with confidence. Click here to get your 16,000 plans and claim your 75% discount today.