The Complete Nicholson Workbench Build: Traditional Plans and Instructions
A human-crafted, high-CTR meta description.
Mar 23, 2026 - Written by: Linda Wise
If you spend enough hours hunched over a wobbly, inadequate work surface, you eventually hit a breaking point. You realize that a workbench isn’t just a table; it is the most critical tool in your shop. It’s the mothership. The bedrock of your accuracy. When I finally decided to upgrade from my cobbled-together plywood disaster, I fell deep into the rabbit hole of historical bench designs.
I bypassed the massive, monolithic French Roubo. I skipped the complex Scandinavian tail-vise setups. Instead, I landed squarely on the English Nicholson workbench.
First documented in Peter Nicholson’s 1812 Mechanic’s Companion, this design is an absolute masterclass in structural engineering. It doesn’t rely on four hundred pounds of solid hardwood to prevent racking. Instead, it utilizes geometric ingenuity—specifically, massive front and rear aprons—to create a rigid, unyielding torsion box. You get an immovable object built entirely from accessible construction lumber.
Before we tear into the granular mechanics of this build, here is a quick look at the hardware that will make your Nicholson sing.
Quick Comparison: Top Picks
| Product | Rating | Check Price |
|---|---|---|
| Gramercy Tools Holdfast | ⭐⭐⭐⭐⭐ | View on Amazon |
| Yost 10-Inch Front Vise | ⭐⭐⭐⭐½ | View on Amazon |
| Irwin Record No. 5 Jack Plane | ⭐⭐⭐⭐½ | View on Amazon |
The Anatomy of the English Workbench
To understand why the Nicholson dominates in practical workholding, you have to look at how it manages physical stress. Hand-tool woodworking generates massive lateral and longitudinal forces. When you push a heavy jointer plane across a rough slab, a poorly designed bench will sway. That sway absorbs the energy of your tool, exhausting you and ruining your edge.
The Nicholson eliminates sway through its aprons.
The Deep Apron Advantage
Most benches have a thick top and relatively thin stretchers. The Nicholson flips this script. The top can be a relatively modest 1.5 to 2 inches thick, but the front and back aprons drop down a full 10 to 14 inches.
From an engineering standpoint, this creates an I-beam effect. The resistance to deflection in a board increases with the cube of its depth. A 12-inch-deep pine apron is astronomically stiffer than a 4-inch hardwood stretcher. It completely neutralizes longitudinal racking.
But structural rigidity is only half the story. The true genius of the wide apron is vertical workholding. By peppering the front apron with 3/4-inch dog holes, you create a massive clamping matrix. You can peg a six-foot-long board to the face of the bench using simple holdfasts, allowing you to edge-plane long stock with zero fuss.
Splay-Legged Stability
Historically, English benches featured plumb (straight) legs. However, modern adaptations often incorporate a slight splay—usually around 10 to 15 degrees—splaying outward toward the floor. I’ve personally found that incorporating a modest splay dramatically increases the footprint’s footprint without eating up valuable real estate at hip level.
This geometry plants the bench firmly onto the floor, fighting the rotational torque generated when you’re heavy-planing the edge of a board clamped in the front vise.
Material Selection: Balancing Cost and Mass
You do not need to drop two thousand dollars on hard maple to build a generational workbench. In fact, Peter Nicholson’s original designs assumed the use of common softwood.
Southern Yellow Pine vs. Douglas Fir
For North American builders, Southern Yellow Pine (SYP) is the undisputed king of workbench softwoods. It is dense, incredibly stiff, and cheap. If you live in the Pacific Northwest, Douglas Fir is your best alternative.
When you head to the lumberyard or big box store, skip the 2x4s. They are usually cut from the fast-growing, unstable tops of the tree. Instead, head straight for the 2x12x12s or 2x12x16s. These massive boards are cut from the lower, older sections of the trunk.
Here’s the real kicker: you want to look at the end grain. Find boards where the pith (the center ring of the tree) is clearly visible, and the grain arcs widely around it. You are going to take these wide boards home, rip the pith right down the middle, and discard it. What you are left with is pristine, quartersawn, or rift-sawn lumber that will remain dead flat through seasonal humidity changes.
The Moisture Content Conundrum
Construction lumber is wet. Even “kiln-dried” framing lumber is usually hovering around 15% to 19% moisture content. If you build your bench immediately, it will warp, shrink, and tear itself apart within six months.
Pro Tip: Buy your lumber at least two months before you plan to build. Stack it in your shop with stickers (thin strips of wood) between each layer to allow air circulation. Paint the ends with latex paint or an end-grain sealer to prevent rapid moisture loss, which causes checking.
Phase 1: Milling and Dimensioning
Once your wood has reached equilibrium with your shop environment, the milling phase begins. You need absolute precision here, as any twist in your components will multiply exponentially when you assemble the base.
If you are using machines, face-joint one side, plane the opposite face parallel, and then joint an edge. If you are a hand-tool purist, grab your Irwin Record No. 5 Jack Plane, put a heavy camber on the blade, and start traversing the grain to hog off the high spots.
You will need to laminate your legs to achieve the necessary thickness. A standard Nicholson leg should be roughly 3.5 to 5 inches thick. Glue up two or three layers of your dimensioned stock, ensuring the grain directions oppose each other slightly to cancel out future cupping.
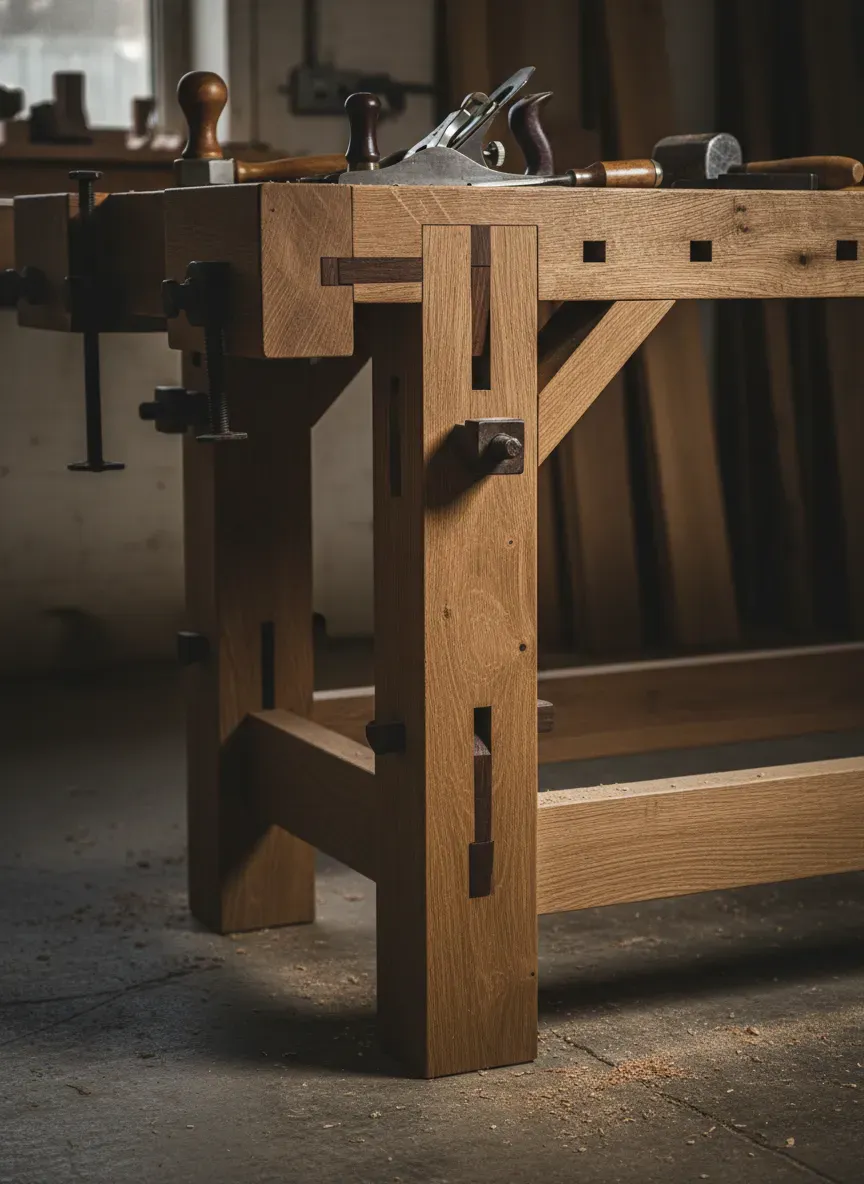
Phase 2: Constructing the Base
The Nicholson base consists of two heavy trestles (the leg assemblies) connected by the massive front and rear aprons.
Bearer Joinery
Each trestle features a top bearer (which supports the benchtop) and a lower stretcher. The joinery connecting the legs to these cross-members must be bombproof.
I strongly recommend using housed lap joints or massive mortise and tenon joints. A lap joint is incredibly fast to execute. You simply cut a wide dado across the face of the leg and drop the cross-bearer into it. When you bolt or glue this connection, the mechanical shoulder of the dado carries the downward sheer force of your pounding and chopping, rather than relying solely on the fasteners.
If you want the bench to be “knock-down” (meaning you can disassemble it to move to a new house), do not glue the stretchers to the legs. Instead, use heavy carriage bolts or specialized bed bolts.
Phase 3: The Aprons and Top
This is where the bench comes to life. The aprons are attached to the outside faces of the trestle legs.
Attaching the Aprons
You have a few choices for attaching the 12-inch wide aprons to the legs. Traditionalists will use massive wooden dowels (drawboring) or large cut nails. For a modern, knock-down approach, lag screws or structural timber screws are exceptional.
If you use screws, drill oversized clearance holes through the apron. Wood moves across its width. A 12-inch pine board can expand and contract by up to a quarter of an inch between summer and winter. If you lock it down with four tight screws in a square pattern, the board will split right down the middle when it shrinks. Secure the top tightly, and elongate the lower screw holes into vertical ovals so the wood can expand downward.
The Top Slabs
The Nicholson top is typically composed of two wide slabs, leaving a gap or “tool well” down the center. This split-top design has two massive advantages. First, you don’t have to surface a 24-inch wide monolithic slab. You only have to surface two 11-inch slabs, which is far easier to manage.
Second, the central gap acts as a built-in planing stop. You can drop a thin strip of wood down the middle, wedging it against the gap, to hold boards laterally.
Secure the top boards to the top bearers of the trestles. Again, account for wood movement. Fasten the front edge of the top securely, but allow the back edge to float slightly using slotted screw holes from underneath.
Workholding: The Heart of the Nicholson
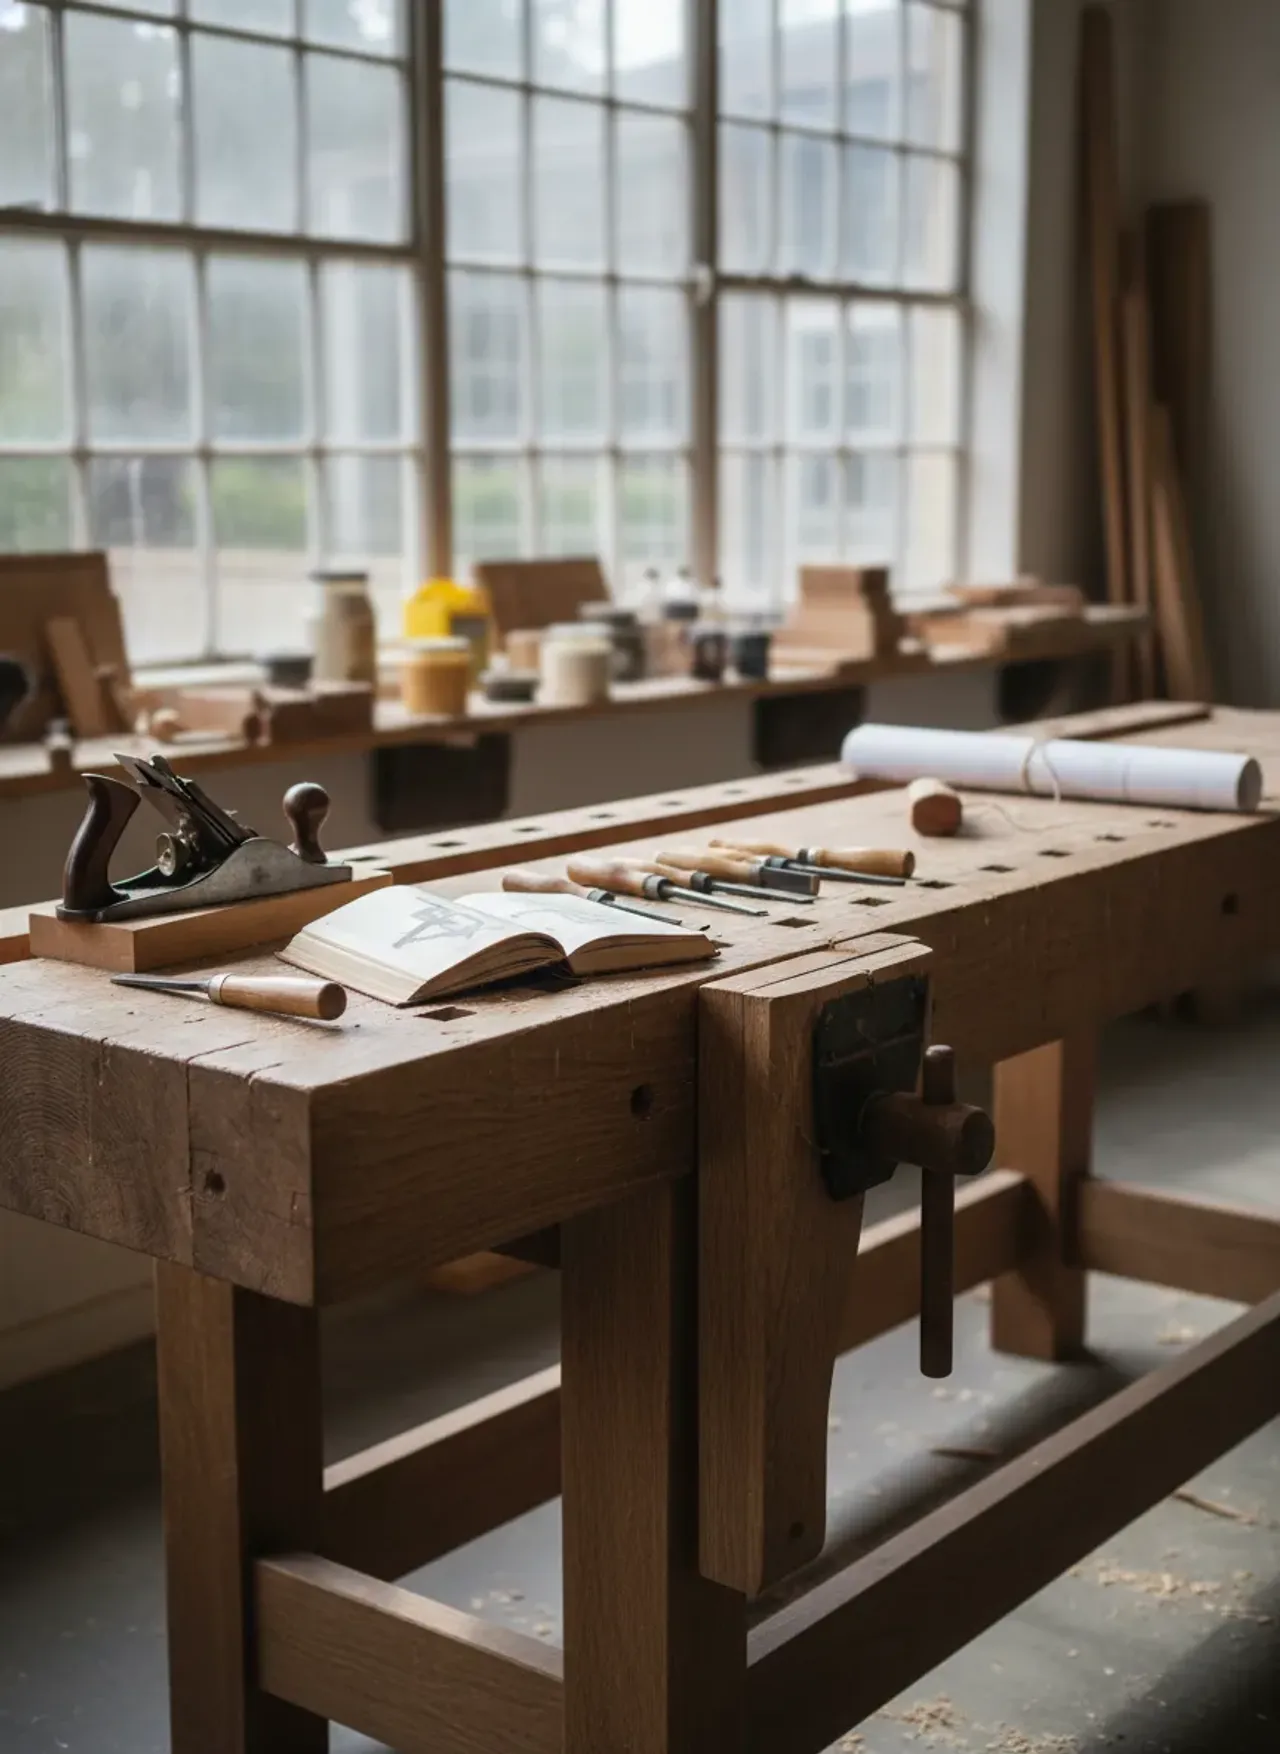
A workbench without workholding is just a kitchen island. The Nicholson relies on a symbiotic relationship between dog holes, holdfasts, and specific vises.
Mastering the Holdfast
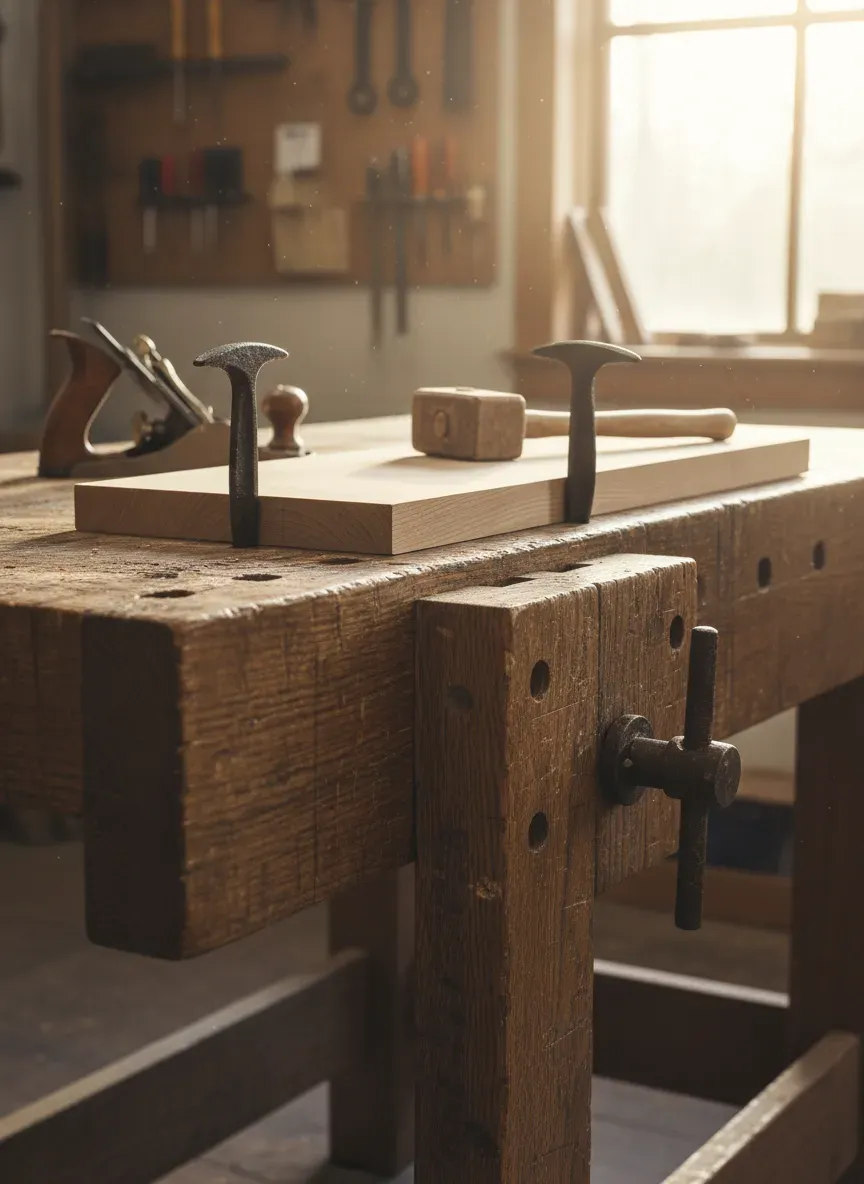
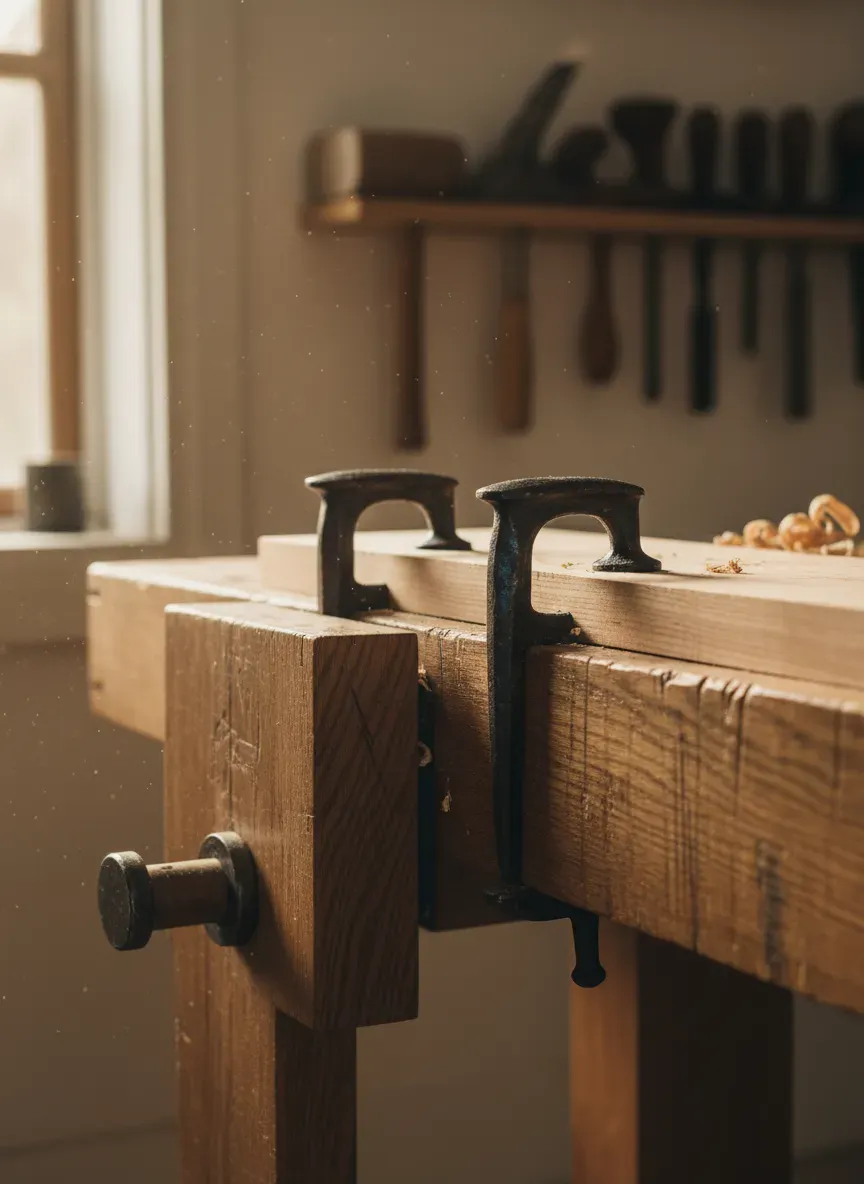
You’ll notice that the front apron of a proper Nicholson is riddled with holes. These aren’t random. They are laid out in a careful grid to accommodate holdfasts.
A holdfast is a heavy, L-shaped piece of forged iron or steel. You drop the shaft into a 3/4-inch hole, tap the top with a mallet, and the shaft instantly wedges against the sides of the hole, clamping whatever is under the pad with hundreds of pounds of pressure. To release it, you simply tap the back of the shaft.
For a holdfast to grip properly, the wood it goes into must be between 1.5 and 2.5 inches thick. If your front apron is only 3/4-inch thick, it will not provide enough friction surface. If you are using standard “one-by” material for your apron, you must laminate a second layer of wood to the inside face where the holes will go. I highly recommend outfitting your bench with a pair of Gramercy Tools Holdfasts. They are wire-drawn, springy, and grip like absolute monsters.
The Face Vise Configuration
While you can technically build a Nicholson with no vise at all (using only holdfasts and planing stops), adding a robust front vise elevates the bench’s utility.
A traditional wooden leg vise is a beautiful, historically accurate option. It utilizes a massive wooden chop and a large wooden screw. However, it requires a parallel guide or a crisscross mechanism to prevent the chop from racking when clamping off-center.
For a smoother, more modern installation, a heavy cast-iron vise mounted flush with the front apron is brilliant. Recess the rear jaw of a Yost 10-Inch Front Vise into the apron itself. This ensures that the face of your apron remains coplanar with the vise chop, allowing you to clamp long boards seamlessly against the bench face.
The Final Finish: Protecting Your Investment
Do not put polyurethane on your workbench.
I repeat: Do not build a glossy, slick surface. A workbench needs to provide friction. When you push a piece of wood across the bench, you want the bench to bite back and hold it in place. Slick film finishes defeat this purpose entirely. Furthermore, film finishes will crack, chip, and look terrible after your first missed mallet strike.
The Traditional Oil and Wax Method
You want a finish that penetrates the wood, seals the fibers against massive moisture swings, but leaves the tactile feel of the raw wood intact.
A mixture of equal parts Boiled Linseed Oil (BLO), mineral spirits, and beeswax is the gold standard. Heat the mixture gently in a double boiler until the wax melts into the liquid. Flood the surface of your completely flattened benchtop and aprons with the warm mixture. Let it soak in for twenty minutes, then aggressively wipe off every drop of excess.
If you leave excess on the surface, it will cure into a sticky, gummy mess. The wood will drink up the oil, hardening the interstitial fibers, while the trace amount of wax provides a beautiful, low-sheen barrier that glue drops will easily pop right off of.
Common Pitfalls and How to Avoid Them
Even with a design as robust as the Nicholson, builders frequently fall into a few specific traps.
Rushing the Flattening Process
Your benchtop must be dead flat. Not “pretty flat,” but mathematically flat. If your benchtop has a hump in the middle, every board you try to plane flat on it will end up bowed.
Use a set of winding sticks (two perfectly straight, parallel lengths of wood placed at opposite ends of the bench) to sight across the top. This will reveal any diagonal twist in the slab. Knock down the high spots with a heavily cambered scrub plane, traversing diagonally across the grain. Once the twist is gone, switch to a long jointer plane and work longitudinally until the surface is uniform.
Over-Complicating the Joinery
There is a temptation to use complex, hidden dovetails or intricate interlocking joints on the base. Resist it. The strength of the Nicholson comes from its macro-geometry, not micro-joinery. A massive, snug-fitting lap joint secured with a 1/2-inch carriage bolt will outlast a delicate dovetail in an environment where heavy impact is the daily norm.
The Dog Hole Spacing Error
Don’t drill dog holes every two inches. It turns your apron into Swiss cheese and severely weakens the structural integrity of the timber.
Instead, space your holes based on the reach of your holdfasts. If your holdfast has a 6-inch reach, space your holes roughly 10 inches apart. This ensures that the clamping radius of one hole overlaps with the clamping radius of the next, giving you total coverage without compromising the wood.
- Key Takeaways:
- Source wide, kiln-dried Southern Yellow Pine or Douglas Fir and rip out the pith for stable lumber.
- Prioritize deep, thick aprons (10–14 inches wide) to completely eliminate longitudinal racking.
- Drill 3/4-inch dog holes only through wood that is at least 1.5 inches thick to ensure holdfasts lock properly.
- Avoid film finishes like polyurethane; opt for a penetrating oil/wax blend to maintain surface friction.
- Flatten the top by traversing the grain first to remove twist, finishing with longitudinal jointer plane passes.
The Bottom Line
The Bottom Line: The Nicholson workbench is a testament to the idea that smart engineering always triumphs over brute mass. By relying on deep, rigid aprons and a highly versatile workholding matrix, you can build a professional-grade workbench over a couple of weekends using off-the-shelf lumber. It will hold your work tighter, resist racking better, and adapt to your evolving woodworking style faster than benches costing five times as much.
Building your own tools, especially the bench that serves as the foundation of your craft, fundamentally changes how you approach woodworking. You stop fighting your environment and start flowing with it.
If this deep dive has your hands itching to grab a saw and start dimensioning lumber, you are going to need precise, easy-to-follow blueprints to bring this build—and thousands of others—to life. I’ve personally found that the absolute best resource for detailed, step-by-step schematics is Ted’s Woodworking. It gives you access to an insane archive of over 16,000 professional woodworking plans, including variations on classic workbench designs, jigs, and shop furniture. Right now, they are offering a massive 75% discount, which makes it a no-brainer for anyone serious about outfitting their shop. Grab your blueprints and start building your legacy bench here: https://a730c6qdqz1iyu9qn8tewytpf2.hop.clickbank.net.