Crafting Excellence: How to Build Heirloom-Quality Benches That Last
Discover the exacting techniques, joinery secrets, and finishing methods required to build a wooden bench that will survive for generations.

Mar 21, 2026 - Written by: Linda Wise
There is a distinct, visceral difference between a bench built to fill a space and a bench built to outlive its maker. I’ve ruined enough expensive walnut in my shop to know that heirloom furniture isn’t born from fancy tools or expensive lumber. It is born from an uncompromising understanding of wood movement, structural physics, and meticulous joinery.
A bench is uniquely punishing on joinery. Unlike a bookshelf that simply sits against a wall holding static weight, a bench absorbs dynamic, shifting loads. People plop down. They drag it across the floor. They tilt back on two legs. If your joinery relies solely on modern synthetic adhesives rather than mechanical interlocking, the racking forces will snap those glue lines within a decade.
Building a bench that your great-grandchildren will fight over requires a shift in mindset. You must stop thinking like an assembler of parts and start thinking like a structural engineer working with a living, breathing, hygroscopic material.
Before we strip down the exact mechanics of heirloom bench construction, here are a few uncompromising tools I keep on my bench when tackling high-tolerance joinery.
Quick Comparison: Top Picks
| Product | Rating | Check Price |
|---|---|---|
| Narex Premium Woodworking Chisels | ⭐⭐⭐⭐⭐ | View on Amazon |
| Thor Double-Faced Woodworking Mallet | ⭐⭐⭐⭐½ | View on Amazon |
| WoodRiver Low Angle Jack Plane | ⭐⭐⭐⭐⭐ | View on Amazon |
The Anatomy of an Heirloom Bench
To construct a piece that defies time, you have to respect the material. Wood is not a static composite. It expands and contracts seasonally across its grain, reacting to the ambient humidity of its environment.
Wood Selection and Grain Orientation
Grabbing off-the-shelf lumber from a big box store is a guaranteed path to failure. Construction-grade pine is dried rapidly in kilns, often leaving the internal cellular structure stressed. We call this case hardening. When you rip a case-hardened board on your table saw, it pinches the blade, warps instantly, and fights you every step of the way.
For an heirloom piece, source your stock from a reputable hardwood dealer. Look for quartersawn or riftsawn boards.
Why quartersawn? Because of the geometry of the growth rings. In a flatsawn board, the rings look like arches on the end grain, meaning the board will invariably cup as it releases or absorbs moisture. Quartersawn boards have growth rings oriented between 60 and 90 degrees to the face of the board. This yields an incredibly stable piece of lumber that expands vertically in thickness rather than horizontally across its width.
When dealing with species like White Oak, quartersawing also exposes the medullary rays, creating a stunning, shimmering effect known as ray fleck.
Understanding Racking Forces
Racking is the enemy of all seating furniture. When you push a bench sideways, the force attempts to fold the legs underneath the seat. If the leg-to-seat joint is weak—say, fastened with pocket screws or dowels—the leverage applied by a 16-inch leg will quickly compromise the connection.
You defeat racking forces through mechanical advantage. Deep mortise and tenon joints, broad shoulders on your aprons, and carefully integrated stretchers near the base of the legs are non-negotiable.

Sourcing and Preparing Your Lumber
The absolute biggest mistake intermediate woodworkers make is rushing the milling process. They buy lumber on a Tuesday, joint and plane it on a Wednesday, and cut their joinery on a Thursday. By Monday, their perfectly tight joints look like a gaping maw.
The Acclimation Phase
Wood needs to acclimate to the specific microclimate of your shop. If your lumber dealer stores their wood in an unheated warehouse at 12% moisture content, and your basement shop is sitting at an arid 6%, that wood is going to move violently the moment you expose fresh fibers.
Bring your rough lumber into the shop, sticker it (place small strips of wood between the boards to allow airflow), and leave it alone for at least two weeks.
Pro Tip: Invest in a high-quality pinless moisture meter. Don’t start milling until the lumber’s internal moisture content matches the equilibrium moisture content (EMC) of your workspace.
The Staged Milling Technique
When you are finally ready to mill, do it in stages.
- Rough Milling: Joint one face and plane the board, leaving it about 1/4-inch thicker than your final dimension. Let it sit overnight. The board will likely bow or twist slightly as internal tensions are released.
- Final Milling: The next day, re-joint the newly warped face and plane it down to your final, precise thickness. This staged approach guarantees dead-flat stock, which is the foundational prerequisite for gap-free joinery.
Mastery of Joinery: The Backbone of Longevity
You can apply the most expensive finish in the world to a bench, but if the joinery is subpar, the piece is garbage. Heirloom furniture relies on wood-to-wood mechanical locks. Glue is merely an insurance policy.
The Drawbored Mortise and Tenon
If there is one joint you must master for bench-making, it is the drawbored mortise and tenon. This is a technique centuries old, utilized by timber framers and medieval furniture makers alike.
Here is how it works: You cut a standard mortise and tenon. Before assembling, you drill a hole through the cheeks of the mortise. Then, you insert the tenon and use a brad point bit to mark the exact center of that hole onto the tenon itself.
Remove the tenon. Now, here is the secret: You drill the hole through the tenon, but you offset it by about 1/32 of an inch closer to the shoulder of the tenon.
During the final glue-up, you drive a tapered wooden peg through the mortise. As the peg passes through the offset hole in the tenon, it acts as a cam, violently pulling the tenon shoulder tight against the mortise face. It creates a mechanical lock so powerful that glue is almost redundant.
If you are going to execute this level of joinery, your chisels must be razor sharp. I constantly rely on my Narex Premium Woodworking Chisels to pare down tenon cheeks until they slide home with a satisfying, suction-like fit.
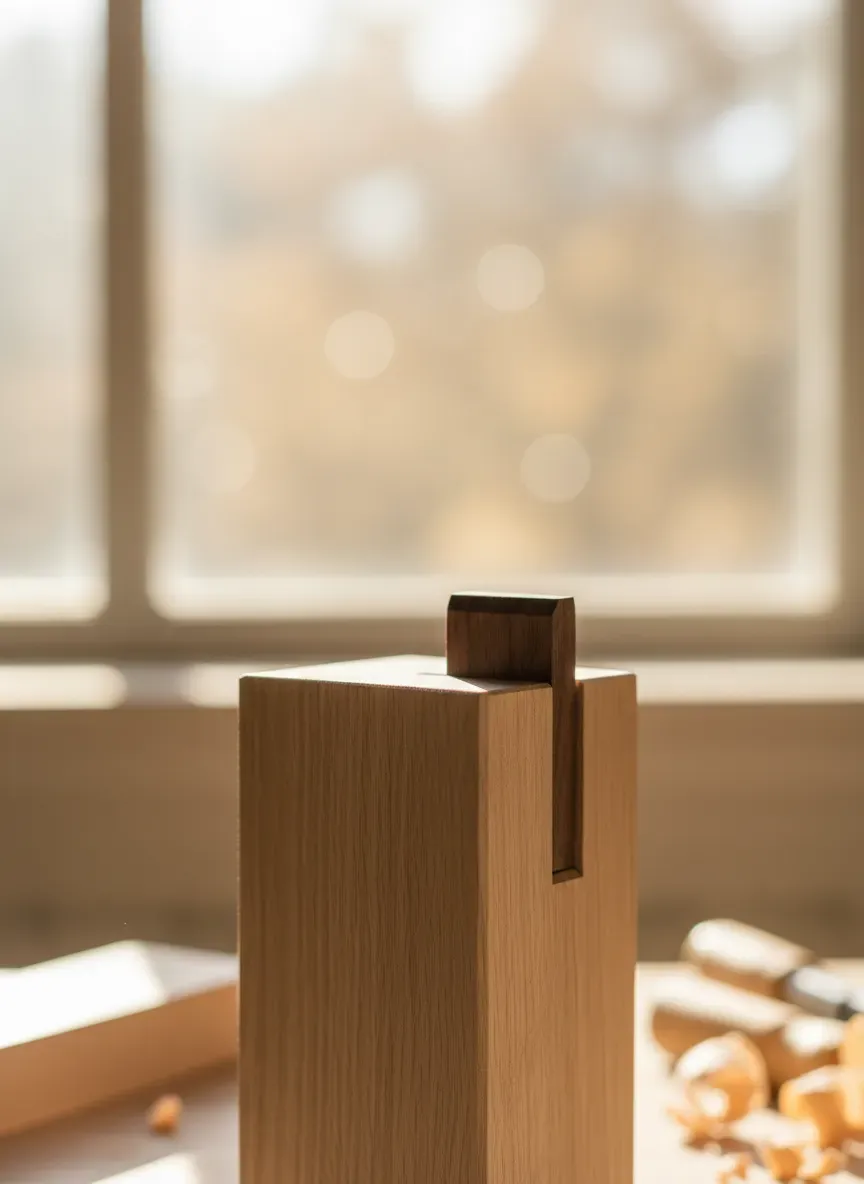
Wedged Through-Tenons
For joining the legs directly to a solid slab seat, wedged through-tenons are both structurally invincible and aesthetically striking.
The mortise is cut entirely through the seat, but it is slightly tapered (wider at the top than at the bottom). The tenon is cut straight, with a kerf sawn down its center. When the leg is driven up through the seat, a hardwood wedge (often a contrasting species like ebony or dark walnut) is hammered into the kerf.
This expands the top of the tenon, locking it permanently into the dovetailed shape of the mortise. It is a one-way trip. Once that wedge is driven home and the glue sets, the leg will break before the joint fails.
The Great Glue Debate: PVA vs. Hide Glue
Modern yellow wood glue (Polyvinyl Acetate or PVA) is incredibly strong, often stronger than the wood itself. But it has a fatal flaw: it is susceptible to creep. Under constant, dynamic tension, PVA glue can stretch and shift over decades. It also prevents finishes from absorbing, leaving ugly white splotches if you fail to clean up squeeze-out.
Liquid hide glue, on the other hand, is the choice of traditionalists and conservators. It crystalizes as it cures, meaning it will never creep under load. Furthermore, it is thermally reversible. If a joint ever needs repair eighty years from now, a restorer can inject steam into the joint, liquefy the hide glue, and disassemble the bench without destroying the wood.
Ergonomics and Dimensional Harmony
A bench that is uncomfortable will never become an heirloom. It will be relegated to a dusty corner of the garage. Building seating furniture requires a strict adherence to human ergonomics.
The Human Factor in Bench Design
The standard height for a dining or entryway bench is between 17 and 18 inches from the floor to the top of the seat. Drop it to 16 inches, and taller guests will feel like their knees are in their chest. Raise it to 19 inches, and shorter guests will have their feet dangling, restricting blood flow to their thighs.
Seat depth should hover between 14 and 16 inches. Anything deeper encourages the sitter to slouch backward, which is disastrous if the bench lacks a backrest.
Integrating a piece into a specific space requires intense precision. If you are crafting a mudroom bench, mastering these dimensions is just as vital as planning your professional entryway storage layout, where traffic flow and daily utility dictate the ultimate function of the space.
Splay and Rake Angles
Straight, plumb legs look heavy and static. To give a bench visual lift and structural stability, the legs should be splayed (angled outward toward the ends) and raked (angled outward toward the front and back).
A compound angle of 5 to 7 degrees is usually the sweet spot. This widens the footprint of the bench, drastically lowering its center of gravity and making it virtually tip-proof.
Calculating compound angles can be a nightmare of geometry. Do not rely on your miter saw detents to be perfectly accurate. Build a dedicated sled for your table saw or cut the angles by hand.
The Craft of Surfacing and Smoothing
Sanding is the lowest form of woodworking. I say that with love, but dragging abrasive grit across beautiful wood fibers tears them, leaving a muddy, muted surface.
To truly make grain pop—to achieve that three-dimensional chatoyance that separates amateur work from museum-quality craft—you must use a sharply honed blade.
Hand Planes and Card Scrapers
A finely tuned hand plane shears the wood fibers cleanly. The resulting surface is glassy to the touch and reflects light with incredible clarity.
For flattening bench seats and smoothing aprons, a low-angle jack plane is invaluable. I frequently reach for my WoodRiver Low Angle Jack Plane because the bevel-up design allows me to swap blades with different cutting angles depending on the grain direction.
When dealing with highly figured woods—like curly maple or crotch mahogany—even the best hand plane can cause tear-out. The grain changes direction wildly, and the plane blade will inevitably dig into rising fibers, ripping them out in ugly chunks.
This is where the cabinet scraper (or card scraper) becomes your best friend. A simple rectangle of hardened steel with a microscopic hook rolled onto its edge, a scraper takes gossamer-thin shavings regardless of grain direction. It requires practice to sharpen correctly using a burnisher, but mastering the scraper will save you hours of tedious sanding.
Edge Treatment
Never leave a sharp 90-degree edge on a bench. Not only is it uncomfortable behind the knees, but sharp edges are brittle. The first time someone bumps the bench with a vacuum cleaner, that crisp edge will splinter.
Use a block plane to cut a heavy chamfer on the bottom edges of the legs to prevent them from catching and splintering on uneven floors. For the seat, either apply a generous round-over or a soft, faceted chamfer.
Finishes That Age Gracefully
The finish you choose determines how the bench will age over the next fifty years.
The Problem with Film Finishes
Polyurethane and modern lacquers are film finishes. They sit on top of the wood like a plastic wrapper. While they offer excellent protection against spills, they have a massive downside: they look like plastic.
Worse yet, when a film finish is deeply scratched or chipped, it cannot be spot-repaired. You have to strip the entire piece, sand it down, and start over. A bench takes a beating. Scuffs and scrapes are inevitable. Coating an heirloom bench in polyurethane is a disservice to the wood.
Penetrating Oils and Hard Wax Blends
An heirloom piece should invite touch. Penetrating finishes soak deep into the cellular structure of the wood, polymerizing and hardening from the inside out.
Boiled linseed oil and pure tung oil have been used for centuries. They bring out an incredible depth of color, warming up the tones of walnut and cherry beautifully. However, traditional oils offer very little protection against standing water.
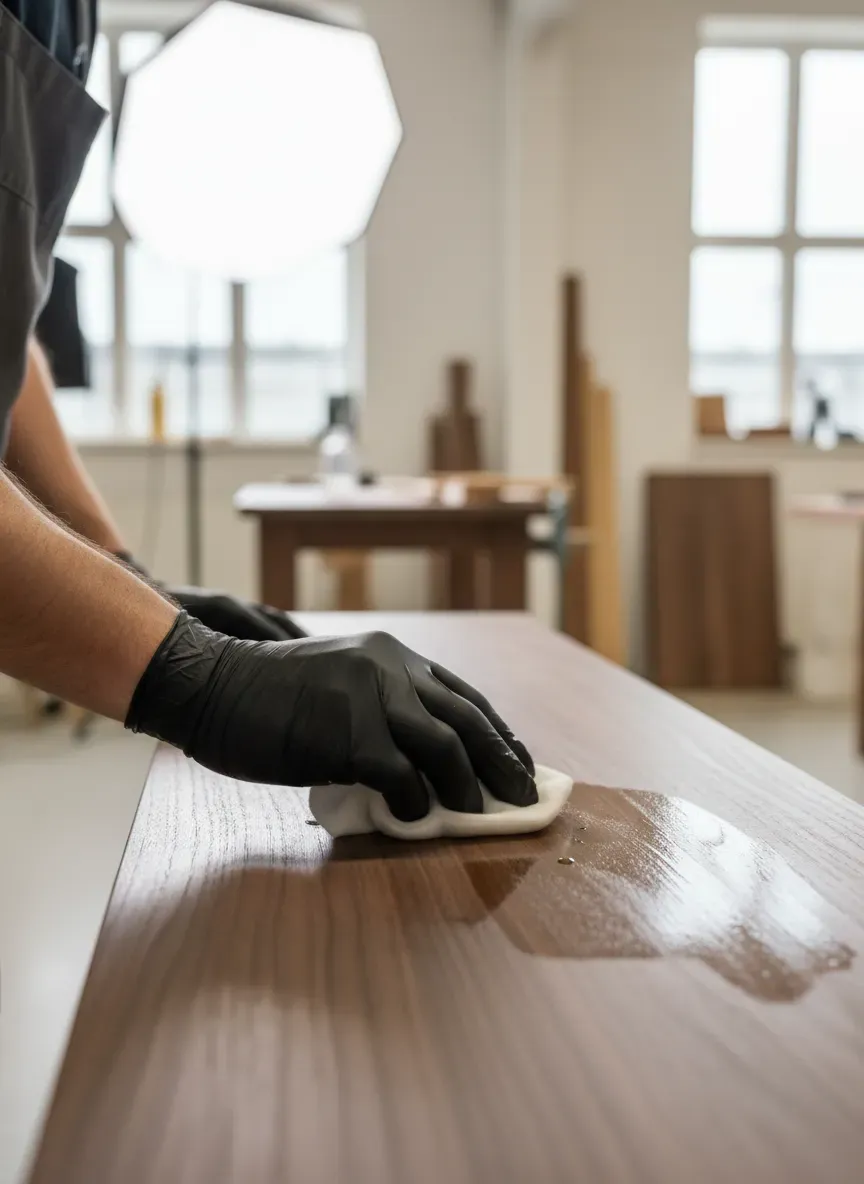
The modern solution—and my personal favorite for bench construction—is a hard wax oil blend like Rubio Monocoat or Osmo Polyx. These finishes combine penetrating natural oils with carnauba and candelilla waxes.
- They bind with the wood fibers at a molecular level.
- They provide exceptional liquid resistance.
- They leave the wood looking and feeling like wood.
Here is the real magic of a hard wax oil: if your bench gets scratched five years from now, you simply lightly sand the damaged spot, rub a few drops of the finish into the scratch, and buff it out. It blends flawlessly. The bench doesn’t degrade over time; it develops a rich, authentic patina.
The Final Reckoning: Assembly and Curing
The glue-up is the most stressful part of woodworking. You have a ticking clock of about 15 minutes before the glue starts to tack up. Panic leads to mistakes.
Dry Fitting is Mandatory
Never apply glue until you have fully assembled the bench dry. Clamp everything down exactly as you will during the final assembly. Check for square across the diagonals. Ensure all your joints close tightly without requiring excessive clamp pressure.
If a joint needs a massive clamp to pull it closed, the joint is poorly cut. You are introducing immense internal stress into the piece before anyone even sits on it. Over time, the wood will win that battle, and the joint will explode. The clamps are just there to hold the wood in place while the glue dries, not to force badly milled wood into submission.
The Art of the Glue-Up
When you are ready, work methodically.
- Key Takeaways for Stress-Free Glue-ups:
- Pre-stage all your clamps and adjust them to the approximate width.
- Have a wet rag and a dry rag ready for immediate squeeze-out cleanup.
- Use a Thor Double-Faced Woodworking Mallet to gently coax stubborn tenons into place without marring the wood.
- Glue up sub-assemblies first. Glue the short ends (leg and short apron) on day one. On day two, join the sub-assemblies with the long stretchers.
Once the clamps are on, walk away. Let the piece cure undisturbed for a full 24 hours. The temptation to unclamp it early to see how it looks has ruined many fine pieces of furniture.
The Bottom Line
The Bottom Line: Crafting an heirloom bench is a testament to patience. It is an active rebellion against a disposable culture. When you meticulously select quartersawn lumber, execute flawless drawbored mortise and tenons, and apply a finish that ages with grace, you aren’t just building furniture. You are building a legacy artifact.
It takes time, precision, and an unyielding commitment to excellence.
But here’s the real kicker: plotting out the dimensions, sourcing the exact cut lists, and figuring out the structural geometry from scratch can take weeks of frustrating trial and error. I’ve personally found that the fastest way to elevate your craft is to start with structurally flawless blueprints.
I bypass the drafting phase entirely using Ted’s Woodworking. It gives you instant access to over 16,000 professional, step-by-step woodworking plans—including stunning heirloom bench designs that take the guesswork out of the complex geometry. Right now, they are offering a massive 75% discount on the entire archive. If you are serious about building pieces that outlast you, grab these plans and focus your energy where it belongs: on the craft itself.