Fast and Sturdy: How to Build a Power Tool Workbench in a Weekend
A human-crafted, high-CTR meta description.

Mar 23, 2026 - Written by: Linda Wise
I’ve personally ruined more good lumber than I care to admit simply because my workbench shifted at the worst possible moment. When you are feeding a heavy sheet of oak plywood through a track saw or bearing down on a handheld router, your work surface needs to absorb the violence of the tool, not amplify it. A wobbly bench isn’t just an annoyance. It is a massive safety hazard.
If you’re operating under the delusion that an old hollow-core door slapped across two folding sawhorses constitutes a “power tool workbench,” we need to have a serious talk. True shop infrastructure requires mass, rigidity, and dead-flat coplanar surfaces. You need a bench that fights back when you push against it.
The good news? You don’t need to spend six months hand-chopping mortise and tenon joints into exotic hardwoods to get there. You can build a bomb-proof, ultra-rigid power tool workbench in a single weekend using standard dimensional lumber and a few sheets of plywood.
Here is exactly how I approach a fast, overbuilt shop fixture that will outlast most of the tools sitting on top of it.
Quick Comparison: Top Picks
| Product | Rating | Check Price |
|---|---|---|
| Kreg Pocket-Hole Jig 720PRO | ⭐⭐⭐⭐⭐ | View on Amazon |
| DEWALT 20V MAX Cordless Drill Combo Kit | ⭐⭐⭐⭐½ | View on Amazon |
| Titebond III Ultimate Wood Glue | ⭐⭐⭐⭐⭐ | View on Amazon |
The Anatomy of a High-Performance Power Tool Workbench
Before we start crosscutting 2x4s, we need to understand the physical forces at play. A traditional hand-tool woodworking bench is designed to resist lateral forces—the side-to-side racking caused by hand planing. A power tool workbench faces a different set of challenges.
Why Standard Benches Fail Under Power Tools
When you fire up a heavy-duty compound sliding miter saw, the motor torque creates a sudden, aggressive rotational force. If your bench lacks sufficient mass, that torque translates into vibration. Vibration is the enemy of precision. It loosens calibration knobs, causes drill bits to wander, and creates chatter marks in your routed profiles.
Standard utility benches fail because they rely entirely on the mechanical strength of their screws. If a bench is just a frame butt-jointed together with drywall screws, it will eventually loosen. Wood expands and contracts with seasonal humidity changes. Screws stretch. Over time, that micro-movement compounds until your table sways like a ship at sea.
Defining “Sturdy”: Managing Load Bearing and Lateral Sheer Forces
To build something indestructible in 48 hours, we rely on triangulation, lamination, and the strategic use of construction adhesives.
We aren’t just driving fasteners; we are creating a unified, monolithic structure. The legs transfer downward load directly into the floor. The stretchers (the horizontal pieces connecting the legs) resist lateral sheer. The heavy, laminated top acts as a structural diaphragm, locking the entire frame into a perfect rectangle that simply cannot rack out of square.
Material Selection: Don’t Overthink It, Do Overbuild It
The secret to a fast build is utilizing off-the-shelf materials. You want heavy, dense, straight stock.
Framing Lumber Tiers
For the skeleton of the bench, standard kiln-dried Douglas Fir or Southern Yellow Pine 2x4s and 4x4s are perfect. However, do not just grab the top boards off the stack at the home center. Take the time to sight down the edge of each board. Look for the crown (the natural curve of the wood) and avoid anything that looks like a hockey stick.
Pro Tip: Buy your dimensional lumber a week before you plan to build. Stack it in your shop with small spacers (stickers) between the boards. This allows the wood to acclimate to your shop’s specific humidity, minimizing warping after your bench is assembled.
For the legs, I highly recommend 4x4 posts rather than laminating two 2x4s together. The solid post offers superior resistance to twisting and provides a massive surface area for your structural stretchers to anchor against.
The Worktop: Plywood Layers vs. MDF
The work surface is where the magic happens. A power tool bench needs to be dead flat and heavy.
I’ve personally found that a hybrid lamination works best. Start with a base layer of 3/4-inch CDX or sanded pine plywood for raw structural integrity. On top of that, laminate a layer of 3/4-inch MDF (Medium Density Fiberboard). MDF is incredibly heavy, which dampens power tool vibration beautifully, and it is manufactured to be perfectly flat.
Top the whole thing off with a 1/4-inch sheet of tempered hardboard. Do not glue this final layer down. Secure it with a few countersunk brad nails or double-sided tape. When you inevitably drill through a workpiece or spill wood stain all over the bench, you can simply pop off the hardboard and replace it for twenty bucks. Your bench will look brand new again.

The Weekend Blueprint: Day 1 - Framing the Beast
Your first day is all about establishing the foundation. You want to execute all your primary cuts, assemble the leg structures, and lock the base frame together.
The Master Cut List and Preparation
Efficiency is born from batching your tasks. Set up a temporary cutting station and break down all your dimensional lumber at once. If you are building a standard 3x6 foot bench, you will need:
- (4) 4x4 legs cut to your desired working height (minus the thickness of your top).
- (4) Long 2x4 stretchers (for the front and back).
- (4) Short 2x4 stretchers (for the sides).
- (3-4) 2x4 center joists to support the plywood top.
Working height is highly subjective. If you use a lot of tall power tools like benchtop drill presses or scroll saws, a lower bench (around 32 inches) saves your shoulders. If your primary task is routing and sanding flat panels, a taller bench (36-38 inches) saves your lower back. Measure your waist height—that is usually the sweet spot for a versatile power tool station.
Leg Assemblies and High-Speed Joinery
To get this done in a weekend, we are skipping traditional mortises. Instead, we lean heavily on modern hardware and adhesives. This is where a specialized tool like the Kreg Pocket-Hole Jig 720PRO pays for itself in a single afternoon.
Pocket holes are incredibly strong when paired with high-quality wood glue. The screw acts as a high-pressure clamp, holding the joint tight while the glue cures into a bond stronger than the wood itself.
- Drill two pocket holes on the ends of every 2x4 stretcher.
- Lay two 4x4 legs flat on the ground.
- Apply a liberal amount of Titebond III Ultimate Wood Glue to the ends of your short stretchers.
- Drive 2.5-inch pocket hole screws to attach the stretchers to the legs, keeping them flush with the outside edges.
You now have two complete end assemblies. Stand them up.
Base Frame Construction and the Importance of Square
Now comes the critical step: connecting the two end assemblies with your long front and back stretchers.
You need a reliable power drill with serious torque to drive screws into dense framing lumber without stripping the heads. A DEWALT 20V MAX Cordless Drill Combo Kit provides the sustained power necessary to sink heavy construction screws deep into the timber.
Attach the top long stretchers first, followed by the bottom stretchers. Before the wood glue has a chance to set, you must verify the frame is square. Grab a tape measure and pull a diagonal line from the top left corner to the bottom right corner. Then measure the opposite diagonal. If the two numbers are identical, your frame is perfectly square. If they differ, rack the frame slightly until the numbers match, then drive a temporary brace across the back to hold it in place while the adhesive cures overnight.
Add your center joists across the top opening, spacing them roughly 16 inches apart. These will prevent your heavy MDF top from sagging over time.
The Weekend Blueprint: Day 2 - Tops, Drops, and Tool Integration
Day two is where the rough skeleton transforms into a precision instrument. The glue on your base is dry. The frame is rigid. Now we build out the working surfaces.
Mounting the Torsion Top
Start by laying down your 3/4-inch plywood base. Secure it to the 2x4 frame using 2-inch wood screws driven every 8 inches along the perimeter and into the center joists.
Next, prepare for the MDF layer. You want full-coverage adhesion here to create a single, incredibly dense slab. Roll wood glue evenly across the entire surface of the plywood. Lay your 3/4-inch MDF sheet perfectly on top. You can use screws to hold it down, but I prefer to drive 1.25-inch brad nails across the surface. They hold the MDF flat against the plywood while the glue dries, and the small nail holes are easily covered by your final hardboard layer.
Customizing for Power Tools: The Drop-Down Miter Well
Here’s the real kicker that elevates a basic table into a professional workstation: flush-mounting your benchtop tools.
If you place a miter saw on top of a standard bench, you have to awkwardly balance long boards while you cut them. By building a dropped platform in the center of your bench, you can sink the miter saw down so that its metal cutting deck is perfectly flush with the wooden wings of your workbench.

Executing the Flush Mount
- Determine the width of your miter saw base and add two inches for clearance.
- Cut a gap of this exact width out of the center of your top layers.
- Measure the exact height of your miter saw’s metal table bed (usually around 3.5 inches).
- Build a sturdy sub-shelf suspended below the main bench top at that exact depth.
- Bolt the miter saw directly to the sub-shelf using heavy carriage bolts.
When you slide a 10-foot 2x4 across your bench, it will slide smoothly across the wood, directly onto the saw’s cutting deck, and out the other side. This provides infinite material support. You can apply this exact same logic to drop-in router plates or portable table saws.
Crucial Upgrades for the Modern Shop Environment
A monolithic block of wood is great, but modern power tool operations require workflow optimization. You have the rest of Sunday afternoon—let’s trick this thing out.
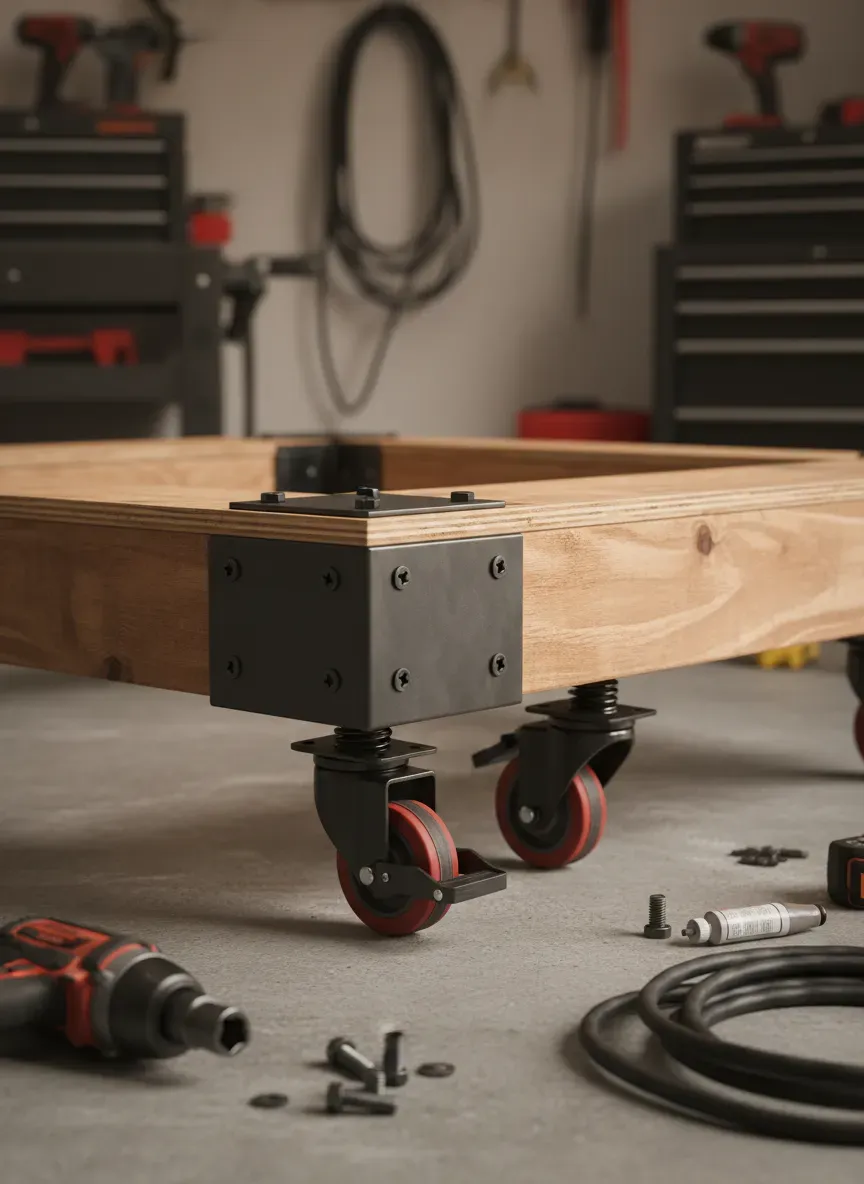
Casters: Mobility Without Sacrificing Stability
If you work in a garage that still needs to park a car, mobility is non-negotiable. However, standard locking casters are terrible for power tool benches. Even when locked, the wheels have a slight micro-shimmy.
Instead, install heavy-duty retractable workbench casters. These bolt to the side of the 4x4 legs. When you step on the pedal, a cam mechanism lifts the entire 300-pound bench half an inch off the floor, allowing you to glide it effortlessly into the center of the room. When you flip the pedal up, the bench drops back down, resting solidly on its 4x4 wooden feet. You get 100% mobility and 100% stability.
Integrated Power Strips and Dust Collection
Running extension cords across the shop floor to your workbench is a tripping hazard and deeply frustrating.
Mount a heavy-duty, 15-amp metal power strip to the side fascia of your workbench. Run a single thick gauge extension cord from the bench to your wall outlet. Now, your bench is electrified. You can plug your sanders, routers, and chargers directly into the bench itself.
Take it a step further by screwing a few PVC pipe hangers under the lip of the bench top. You can run a dedicated 2.5-inch dust collection hose right to the front of your workstation, ensuring your shop vac is always within arm’s reach when the sawdust starts flying.
Common Pitfalls and How to Dodge Them
I have watched dozens of weekend warriors build shop furniture, and they almost always make the same three structural errors. Avoid these, and your bench will last decades.
The Racking Phenomenon
If you skip the bottom stretchers to leave room for your feet or a trash can, you are inviting structural failure. The bottom third of the bench is where lateral racking forces are neutralized. If you absolutely must have the front open, you must install massive diagonal braces on the back and sides to compensate for the missing lower support.
Fastener Failure
Never use drywall screws to build shop furniture. Drywall screws are heat-treated to be extremely hard, making them brittle. When subjected to the aggressive vibration of a heavy router or planer, the heads of drywall screws will snap off entirely. Always use structural construction screws or carriage bolts, which are designed to flex slightly without shearing under heavy loads.
Out-of-Square Assemblies
If your frame is skewed by even a quarter of an inch out of square, it will haunt every project you build on it. Your drop-in tools won’t align. Your track saw won’t sit flat. Take the extra five minutes during the glue-up phase on Day 1 to double-check those diagonal measurements.
Key Takeaways
- Mass is King: A power tool workbench relies on heavy materials (4x4 posts and MDF) to absorb the violent torque and vibration of electric motors.
- Triangulation Prevents Racking: Ensure your frame features upper and lower stretchers secured with high-quality structural screws and wood glue.
- Flush-Mount Your Hardware: Dropping your miter saw or router plate so the deck aligns perfectly with the workbench top provides infinite, safe material support.
- Use Retractable Casters: Never rest a power tool bench permanently on wheels. Use drop-down casters so the wooden legs sit flush on the concrete during operation.
- Laminate the Top: Combine plywood for tensile strength with MDF for flatness and weight, topped with a replaceable 1/4-inch hardboard skin.
The Bottom Line: A proper power tool workbench isn’t just a piece of shop furniture; it is the most important tool you will ever own. By combining heavy dimensional lumber, intelligent hardware integration, and flush-mounted tool wells, you can build a vibration-killing, hyper-accurate workstation in a single weekend.
You’ve just invested 48 hours into building the ultimate foundation for your shop. The top is dead flat, the frame is rigid, and your tools are perfectly integrated. Now, the obvious question is: what are you going to build on it?
If you want to put your new workbench to the test immediately, I highly recommend grabbing a comprehensive set of blueprints. I’ve personally found that having step-by-step schematics removes all the guesswork from the actual woodworking. You should check out Ted’s Woodworking. The archive gives you instant access to over 16,000 professional woodworking plans, ranging from simple weekend projects to intricate custom furniture. Right now, you can lock in a massive 75% discount, which is a total steal for the sheer volume of blueprints you get. Get your bench built, load up a new plan, and start making some sawdust.