Maximize Your Small Space: the Best Slim Entryway Storage Cabinets
Transform your narrow hallway into an organized drop zone. Learn spatial clearance mathematics, tilt-out cabinet ergonomics, style comparisons, installation tricks, and safety tips.
Mar 30, 2026 · Linda Wise
5 min readThe front door swings open, and you are immediately greeted by the chaotic reality of daily life. A rogue shoe trips you up, a dog leash snags on the knob, and mail sits in a pile on the floor.
I have spent the past 12 years consulting on interior layouts for urban apartments and historic New England homes where the “foyer” is nothing more than a three-foot-wide corridor. The spatial reality of narrow hallways leaves zero room for error. You cannot place a standard dresser or console table in these zones; you need high-efficiency storage. You need a piece of furniture that performs a spatial magic trick: hiding dozens of shoes while protruding less than ten inches from the wall.
Finding the right piece requires navigating a market flooded with poor particleboard and inaccurate dimensional claims. I have sourced, built, and customized dozens of these units. Today, I am sharing the exact rules, dimensions, and styling tips to help you transform your narrow entryway into a functional, organized drop zone.
The 36-Inch Hallway Rule: Clearance Mathematics
Let’s begin with the physical dimensions. The standard residential hallway in North America is 36 inches (914 mm) wide. In older pre-war apartments, this can shrink to 32 inches (812 mm).
To maintain safe passage, an entryway corridor requires a minimum clear walking space of 24 inches (610 mm). This is the minimum width required for an adult carrying groceries or bags to walk comfortably.
By applying this requirement, you can easily calculate the maximum allowable depth for your entryway furniture:
$$\text{Maximum Furniture Depth} = \text{Hallway Width} - 24\text{ inches of walking clearance}$$
Hallway Depth Calculation Guide
=============================================================================
Hallway Total Width   Max Cabinet Depth   Usable Walking Path   Verdict
-----------------------------------------------------------------------------
32" (812 mm)          8" max              24" clearance         Slim tilt-out only
36" (914 mm)          10" - 12"           24" - 26" clearance   Low-profile cabinet
42" (1066 mm)         12" - 14"           28" - 30" clearance   Standard console OK
48" (1219 mm)         16" - 18"           30" - 32" clearance   Deep bench/wardrobe
=============================================================================
If your hallway is 36 inches wide, your cabinet cannot exceed 12 inches in depth. A standard console table, which is typically 14 to 18 inches deep, is a liability in these spaces. You must focus on ultra-low-profile designs that keep the pathway clear.
How Tilt-Out Mechanisms Save Space
A standard shoe shelf stores shoes flat, requiring a shelf depth of at least 12 to 14 inches to accommodate adult footwear. A tilt-out flipper cabinet solves this by storing shoes vertically.
Standard Shelf vs. Tilt-Out Flipper Door
=================================================================
Standard Flat Storage:
  [ Shoe Seated Flat ] ----------> Requires 12" - 14" Depth
  ====================

Tilt-Out Vertical Storage:
  |  \
  |   \--- [ Shoe Seated Vertically ] ---> Requires only 6.5" - 9" Depth
  |    \
=================================================================
When you pull open a flipper panel, the door pivots downward on a side hinge, exposing a vertical pocket. You slide the shoes toe-down into the pocket. When closed, the shoes sit upright against the wall, reducing the required cabinet depth to just 6.5 to 9 inches (165–229 mm).
- Hinge Durability: Pay close attention to the hinge hardware. Cheap plastic pivot brackets will crack under the weight of heavy shoes. Seek out units that utilize powder-coated steel or cast alloy hinges for daily reliability.
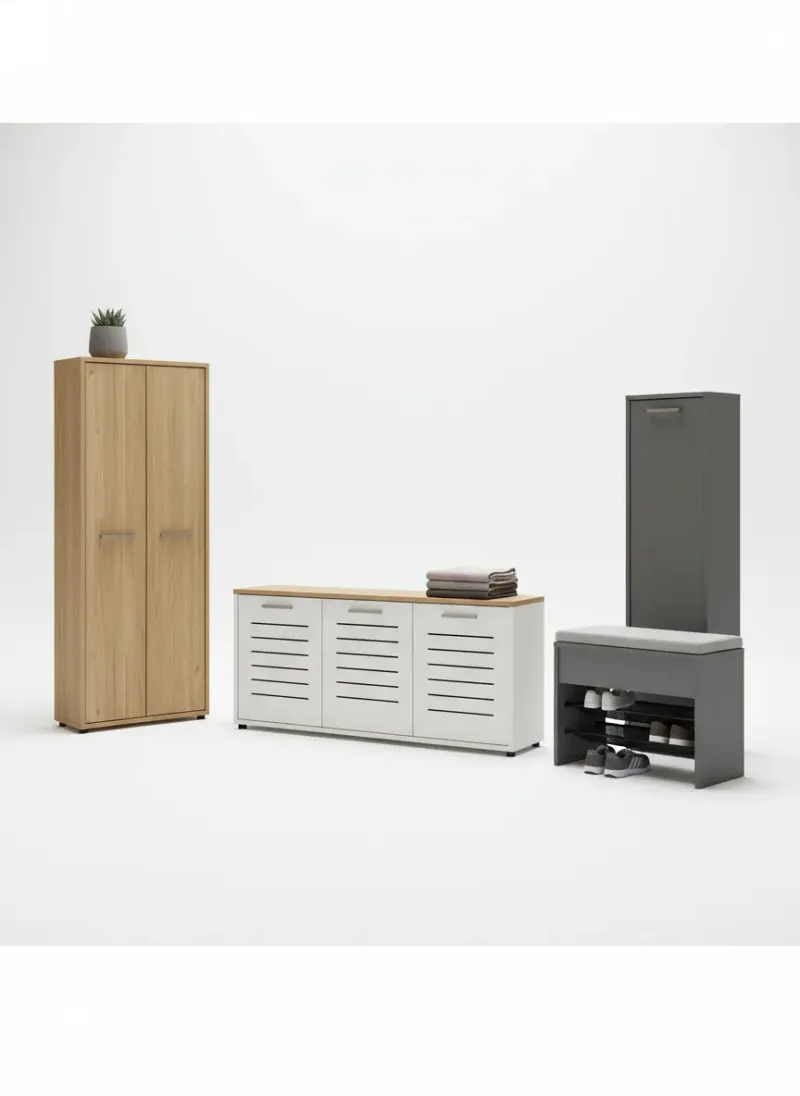
Floating Wall-Mounted vs. Floor-Standing Cabinets
You must decide whether to mount your cabinet directly to the wall or use a floor-standing model. Each approach has distinct installation requirements.
Cabinet Mounting Styles
=============================================================================
Style            Floor Clearance   Installation Complexity   Visual Impact
-----------------------------------------------------------------------------
Floating         6" - 12" clear    High (Must hit studs)     Sleek, spacious
Floor-Standing   0" (Sits on floor)Low-Medium                Traditional
=============================================================================
1. Floating Wall-Mounted Cabinets
A floating cabinet bolts directly to your wall studs, leaving the floor beneath completely clear.
- Pros: By exposing the floor, you create the optical illusion of a wider hallway. It also makes cleaning easy, allowing you to sweep or slide a boot tray underneath.
- Cons: Installation is demanding. You must locate vertical wood studs behind the drywall and mount the unit securely using 3-inch cabinet screws. If you cannot align the mounting holes with your studs, you must use heavy-duty steel toggle bolts.
2. Floor-Standing Cabinets
Floor-standing cabinets rest on the floor, though they still require wall anchoring at the top to prevent tipping.
- Pros: They are easier to install and can support more weight, making them suitable for heavy collections of shoes.
- Cons: They sit directly on the floor, which can accumulate dust. They can also feel slightly more imposing in very tight corridors.
Style Analysis: Four Design Archetypes
The style you select should complement the existing architecture of your home. Here is an evaluation of the four most common entryway design styles.
1. The Rattan Boho Cabinet
- Materials: Typically constructed of a light oak veneer frame with natural woven rattan door fronts.
- Aesthetic: Warm, organic, and casual. Excellent for coastal or bohemian homes.
- Pros: Woven rattan inserts provide natural airflow, allowing moisture to escape and reducing odors.
- Cons: Woven rattan is delicate and can be damaged by pet claws or sharp shoe buckles.
2. The High-Gloss Minimalist Cabinet
- Materials: Engineered wood finished with a high-gloss white or grey lacquer.
- Aesthetic: Sleek, modern, and clean.
- Pros: The glossy surface reflects light, helping to brighten dark hallways.
- Cons: Shows fingerprints and smudges easily, requiring regular cleaning.
3. The Mid-Century Modern Cabinet
- Materials: Warm walnut or teak veneer with tapered wood legs and brass hardware.
- Aesthetic: Classic, structured, and sophisticated.
- Pros: Tapered legs raise the unit off the floor, reducing its visual weight.
- Cons: Legs eat into the vertical storage space, slightly reducing the capacity of the bottom drawer.
4. The Industrial Steel Cabinet
- Materials: Powder-coated steel sheet metal.
- Aesthetic: Utilitarian, modern, and rugged.
- Pros: Virtually indestructible. Impervious to moisture from wet shoes and easy to wipe clean.
- Cons: Can look cold or clinical if not styled with warmer decorative elements.
Material Durability: MDF vs. Plywood vs. Solid Wood vs. Steel
The entryway is a demanding environment exposed to tracked-in moisture, dirt, and heavy use. The material of your cabinet directly affects its lifespan.
Material Comparison Matrix
=============================================================================
Material Type          Moisture Resistance   Strength   Typical Lifespan
-----------------------------------------------------------------------------
Solid Hardwood         High (if sealed)      Very High  20+ years
Birch Plywood          Medium-High           High       15+ years
Powder-Coated Steel    Excellent             Very High  20+ years
Melamine-Coated MDF    Medium                Medium     5-10 years
Standard Paper-MDF     Poor                  Low        2-5 years
=============================================================================- Powder-Coated Steel: The most durable choice for wet climates. It resists moisture, scratches, and mud.
- Solid Wood (White Oak, Maple, Walnut): Offers beautiful natural grain and long-term durability, but must be treated with a water-resistant topcoat (like polyurethane) to protect the wood from damp footwear.
- Birch Plywood: A strong, stable material that resists warping. A great option for custom or high-end cabinets.
- Medium-Density Fiberboard (MDF): The most common material for budget furniture. If standard MDF is exposed to wet boots, it will absorb water, swell, and delaminate. If you purchase an MDF cabinet, ensure it has a melamine coating, and always dry wet shoes before storing them.
Interior Organization: What Fits (and What Doesn’t)
A common point of frustration with slim tilt-out cabinets is realizing that some of your footwear collection will not fit inside.
Tilt-Out Pocket Clearances
=================================================================
[ Fits Comfortably ]
  * Low-profile sneakers, running shoes, tennis shoes
  * Flats, loafers, boat shoes, sandals, slippers
  * Low heels (under 2 inches)

[ Does NOT Fit ]
  * Tall winter/rain boots (Hunter, L.L. Bean duck boots)
  * High-top basketball shoes (size 10 and above)
  * High heels (over 3 inches)
=================================================================- Low-Profile Shoes (Sneakers, Loafers, Flats): These fit easily into standard 7-inch-deep tilt-out pockets.
- Large Men’s Shoes (Sizes 11+): These can be too long for shallow cabinets. Look for cabinets that let you store shoes at a slight angle or feature adjustable internal dividers.
- Boots and High Tops: Standard tilt-out pockets are not deep enough for tall boots or high-top sneakers. Plan to store these in a nearby closet or on a dedicated boot tray on the floor.
Installation: Conquering the Baseboard Gap
Because slim cabinets are tall and shallow, they must sit flush against the drywall to be anchored securely. However, standard baseboard trim sticks out 1/2-inch to 1-inch from the wall, leaving a gap at the top of the cabinet.
Baseboard Clearance Options
======================================================================
[ 1. Notch Cutout ]         [ 2. Spacing Block ]    [ 3. Scribing Legs ]
      | Drywall                   | Drywall               | Drywall
      |                           |                       |
      |                           |[Block]-Cabinet        |
      |                           |    |                  |
      |---Cabinet                 |    |                  |---Cabinet (Leg cut
      |    |                      |    |                  |    to match
  [Trim]--/ (Notch)           [Trim]   |              [Trim]--/ trim)
======================================================================
To resolve this issue, use one of these three methods:
- The Baseboard Cutout: Many slim shoe cabinets feature a pre-cut notch at the bottom rear of the side panels to clear standard baseboards.
- The Spacer Block: Secure a painted wooden spacer block to the wall studs behind the top of the cabinet. Screw the cabinet through this block into the wall studs, bridging the baseboard gap.
- Scribing the Legs: For a custom, built-in appearance, trace the profile of your baseboard onto the back legs of the cabinet using a compass, then cut the profile out using a jigsaw or oscillating multi-tool.
Mandatory Wall Anchoring
You must anchor slim entryway cabinets to the wall. Because they are tall and narrow, pulling open a drawer loaded with shoes shifts the center of gravity forward, creating a tipping hazard. Anchor the unit securely to wall studs using 3-inch screws, or use toggle bolts rated for at least 75 pounds in hollow drywall.
Styling Your Slim Cabinet: Form Meets Function
The top surface of a slim cabinet is prime real estate. You must balance decorative elements with daily functional utility.
Top Surface Styling Layout
=========================================================
  [ Tall Vase / Lamp ]        [ Arched Mirror ]       [ Ceramic Catchall ]
  (Left - Height)             (Center - Focal)        (Right - Low Utility)
  =========================================================================
                                [ Cabinet Top ]
=========================================================
The Focal Point
Hang a large arched mirror directly above the cabinet. This draws the eye upward, makes the hallway feel brighter by reflecting light, and serves as a last-minute checkpoint before you leave the house.
The Tall Anchor
Place a tall decorative object on one side of the cabinet top to establish height. A structured ceramic vase with dried branches or a slim table lamp works well.
The Catchall Tray
Keep loose items organized by placing a marble vanity tray or a small woven bowl on the opposite side of the cabinet. This defines a boundary for keys, mail, and sunglasses, preventing clutter from spreading across the surface.
Customizing Factory Furniture (The “IKEA Hack” Route)
If you find a cabinet with the correct dimensions but a plain finish, you can easily customize it to look like a bespoke piece of furniture.
Factory Cabinet Customization Process
=============================================================================
Step              Action                     Materials
-----------------------------------------------------------------------------
1. Sanding        Lightly scuff surface      220-grit sandpaper
2. Priming        Apply adhesion coat        Shellac-based primer (e.g., Zinsser BIN)
3. Painting       Roll two thin finish coats Acrylic satin enamel paint
4. Hardware       Replace factory handles    Solid brass or matte black pulls
=============================================================================- Upgrading Hardware: Replace cheap plastic factory knobs with solid brass, matte black, or leather tab pulls. This simple change instantly elevates the look of the cabinet.
- Painting Laminate: To paint a laminate or melamine cabinet, scuff the surface with 220-grit sandpaper, apply a coat of extreme-bond shellac primer, and finish with two coats of high-quality acrylic enamel paint using a foam roller for a smooth finish.
- Applying Vinyl Wrap: Use heavy-duty, self-adhesive contact paper to wrap the top surface of the cabinet in a faux stone, marble, or wood grain finish. Modern vinyl wraps are highly durable and water-resistant.
By understanding the spatial math, choosing a style that fits your needs, and executing a secure installation, you can transform your narrow hallway into a clean and organized entryway.
Last updated: June 2026
Top Picks: Best Home Organization
Editor's shortlist with verified ratings. Prices and availability below — clicking an Amazon link earns us a small commission at no extra cost to you.
| # | Product | Rating | Reviews | Tag | Check Price |
|---|---|---|---|---|---|
| 1 | mDesign Stackable Storage Bins | 6,820 | Top Pick | View on Amazon | |
| 2 | Seville Classics Storage Organizer | 3,210 | — | View on Amazon | |
| 3 | Simple Houseware Closet Organizer | 2,450 | Best Closet | View on Amazon | |
| 4 | Rubbermaid Cleverstore Clear Container | 4,120 | — | View on Amazon | |
| 5 | IRIS USA Storage Bin with Lid | 2,210 | Best Stackable | View on Amazon |
Affiliate disclosure: As an Amazon Associate we earn from qualifying purchases.
Tag: entreyway-20 — change in src/data/topPicks.ts.