No Experience Needed: Simple DIY Benches Perfect for Beginners
A human-crafted, high-CTR meta description.

Mar 21, 2026 - Written by: Linda Wise
I remember staring at a pile of pine boards in my driveway, completely paralyzed by the fear of making the wrong cut. If you’ve never picked up a circular saw, the world of woodworking feels like an exclusive club guarded by grizzled veterans speaking a different language. They throw around terms like kerf, tear-out, and mortise and tenon, making the barrier to entry seem insurmountable.
You don’t need a fully equipped, climate-controlled shop to build furniture you’re actually proud of. I’ve personally found that the humble wooden bench is the absolute best entry point into this craft. It demands minimal tools, requires basic dimensional lumber, and forgives a multitude of beginner sins. A bench is structurally straightforward—essentially just a top supported by legs—yet it introduces you to the foundational mechanics of joinery, measuring, and finishing. By the time you sink the final screw into your first bench, you’ll have shattered the intimidation factor entirely.
Quick Comparison: Top Picks
| Product | Rating | Check Price |
|---|---|---|
| DEWALT 20V Max Cordless Drill | ⭐⭐⭐⭐⭐ | View on Amazon |
| Kreg R3 Pocket Hole Jig | ⭐⭐⭐⭐½ | View on Amazon |
| DEWALT Random Orbit Sander | ⭐⭐⭐⭐⭐ | View on Amazon |

The Psychology and Physics of Your First Build
Why a bench? Let’s talk about the instant gratification loop.
When you attempt to build something overly complex for your first project—say, a dresser with inset drawers—the inevitable mistakes compound. A millimeter off on a drawer slide translates to a drawer that binds, frustrating you into abandoning the craft entirely. A simple farmhouse-style bench bypasses this trap. If one of your apron boards is an eighth of an inch short, the bench still functions perfectly. The rustic aesthetic actually absorbs small miscalculations, disguising them as “character.”
Structurally, a bench introduces you to the concept of triangulation and sheer strength without requiring complex math. You’ll learn how to distribute weight. A flat board spanning two legs will sag under human weight unless supported by an apron—a vertical piece of wood running underneath the seat that provides rigid longitudinal support. Understanding this basic principle of physics changes how you look at all furniture.
The Anatomy of a Foolproof Design
Every robust bench consists of three primary elements:
- The Top (Seat): The contact surface. Usually constructed from 2x8 or 2x10 dimensional lumber.
- The Apron: The structural framework directly beneath the top. This prevents the seat from bowing when your uncle sits heavily on it after Thanksgiving dinner.
- The Legs: The vertical supports transferring the load to the floor.
Pro Tip: Never build a bench where the legs attach directly to the underside of the seat without an apron. The lateral forces of someone sitting down and shifting their weight will eventually snap the fasteners, resulting in a collapsed piece of furniture and a bruised ego.
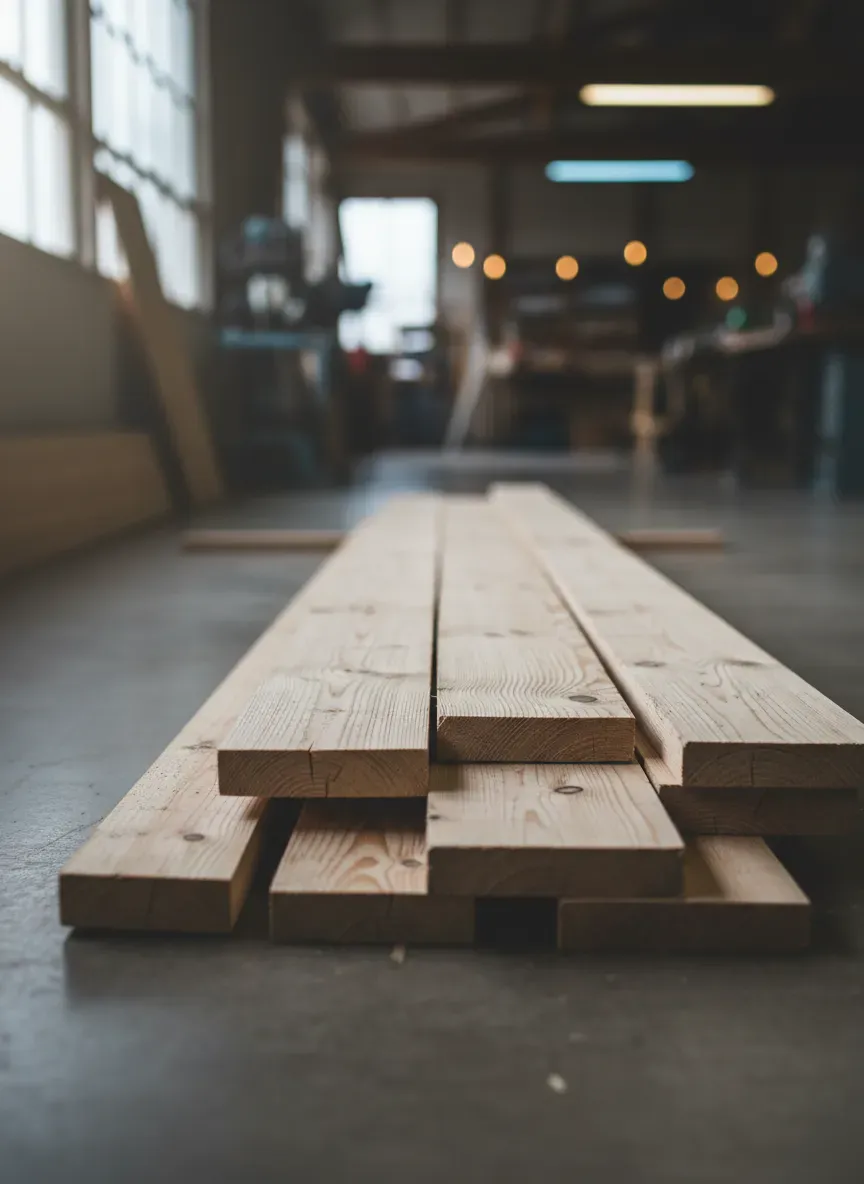
The Core Materials: Navigating the Lumber Aisle
Walking into a big-box home improvement store can be incredibly overwhelming. You are greeted by racks of lumber, varying wildly in price and quality. For your first project, ignore the expensive hardwoods like oak or walnut. You are going to build with construction-grade pine or whitewood.
Here is the real kicker about construction lumber: it is sold in “nominal” sizes, not actual sizes. When you buy a 2x4, you are not getting a board that is two inches thick and four inches wide. You are buying a board that is 1.5 inches thick and 3.5 inches wide. The original rough-sawn lumber was 2x4, but the drying and planing process removes material. Failing to account for this half-inch discrepancy is the number one reason beginner cut lists fail.
Sourcing Straight Wood in a Crooked World
Construction lumber is notoriously wonky. It is dried quickly in giant kilns, leading to a host of dimensional defects. You have to inspect every single board before putting it in your cart.
Look down the length of the board like you are aiming a rifle. You are checking for three specific defects:
- Bowing: The board curves like a ski along its flat face.
- Cupping: The edges of the board curl upward, creating a U-shape across the width.
- Twisting: The board looks like a spiral staircase. Leave these immediately; a twisted board is impossible to wrestle into a square piece of furniture.
Select boards that are as heavy as possible? Actually, no. A board that feels unusually heavy is holding excess moisture. As that moisture inevitably evaporates in your climate-controlled home, the wood will shrink and warp, tearing your tight joints apart. Look for lighter boards with tight, straight grain patterns.
The Beginner’s Tool Arsenal: High Impact, Low Cost
You do not need a $2,000 cabinet saw to build a bench. You can execute this entire project with three power tools.
First, you need a reliable drill. I highly recommend the DEWALT 20V Max Cordless Drill. It delivers consistent torque, the battery life is phenomenal, and it feels perfectly balanced in the hand. You’ll use this for both drilling pilot holes and driving your fasteners.
Second, a cutting implement. While a miter saw is ideal for crosscuts, a basic circular saw paired with a cheap plastic speed square will yield perfectly straight, 90-degree cuts if you take your time.
The Ultimate Cheat Code: Pocket Hole Joinery
If there is one technique that has democratized woodworking for beginners, it is the pocket hole. Traditional joinery requires carving intricate interlocking shapes into the wood. Pocket hole joinery simply uses a specialized jig to drill an angled hole into one board, allowing a self-tapping screw to pull it tightly against another board.
You’ll notice that professional-looking DIY furniture rarely has visible screw heads on the outside. This is achieved using the Kreg R3 Pocket Hole Jig. It is inexpensive, clamps directly to your workpiece, and creates incredibly strong joints that are entirely hidden on the inside of the bench apron. It feels like cheating, but it is structurally sound and incredibly efficient.
Step-by-Step: The Two-Hour Farmhouse Bench
Let’s walk through the actual fabrication of a classic, 48-inch long entryway bench. This design perfectly demonstrates how a well-crafted bench forms the foundation of 7 professional entryway storage setups.
The Cut List
Assuming you are using standard 2x4s for the frame and a 2x10 for the top, here is what you need to cut:
- Seat Top: One 2x10 cut to 48 inches.
- Legs: Four 2x4s cut to 16.5 inches (giving you an 18-inch final seat height once the 1.5-inch top is attached).
- Long Aprons: Two 2x4s cut to 39 inches.
- Short Aprons: Two 2x4s cut to 6.5 inches.
Assembly Tactics That Prevent Wobbly Legs
Step 1: Drill the Pocket Holes Take your apron pieces (both the 39-inch and 6.5-inch boards). Using your Kreg jig set to the 1.5-inch material thickness setting, drill two pocket holes on each end of all four apron boards. Then, drill pocket holes along the top edge of these aprons, spacing them roughly every 8 inches. These top-facing holes will eventually secure the bench top.
Step 2: Build the Short Sides Lay two legs flat on your work surface. Place a 6.5-inch short apron between them, flush with the top. Use wood glue on the ends of the apron. Wood glue is actually stronger than the wood itself once cured; the screws just act as internal clamps holding everything together while the glue dries. Drive 2.5-inch pocket hole screws through the apron into the legs. Repeat for the other side. You now have two distinct leg assemblies.
Step 3: Connect the Frame Stand your leg assemblies up. Position the 39-inch long aprons between them, again flush with the top edge. Glue and screw these into place. You should now have a sturdy, rectangular frame with four legs. If it rocks slightly on a flat floor, don’t panic. Minor discrepancies can be sanded out later.
Step 4: Attach the Top Lay your beautiful 48-inch 2x10 flat on the ground, with the side you want to sit on facing down. Flip your assembled frame upside down and center it on the board. You should have a uniform overhang on all sides. Drive 2.5-inch pocket screws through those upward-facing pocket holes you drilled earlier, pulling the top tightly to the frame.
Key Takeaways for Assembly:
- Always use wood glue. It is the true hero of furniture making.
- Wipe away glue squeeze-out immediately with a damp rag. Dried glue will block wood stain later, leaving ugly, light-colored splotches.
- Drive screws slowly. Over-torquing will strip the wood fibers, destroying the holding power of the screw.
Finishing Strong: The Art of Surface Preparation
You have a fully assembled bench. It probably looks a little rough around the edges, complete with factory stamps and barcode stickers. This is where the magic happens. A phenomenal finish can make thirty dollars’ worth of cheap pine look like a boutique furniture piece.
The Progressive Sanding Methodology
Sanding is tedious. There is no sugarcoating it. But it is the single most critical step distinguishing amateur work from professional craftsmanship.
Do not try to sand a whole bench by hand. You will exhaust yourself and yield uneven results. Invest in the DEWALT Random Orbit Sander. Unlike a standard sheet sander, a random orbit sander moves in erratic microscopic circles, preventing those ugly, swirling scratch marks from ruining your wood grain.
Start with 80-grit sandpaper. This is your aggressive, material-removing grit. Use it to erase mill glaze, factory stamps, and any slight unevenness where your joints meet. Run the sander slowly—about one inch per second. Let the weight of the machine do the work; pushing down hard will only gouge the wood and wear out your sanding pads prematurely.
Once the entire bench feels uniform, swap to 120-grit paper. This step removes the deep scratches left behind by the 80-grit. Finally, finish the entire piece with 220-grit. At this stage, the wood should feel as smooth as glass to the touch.
Taming Pine’s Blotchy Nature
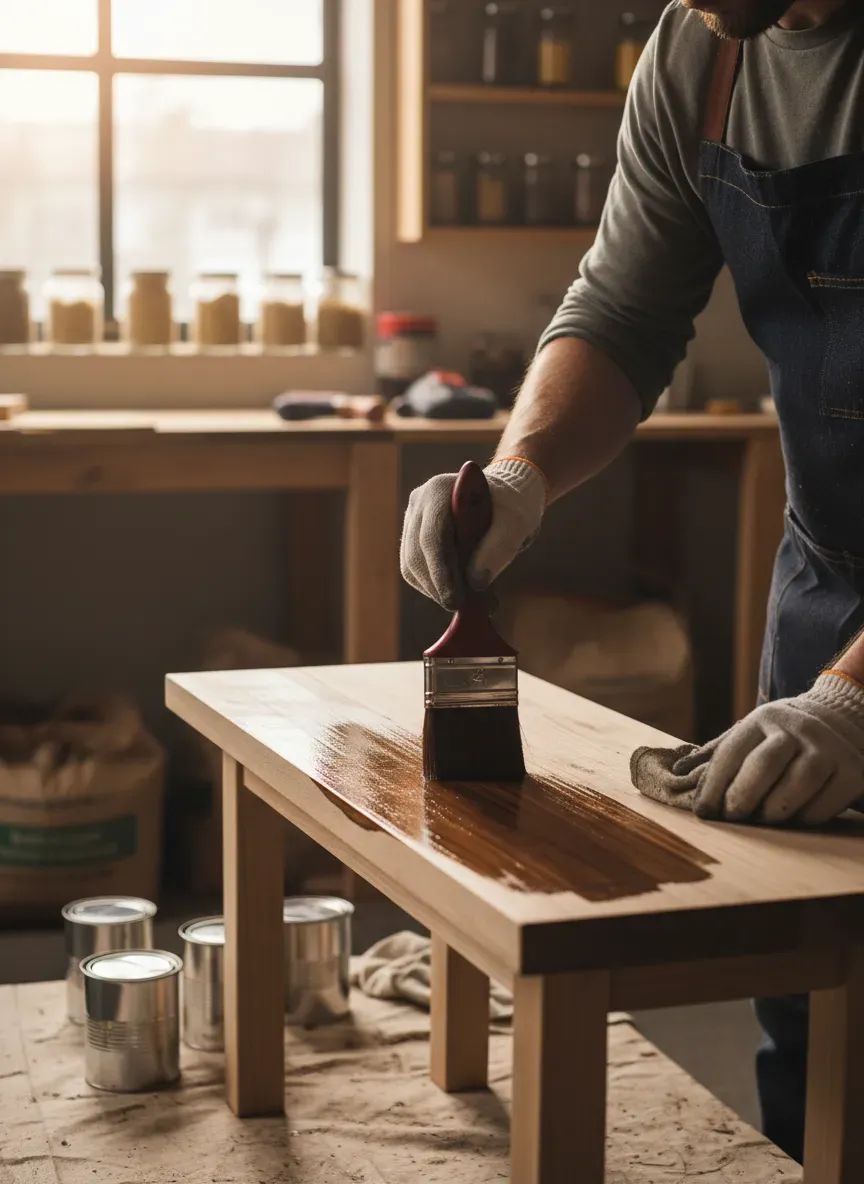
Pine is notorious for taking stain unevenly. Its cellular structure contains alternating areas of dense latewood and soft, highly absorbent earlywood. If you apply a dark stain directly to bare pine, it will look incredibly blotchy and muddy.
To bypass this, you must apply a pre-stain wood conditioner. Think of this as a primer for stain. It partially seals the overly absorbent pores of the wood, allowing the pigmented stain to penetrate evenly. Wipe it on, let it sit for fifteen minutes, wipe off the excess, and immediately apply your stain.
I’ve personally found that applying stain with a clean cotton rag provides far more control than using a brush. Wipe the stain on in the direction of the wood grain, let it sit for a few minutes to achieve your desired depth of color, and then rigorously wipe off all the excess.
Sealing the Deal: Topcoats
Stain provides color, but it provides zero physical protection. To protect your bench from wet shoes, dropped keys, and general wear and tear, you need a topcoat.
For beginners, water-based polyurethane (often sold as Polycrylic) is the most forgiving option. It dries crystal clear, doesn’t emit toxic fumes, and cleans up easily with soap and water. Apply three thin coats with a high-quality synthetic brush, lightly hand-sanding with 220-grit paper between coats to knock down any dust nibs that settled into the wet finish.
Common Pitfalls and How to Sidestep Them
Wood is hydroscopic. It behaves like a rigid sponge, constantly absorbing and releasing moisture from the surrounding air. As humidity rises in the summer, the wood swells. In the dry heat of winter, it shrinks. You cannot stop this movement; you can only accommodate it.
If you tightly screw your bench top to the frame without allowing for any movement, a severe moisture swing could cause the top to crack right down the middle as the wood fights against the screws. The pocket hole method mentioned above is generally forgiving enough for softwoods like pine, but as you progress to wider hardwood tops, you’ll need to learn about specialized fasteners like Z-clips or figure-eight fasteners that allow the top to subtly expand and contract independently of the rigid frame beneath it.
Another frequent beginner mistake is over-sanding the edges. While you want to remove sharpness, aggressively rounding over the edges of your bench with a sander can make the piece look amateurish and lumpy. If you want a perfectly rounded edge, that requires a router. For now, just lightly “break” the sharp edges with a single, gentle pass of your sander.
Stepping Up Your Game: Simple Customizations
Once you understand this foundational build, the customization options are limitless.
- The Two-Tone Finish: Instead of staining the entire bench, paint the leg and apron assembly a crisp white or deep charcoal, and stain only the seat top. This classic farmhouse look hides imperfections in the frame joints beautifully.
- Adding a Shoe Shelf: Cut three smaller pieces of lumber and run them horizontally between the short lower leg braces (which you would add a few inches off the floor). Suddenly, your simple bench is a highly functional storage unit.
- Distressing: If you want a truly vintage look, beat the bench up before you stain it. A bag of screws whacked against the wood, a few strategic hammer dents, and some aggressive sanding on the corners will create artificial wear patterns that catch dark stain beautifully, simulating decades of use.
The Bottom Line
Building your first piece of furniture is a transformative experience. You shift from being a passive consumer of goods to a creator. You will inevitably look at store-bought furniture differently, noticing the flimsy particleboard and the cheap veneers. There is an unparalleled satisfaction in sitting down on a sturdy, beautiful piece of furniture and knowing that your hands shaped it from raw materials. Start simple. Accept that you will make a few mistakes. Respect the tools, take your time with the measurements, and embrace the sawdust.
If reading through this process has sparked that creator’s itch, you are exactly where I was a few years ago. You just need a roadmap. I cannot emphasize enough how valuable it is to have clear, idiot-proof blueprints when you’re starting out. I highly recommend checking out Ted’s Woodworking. It is an absolute goldmine containing over 16,000 step-by-step woodworking plans, ranging from beginner benches like this one to advanced cabinetry. Right now, they are offering a massive 75% discount, which gives you lifetime access to an entire library of cut lists, material breakdowns, and 3D schematics. It completely eliminates the guesswork of dimensioning and design, allowing you to focus entirely on the fun part: actually building something incredible with your own two hands. Grab the plans, head to the lumber yard, and start building.