The Secret to a Rock-Solid Bench: A Guide to Laminating Plywood
Discover the expert techniques for laminating plywood to create an indestructible, dead-flat workbench. Stop dealing with deflection and build a bench that lasts.
Mar 19, 2026 - Written by: Linda Wise
I’ve personally found that the heart of any serious workshop isn’t the three-horsepower cabinet saw or the precision-milled router lift. It is the workbench. If your primary work surface deflects when you strike a chisel, vibrates when you run a sander, or sags under the weight of a heavy glue-up, you are fighting a losing battle against your own shop infrastructure. A flimsy bench steals your kinetic energy and ruins your accuracy.
For centuries, the gold standard was a massive slab of European beech or hard maple. Those benches are stunning, undeniably effective, and incredibly expensive. They also require a monumental amount of labor to flatten and stabilize. Here is the real kicker: you can achieve that exact same unyielding mass, dead-flat reference surface, and brutalist durability using a fraction of the budget.
The secret lies in the engineered mastery of laminating plywood.
By taking multiple sheets of high-quality plywood and permanently fusing them into a monolithic slab, you bypass the anisotropic nature of solid wood. You eliminate seasonal cupping, twisting, and bowing. You create an immovable object. But slapping some glue between two sheets of oriented strand board won’t get you there. Laminating plywood for a structural benchtop requires a deep understanding of adhesive rheology, clamping pressure distribution, and material selection.
Quick Comparison: Top Picks
Before we dive into the heavy theory and practical application, here is a quick look at the core gear you’ll need to execute a flawless, void-free lamination.
| Product | Rating | Check Price |
|---|---|---|
| Titebond III Ultimate Wood Glue | ⭐⭐⭐⭐⭐ | View on Amazon |
| Bessey K Body REVO Clamps | ⭐⭐⭐⭐⭐ | View on Amazon |
| Silicone Glue Roller Set | ⭐⭐⭐⭐½ | View on Amazon |
The Anatomy of a Bulletproof Bench Top
To understand why a laminated plywood benchtop performs so spectacularly, we have to look at the physics of the material. Solid wood is essentially a bundle of microscopic straws that once transported water up a tree trunk. Because of this cellular structure, wood expands and contracts across its grain as ambient humidity fluctuates.
Why Plywood Outperforms Solid Wood Here
Plywood subverts this biological vulnerability. Manufacturers peel thin veneers of wood and stack them with the grain of each subsequent layer running perpendicular to the one below it. Once bonded under immense heat and pressure with phenolic resins, the layers restrict each other from moving. The cross-banding locks the material in place.
When you take three or four sheets of 3/4-inch plywood and laminate them face-to-face, you are exponentially multiplying that cross-banded stability. A three-inch-thick slab of laminated plywood is virtually inert. It won’t cup when the summer humidity hits 90%, and it won’t crack when the winter air dries out your shop. It possesses a staggering strength-to-weight ratio, yet offers enough mass to absorb the shock of heavy mallet blows.
The Core Concept of Lamination
Lamination is not merely sticking things together. It is the creation of a composite material. When executed correctly, the glue line becomes stronger than the wood fibers surrounding it. However, the success of this composite relies entirely on intimate, gap-free contact between the substrates. Any void in your glue line is a structural failure waiting to happen. If a section of the plywood isn’t bonded, that specific area will sound hollow when struck and will flex under downward pressure, destroying your flat reference surface.
Selecting the Right Materials
You cannot build a cathedral on a swamp. The quality of your raw materials dictates the final performance of the bench.
Grading the Plywood: Baltic Birch vs. CDX
Do not attempt this with standard construction-grade CDX or cheap BC-grade pine plywood from a big-box home center. Those sheets are plagued with core voids—empty spaces hidden between the inner plies. When you apply heavy clamping pressure to construction-grade plywood, those voids collapse. The surface dips, creating a wavy, unpredictable topography.
You want void-free core plywood. The absolute pinnacle for shop fixtures is Baltic Birch. A standard 3/4-inch (18mm) sheet of Baltic Birch features 13 uniform plies of solid birch, edge-to-edge, with zero voids. It is dense, heavy, and structurally flawless.
If Baltic Birch is outside your budget or locally unavailable, seek out a high-quality ApplePly or a premium cabinet-grade hardwood plywood (like maple or oak veneer) with an MDF core. The MDF core guarantees a perfectly flat, void-free substrate, though it sacrifices a minor amount of impact resistance compared to solid birch plies.
Glue Selection: The Hidden Variable
Your choice of adhesive will make or break this project. You might be tempted to grab whatever half-empty bottle of yellow glue is sitting on your shelf, but face-laminating large panels requires specific chemical properties—namely, a long “open time.”
Open time is the window you have from the moment the glue touches the wood until it begins to tack up and skin over. Standard PVA (polyvinyl acetate) glues, like Titebond I, give you about 3 to 5 minutes. That is nowhere near enough time to spread glue over a 24x60 inch surface, align a heavy sheet of plywood, and apply dozens of clamps. If the glue skins over before it’s under pressure, you get a weak, crusty bond.
I always recommend Titebond III Ultimate Wood Glue for large-scale laminations. It provides a generous 8 to 10 minutes of open assembly time, flows beautifully, and cures to a rigid, waterproof bond. Alternatively, cold-press veneer glues or slow-setting two-part epoxies work exceptionally well, though epoxy significantly raises the cost.
Pro Tip: Temperature drastically affects adhesive open time. If your shop is a sweltering 90 degrees, your glue will kick off much faster. Try to do massive glue-ups in a climate-controlled environment, or wait for the cool early morning hours.
The Preparation Phase: Setting Up for Success
Panic is the enemy of a successful glue-up. Once you start pouring adhesive, the clock is ticking. You cannot afford to spend precious minutes searching for a missing clamp or realizing your panels don’t fit together.
Milling and Sizing Your Sheets
Start by cutting your plywood sheets roughly 1 inch oversized in both length and width. Why? Because wet glue acts like a hydroplaning lubricant. When you stack heavy sheets of plywood with a layer of liquid PVA between them, they will slip and slide relentlessly as you apply clamping pressure.
Trying to keep four edges perfectly flush during a massive lamination is an exercise in futility. By cutting the pieces oversized, you give yourself a margin of error. Once the massive slab is fully cured, you will trim it down to its final, perfect dimensions.
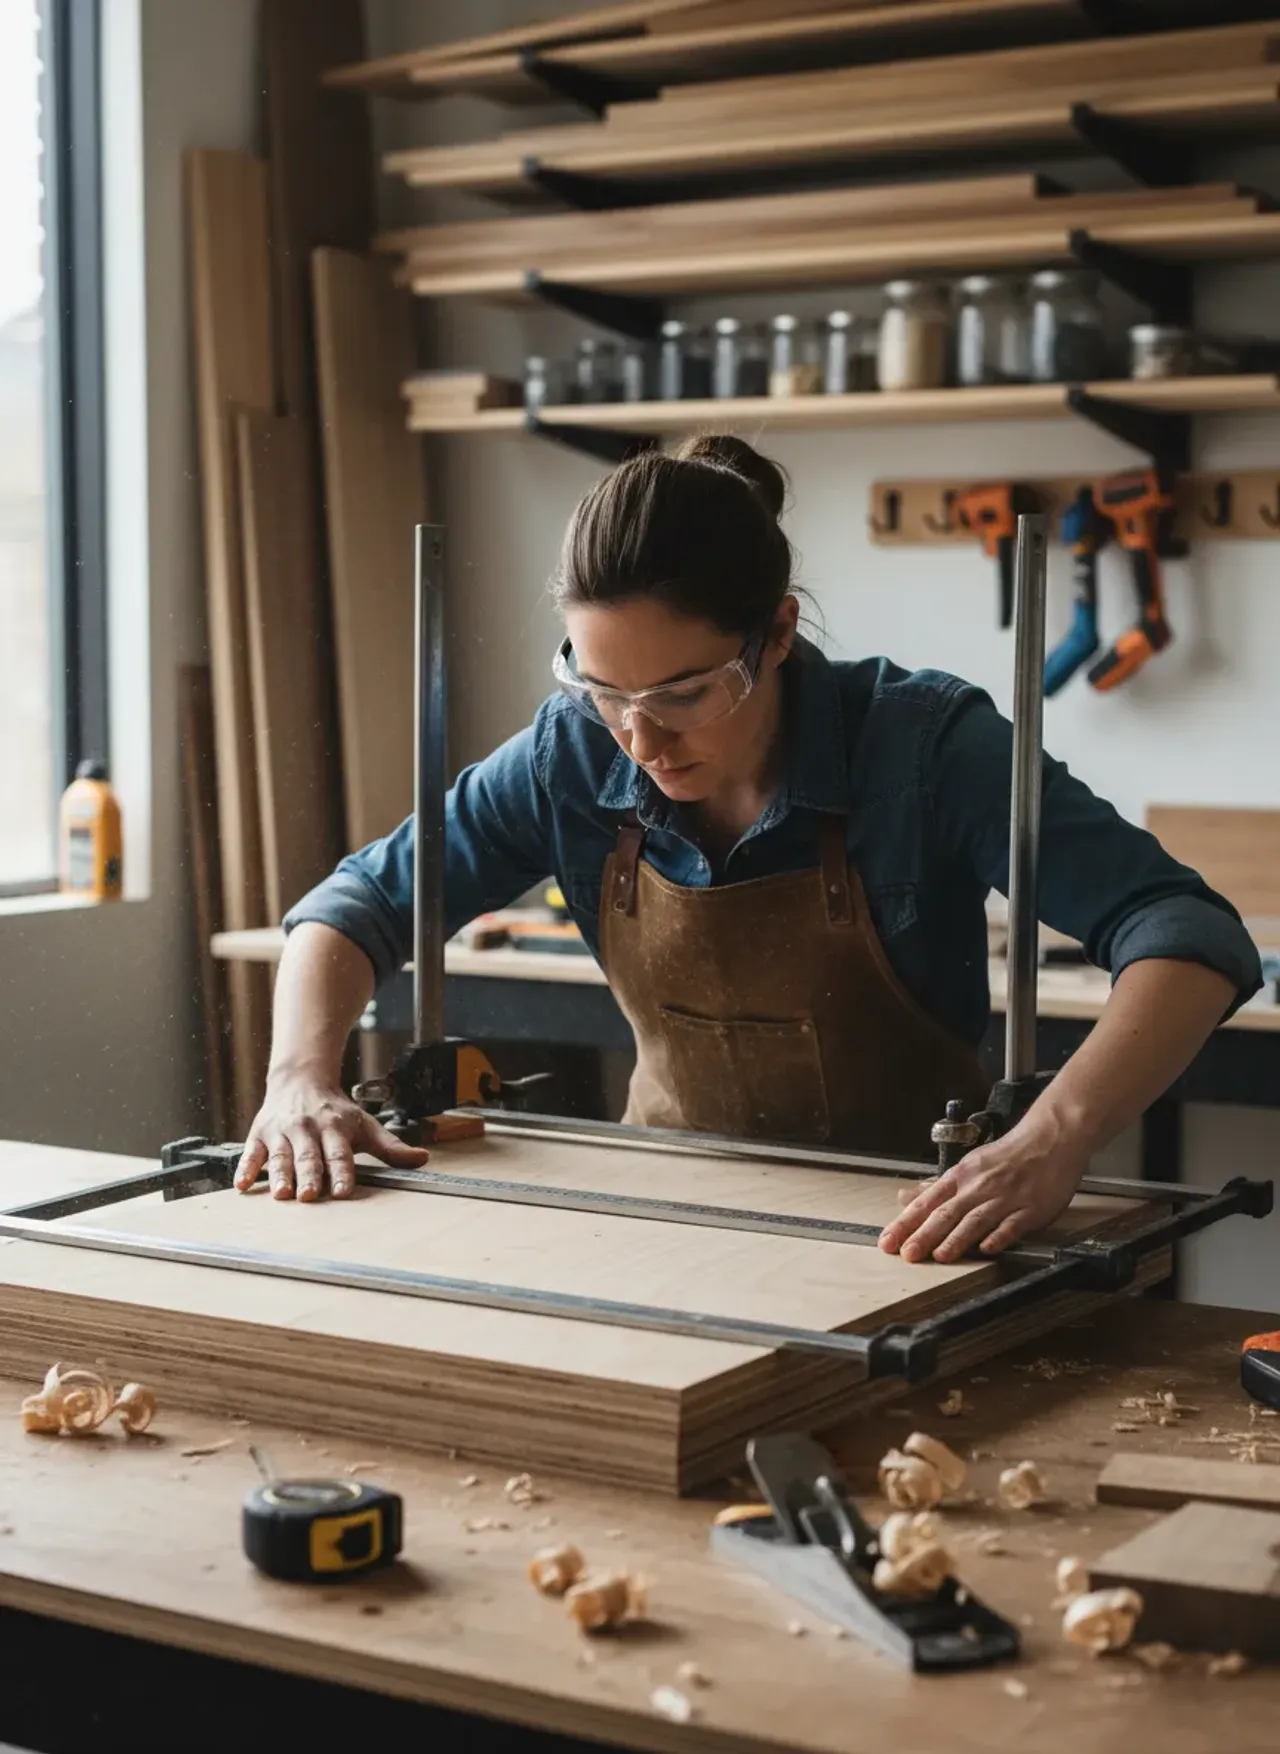
The Critical Dry Fit
Never skip the dry fit. Stack your oversized panels exactly as they will sit during the glue-up. Mark reference lines across the edges with a carpenter’s pencil so you can quickly realign them.
Next, rehearse your clamping strategy. Lay out every single clamp you intend to use. Open the jaws to the correct width. You’ll notice that standard F-style or parallel clamps can only reach a few inches in from the edge of the panel. How do you apply pressure to the dead center of a two-foot-wide benchtop?
You have two reliable options:
- Cambered Cauls: These are stout pieces of hardwood with a slight curve (camber) planed into one edge. You place them across the top and bottom of your plywood sandwich. As you clamp the ends of the caul at the edges of the plywood, the curve forces pressure down into the center of the panel first, distributing it evenly outward.
- The Screw Method: This is my preferred tactic for shop furniture. You spread the glue, lay down the top sheet, and systematically drive coarse-thread wood screws through the bottom sheet into the top sheet. The screws act as permanent, internal clamps. As long as you counter-sink them deeply from the underside, they will never interfere with your work surface.
The Lamination Process: Step-by-Step Execution
You have your void-free plywood. You have your slow-setting glue. Your dry fit went flawlessly. It is time to execute.
Spreading the Adhesive
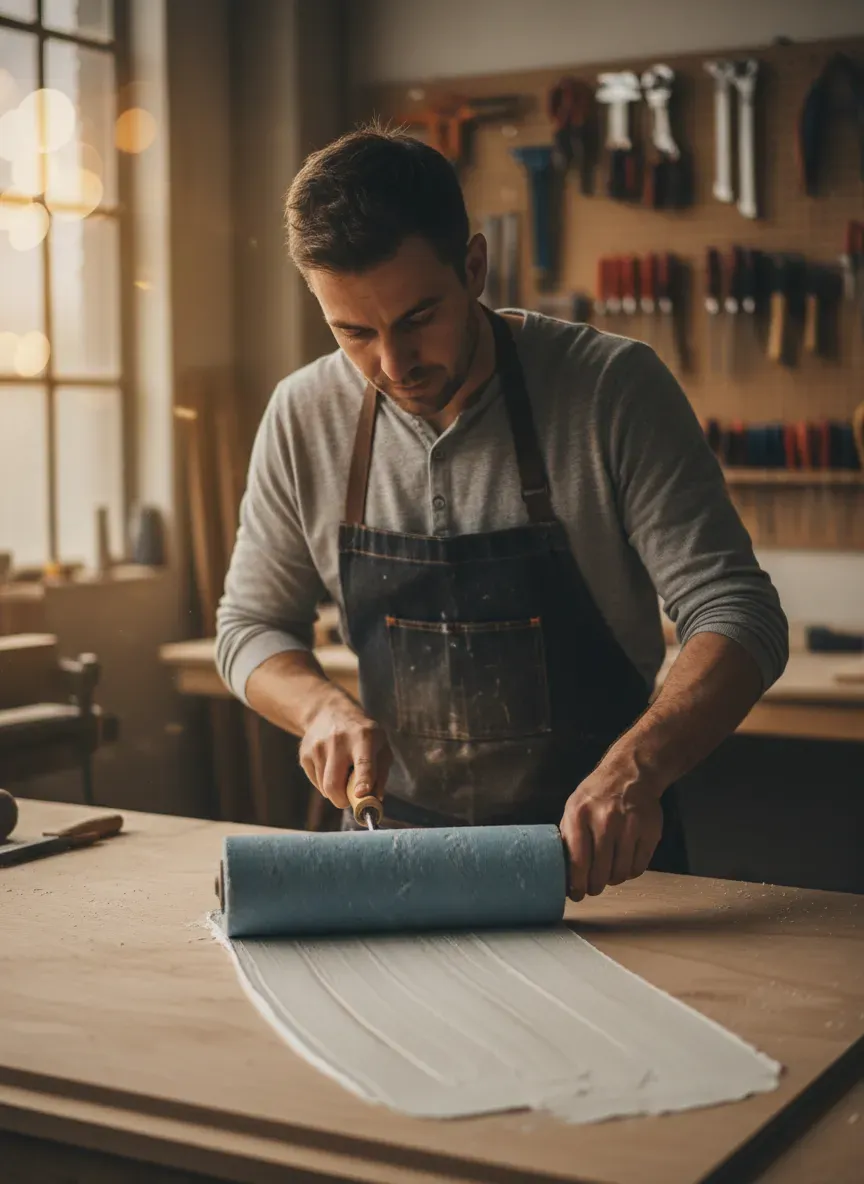
Do not drizzle the glue in a zigzag pattern and smash the boards together. That method traps massive air pockets and leaves huge patches of wood completely unbonded.
Pour a generous, continuous bead of glue down the center of your bottom panel. Using a Silicone Glue Roller Set or a finely notched trowel, spread the adhesive out to the edges. You are aiming for a “wet film thickness” that resembles a freshly painted wall. The surface should glisten uniformly, without any deep puddles or dry spots.
If the plywood looks thirsty and immediately sucks the moisture out of the glue, apply a little more. You want 100% coverage.
The Clamping Matrix
Carefully drop your next sheet of plywood onto the wet adhesive. If you are using screws to pull the layers together, start directly in the dead center of the panel. Drive your first screw. Move six inches to the left, drive a screw. Six inches to the right, drive a screw.
You must work from the center outward in concentric circles. This action chases the trapped air and excess glue out toward the edges. If you start clamping or screwing at the perimeter first, you will trap a giant blister of air in the center, causing “hydraulic lock.” The panel will never sit flat.
If you are using Bessey K Body REVO Clamps and cauls, the same rule applies. Apply the center cauls first, tighten them down, and systematically work your way out to the ends. You should see a consistent, tiny bead of glue squeezing out along the entire perimeter. That “squeeze-out” is your visual confirmation that you have achieved adequate pressure and coverage.
Curing and Patience
Walk away.
PVA glue reaches about 50% of its final strength in a few hours, but it takes a full 24 hours to cure completely. Furthermore, you just introduced a massive amount of water (from the glue) into the wood fibers. The plywood needs time to absorb that moisture, swell slightly, and then release it back into the atmosphere. If you immediately start surfacing the benchtop while the wood is still swollen from the glue moisture, the wood will eventually shrink, leaving sunken glue lines. Give it 48 hours to acclimatize.
Flattening and Squaring the Behemoth
Once cured, your oversized slab will be heavy, unwieldy, and incredibly rigid. Now you must refine it into a precision instrument.
Router Sleds and Hand Planes
Even with careful lamination, the top surface might have a slight bow or twist. To achieve a dead-flat reference surface, the most foolproof method is a router sled.
Build a simple carriage that spans the width of the benchtop, riding on two perfectly straight, parallel rails temporarily attached to the sides. Chuck a wide surfacing bit into your router, and slowly mill away the high spots, taking off perhaps a 16th of an inch at a time. This guarantees a surface that is coplanar to your rails.
If you prefer traditional methods, a long jointer plane (like a No. 7 or No. 8) will make quick work of high spots, provided your blade is sharp and you know how to read the grain.
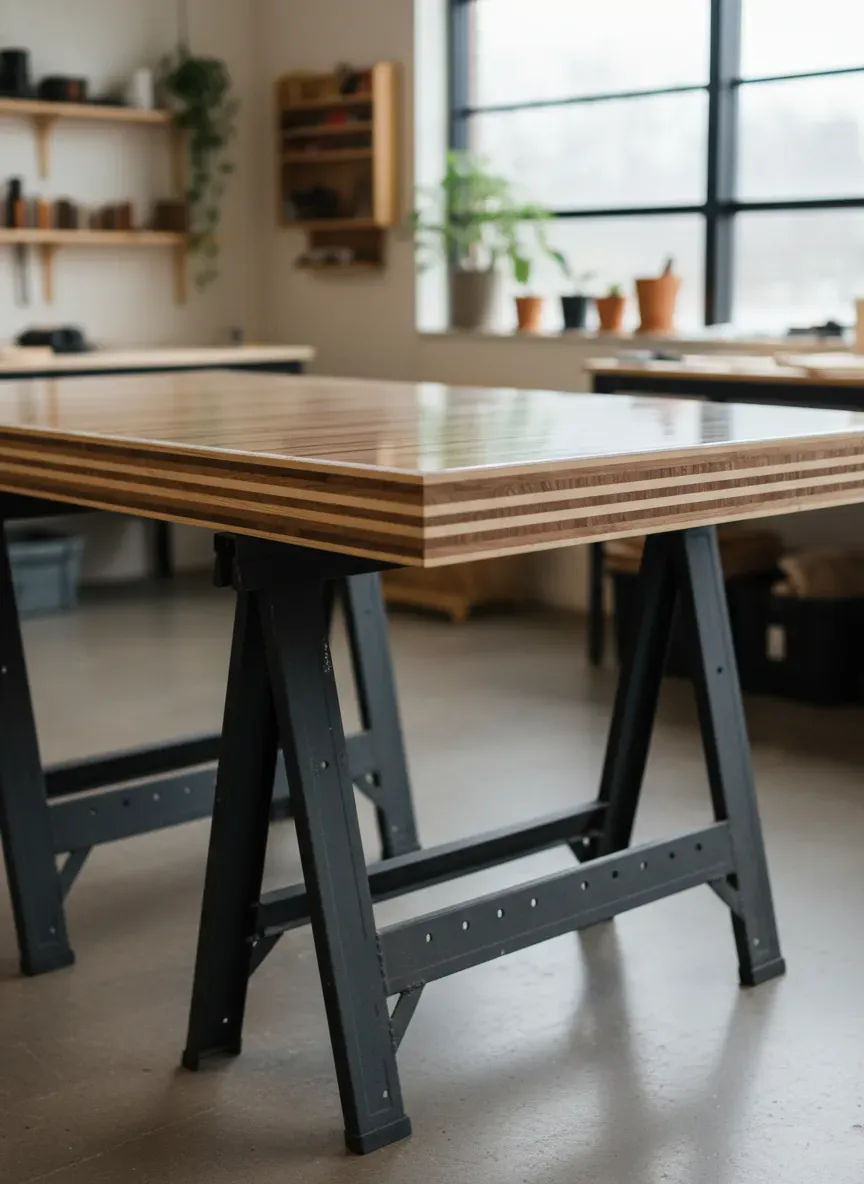
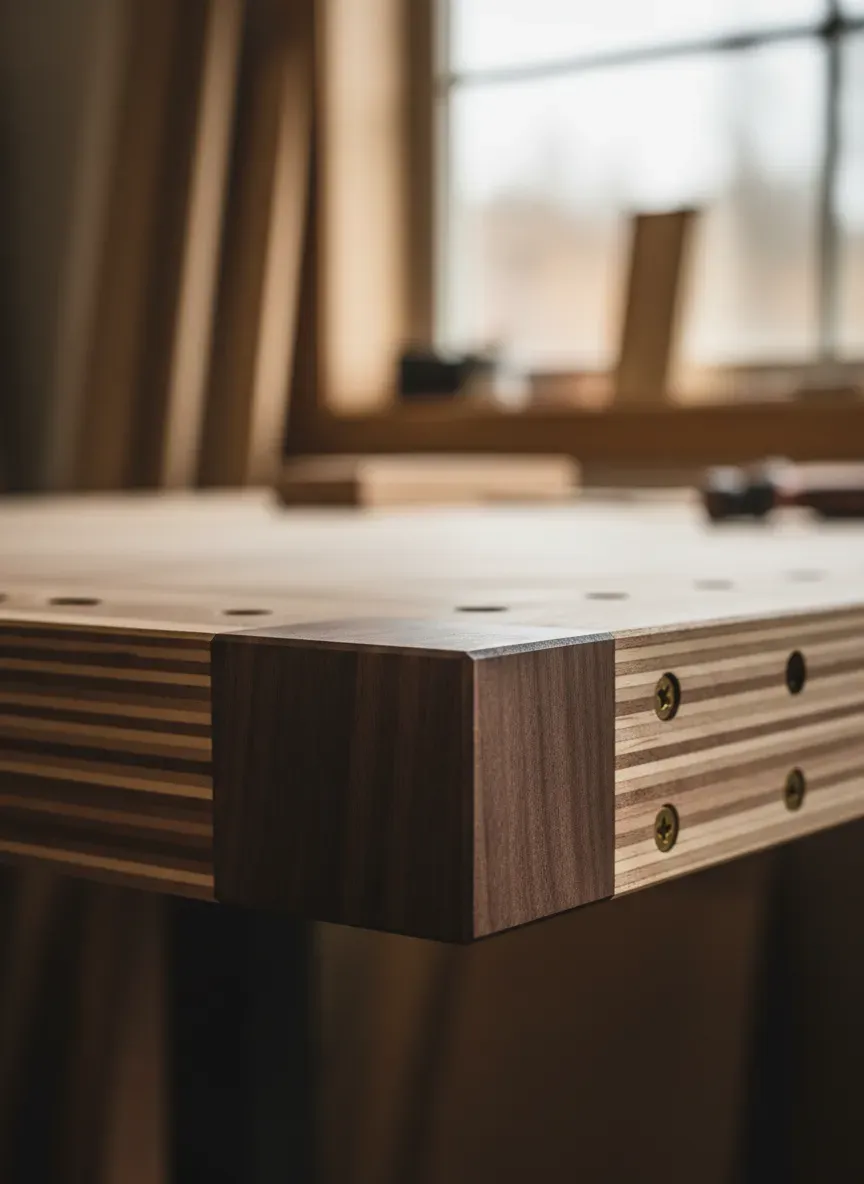
Once the top is flat, use a track saw or a circular saw with a straight-edge guide to trim the oversized edges back to your final dimensions. The freshly cut edges will reveal the beautiful, striped end-grain of the stacked plywood plies.
Edge Banding for Aesthetics and Durability
While exposed plywood edges have a cool, industrial aesthetic, they are vulnerable to impact damage. Dropping a heavy cast-iron hand plane on an exposed plywood edge will crush the veneers and cause splintering.
To armor the bench, glue a thick strip of solid hardwood—like ash, oak, or maple—around the perimeter. This edge banding protects the vulnerable plies, provides a robust surface for mounting vises, and gives the benchtop the polished look of a solid wood slab.
Integrating the Top into Your Shop Ecosystem
A rock-solid top is only half the equation; it needs a base worthy of its mass. You can build a heavy timber-frame base using mortise and tenon joinery, or fabricate a welded steel frame. The key is ensuring the base provides continuous, rigid support.
Interestingly, the skills required to engineer this heavy-duty shop fixture translate directly into high-end home furniture. Once you understand the mechanics of rigid substrates and void-free lamination, you can apply these principles to everything from thick, floating shelves to crafting some of the most durable 7 professional entryway storage solutions imaginable. A heavy, laminated bench seating area in a mudroom, wrapped in beautiful hardwood veneer, will survive decades of abuse from boots, bags, and kids, using the exact same structural theory you just applied in the garage.
Common Pitfalls and How to Dodge Them
Even seasoned builders occasionally fumble a large lamination. Here are the traps to avoid:
- Starved Joints: Applying too little glue because you are afraid of a messy squeeze-out. If the wood absorbs the glue before it’s clamped, the bond will fail. Always err on the side of slightly too much adhesive.
- Inadequate Clamping Pressure: A few spring clamps around the edges won’t cut it. Plywood requires massive, evenly distributed pressure (ideally over 100 PSI) to force the layers into intimate contact. Use heavy cauls or the internal screw method.
- Ignoring Grain Orientation: Even though plywood is dimensionally stable, the outer face veneers still have a primary grain direction. For maximum rigidity, cross the grain of your sheets. If the top sheet has its grain running lengthwise, the middle sheet should have its face grain running side-to-side.
- Sanding Through the Veneer: Modern plywood face veneers are alarmingly thin—often less than 1/40th of an inch. If you get overly aggressive with a belt sander trying to flatten a bump, you will burn right through the top layer, exposing the ugly inner core. This is why router sleds are superior for flattening.
Key Takeaways
- Laminated plywood creates an incredibly dense, flat, and stable workbench top at a fraction of the cost of solid hardwood.
- Void-free core material, like Baltic Birch, is mandatory to prevent surface dipping under clamping pressure.
- Extended open-time adhesives (like Titebond III) are critical to surviving the stress of a large-scale glue-up.
- Always clamp from the center outward to chase air and excess glue out of the joint, preventing hydraulic lock.
- Armor your finished slab with thick hardwood edge banding to protect the vulnerable end-grain plies from impact damage.
The Bottom Line: You do not need to spend thousands of dollars on a European beech slab to get professional-tier results in your shop. By combining high-quality engineered materials with deliberate, calculated execution, you can manufacture a workbench top that will outlast you. It requires sweat, precision, and an aggressive amount of glue, but the reward is a dead-flat surface that refuses to budge.
Now that you know how to build an indestructible foundation for your workshop, the only question left is: what are you going to build on it?
If you are gearing up to tackle serious projects—whether that’s outfitting your entire home with custom furniture, building outdoor timber structures, or crafting intricate jewelry boxes—you need high-quality blueprints. I highly recommend checking out Ted’s Woodworking. They offer an absolutely massive archive of over 16,000 step-by-step woodworking plans, taking the guesswork out of dimensions, cut lists, and joinery. Right now, you can grab the entire collection at a 75% discount. It’s an incredible resource that I constantly dig into when I need fresh inspiration or perfectly calculated schematics to match my heavy-duty benchtop.