The Sliding Deadman: Why Your Workbench Needs This Essential Support
A human-crafted, high-CTR meta description.
Apr 14, 2026 - Written by: Linda Wise

Picture this. You’ve just milled a magnificent, eight-foot slab of 8/4 rough sawn hard maple. You drag it over to your workbench, clamp the front edge securely into your leg vise, and step back. Immediately, gravity takes over. The far end of the board dips toward the floor. Your vise racking under the brutal torsion of the cantilevered weight groans in protest. You try to prop up the sagging end with your knee while simultaneously balancing a No. 7 jointer plane. It’s an ergonomic nightmare, and frankly, a fantastic way to ruin a perfectly good piece of timber.
I’ve personally fought this battle more times than I care to admit. Trying to edge-joint or cut joinery on long, unwieldy stock using only a primary front vise is an exercise in utter futility. The board chatters. The plane skips. The joinery ends up sloppy.
Enter the sliding deadman.
This centuries-old workholding fixture is the unsung hero of the traditional hand-tool woodworking shop. If you’re serious about building furniture, wrestling with large stock, or simply saving your lower back from inevitable ruin, understanding and utilizing a sliding deadman isn’t optional. It’s foundational.
Before we tear into the mechanics, history, and exact construction methods of this indispensable shop fixture, here is a quick look at the hardware that brings bench workholding to life.
Quick Comparison: Top Picks
| Product | Rating | Check Price |
|---|---|---|
| Benchcrafted Classic Leg Vise | ⭐⭐⭐⭐⭐ | View on Amazon |
| Gramercy Tools Holdfast | ⭐⭐⭐⭐½ | View on Amazon |
| Kreg In-Line Bench Dogs | ⭐⭐⭐⭐ | View on Amazon |
The Anatomy and Etymology of the Deadman
To appreciate why this device transforms your workflow, you need to understand its roots. Popularized heavily in the 18th century by the legendary French cabinetmaker André Roubo in his masterwork L’Art du Menuisier, the sliding deadman (sometimes called a board jack) is elegantly simple.
Why the morbid name? In industrial and maritime terminology, a “deadman” refers to an object or mechanism designed to hold dead weight, effectively acting as an extra set of hands that never tire, complain, or drop the load. It takes on the burdensome, static weight of your material.
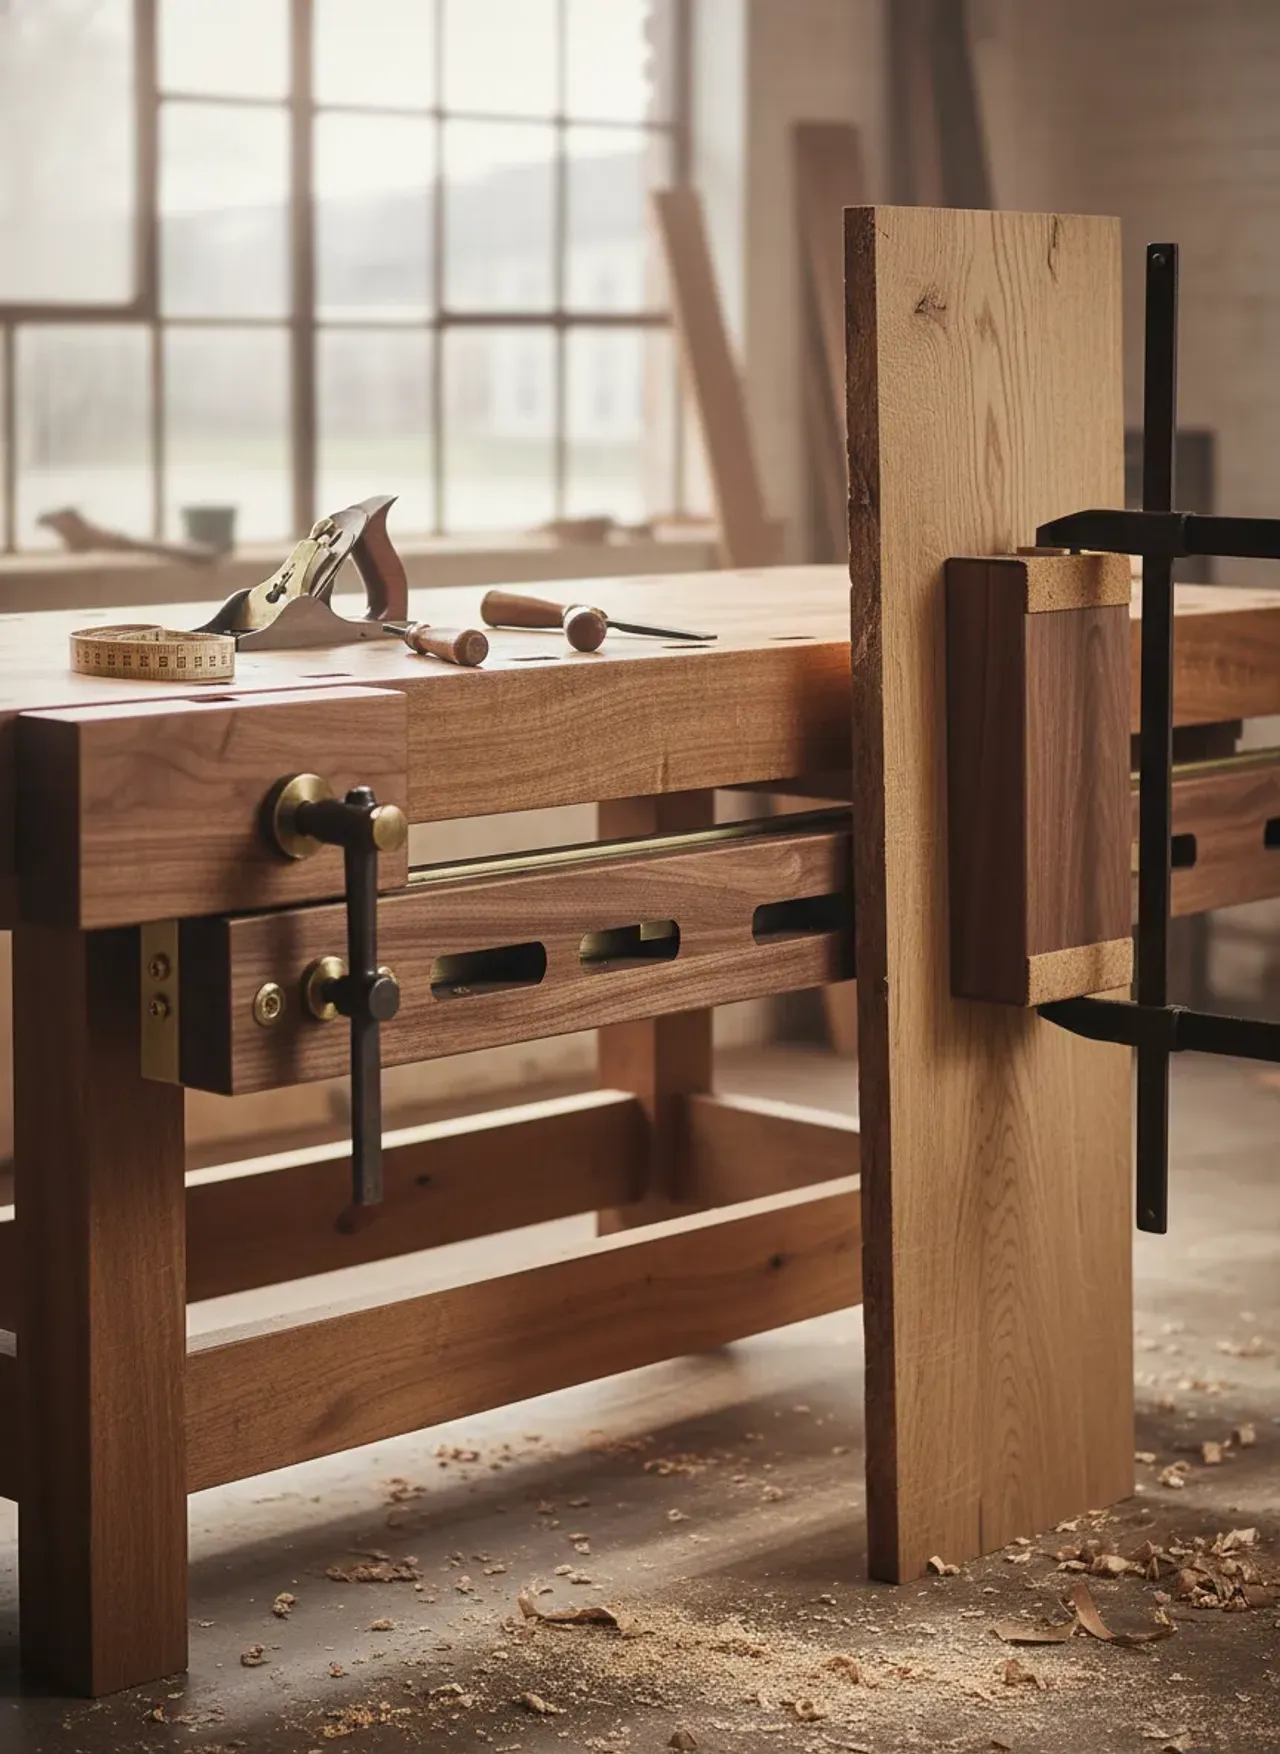
A standard sliding deadman consists of a single, thick, vertical piece of heavy hardwood. It traverses horizontally along the front of the workbench. The top of the deadman typically rides in a groove cut into the underside of the benchtop overhang, while the bottom glides along a track—usually a V-groove—milled into the lower front stretcher of the bench. The face of the board is peppered with a matrix of holes sized to accept pegs, holdfasts, or bench dogs.
The Physics of Unyielding Support
When you secure a long board in a leg vise, you are creating a massive lever. If the board is six feet long and the vise jaws only grip the first ten inches, you have over five feet of unsupported mass acting as a lever arm. Every time you push a hand plane across that edge, you are applying downward and forward force.
Without secondary support, the board pivots. Your leg vise, no matter how robust the screw or crisscross mechanism, will suffer from racking. The sliding deadman interrupts this physics equation. By sliding the deadman down the bench to support the far end of the board, and inserting a peg directly underneath the lower edge of your workpiece, you neutralize the lever.
The weight is transferred straight down into the massive lower stretcher of your workbench. The chatter vanishes. The board becomes dead-flat and rock-solid, allowing your plane to glide over the edge, pulling up those glorious, sweeping curls of translucent end-grain or edge shavings.
Pro Tip: Never lock your deadman rigidly in place horizontally. Its power comes from remaining captive vertically but sliding freely horizontally. When you position your board, the friction of the board pressing against the peg will naturally lock the deadman’s lateral movement.
Why Your Bench Is Crippled Without One
You might be thinking, “Can’t I just use a roller stand or a standalone bench jack?”
You could. But you’ll hate it.
Standalone bench jacks are notoriously unstable. They tip over the moment you bump them. They require you to constantly kick them into position while balancing heavy timber. They clutter up the floor space right where your feet need to be planted for a heavy planing stroke.
The sliding deadman, conversely, is integrated into the architecture of the workbench. It is always exactly where you need it, and it kicks out of the way with the flick of an ankle when you don’t.
Overcoming Edge Planing Nightmares
Let’s look at the specific scenarios where a bench without a deadman actively fights your craftsmanship.
Working with Door Stiles and Long Rails: If you are building traditional frame-and-panel doors or bed frames, you are dealing with long, narrow stock. Edge planing a 7-foot bed rail requires absolute rigidity. Any flex in the board translates to a convex or concave edge, ruining your joinery fit. A sliding deadman provides infinite adjustability to support that rail perfectly parallel to the benchtop.
Dovetailing Wide Carcases: Here’s the real kicker that many modern woodworkers miss. The sliding deadman isn’t just for edge jointing; it’s a brilliant surface for clamping wide case sides. Imagine you are cutting dovetails on the side of a blanket chest that is 24 inches wide.
You drop one edge of the board into your front vise. But how do you stabilize the massive width of it? You slide the deadman over to meet the opposite edge. Because a properly built deadman is flush with the front edge of your benchtop and your leg vise chop, you can use a surface clamp or a traditional holdfast right through the deadman’s holes to pin the board flat against the bench assembly. It creates a massive, unyielding wall of workholding.
- Key Takeaways for Workholding:
- Eliminates cantilevered stress on your primary vise.
- Dramatically reduces vibration and tool chatter.
- Keeps the floor area clear of tripping hazards.
- Allows for rapid, tool-free vertical adjustments.
Designing and Building Your Own Sliding Deadman
If you are convinced that you need one (and you should be), the next step is building it. You cannot buy a universal sliding deadman off the shelf. Because workbench heights, stretcher depths, and overhangs vary wildly, this is a bespoke fixture you must mill to fit your specific bench.
Selecting the Right Material
Density is your friend here. Do not build a sliding deadman out of pine, fir, or poplar. It needs mass to dampen vibration, and it needs a hard-wearing end grain at the bottom to survive decades of sliding back and forth in a track.
I highly recommend ash, hard maple, hickory, or white oak. You want a board that finishes out to at least 1.5 inches thick (often up to 2 inches) and about 6 to 8 inches wide. It needs to be heavy enough that it hangs plumb, pulled down by its own gravity.
The Anatomy of the Tracks
The interface between the deadman and the bench is where most builders make their fatal errors.
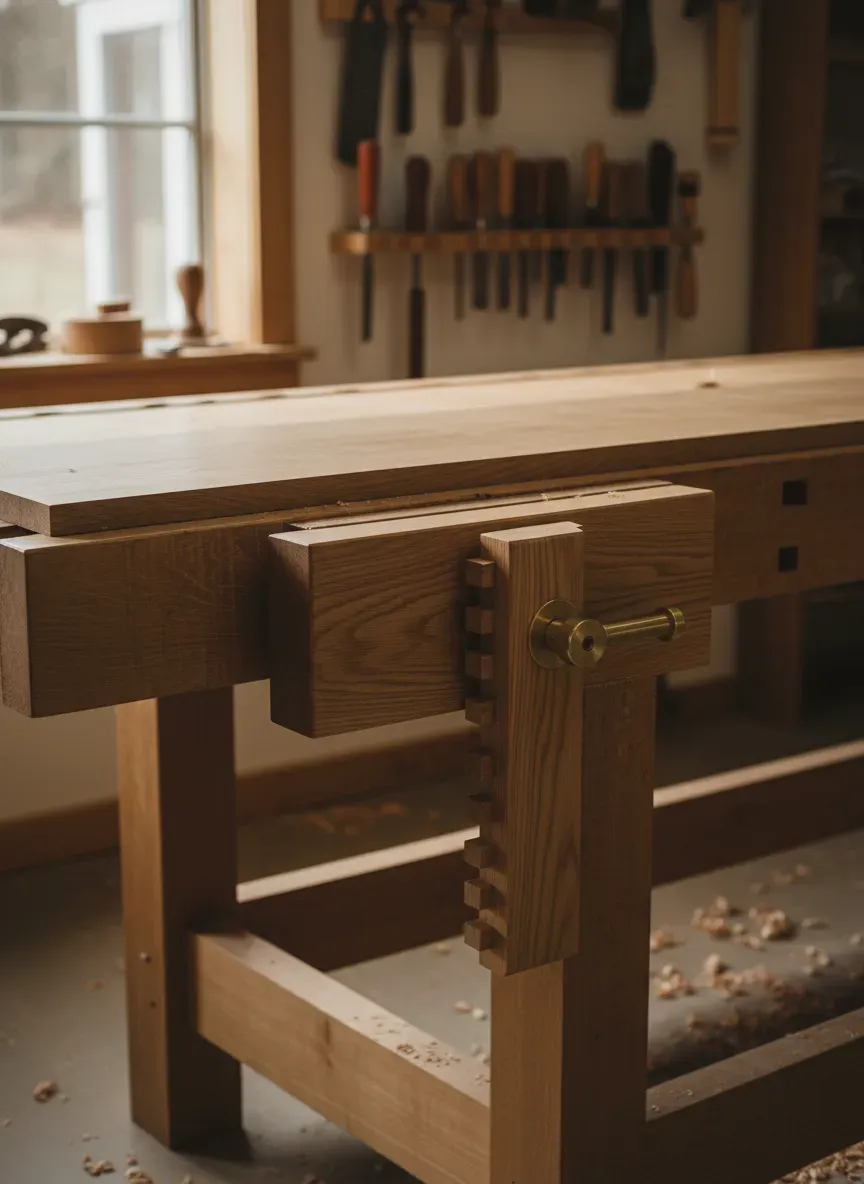
The Bottom Track: The traditional and still superior method is the V-groove. You mill a V-shaped groove (usually 90 degrees) into the top edge of your bench’s lower front stretcher. Then, you cut a corresponding V-shape onto the bottom edge of the deadman.
Why a V-groove instead of a square dado or a T-track? Dust clearance. Woodworking shops generate shavings, sawdust, and debris. A square track will quickly pack with compacted dust, lifting the deadman out of alignment and causing it to bind. A V-groove is inherently self-clearing. Dust falls to the very apex of the V, but the deadman rides on the angled slopes. As you slide the deadman back and forth, it physically pushes debris out of the way.
The Top Track: The top of the deadman needs to be captured so the board doesn’t fall over, but it requires enough vertical play that you can easily install and remove the fixture. Typically, a square groove is routed into the underside of the benchtop, about an inch deep and slightly wider than the tongue cut onto the top of the deadman.
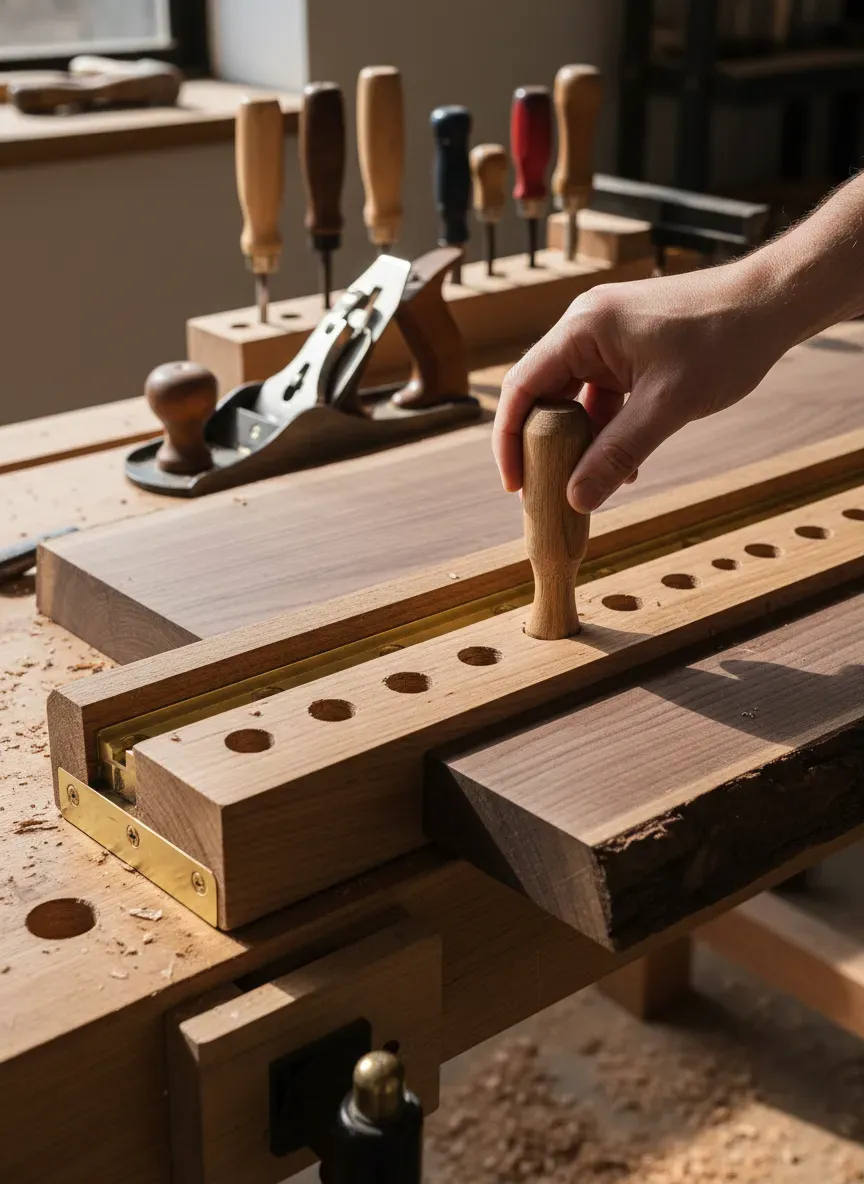
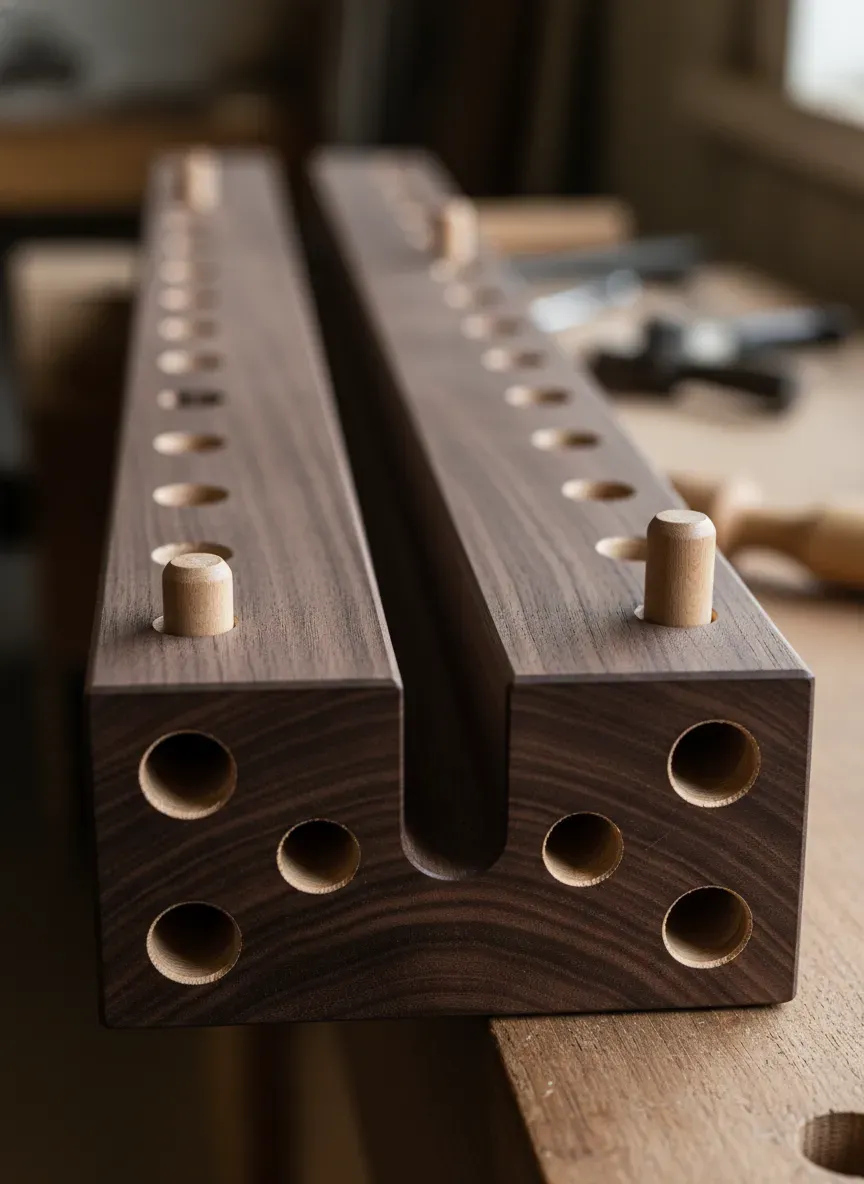
Staggering the Peg Holes
Do not simply drill a single column of holes down the center of the board. Wood is an organic material, and dropping a heavy plank onto a peg exerts immense shear force. If you space holes too closely together in a single vertical line, you risk splitting the deadman down the middle like firewood.
Instead, bore two staggered columns of holes. If you want a peg height adjustment every 1 inch vertically, drill your holes on 2-inch centers, but offset the left column from the right column by one inch. This gives you micro-adjustability for any board width without compromising the structural integrity of your hardwood plank.
Standardize your hole size. If your bench uses 3/4-inch dog holes, drill 3/4-inch holes in your deadman. This allows you to use your existing arsenal of bench dogs, pegs, and holdfasts interchangeably.
Pitfalls to Avoid During Construction
You’ll notice that the geometry has to be precise. Here are the traps to avoid:
- Making it too tight. Wood breathes. It expands in humid summers and shrinks in dry winters. If you fit the deadman perfectly tight between the upper groove and lower track, it will irrevocably bind in August. You must engineer a gap. Typically, you want a full 1/4-inch to 3/8-inch of clearance at the top when the deadman is resting fully in the bottom V-groove. To install it, you push the top up deep into the upper groove, swing the bottom into the V-track, and drop it down.
- Misaligning the planes. The front face of the deadman must be perfectly coplanar with the front edge of your benchtop and the face of your leg vise. If the deadman sits recessed by even a quarter inch, clamping a long board to it will bow the board inward, inducing a curve right before you try to plane an edge flat.
- Applying the wrong finish. Do not use film-building finishes like polyurethane, varnish, or shellac on the sliding tracks. They will get gummy, sticky, and eventually peel off under friction. Leave the V-groove and top tongue bare wood. Burnish the wood with a piece of brown paper bag, and then aggressively apply paste wax, Gulf wax, or even a block of beeswax. A properly waxed deadman weighing ten pounds will slide effortlessly with a one-finger push.
Upgrading an Existing Workbench
What if you didn’t build a massive Roubo bench from scratch? Can you retrofit a sliding deadman onto a commercial bench or a Nicholson-style bench?
Absolutely, though it requires a bit of clever engineering.
If your current bench lacks a heavy front stretcher flush with the front legs, you cannot implement a traditional deadman. However, you can add an auxiliary stretcher. Bolt a thick, heavy hardwood rail across the front legs of your bench, as low to the ground as possible, ensuring the face of this new rail is flush with the benchtop edge above. Mill your V-groove into this new rail.
For the top track, if your benchtop doesn’t overhang the legs enough to house a groove, you can attach a wooden guide rail or cleat underneath the benchtop to capture the upper tongue of the deadman.
Pro Tip: If retrofitting a V-groove into a fully assembled bench seems impossible because your router won’t reach the corners near the legs, you can mill the V-groove into a separate strip of wood, and then screw and glue that strip onto the top of your existing stretcher.
The Bottom Line: A workbench is not simply a table; it is a three-dimensional clamping system. A leg vise only holds the front. The benchtop only holds the bottom. The sliding deadman is the critical puzzle piece that holds the middle and the end, securing your work in the vertical plane.
Once you install one, the sheer stability it brings to your hand tool work is revelatory. You will stop fighting your material and start actually woodworking. You’ll find yourself taking heavier, more confident passes with your planes, cutting dovetails faster, and ending your shop sessions without a throbbing lower back.
Building shop fixtures like a sliding deadman often unlocks an appetite for more complex, heirloom-grade furniture. Once your bench is finally equipped to hold massive slabs and delicate long rails alike, you need projects worthy of that newfound capability.
If you are looking for the absolute motherlode of detailed, step-by-step schematics to feed your shop time, I cannot recommend Ted’s Woodworking highly enough. I’ve spent hours pouring over these archives. They offer an instantly accessible vault of over 16,000 distinct woodworking plans—from massive traditional workbenches to intricate jewelry boxes and full-scale cabinetry. It eliminates the guesswork, giving you exact cut lists and diagrams. Right now, you can grab the entire collection at a massive 75% discount.
Stop struggling with vague internet sketches and give your newly upgraded workbench the projects it deserves. Get immediate access to 16,000 woodworking plans at 75% off right here.