Solving the Backpack Problem: Heavy-Duty Entryway Hooks for Students and Commuters
Why standard hooks fail under the weight of modern tech and textbooks. A contractor's guide to heavy-duty hardware, installation physics, and protecting your drywall.
Feb 10, 2026 - Written by: Linda Wise

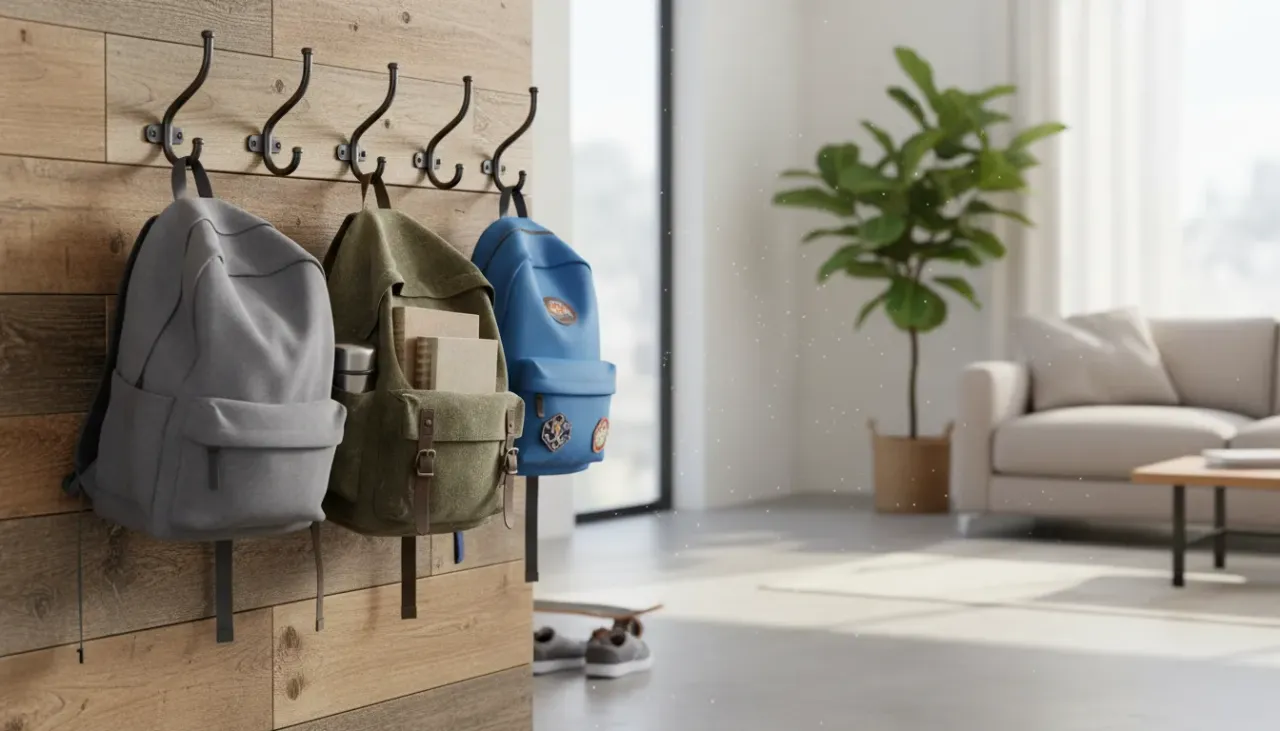
We need to talk about the “thud.”
If you live with a student, a tech-heavy commuter, or arguably anyone carrying a modern workload, you know the sound. It’s the distinct, floor-shaking noise of a twenty-pound backpack being dropped onto the entryway floor because the existing storage solution just isn’t up to the task. Or worse, you’ve experienced the heart-sinking crunch of a standard coat hook ripping cleanly out of the drywall, leaving a crater of gypsum dust and a damaged deposit check in its wake.
Here is the reality: Most “decorative” hooks sold in big-box stores are designed for raincoats and scarves. They are not engineered for the density of a college student’s calculus textbooks combined with a 16-inch MacBook Pro and a 40-ounce hydro-flask.
I’ve spent years fixing entryways where aesthetics were prioritized over physics. The “Backpack Problem” isn’t just about clutter; it is a structural challenge that requires specific hardware and, more importantly, a specific installation philosophy. We aren’t just hanging coats here; we are anchoring deadweight loads that fluctuate daily.
This guide tears down the mechanics of heavy-duty entryway storage. We’re going to look at metallurgy, shear strength, and the specific products that actually hold up when real life happens.
The Physics of Failure: Why Standard Hooks Snap
Before we start drilling holes, you have to understand why your previous hooks failed. It usually boils down to two forces: shear force and leverage (moment arm).
When a manufacturer rates a hook for “35 pounds,” they are testing that weight in a static environment, usually hanging dead center, flush against a solid board. Real life is messier. A backpack rarely hangs perfectly straight. It bulges.
When a thick strap sits on the tip of a long hook, it acts as a lever. If the hook extends three inches from the wall, and the weight is concentrated at the tip, the force exerted on the screws—specifically the top screw—multiplies significantly. This is basic mechanics. The further the load is from the wall (the fulcrum), the harder that top screw is being pulled out (tension), while the bottom of the hook drives into the drywall (compression).
Pro Tip: Never trust the “max weight” rating on the packaging implicitly. Those ratings assume you are bolted into a solid wood stud. If you are using drywall anchors, cut that rating by 60% immediately.
The “Dynamic Load” Factor
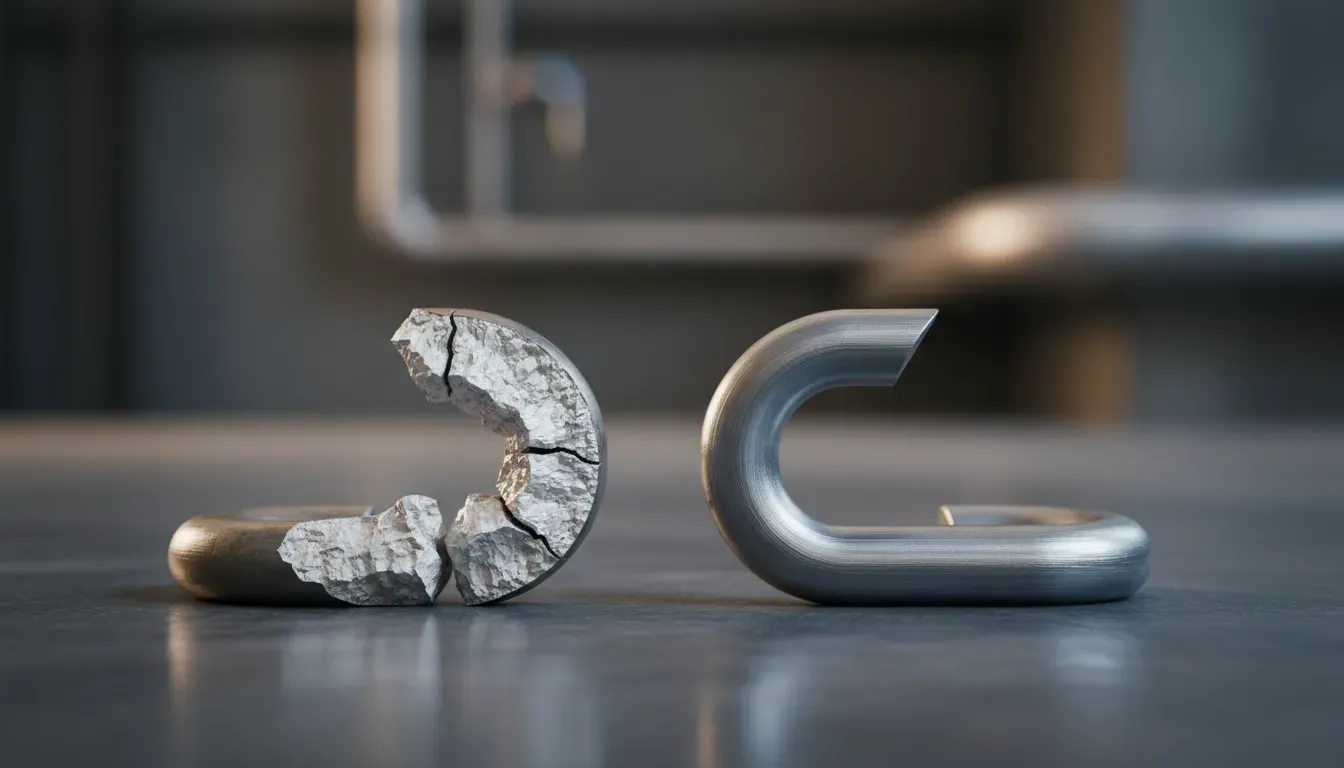
There is also the issue of dynamic loading. A 20-pound backpack doesn’t just appear on the hook; it is swung, dropped, or tossed. That momentary force upon impact—the kinetic energy transferring to the hardware—can spike the load to double or triple the static weight of the bag. Cheap zinc-alloy hooks are brittle. Under that sudden shock, they don’t bend; they snap.
Material Science: Identifying True Heavy-Duty Hardware
Walk down the hardware aisle, and everything looks like metal. But “metal” is a broad spectrum, ranging from “basically hard cheese” to “industrial-grade steel.”
1. Zinc Die-Cast vs. Forged Iron vs. Steel
Most decorative hooks are Zinc Die-Cast. It’s a process where molten zinc is injected into a mold. It allows for intricate, pretty designs, but the grain structure is granular and porous. It is notoriously weak against shock. If you see a hook with a complex, flowery design that feels lighter than it looks, put it back.
For the Backpack Problem, you want Forged Iron or Solid Steel.
- Forged Iron: Heated and hammered into shape. The grain of the metal follows the curve of the hook, providing immense tensile strength.
- Stainless Steel: Often machined or bent. Excellent for modern aesthetics and resists bending, though proper gauge thickness is required.
- Aluminum: Only acceptable if it is aircraft-grade or incredibly thick. Generally, I avoid it for heavy bags.
2. The Anatomy of the Anchor Point
Look at the backplate of the hook. A heavy-duty hook should almost always have at least two screw holes, preferably arranged vertically.
- Vertical Alignment: The top screw handles the tension (pull-out force), while the bottom screw stabilizes the compression. This is the strongest configuration for narrow framing like studs.
- Horizontal Alignment: Good for wider boards, but if you aren’t hitting a stud, horizontal anchors in drywall are prone to failing simultaneously, tearing out a large chunk of wall.
The “Big Three” Recommendations
I’ve tested dozens of hooks in mudrooms and entryways. When clients ask me what to buy so they “never have to fix this again,” I point them to these three categories.
1. The Industrial Workhorse
For pure utility and an aesthetic that fits farmhouse or industrial lofts, you cannot beat the reliability of cast iron or heavy steel. You want a hook with a deep “throat” to catch thick straps, but a thick shank that won’t deform.
If you want the best experience, I highly recommend checking out the Franklin Brass Heavy Duty Coat and Hat Hook. This is the gold standard for budget-friendly but nearly indestructible hardware. The geometry is squat and compact, reducing that “leverage” problem we discussed earlier.
2. The Modern Minimalist
If your home leans towards sleek lines and you hate the look of bulky rustic iron, you need a solid aluminum or steel hook that relies on hidden mounting plates or substantial cylinder designs. The trick here is finding one that doesn’t look like a bathroom towel hook (which will bend instantly).
For a sleek, non-intrusive look that holds massive weight, look at the Skog Å Kust Heavy Duty Wall Hooks. Originally designed for heavy wet-dry bags, these are over-engineered in the best possible way.
3. The Rail System Solution
Sometimes, the wall itself is the weak point. If you have old plaster or crumbly drywall, putting individual hooks up is a gamble. A “Hook Rail” distributes the weight of a single heavy backpack across multiple studs. By screwing a long board (rail) into two or three studs, the hooks mounted to that board become virtually immovable.
My go-to for families with multiple heavy bags is the Liberty Hardware Ruavista Hook Rail. The backing board is substantial, and the hooks are permanently affixed, meaning they won’t wiggle loose over time.
Installation Protocols: The “Stud or Bust” Rule
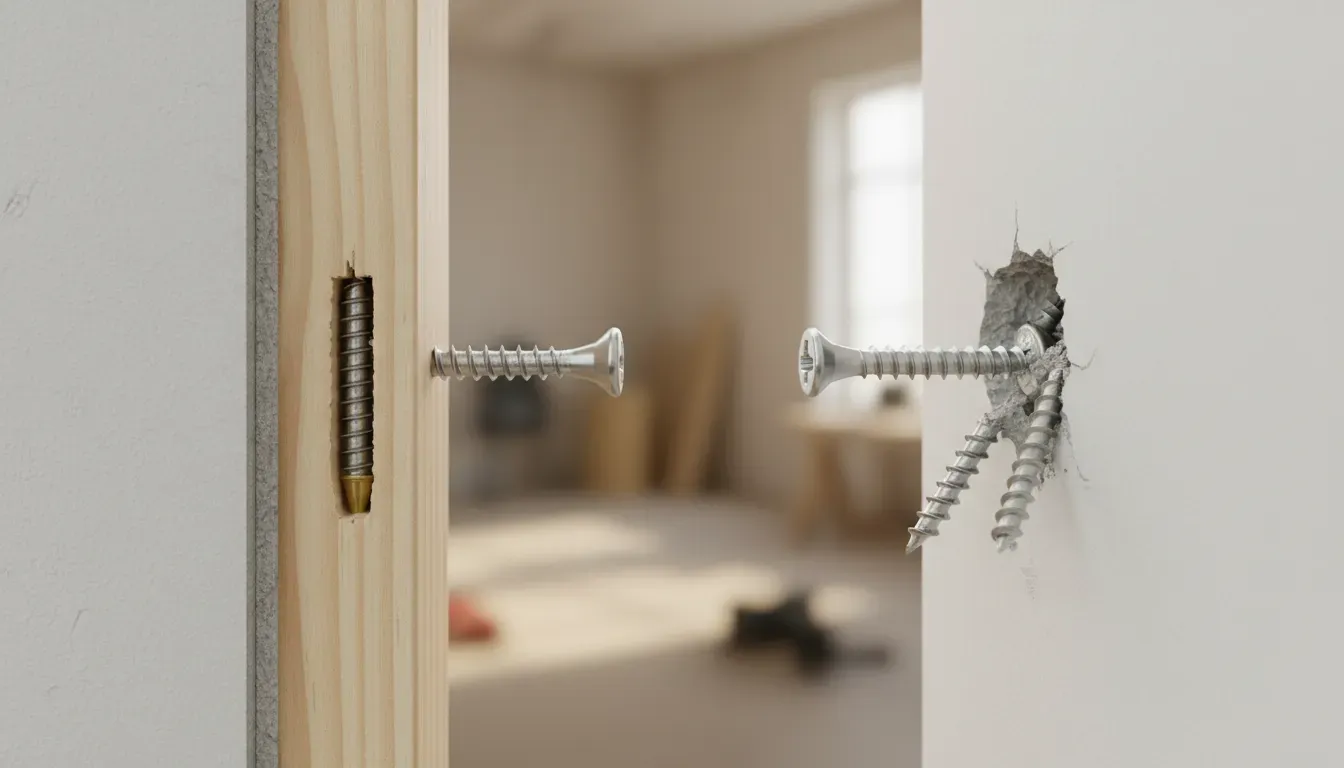
I cannot emphasize this enough: Do not hang a student’s backpack on a drywall anchor.
I don’t care if the package says “Rated for 75 lbs.” Plastic anchors degrade. They chew up the gypsum board every time the bag is lifted off. Eventually, the hole widens, and the hook falls out.
Finding the Stud
You need to drive a 2.5-inch wood screw directly into the wooden framing (studs) behind the drywall.
- Locate: Use a magnetic stud finder (more reliable than the cheap electronic ones) to find the nails holding the drywall. That’s your stud center.
- Verify: Use a thin finish nail to poke the wall and confirm you hit wood before drilling your pilot hole.
- Pilot: Drill a hole slightly smaller than the shank of your screw. This prevents the wood stud from splitting, which is crucial when you are driving thick screws.
What If a Stud Isn’t Available?
If your entryway layout forces you to mount a hook in a hollow cavity, you have only one viable option: The Toggle Bolt.
Forget plastic plugs. Forget screw-in anchors. You need a SnapToggle (or similar toggle bolt system). These devices feature a metal bar that flips open behind the wall, effectively sandwiching the drywall between the hook and the metal bar. It spreads the load over a larger area of the gypsum.
Key Takeaway: Even with toggle bolts, drywall has a limit. I wouldn’t trust a toggle bolt with a dynamic load over 30 lbs repeatedly. If you can’t hit a stud, seriously consider mounting a piece of wood (a cleat) to the studs first, then mounting your hooks to that wood.
Designing the “Commuter Station”
The hardware is only half the battle. The placement and surrounding protection determine the longevity of your entryway.
Vertical Spacing and “Wall Rub”
Backpacks are dirty. They have abrasive zippers, plastic buckles, and grit from the floor. If you hang a bag directly against painted drywall, within three months, you will have scuff marks, gouges, and gray stains.
The Solution: Install a “wainscoting” effect or a protective backer board. I often advise clients to mount a 1x6 or 1x8 inch finished board horizontally across the wall. You mount the hooks to this board. This serves a dual purpose:
- It allows you to anchor the board to the studs (strength).
- It acts as a bumper, so the bag rubs against the wood, not your delicate “Agreeable Gray” paint.
Height Logistics
For students, height matters. If a hook is too high, they have to swing the bag up, increasing that dynamic shock load we talked about. If it’s too low, the bag drags on the floor.
- Adult Commuters: 60-66 inches off the floor.
- Teens/College: 60 inches is usually the sweet spot.
- Younger Kids: 48-52 inches. Consider a double-row system where you can move hooks up as they grow.
The “Dump Zone” Buffer
Even with the best hooks, some days the bag just isn’t getting hung up. It happens. You come home exhausted, and the bag hits the floor. Design your space to accommodate this failure state. Place a rugged boot tray or a heavy-duty mat directly beneath the hooks. This protects your hardwood or tile from the impact of a laptop hitting the deck inside a canvas bag.
The Renter’s Dilemma
I hear you. “I rent. I can’t drill into studs or mount backer boards.” This is a tough spot because adhesives (like Command Strips) are simply not physics-compliant for the Backpack Problem. They rely on the bond between paint and paper. Heavy bags will rip the paper right off the gypsum.
The Workarounds:
- Over-the-Door Heavy Duty Racks: Look for commercial-grade metal racks that sit flush. Use felt pads on the back to prevent banging.
- The “Coat Tree” (With a Caveat): Free-standing coat racks are notorious for tipping over with heavy backpacks. If you go this route, you need one with a wide, weighted base and a low center of gravity. Look for “weighted base coat stands” specifically.
- Tension Poles: Industrial tension rods (floor to ceiling) can sometimes support attachments for bags, but verify the weight rating carefully.

Maintenance: The Wiggle Test
Nothing fails instantly; it fails incrementally. Make it a habit to perform the “Wiggle Test” once a season. Grab the hook and give it a firm shake.
- If it moves: The screw is stripping the wood or the anchor is failing.
- The Fix: Do not just tighten the screw. It will just strip further. Remove the screw, insert a toothpick or two with wood glue into the hole, let it dry, and re-drive the screw. Or, upsize the screw diameter slightly.
The Bottom Line
Solving the Backpack Problem isn’t about buying the prettiest hook at the home decor store. It is about respecting the weight of the gear we carry. We are hauling mobile offices and libraries on our backs.
To reclaim your entryway, you have to think like a structural engineer. Prioritize forged metals over brittle zinc. Hunt for studs like your drywall depends on it (because it does). And understand that a $15 investment in proper hardware now saves you a $200 drywall patch-and-paint job later.
Get the heavy-duty hooks. Mount them into wood. And enjoy the silence of a bag being hung up securely, rather than the thud of it hitting the floor.