Stop Messing Up Your Glue-Ups: Expert Tips for a Flat Workbench Top
Master the art of the perfect workbench glue-up. Discover expert strategies for milling, clamping, and flattening massive slabs without the panic.
Mar 22, 2026 - Written by: Linda Wise
I remember the first time I attempted to laminate a heavy workbench top. I had fifteen boards of hard maple, a single bottle of fast-setting PVA glue, and the arrogant confidence of a novice. I slathered the adhesive, frantically cranked down my rusty pipe clamps, and watched in absolute horror as the boards slipped, bowed, and twisted into a shape resembling a wooden potato chip. The panic sweating was real. I spent the next two weeks aggressively attacking that ruined slab with a hand plane, trying to recover a usable surface.
You’ve likely been there. The massive, multi-board glue-up is one of the most stressful crucibles in woodworking. You are racing against the chemical cross-linking clock of your adhesive while trying to force a notoriously stubborn, anisotropic material into perfectly flat submission. When you mess up a workbench top, you don’t just lose a few hours of labor; you waste hundreds of dollars in premium hardwood and sabotage the foundational tool of your entire shop.
A flat bench is non-negotiable. If your reference surface is curved, every piece of furniture you build on it will inherit that warp. Today, we are going to dismantle the mechanics of the perfect slab lamination. I’ll show you exactly how to prep, clamp, and flatten a monstrous workbench top without losing your mind or your lumber.
Quick Comparison: Top Picks
| Product | Rating | Check Price |
|---|---|---|
| Titebond III Ultimate Wood Glue | ⭐⭐⭐⭐⭐ | View on Amazon |
| Bessey K Body REVO Parallel Clamps | ⭐⭐⭐⭐⭐ | View on Amazon |
| WoodRiver #7 Jointer Plane | ⭐⭐⭐⭐½ | View on Amazon |
The Anatomy of a Disastrous Lamination
Before we lay down the roadmap to success, we need to understand the physics of failure. Wood is essentially a bundle of microscopic, hygroscopic straws. It drinks moisture from the air and swells; it loses moisture and violently shrinks.
When you laminate a workbench top, you are introducing a massive amount of liquid water (via the glue) directly into the joints of those boards. If your internal stresses are unbalanced, or if your boards were improperly dried, the slab will tear itself apart. You might achieve a flat top on Tuesday, only to walk into your shop on Friday and find a pronounced cup.
The Equilibrium Moisture Content Trap
Many woodworkers buy lumber straight from the supplier, run it through the planer, and glue it up the same afternoon. That is a recipe for a twisted slab. Wood needs to reach Equilibrium Moisture Content (EMC) with your specific shop environment. If you skip acclimatization, you are gambling with internal case hardening and tangential shrinkage.
Bring your lumber into the shop, sticker it evenly to allow airflow on all four sides, and let it rest for at least three weeks. Yes, waiting is agonizing. But patience here prevents catastrophic warping later.
Prep Work: The Invisible Foundation of Flatness
You cannot clamp your way out of bad milling. If your board edges look like rolling hills, no amount of clamping pressure will force them into a seamless, permanent joint. The adhesive might hold initially, but the internal tension will eventually cause joint failure or massive deflection across the slab.
The Two-Stage Milling Sequence
I’ve personally found that the secret to dead-flat boards lies in a two-stage milling process. When you remove material from a board, you release trapped internal tensions. The wood will almost always react by bowing or twisting slightly over the next 24 hours.
- Rough Milling: Joint and plane your boards about 1/8-inch thicker and 1/4-inch wider than your final desired dimensions. Stack them neatly with stickers and walk away for two days.
- Final Milling: Once the wood has thrown its little temper tantrum and settled into its new shape, perform your final pass on the jointer and planer.
When edge jointing, pay obsessive attention to your fence. If your jointer fence is off by even half a degree, that error will compound across ten boards, resulting in a workbench top that curves like a halfpipe. To neutralize this, use the “fold-out” method: alternate the faces of your boards against the jointer fence. If one edge is cut at 89 degrees and the mating edge is cut at 91 degrees, they will perfectly cancel each other out to form a 180-degree flat plane.
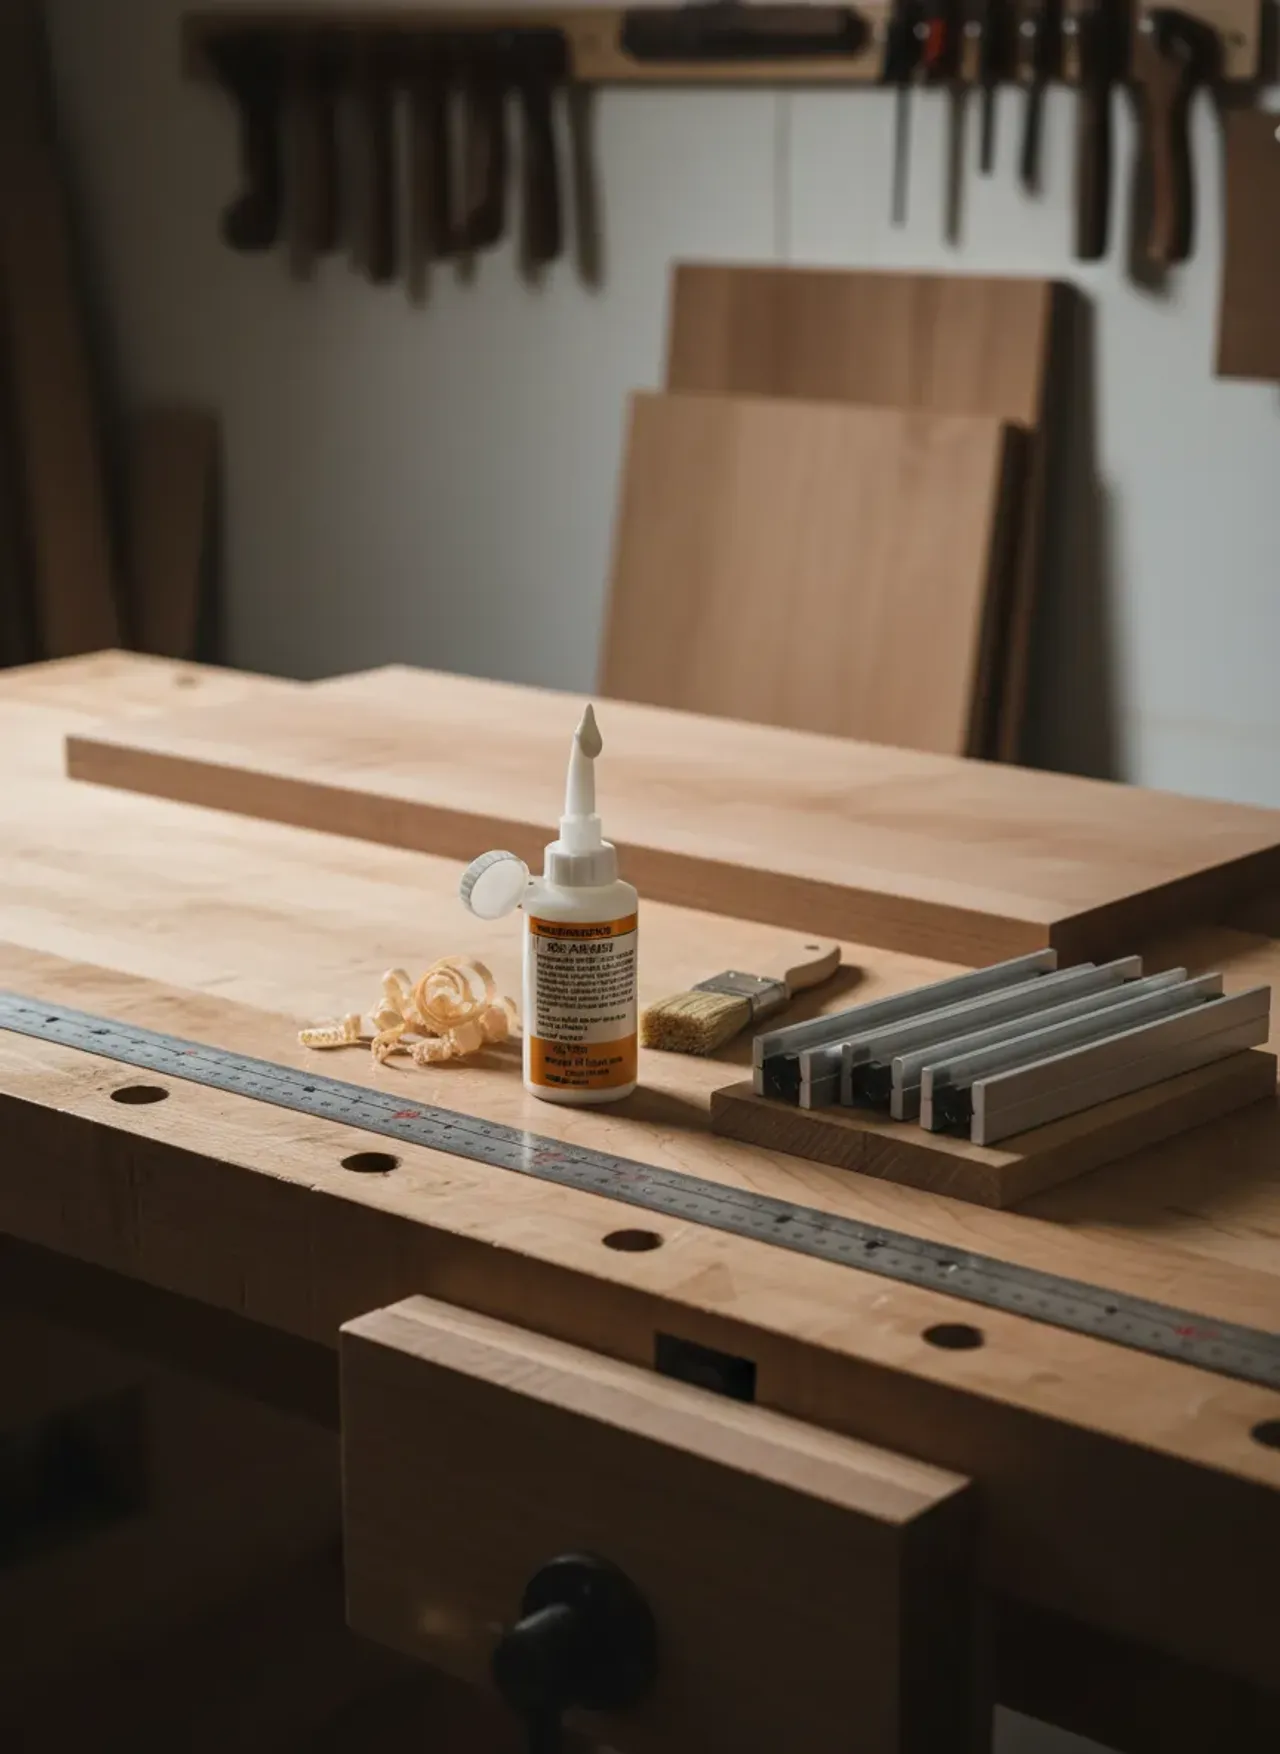
Selecting the Right Adhesive Arsenal
If you are attempting a massive glue-up, throw away your standard fast-setting glues. You need open time. I highly recommend Titebond III Ultimate Wood Glue for this exact reason. It offers a longer open assembly time compared to standard PVA glues, giving you a precious extra few minutes to align your boards, adjust your clamps, and seat your cauls before the chemical cross-linking begins to bite.
Keep your shop temperature in mind. If it’s a sweltering 95 degrees inside your garage, your glue’s open time will be cut in half. I’ve often scheduled my largest workbench laminations for 6:00 AM just to take advantage of the cooler morning air.
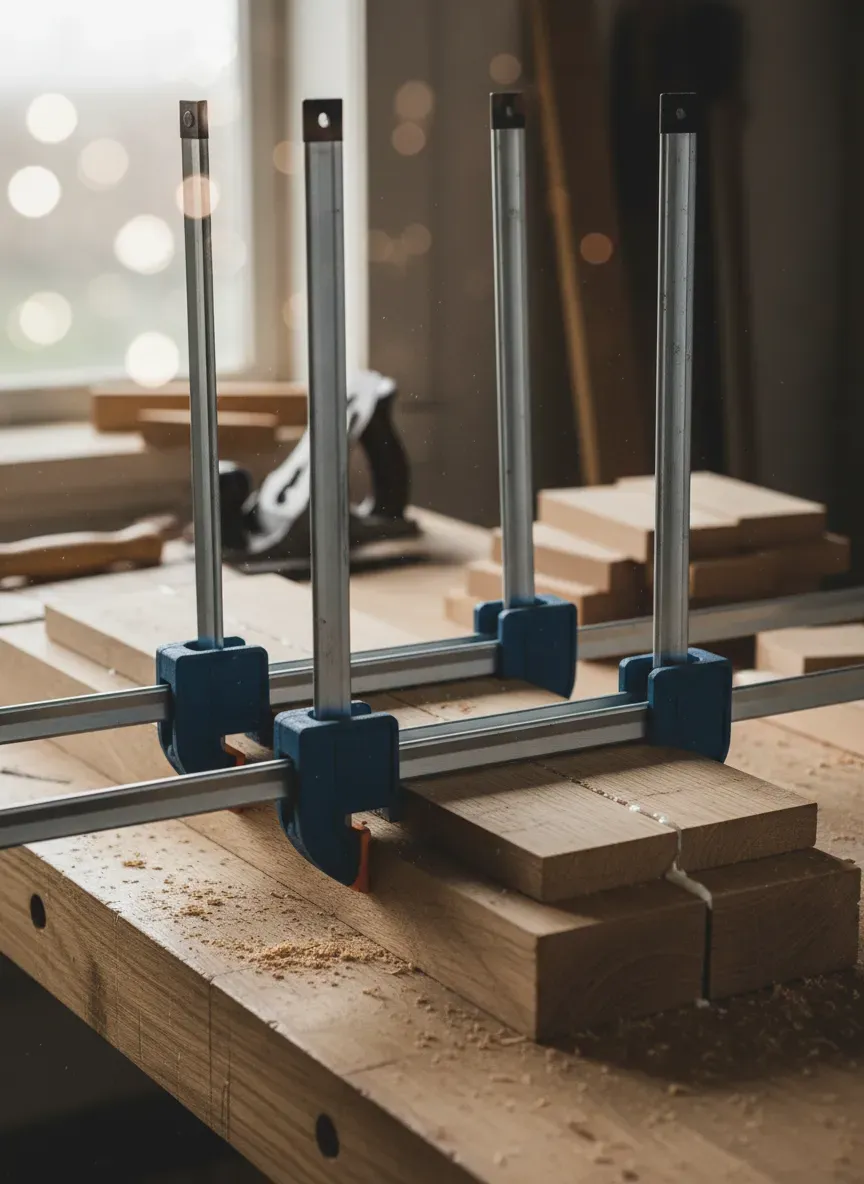
Clamping Strategies That Actually Work
Forget the myth that you need to tighten your clamps until the steel bars bend. Excessive pressure starves the joint of adhesive, squeezing out the very material required to create a bond, leaving you with a fragile, glue-starved seam.
The Physics of Pressure Distribution
Clamping pressure radiates outward from the clamp head in a roughly 45-degree cone. If your clamps are spaced too far apart, you will have tight joints directly under the clamp jaws and weak, gaping joints in the spaces between them. A good rule of thumb is to space your clamps every 8 to 10 inches along the length of the benchtop.
You must alternate your clamps—one over, one under. If you place all your clamps on the top face of the slab, the slight deflection in the clamp bars will pull the entire assembly into a bow. Alternating top and bottom neutralizes this directional pull. Heavy-duty parallel clamps, like the Bessey K Body REVO Parallel Clamps, are absolute lifesavers here because their jaws remain rigidly at 90 degrees under heavy load, preventing the boards from sliding upward.
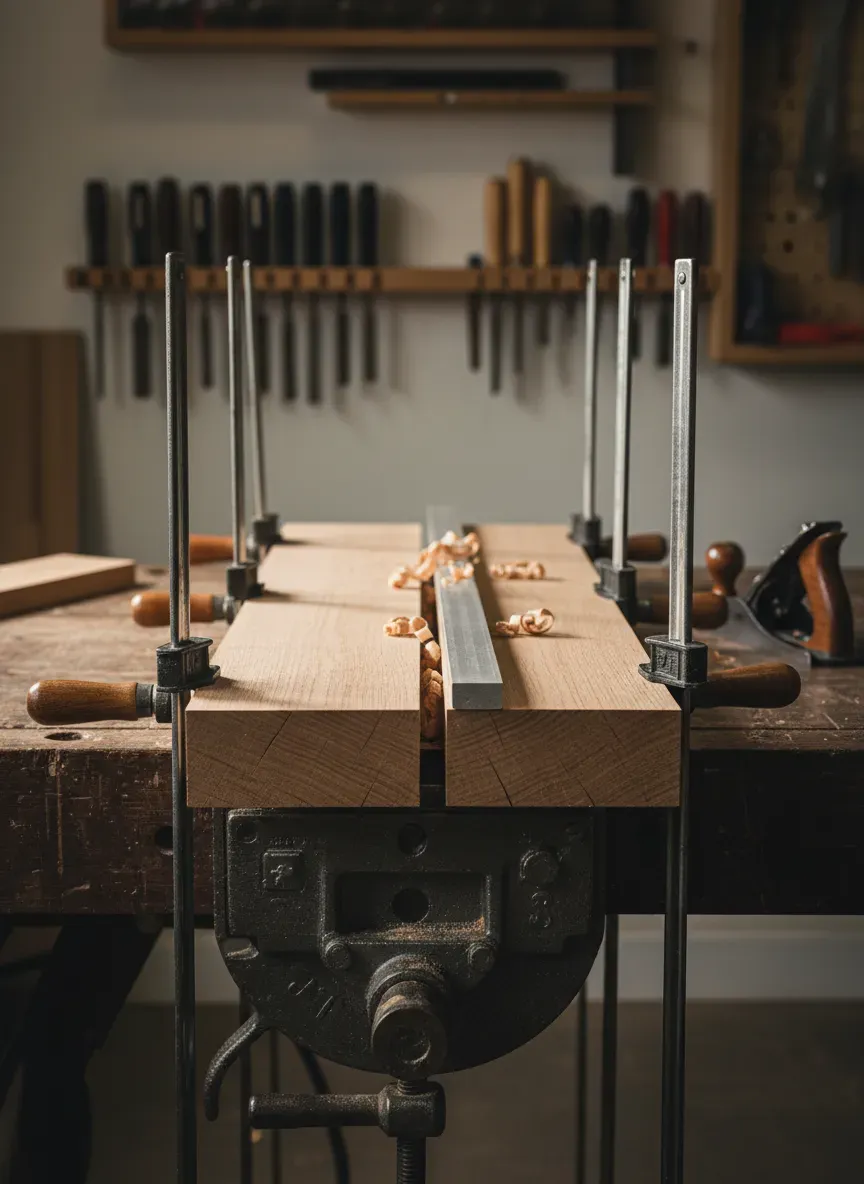
The Cauls Are Calling
Here’s the real kicker: clamps only pull the boards together horizontally. They do absolutely nothing to keep the faces flush vertically. Enter the caul.
Cauls are stout, perfectly straight pieces of scrap wood clamped across the top and bottom faces of your glue-up to force the boards into vertical alignment. Without them, your boards will slip like wet spaghetti the second you apply horizontal clamping pressure.
Pro Tip: Your cauls will inevitably get covered in squeeze-out. To prevent accidentally gluing your cauls permanently to your new workbench top, wrap the contacting edge of the caul tightly in clear packing tape. Wood glue absolutely refuses to stick to the slick surface of packing tape, allowing you to pop the cauls right off once the glue cures.
For wide benchtops, standard straight cauls might not exert enough pressure in the dead center of the slab. Expert bench builders use cambered cauls. By taking a hand plane and shaving a slight taper onto the outer edges of the caul (leaving a subtle belly in the middle), the clamp pressure at the ends forces the belly downward, applying massive, highly concentrated pressure precisely to the center of the glue-up.
If you are planning on building a stunning bench using traditional joinery, mastering the use of cambered cauls is a skill that will elevate your craftsmanship immediately.
Executing the Perfect Glue-Up Sequence
When the glue bottle opens, the talking stops. You need a rehearsed, tactical plan.
Dry Fits Save Lives (and Lumber)
Never, ever skip the dry fit. A dry fit is a full dress rehearsal of the glue-up without the adhesive. It reveals the clamps you forgot to adjust, the cauls that are slightly too short, and the board that inexplicably developed a bow overnight. Lay out every single clamp open to the exact width needed. Pre-cut your tape-wrapped cauls. Have a damp rag and a mallet within arm’s reach.
The Sub-Assembly Approach
The biggest mistake novices make is trying to glue up a 24-inch wide workbench top all at once. Wrestling 15 slippery, glue-covered boards simultaneously is an exercise in futility.
Divide and conquer. Break the top down into manageable sub-assemblies. Glue three boards together. Then glue another three boards together. Let these smaller sections cure overnight. The next day, you only have to run those smaller slabs through your thickness planer (if they fit) or joint their mating edges, and then perform a final, stress-free glue-up connecting the sub-assemblies.
This sub-assembly technique is precisely the same method used when constructing rugged DIY entryway storage projects where massive, flat panels are required. It dramatically reduces your wet-edge exposure time and guarantees a flatter final product.
Managing Squeeze-Out
There is a fierce debate among woodworkers regarding squeeze-out. Do you wipe it immediately with a wet rag, or let it cure and chisel it off?
Wiping with a wet rag pushes diluted glue deep into the wood fibers surrounding the joint, which will glaringly reveal itself later when you apply a finish. Waiting until the glue is rock hard means risking tearing out chunks of wood grain when you try to chisel the hardened beads away.
The sweet spot is the semi-dry scrape. Wait about 30 to 45 minutes after clamping. The squeeze-out will transition from a liquid puddle into a rubbery, semi-solid gel. At this precise stage, you can use a standard paint scraper or a sharp chisel to peel the glue off in one satisfying, continuous ribbon without smearing it into the pores of the hardwood.
Flattening the Beast: Post-Glue-Up Tactics
Even if you execute the glue-up perfectly, a massive wooden slab will rarely emerge from the clamps dead flat. You will have minor steps between boards and slight sweeping curves. You now face the final boss of workbench building: flattening the top.
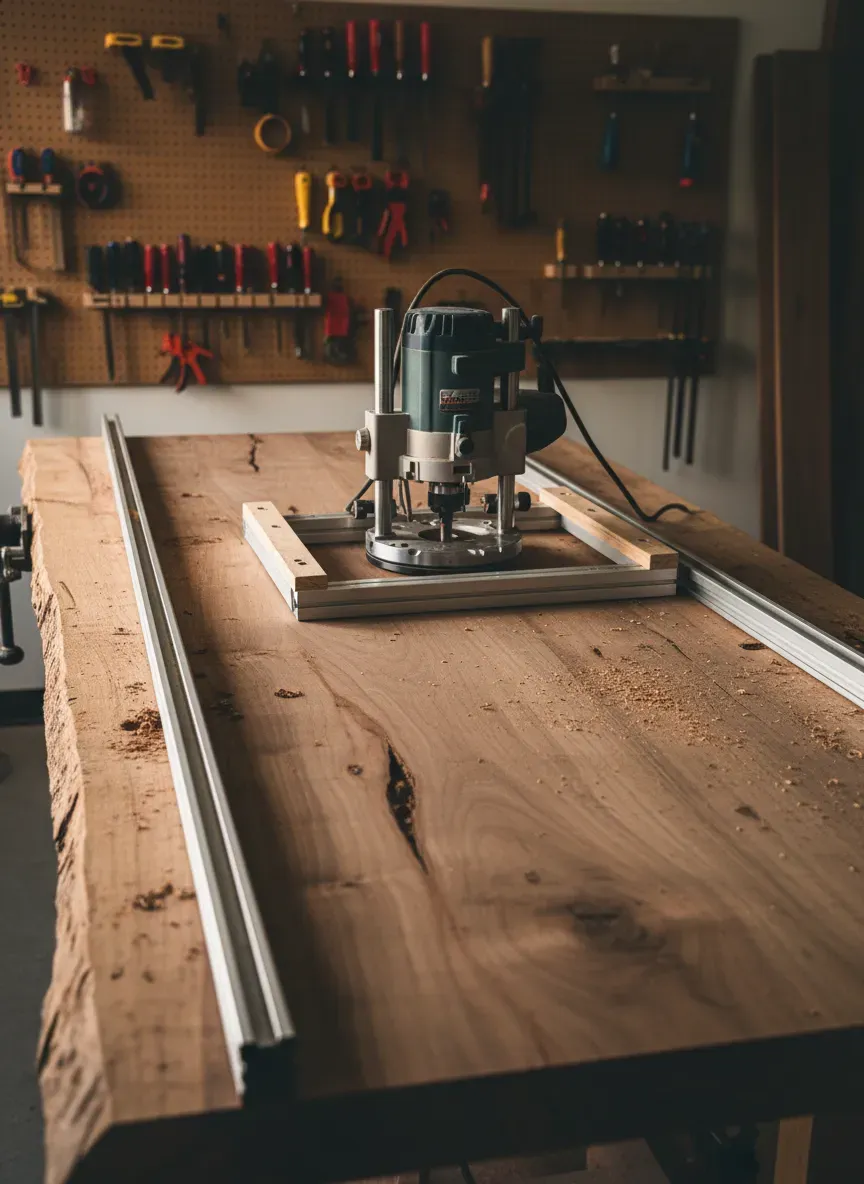
The Router Sled Juggernaut
For absolute precision, especially on end-grain or highly figured tops where tear-out is a severe risk, the router sled is the undisputed champion.
You build two perfectly straight, parallel rails along the sides of your workbench slab. A carriage holding your plunge router rides on these rails, allowing you to suspend a large spoilboard surfacing bit just above the wood. By systematically sweeping the router back and forth across the entire surface, you mill the top down to a perfectly planar surface.
It is incredibly messy, ridiculously loud, and creates enough sawdust to fill a small swimming pool. But the results are mechanically flawless.
The Traditional Hand Plane Method
If you lack a router or simply prefer the quiet rhythm of hand tools, you can flatten a slab using traditional planes. This method requires stamina and a keen eye for reading grain direction.
You begin with a scrub plane or a jack plane with a heavily cambered iron, aggressively traversing the slab diagonally to knock down the high spots and remove the dried glue lines. Use winding sticks—two perfectly straight pieces of contrasting wood placed at opposite ends of the bench—to sight down the length of the slab and identify twists.
Once the rough topography is leveled, you switch to the heavy artillery. A massive jointer plane, such as the WoodRiver #7 Jointer Plane, is designed specifically for this task. Its long sole bridges the microscopic valleys and only cuts the peaks, effectively bridging the gaps until the surface is trued.
The physical effort required to push a heavy #7 plane across hard maple is substantial, but the glassy, shimmering surface it leaves behind is deeply rewarding. It’s the exact same technique utilized by master artisans dedicated to crafting heirloom-quality furniture pieces.
Common Pitfalls and How to Sidestep Them
To synthesize this deep dive, let’s look at the most frequent errors that plague shop benches, and exactly how to preempt them.
- Key Takeaways for a Flawless Benchtop:
- Ignoring the Grain Orientation: While alternating growth rings (smiles and frowns) theoretically neutralizes overall cupping, it often forces you to plane against the grain on half your boards. Prioritize aesthetic grain matching and let proper joinery and stout bench legs keep the top flat.
- Using Dull Milling Blades: A dull jointer knife doesn’t cut; it pounds the wood fibers, leading to a bruised, weak surface that glue struggles to penetrate. Keep your machinery razor-sharp.
- Rushing the Cure Time: You might be tempted to pull the clamps off after two hours. Don’t. For a massive structural slab, leave it under pressure for a minimum of 12 hours, and wait a full 24 hours before you attack it with a hand plane or router sled.
- Failing to Seal the Underside: Once your top is flat, you must apply your finish (like boiled linseed oil or a penetrating Danish oil) equally to the top and the bottom. If you only seal the top face, the bottom will continue to absorb seasonal moisture rapidly, resulting in an aggressive, permanent cup.
The Bottom Line
A flat, unyielding workbench top is the literal foundation of all your future woodworking success. It is not an area where you can cut corners. By mastering your milling sequence, understanding the chemistry of your adhesive, utilizing cambered cauls, and executing a stress-free sub-assembly strategy, you completely eliminate the chaos of the massive glue-up.
You transform an anxiety-inducing gamble into a calculated, predictable mechanical process. Respect the wood’s inherent movement, control your clamping pressure, and your bench will reward you with decades of dead-flat reliability.
Now, here’s the real kicker. Mastering the workbench glue-up is just the beginning. If you’re looking to elevate your shop and start building jaw-dropping projects on that brand-new flat surface, you need exceptional, easy-to-follow blueprints. I highly recommend checking out Ted’s Woodworking. I’ve personally found it to be an absolute goldmine. You get immediate access to over 16,000 meticulously detailed woodworking plans, covering everything from simple jigs to complex heirloom furniture. Right now, there is a massive 75% discount available, making it the perfect time to stock your project library. Don’t stare at a beautifully flat workbench with nothing to build—grab those plans and start making sawdust!