The Toothed Planing Stop: A Must-Have Tool for Precision Woodworking
Discover why the traditional toothed planing stop is the ultimate workholding solution for hand tool woodworkers. We break down installation, technique, and workshop flow.
Apr 14, 2026 - Written by: Linda Wise

If you spend enough hours pushing a hand plane across rough timber, you inevitably encounter the tyranny of the tail vise. I vividly remember the days I spent agonizing over bowed stock, desperately cranking my wagon vise tighter, only to watch the board buckle upward in the center. It’s a maddening kinetic paradox: the very pressure required to hold the wood secure introduces a warp that makes flattening it impossible.
Then, I drove a toothed planing stop into my benchtop.
The immediate shift in my workshop rhythm was staggering. No more twirling handles. No more over-constraining the lumber. You simply drop the board onto the bench, push its end grain against a jagged strip of iron, and get to work. The forward momentum of your plane does all the holding. It is a revelation in efficiency, a piece of ancestral engineering that modern woodworkers ignore at their own peril. If you are serious about milling stock by hand, integrating a toothed planing stop into your bench isn’t just a recommendation—it is a fundamental necessity.
Quick Comparison: Top Picks
| Product | Rating | Check Price |
|---|---|---|
| Crucible Tool Planing Stop | ⭐⭐⭐⭐⭐ | View on Amazon |
| Benchcrafted Planing Stop | ⭐⭐⭐⭐½ | View on Amazon |
| Taytools 90-Degree Toothed Stop | ⭐⭐⭐⭐ | View on Amazon |
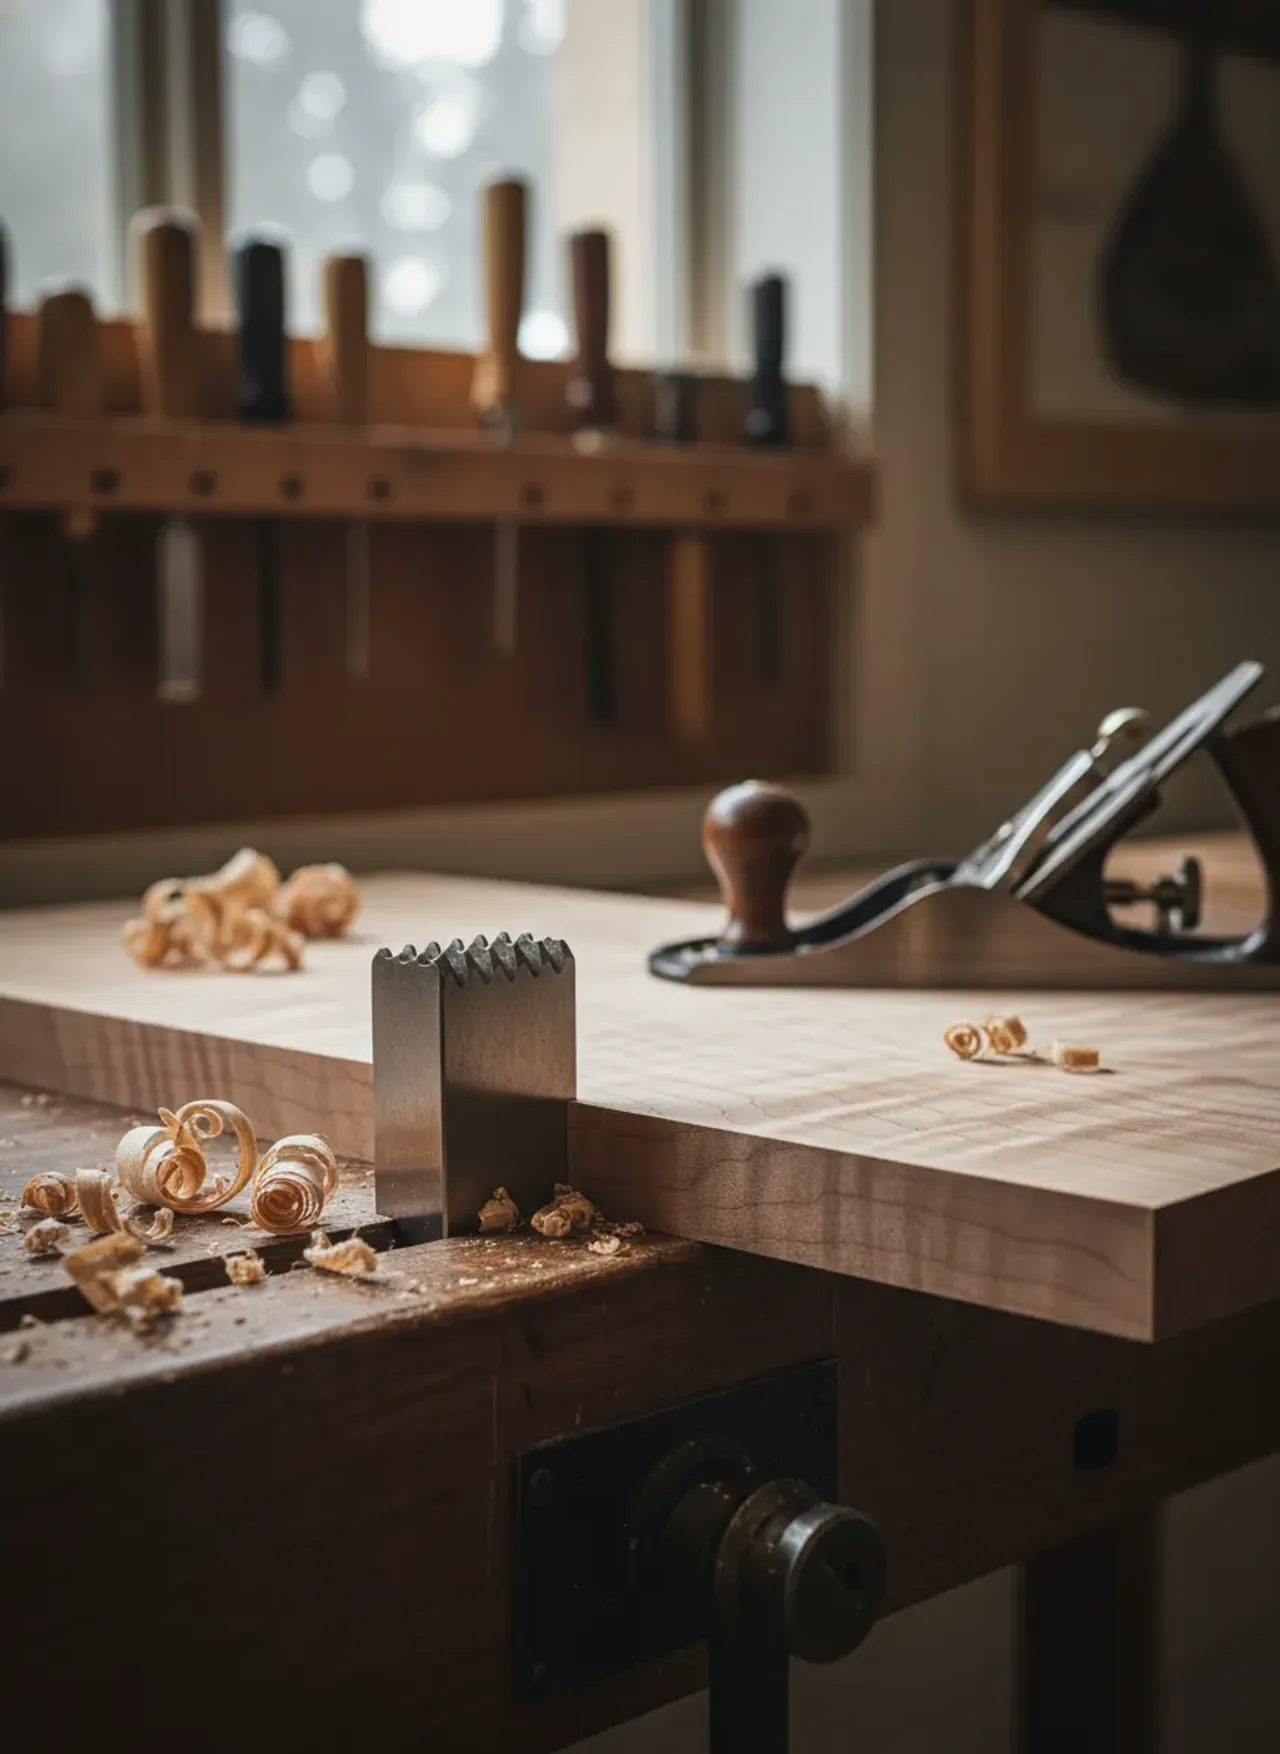
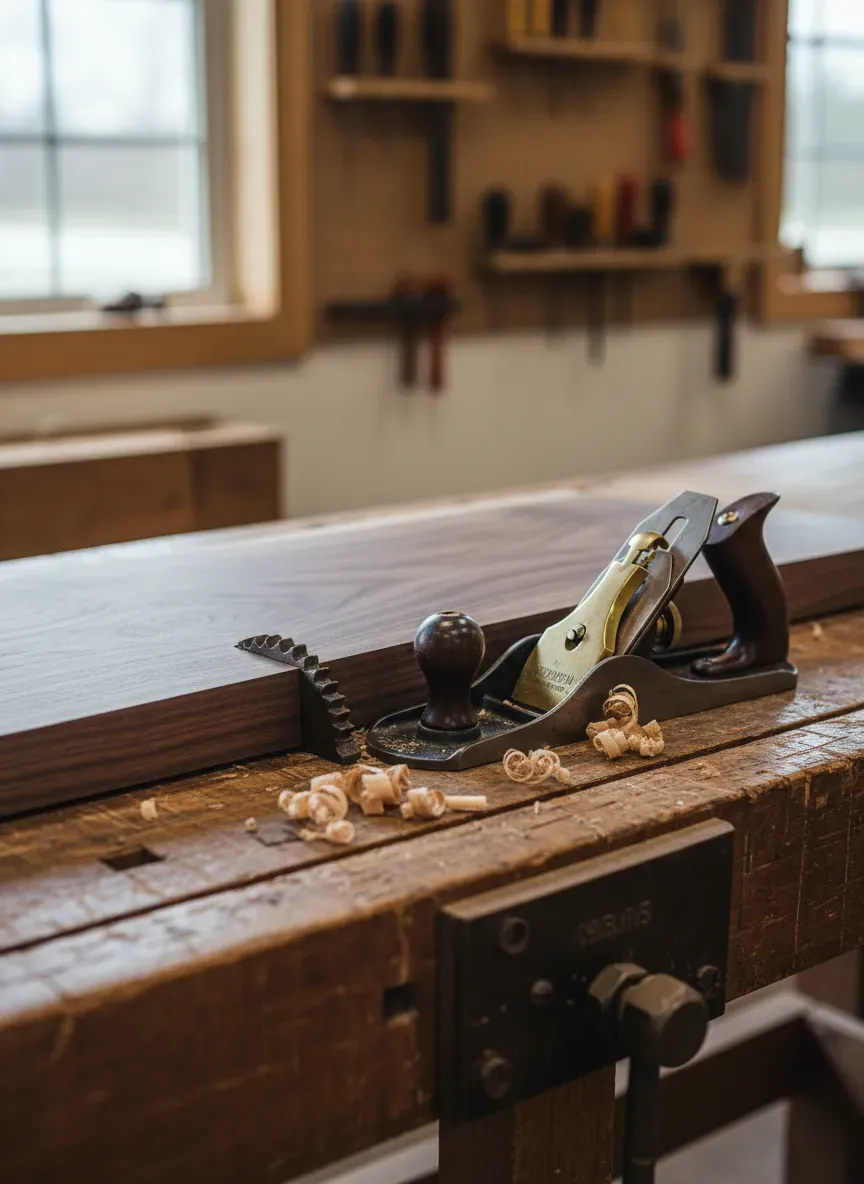
The Anatomy of a Forgotten Masterpiece
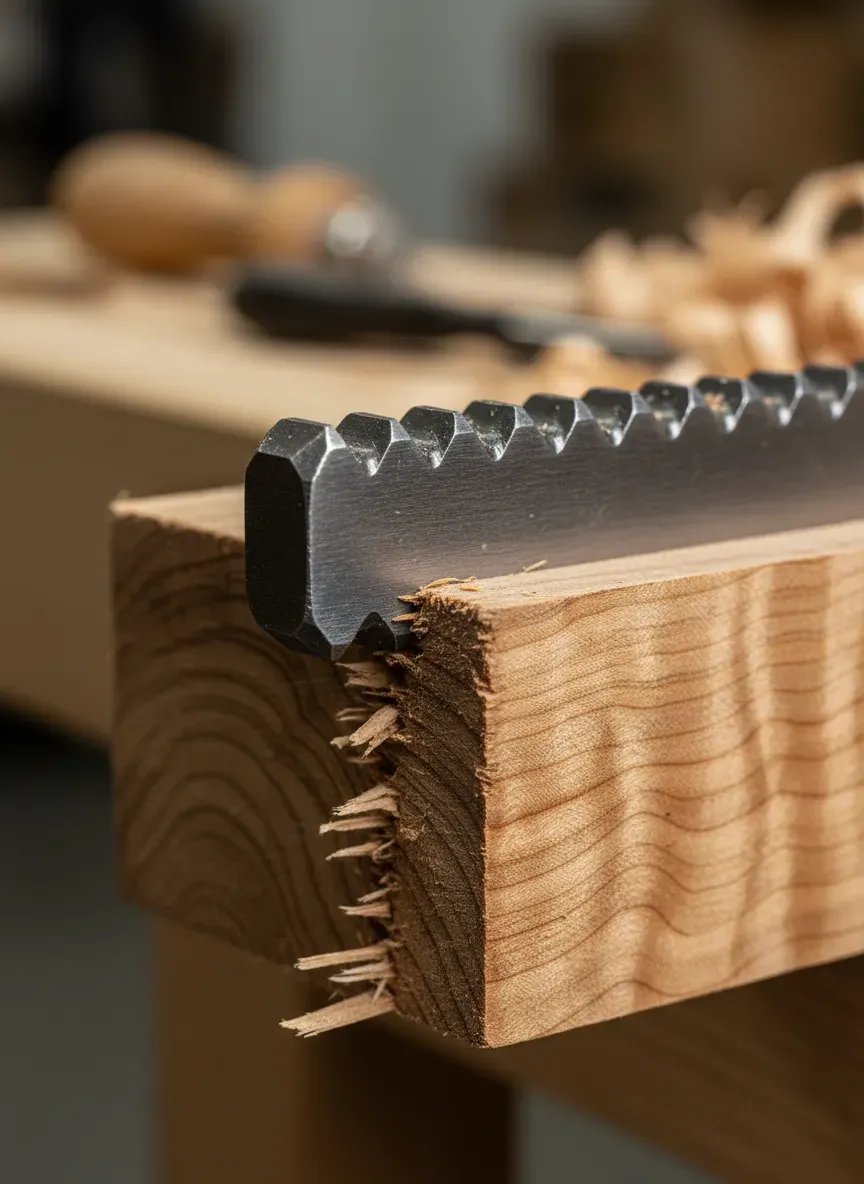
To the uninitiated, it looks like a medieval torture device protruding from an otherwise pristine Roubo workbench. A heavy plate of steel or iron, usually around two inches wide, terminating in a row of aggressive, filed teeth. This metal plate is affixed to a stout wooden block—often hickory, ash, or hard maple—which is friction-fit into a through-mortise in the benchtop.
Form Meets Function
You adjust the stop by striking it. A swift tap on the bottom of the wooden block from underneath the bench raises the teeth above the benchtop. A tap on the top of the metal plate drives it back down flush.
This brutal simplicity masks a sophisticated physical dynamic. When you push a board against those teeth, they bite deeply into the end grain. The force of your hand plane traveling forward buries the board further into the stop, locking it in place. Because the board is only constrained at one end, it lies perfectly flat against the benchtop. There is no compressive force acting on the length of the board to cause it to bow or deflect.
The Metallurgy Behind the Bite
I’ve personally found that the material of the stop dictates its lifespan and performance. Antique stops were forged from wrought iron. They were tough, easily filed, and prone to bending rather than snapping if struck off-axis. Today’s premier manufacturers utilize high-carbon steel.
High-carbon steel provides immense rigidity. When you are traversing a heavily cupped slab of white oak with a scrub plane, the lateral forces are tremendous. A cheap, mild-steel imitation will bend backward over time, losing its vertical registration. A properly hardened steel stop holds its edge, ensuring the teeth remain sharp enough to pierce the end grain without requiring excessive forward force.
Why a Vise Isn’t Always the Answer
We live in a tooling era obsessed with clamping pressure. Browse any modern woodworking catalog, and you are bombarded with twin-screw vises, quick-release tail vises, and an endless array of holdfasts and bench dogs. While these tools have their place, they often slow down the initial stages of dimensioning lumber.
The Trap of Over-Constraining
Here is the real kicker about flattening a board: wood is incredibly flexible. If you place a board with a slight twist between two bench dogs and tighten a tail vise, the wood will flex. You plane the top surface until it looks perfectly flat, release the vise, and watch the board instantly spring back into a twisted shape. You have merely planed a flat surface into a board while it was under tension.
By utilizing a toothed planing stop, you rely entirely on gravity and the directional force of your cut. The board rests in its natural, relaxed state. As you remove the high spots, you are genuinely flattening the timber, not just temporarily conforming it to the bench.
Speed and Flow in the Workshop
Consider the physical routine of milling four boards for a small cabinet using a vise. You insert the board, tighten the vise, plane a face, loosen the vise, flip the board, tighten the vise, plane the other face, loosen the vise.
Now contrast that with the stop. You drop the board, push it forward, and plane. To flip it, you simply pick it up, turn it over, and push it forward again. The transition takes milliseconds. In a hand-tool workshop, efficiency is not about swinging your plane faster; it is about eliminating the dead time between productive actions. The toothed stop gives you that time back.
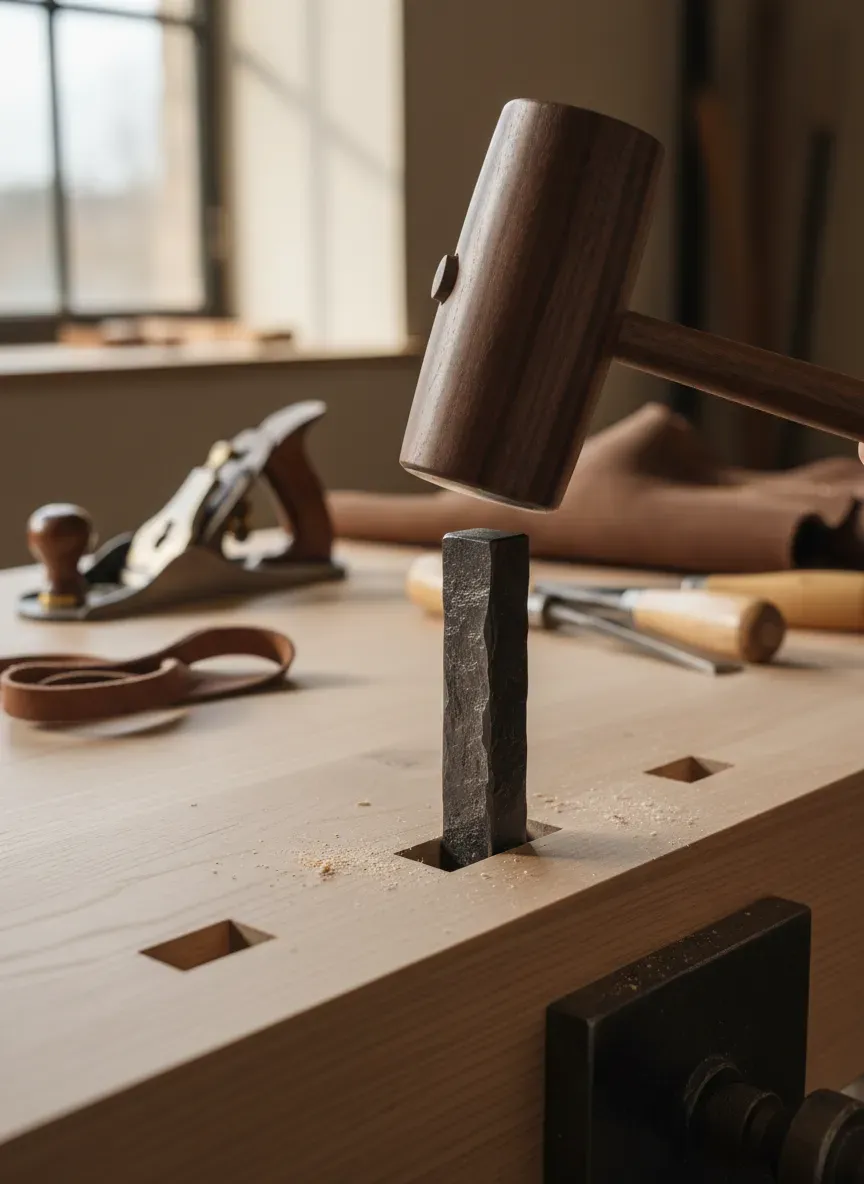
Installing Your First Toothed Planing Stop
If you are convinced to make the leap, retrofitting a stop into an existing bench is a straightforward but precise operation. You cannot afford sloppiness here. The mortise must tightly grip the wooden block, relying purely on friction to hold it at the desired height.
Choosing the Right Bench Location
Placement is critical. I recommend locating the stop roughly 12 to 15 inches from the left end of your bench (if you are right-handed). It should be set in from the front edge by about two to three inches. This placement allows you to plane comfortably without leaning too far over the bench, while keeping the bulk of the board fully supported by the benchtop.
Make sure you check the underside of your bench before cutting. You absolutely must avoid intersecting with bench legs, vise hardware, or support battens. You need clear access to strike the bottom of the block with a mallet.
Mortising the Block: A Step-by-Step Approach
- Select Your Stock: Choose a highly stable, dense hardwood for the block. Quarter-sawn ash or hard maple are exceptional choices. Cut the block roughly 2 inches by 2 inches, and make it about 2 inches longer than the thickness of your benchtop.
- Mount the Hardware: Attach your chosen metal stop to the block according to the manufacturer’s specifications. Usually, this involves a few heavy-duty wood screws.
- Lay Out the Mortise: Place the block onto the benchtop in the desired location and knife around it precisely.
- Create a Slight Taper: This is the secret to a perfect friction fit. When chopping the mortise, angle your chisels incredibly slightly—we are talking one or two degrees—so the hole is fractionally wider at the bottom than at the top. Alternatively, you can cut the mortise perfectly plumb and plane a minuscule taper into the wooden block itself.
- Chop and Pare: Hog out the waste with a brace and bit, then carefully pare back to your knife lines.
- Test the Fit: Drive the block in. It should require firm strikes from a wooden mallet to move, but it shouldn’t be so tight that you risk splitting your benchtop.
Pro Tip: If your mortise ends up slightly too loose and the block drops during heavy planing, do not despair. Remove the block, brush a thin layer of hide glue onto one face, and adhere a piece of thick paper or veneer to it. Once dry, re-insert the block. The added thickness will restore a perfect friction fit.
Master-Level Techniques for Daily Use
Owning the hardware is only half the battle. Learning to trust the stop and adapting your body mechanics to its unique advantages will elevate your craft.
Traversing the Grain with Confidence
The true test of a workholding system occurs when you grab a scrub plane or a heavily cambered jack plane to dimension rough lumber. To hog off material quickly, you must plane diagonally—sometimes up to 45 degrees across the grain.
When traversing, you introduce severe lateral forces. Without a vise, won’t the board just spin off the bench?
You’ll notice that this is exactly where the teeth earn their keep. As you push the board diagonally into the stop, the teeth bite deeply, creating a pivot anchor. As long as the vector of your plane’s forward motion intersects the vertical plane of the stop, the board remains remarkably stable. The friction between the rough underside of the board and the benchtop provides secondary resistance.
Handling Thin Stock and Difficult Figuration
Planing a 1/4-inch thick drawer bottom is notoriously frustrating. Vises buckle them; dogs shatter their delicate ends.
To use a planing stop with thin stock, tap the block down until the teeth barely protrude—perhaps 1/16th of an inch above the benchtop. The teeth only need to catch the lower edge of the end grain. Because the board rests flat without end-to-end compression, you can aggressively smooth highly figured, brittle woods without fear of the board bowing upward into the path of your cutting edge.
The “Tap and Bite” Method
When you first place a board against the stop, do not immediately take a heavy, full-length shaving. Instead, employ the “tap and bite.”
Slide the board gently against the teeth. Place your plane on the near end of the board, apply firm downward pressure, and take a short, forceful push forward. You will feel the board thrust forward, embedding the teeth into the end grain. Once seated, you can take a step back and begin your full, sweeping passes. This preliminary seating stroke prevents the board from stuttering or shifting during your first real cut.
Troubleshooting Common Pitfalls
Even the most elegant tools require a learning curve. If you find yourself fighting the planing stop, you are likely experiencing one of a few common kinematic errors.
Board Spinning and Lateral Shift
If the board continually spins away from the stop, examine your stance and your pushing angle. The force applied through the tote of your hand plane must be directed toward the stop. If you are standing too far to the side and pushing outward, you are breaking the anchor.
For exceptionally wide panels, a single two-inch stop might not provide enough lateral stability. Traditional woodworkers solved this elegantly with a “doe’s foot”—a simple wooden batten with a V-notch cut into one end. You place the notched end against the far corner of your wide panel and secure the batten to the bench with a holdfast. Now, the board is trapped between the iron teeth of the stop and the wooden V-notch, rendering it completely immobile regardless of your planing angle.
Marring the End Grain Unnecessarily
Yes, the toothed stop leaves a row of puncture marks in your end grain. This is a feature, not a bug.
In historical cabinetmaking, stock was milled slightly over-length. You flatten the faces, joint the edges, and only then do you crosscut the board to its final, exact dimension. The punctured end grain is simply sawn away during the final sizing phase.
If you are forced to surface a board that is already cut to its exact final length, you can temporarily circumvent the teeth. Grab a piece of scrap wood of the same thickness. Place the scrap against the teeth, and place your workpiece against the scrap. The teeth bite the scrap, and the forward pressure traps your workpiece against the smooth edge of the scrap.
Comparing the Top Options on the Market
If you are ready to upgrade your bench, selecting the right hardware is your next step. Having rigorously tested various models, I can confidently break down the leading contenders.
The Crucible Tool Planing Stop is, quite simply, the platinum standard. Forged with an uncompromising eye for historical accuracy and metallurgical excellence, it features incredibly sharp, aggressive teeth that require very little forward pressure to seat deeply. The heavy steel plate will not deflect under massive traversing forces. It is an heirloom-quality component.
For those who appreciate modern refinement, the Benchcrafted Planing Stop offers exceptional performance. Benchcrafted is legendary for their bench hardware, and their stop is machined to exacting tolerances. The tooth profile is slightly less aggressive than Crucible’s, making it a bit friendlier if you work predominantly with softer woods or delicate stock, yet it maintains absolute rigidity.
If you are outfitting your workshop on a tighter budget, the Taytools 90-Degree Toothed Stop represents outstanding value. While the steel might not boast the same proprietary hardness as the premium brands, it easily gets the job done for the average weekend woodworker. The 90-degree mounting flange simplifies installation for those who prefer to screw the stop to the face of a block rather than mortising a flat plate into the top.
Key Takeaways
- A toothed planing stop relies on directional force, eliminating the bowing caused by traditional tail vises.
- Friction-fit wooden blocks allow for instantaneous height adjustments with a simple mallet tap.
- Traversing rough stock requires the aggressive bite of hardened steel teeth to prevent lateral spinning.
- Installing the stop requires a precisely chopped, slightly tapered mortise to ensure a slip-free friction grip.
Maintenance and Longevity
A planing stop is incredibly low maintenance, but it is not entirely zero maintenance.
Over years of heavy use, especially if you routinely mill abrasive tropical hardwoods or strike the stop accidentally with a metal hammer, the teeth will dull. A dull stop requires you to push harder to seat the board, increasing fatigue.
Every few years, pull the block out of the bench. Secure it in an engineer’s vise, and use a standard triangular file to refresh the bevels on the teeth. It takes less than five minutes. A few drops of jojoba oil or a quick wipe with a microcrystalline wax across the metal surface will keep rust at bay, ensuring the stop remains a steadfast partner in your workshop for decades.
The Bottom Line: You cannot fully appreciate the rhythm, speed, and joy of traditional hand-tool woodworking until you liberate yourself from the vise. The toothed planing stop is the key to that liberation. It forces you to work with the natural physics of the wood rather than fighting against them.
Once your bench is dialed in and your stock is perfectly flat, the real magic begins: building. Having a beautifully surfaced board is useless if you don’t have a vision for it. When I want to stop agonizing over dimensions and start actually constructing, I rely on proven blueprints. I highly recommend checking out Ted’s Woodworking. With an astonishing archive of over 16,000 comprehensive woodworking plans, it completely eliminates the guesswork from your next project. Whether you’re building a simple shaker end table or a complex built-in, these detailed schematics guide you every step of the way. Right now, you can grab the entire collection at a 75% discount, making it the perfect time to turn your perfectly planed lumber into something breathtaking.