The Ultimate Blueprint for Built-In Entryway Organization: 10 Planning Steps
Stop the clutter at the door. A master carpenter's guide to designing, sizing, and building the perfect entryway storage system for your home's unique flow.

Feb 18, 2026 - Written by: Linda Wise

The entryway is the handshake of your home. It’s the first thing you see when you return from a long day, and it’s the initial impression your guests receive. Yet, for most people, this critical transitional space is a disaster zone of kicked-off shoes, piled mail, and coats draped over banisters.
You might have tried buying a standalone coat rack or a generic shoe bench. They usually fail. Why? because they aren’t integrated into the architecture of your life. The only way to truly solve the “mudroom madness” is to commit to the ultimate blueprint for built-in entryway organization: 10 planning steps that transform a chaotic corridor into a high-functioning machine for living.
I’ve designed hundreds of these spaces, and I can tell you that a built-in unit isn’t just furniture; it’s infrastructure. It adds equity to your home and sanity to your routine. But you can’t just slap some plywood against a wall and call it a day. You need a strategy.
Here is the comprehensive, step-by-step methodology for executing a flawless built-in project.
Step 1: The Behavioral Audit
Before you pick up a tape measure or look at a single paint swatch, you need to conduct a forensic analysis of your family’s behavior. Most DIYers and even some designers skip this. They design for how they wish they lived, rather than how they actually live. That is a recipe for expensive clutter.
Stand in your entryway at 5:30 PM on a Tuesday. Watch what happens.
- The Drop Pattern: Do your kids throw their bags on the floor immediately, or do they carry them to the kitchen?
- The Shoe Count: accurately count how many pairs of shoes are currently near the door. Not how many should be there, but the actual number. If you have 12 pairs in rotation but build storage for six, your built-in has failed before the paint dries.
- The height factor: Are the current hooks too high for the youngest family member? If a five-year-old can’t reach the hook, the coat ends up on the floor. Every time.
Pro Tip: Categorize your storage needs into “Active” and “Deep.” Active items are used daily (current season jackets, school bags). Deep items are occasional (umbrellas, snow boots in July). Your built-in must prioritize Active storage at eye and hand level.
Step 2: Defining the Dimensional Constraints
Now we get technical. A built-in needs to feel like it was born with the house, which means respecting the geometry of the room. The biggest mistake I see is depth miscalculation.
Standard kitchen cabinets are 24 inches deep. However, in a narrow hallway or foyer, a 24-inch unit feels like a monolith blocking the sun. For most entryways, a depth of 15 to 18 inches is the “Goldilocks” zone. It’s deep enough to hold a hook and a bulky coat without the sleeve protruding, but shallow enough to maintain traffic flow.
You also need to consider sizing secrets for choosing the perfect entryway dimensions relative to your ceiling height. If you have 9-foot ceilings, stopping your built-in at 7 feet creates a dust ledge that collects allergens and forgotten frisbees. Take the cabinetry all the way to the ceiling with crown molding. It draws the eye up and maximizes volume.

Step 3: Material Selection and Durability
The entryway is a hostile environment. It faces temperature fluctuations from the opening door, moisture from rain-soaked coats, and the grit of road salt or mud on boots. Using standard particle board here is a ticking time bomb. It will swell and crumble within three winters.
You have to be strategic about materials.
The Breakdown
- Plywood (Cabinet Grade): This is your structural champion. It’s stable, holds screws well, and resists moisture far better than MDF. Use this for the “carcass” (the main box).
- MDF (Medium Density Fiberboard): Excellent for painted surfaces like doors or trim because it has no grain and paints beautifully. However, never let raw MDF touch the floor. It acts like a sponge.
- Hardwood: Essential for the bench seat. People sit here with keys in their back pockets and rivets on their jeans. A painted seat will chip. A stained white oak or maple seat will age with dignity.
When debating wood vs metal and which material reigns supreme for hardware and accents, consider the climate. In high-humidity coastal areas, cheap plated metals will pit. Solid brass or powder-coated steel are non-negotiables for longevity.
Step 4: Engineering the Seating Dynamics
The bench is the anchor of the built-in. It invites you to pause, sit down, and remove your shoes, signaling the transition from “world” to “home.” But ergonomics matter here.
If the bench is too high, your feet dangle, making it hard to tie laces. If it’s too low, it’s a struggle to stand up for older relatives. The sweet spot is generally between 17 and 19 inches off the finished floor.
You also need to decide on the storage under the bench.
- Open Cubbies: Great for kids and quick access, but visually “busy.”
- Drawers: Clean look, but expensive to build and hardware can interfere with the baseboard heaters or rugs.
- Flip-Top Bench: AVOID. You might think it offers great storage, but you have to remove the cushions and everyone sitting on the bench just to get a pair of boots. It becomes a black hole where items go to die.
If you are struggling with the specific measurements, looking into ergonomics of entryway benches storage seating will save you from building a beautiful bench that nobody actually wants to sit on.
Step 5: The “Drop Zone” Mechanics
This is the secret sauce. The “Drop Zone” is a designated area at waist height (about 36-42 inches) specifically designed for the contents of your pockets. Keys, wallets, sunglasses, and phones.
Without a Drop Zone, these items migrate to the kitchen island, creating clutter creep.
In your built-in design, carve out a niche or a small shelf specifically for this. Even better, integrate technology. I personally love installing a hidden charging strip inside a drawer or at the back of a cubby. It keeps the cords hidden and ensures your devices are charged when you leave the house.
If you want the best experience, I highly recommend checking out the Luminoodle Under Cabinet Lighting. It’s perfect for illuminating these niches, ensuring you aren’t fumbling for keys in the dark.
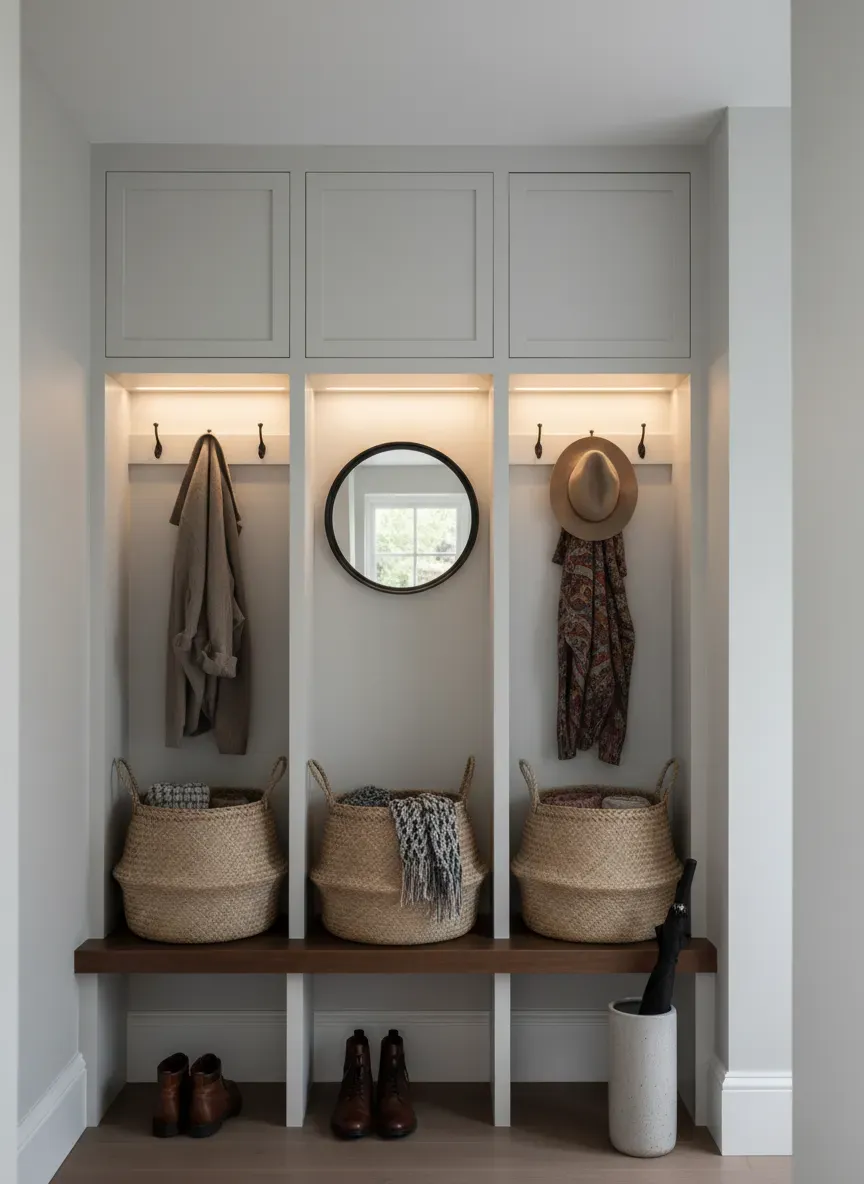
Step 6: Vertical Integration and “Dead Space”
We briefly touched on ceiling height, but let’s drill down on the upper echelon of your built-in. This is often wasted space, but in a smaller home, it’s prime real estate for seasonal rotation.
Design the upper cabinets with solid doors (to hide the mess) and use them for off-season storage. Beach towels in winter; heavy wool blankets in summer. Because this area is hard to reach, do not use it for anything you need weekly.
The Ladder Rail: For homes with exceptional ceiling height (10ft+), consider installing a rolling library ladder. It turns the storage into a statement piece and makes the upper reaches accessible. Just ensure your floor space can accommodate the ladder’s footprint.
Step 7: Family-Centric Accessibility
If you have children, your built-in needs to grow with them. A common failure point is installing hooks at adult height (60-64 inches) and expecting a six-year-old to use them. They won’t. They physically can’t.
The Two-Tier Hook System: Install one row of robust double hooks at the standard adult height. Then, install a second row (or specialized knobs) at about 36-40 inches. This allows children to hang their own backpacks and jackets. As they grow, the lower hooks transition to holding bags, scarves, or dog leashes.
This is a core tenet of designing a kid-friendly entryway with low maintenance in mind. If the system is too complex or physically out of reach, the floor becomes the default storage unit.
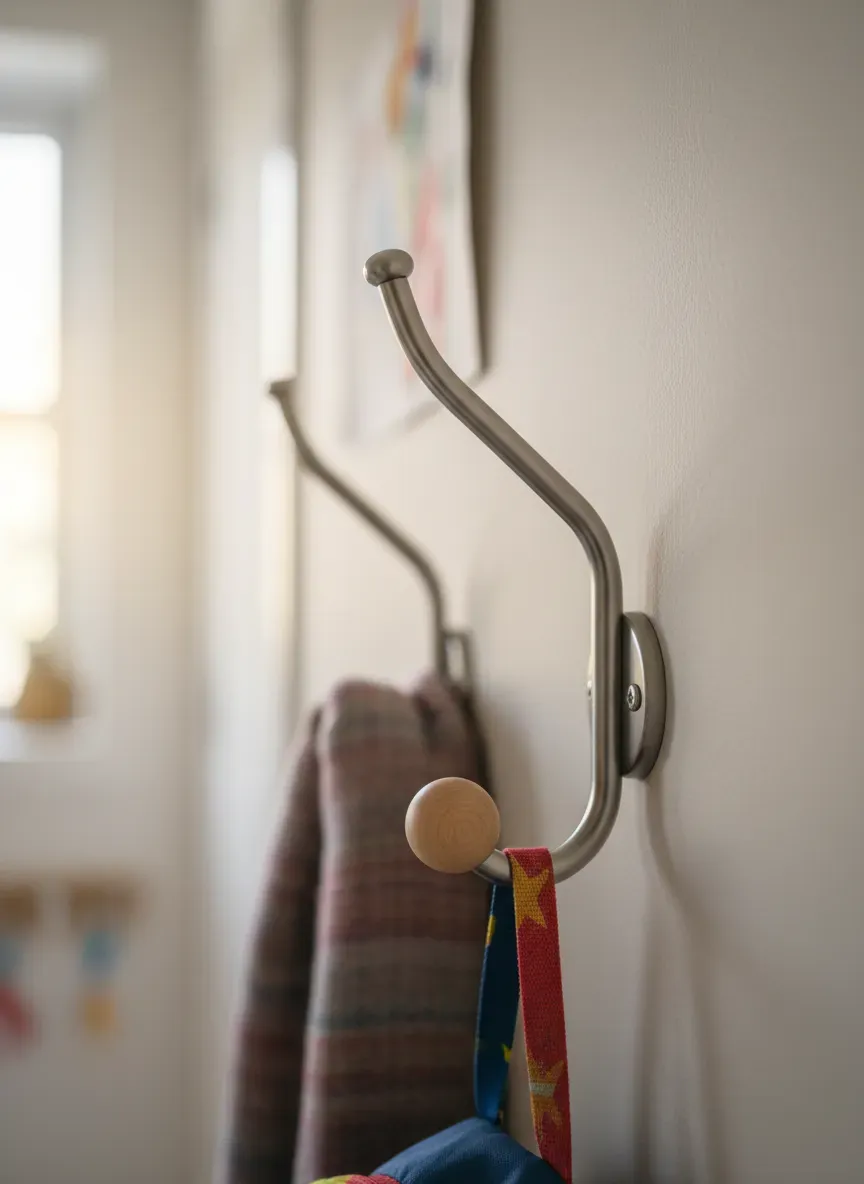
Step 8: Hardware and “The Jewelry”
You can build a cabinet out of the finest walnut, but if you put flimsy, cheap hooks on it, the whole project feels budget. Hardware is the jewelry of the room. It’s the tactile interface—the thing you touch every day.
For heavy winter coats and loaded backpacks, you need cast metal hooks, not stamped sheet metal. Look for hooks with a “return” or a deep curve to prevent items from sliding off.
The Bottom Line: Don’t skimp here. Spend the extra $50 on high-end hardware. It changes the entire tactile experience of the unit.
For a sleek, modern look that can hold significant weight, I often specify the Richelieu Hardware Contemporary Metal Hook. It has the structural integrity to hold a wet wool coat without bending, which is a common issue with big-box store finds.
Step 9: Tackling Architectural Quirks
Not everyone has a perfectly square mudroom waiting to be filled. Often, we are dealing with the space under a staircase or a weird alcove near the garage door.
Under the Stairs: This is the ultimate puzzle. Standard square cabinets waste the triangular geometry of a staircase. Instead, look into pull-out “towers”—tall, vertical drawers that slide out on heavy-duty runners. This allows you to utilize the full depth of the space under the stairs (often 3 feet or more) which would otherwise be a dark cavern.
If you are dealing with this specific geometry, researching techniques for maximizing entryway storage under stairs is mandatory. It requires different joinery and hardware than a standard wall unit.
Radiators and Vents: Never block a heat source. If your built-in must go over a radiator, you need to incorporate metal grilles into the toe kick or the bench face to allow airflow. Ignoring this will warp your wood and burn out your HVAC system.
Step 10: The Finish and Aesthetics
The final step in our ultimate blueprint for built-in entryway organization: 10 planning steps is the finish. This determines whether your project looks like a high-end custom job or a weekend warrior experiment.
Scribing: Walls are never straight. Floors are never level. If you just push a square cabinet against a wall, you will have ugly gaps. You must “scribe” the unit—shaping the filler pieces to match the contours of your wonky walls. This seamless connection is the hallmark of professional joinery.
Paint vs. Stain:
- Paint: Use a high-quality enamel or urethane-based paint. These cure harder than standard latex wall paint and resist scuffing.
- Stain: Shows off the grain but requires better quality wood.
To keep the open cubbies looking curated rather than chaotic, utilize uniform baskets. This hides the visual noise of gloves and beanies. I prefer natural textures to soften the hard lines of the cabinetry. The StorageWorks Water Hyacinth Baskets are exceptionally durable and sized perfectly for standard 12-14 inch shelving.
Key Takeaways for Execution
- Audit First: Don’t build for a fantasy life; build for your reality.
- Depth Matters: 15-18 inches is the sweet spot for flow and function.
- Go High: Floor-to-ceiling designs maximize storage and minimize cleaning.
- Material Science: Use plywood for the box, hardwood for the bench, and MDF for the paint grade facings.
- Light It Up: Integrated lighting transforms a closet into a feature.
The Financial and Mental ROI
A custom built-in entryway is an investment. It costs money and time. But the return is immediate. There is a palpable shift in your mood when you walk into a home that has a place for everything. The visual noise quiets down. The frantic search for keys ends.
By following this blueprint, you aren’t just stacking wood; you are engineering a smoother departure and a warmer welcome every single day. The permanence of a built-in signals that this house is handled, organized, and designed with intention.
Start with the audit. Measure your shoes. Watch your family. The perfect design is hiding in those details, waiting for you to build it.