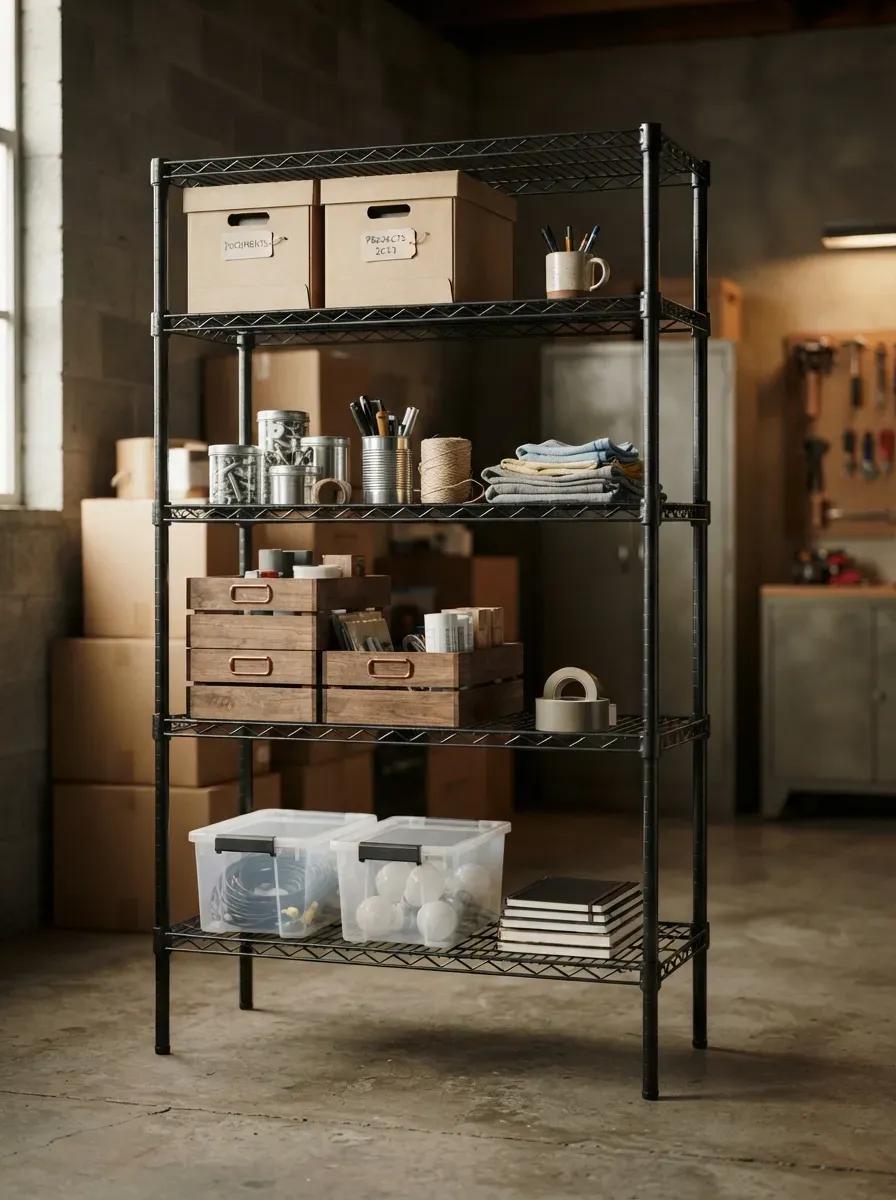
10 Clever Storage Room Ideas to Completely Transform How You Organize
Discover 10 clever storage room ideas and organization hacks that actually work. From vertical shelving to QR code inventory systems, learn exactly how to organize a storage room once and for all.
Jul 28, 2026 · Linda Wise
5 min readYou open the storage room door looking for one item — a box of holiday lights or a spare light bulb — and instead you’re met with an avalanche of unlabeled bins, a teetering stack of cardboard boxes, and three items that shouldn’t even exist in your home anymore. You grab what you need (maybe), kick a few things back in, and shut the door as fast as possible.
Sound familiar? You’re not alone, and the room is not the problem. The system — or lack of one — is.
A well-executed set of storage room ideas can transform a chaotic, anxiety-inducing black hole into one of the most functional rooms in your home. The right storage room organization strategy doesn’t just give you more space. It gives you time, mental clarity, and the ability to actually find things when you need them.
This guide delivers 10 battle-tested, practical storage ideas that address the real reasons storage rooms fail: poor vertical utilization, opaque containers, zero zoning, and no inventory system. Whether you’re working with a basement utility room, a hallway closet, or a dedicated garage storage area, these strategies will work.
Quick Comparison: Top Picks
Before diving in, here are the three foundational products every optimized storage room needs.
| Product | Best For | Rating | Check Price |
|---|---|---|---|
| Heavy-Duty 5-Tier Metal Wire Shelving | Structural backbone shelving | ⭐⭐⭐⭐⭐ | View on Amazon |
| IRIS USA Clear Plastic Storage Bins with Lids | Replacing cardboard boxes | ⭐⭐⭐⭐½ | View on Amazon |
| FLEXIMOUNTS Overhead Garage Storage Rack | Ceiling-level seasonal storage | ⭐⭐⭐⭐⭐ | View on Amazon |
Why Most Storage Rooms Fail (And How to Fix Them)
Before implementing any storage room ideas, you need to understand the root cause of the chaos. Most storage rooms fail for three predictable reasons:
- 2D Thinking in a 3D Space. Homeowners think in square feet, not cubic feet. A 10×10 room with 8-foot ceilings contains 800 cubic feet of volume — but most people only use the bottom two feet, leaving 75% of usable space completely empty.
- Opaque Containers. When you can’t see inside a bin, you can’t find what you’re looking for, so you stop putting things away properly because it feels pointless.
- No Zone System. When everything is stored everywhere, retrieval becomes a random-access scavenger hunt. Without intentional zones, entropy always wins.
Fix these three things, and everything else gets easier.
1. Scale Vertically with Industrial-Grade Wire Shelving
If you take only one actionable storage tip from this guide, make it this: stop stacking bins directly on the floor and start building vertically.
Floor-stacking destroys your storage capacity in two ways. First, stacked bins bow under their own weight, cracking lids and eventually exposing contents to moisture and pests. Second, every time you need something at the bottom of a stack, you’re doing a full extraction — lifting 40 pounds of plastic just to get to the item you actually need.
The single most impactful upgrade for any storage room is a set of Heavy-Duty 5-Tier Metal Wire Shelving units placed along every perimeter wall.

Why Wire Shelving Wins Every Time
- Air Circulation: Wire shelves don’t trap moisture the way solid wood or MDF does, which is critical for basement storage rooms prone to humidity.
- Dust Management: Dust falls through the gaps to the floor below rather than accumulating on a flat shelf surface.
- Visual Transparency: Standing below a wire rack, you can read labels on the bottom or sides of bins above you without moving anything.
- Load Capacity: Quality wire racks hold up to 800 pounds per shelf — more than enough for heavy toolboxes, cast-iron cookware, or emergency water storage.
Installation tip: Leave a 3-inch gap between the back of the shelf unit and the wall. This prevents stagnant air pockets that can encourage mold growth on drywall behind the shelving.
2. Replace Every Cardboard Box with Clear, Latching Plastic Bins
Cardboard is the #1 enemy of a well-organized storage room.
Cardboard is hygroscopic — it literally absorbs moisture from the surrounding air. This makes it an ideal nesting environment for silverfish, spiders, and mice. Over time, cardboard loses structural integrity, collapses, and spills its contents. Items stored in cardboard boxes are also invisible, which means every retrieval becomes a guessing game.
The fix is simple: replace every cardboard box in your storage room with IRIS USA Clear Plastic Storage Bins with Lids.
The Visual Access Principle
The difference in daily usability is dramatic:
[Cardboard Box] → Unknown contents → Open lid → Wrong box → Frustration
[Clear Plastic Bin] → Instant visual ID → Direct access → Done in 10 seconds
When shopping for bins, prioritize:
- Heavy-duty latching handles that compress the lid seal to keep out pests and humidity
- Gasket-sealed lids for basement environments or anywhere humidity exceeds 50%
- Standardized sizing so bins stack neatly without wobbling on wire shelving
These are not just storage hacks — they are the structural foundation of a functional system.
3. Reclaim the Ceiling with an Overhead Storage Rack
The zone above your head is the most wasted real estate in any storage room. The ceiling plane — from 7 feet up to the joists — is ideal for items you access once or twice per year: holiday decorations, patio cushions, inflatable pool toys, camping tents, and ski equipment.
Mounting a FLEXIMOUNTS Overhead Garage Storage Rack to your ceiling joists immediately reclaims 16–32 square feet of floor space and frees up your primary shelving units for more frequently accessed goods.
Critical safety note: Always use a stud finder to locate the exact center of ceiling joists before drilling. Never use drywall anchors for overhead racks. Install with heavy-duty steel lag bolts and perform a pull-test (hang your full body weight from the rack) before loading it with any items.
The Vertical Hierarchy — A Complete Storage Room Framework
Use this vertical zoning framework across your entire storage room:
| Height Zone | What Belongs Here | Example Items |
|---|---|---|
| Ceiling (7ft+) | Lightweight, seasonal, infrequent | Holiday wreaths, patio cushions, kayak paddles |
| Eye Level (4–6ft) | Moderate weight, regular use | Camping gear, hobby supplies, tools |
| Waist Level (2–4ft) | Heavy, frequently accessed | Power tools, pantry overflow, bulk household goods |
| Floor Level (0–2ft) | Extra-heavy, oversized | Rolling coolers, suitcases, generators |
Apply this logic universally and your storage room will never feel overwhelming again.
4. Mount a Pegboard Wall for Geometric Outliers
Not everything belongs in a bin. Rakes, shovels, extension cords, folding chairs, brooms, and ladders are what we call “geometric outliers” — their shapes make them impossible to contain in a standard rectangular bin. Left without a designated home, they end up leaned against walls, waiting to tip over and create a dangerous domino effect.
A heavy-duty steel or high-density fiberboard pegboard system mounted to one full wall solves this immediately.

How to Zone a Pegboard System
Don’t throw hooks on randomly. Create defined functional zones:
- Electrical Zone: J-hooks for extension cords, power strips, and cable organizers
- Maintenance Zone: Specialized pegboard clips for hammers, wrenches, and screwdrivers
- Cleanup Zone: Long broom hooks, dustpan holders, and microfiber cloth rails near the door
Pro storage hack: Use a permanent marker or paint pen to trace the outline of each tool on the pegboard behind it. This “shadow boarding” technique creates an immediate visual audit — you can see at a glance which tool is missing and where it belongs when you’re done using it.
5. Zone the Room Using the Grocery Store Model
Here is one of the most powerful storage room ideas that nobody talks about: design your storage room the same way a grocery store is designed.
Grocery stores place the most frequently purchased staples (milk, eggs, bread) at the very back of the store. They put high-margin impulse items at eye level and bulk goods on the lowest shelves. Every placement decision is intentional and behavior-driven.
Apply that same logic to your storage room by establishing three clear retrieval zones.
The Three-Zone Storage Room Framework
[ Storage Room Entrance ]
|
▼
ZONE A — High Frequency
(Items accessed weekly)
→ Pantry overflow, cleaning supplies, pet food, paper goods
|
▼
ZONE B — Medium Frequency
(Items accessed monthly or seasonally)
→ Sports gear, tools, hobby supplies, seasonal clothing
|
▼
ZONE C — Low Frequency
(Items accessed annually or for emergencies)
→ Tax documents, holiday décor, heirloom items, backup appliances
The logic is behavioral: if your most-used items are at the back of the room, you’ll eventually stop putting them away properly because retrieval feels like too much effort. Make the path of least resistance the organized path, and the system maintains itself.
6. Use Tension Rods as Vertical Dividers
One of the most underrated storage hacks costs less than $10 and takes five minutes to implement: tension rods used as vertical dividers inside your shelving units.
This technique is ideal for flat, awkward items that resist stacking cleanly:
- Baking sheets and wire cooling racks
- Cutting boards and serving boards
- Picture frames and art canvases
- Extra table leaves
- Folded step stools
By storing these items vertically — like books on a library shelf — you can extract any single piece without disturbing everything else. No more lifting a six-pound cast iron lid every time you want a baking sheet.
For wrapping paper, architectural blueprints, or rolled shipping materials, install a tension rod horizontally between two shelf uprights or wall studs. The rolls hang suspended, organized, and wrinkle-free.
7. Maximize the Back of the Door
The back of your storage room door is a flat, vertical surface with roughly 6 square feet of usable space — and in most homes, it’s completely ignored.
A heavy-duty, over-the-door pocket organizer transforms this dead space into the most accessible spot in the room: an “instant grab zone” for small, high-use items that you need quickly without going deep into the storage area.
What to Store in Your Door Organizer
| Category | Items |
|---|---|
| Hardware | Tape measures, zip ties, picture hooks, small drill bits |
| Utility | Flashlights, spare batteries, lightbulbs, safety glasses |
| Adhesives | Super glue, duct tape, caulking tubes, wood glue |
| Seasonal Quick-Grab | Sunscreen in summer, hand warmers in winter |
The result: you run in, grab what you need, and run out in 15 seconds — without triggering a chain reaction of toppling bins.
8. Deploy Rolling Utility Carts for Portable Workstations
Static shelving holds most of what you need, but some tasks require your supplies to move with you. Crafting projects, car maintenance, woodworking, gardening prep — these activities often happen in different locations throughout the house or garage.
A heavy-duty rolling utility cart gives you a dedicated, portable workspace that lives in the storage room when not in use but rolls wherever you need it.

What to Look for in a Storage Cart
- All-metal construction: Plastic carts warp under heavy tools or liquid containers
- Locking casters on at least two wheels: Essential for working on sloped driveways or garage floors
- Tray lips at least 2 inches deep: Prevents spray cans and small parts from rolling off when crossing a threshold
When your project is complete, roll the cart back to its designated parking spot — a specific, marked area on the storage room floor that no other item encroaches on. This “parking spot” principle is one of the best storage tips for maintaining any mobile system long-term.
9. Color-Code Fabric Bins for All Soft Goods
Clear plastic bins are unmatched for hard, heavy, utility items. But for textiles — spare blankets, winter coats, seasonal throw pillows, sleeping bags — plastic bins are the wrong choice. Sealed plastic can trap residual moisture inside fabric items, leading to a stale, musty smell that seeps into even the most pristine linens.
For all soft goods, use breathable canvas or non-woven fabric bins instead. The woven structure allows air to circulate continuously, which prevents odor buildup and fabric degradation over time.
The Color-Code System for Textile Storage
Apply a consistent color system across all your fabric bins so you can identify categories at a glance:
- 🔵 Blue Bins: Winter gear — snowsuits, thermal blankets, wool socks, ski accessories
- 🟢 Green Bins: Outdoor/camping textiles — sleeping bags, hammocks, travel towels
- 🟡 Yellow/Cream Bins: Guest linens — spare sheets, pillowcases, extra bath towels
- 🔴 Red Bins: Emergency kit — first aid supplies, emergency blankets, flashlight, water purification
For a finishing touch, drop a cedar block or a sachet of dried lavender into each bin. Cedar naturally repels moths and insects; lavender keeps fabrics smelling fresh for months. This small step protects your investment in quality textiles throughout years of storage.
10. Build a Digital QR-Code Inventory System
You can implement every storage room idea on this list and still waste twenty minutes searching for a single item — if you have no inventory system. Organization without cataloging is just slightly more organized chaos.
The most powerful storage room organization upgrade available today costs nothing and takes a single afternoon to set up: a QR-code-based digital inventory system.
How to Set Up Your Storage Room Inventory
Step 1 — Pack your bin. Load items into a clear, latching container as you normally would.
Step 2 — Photograph the contents. Lay items flat, take a photo with your smartphone. This photo becomes your visual record.
Step 3 — Assign a bin number. Label the outside of the bin with a permanent number (e.g., “Bin #14”) and a QR code sticker.
Step 4 — Link and catalog. Scan the QR code with an app like Sortly, Boxy, or a simple Google Sheet. Upload the photo and add searchable keywords: “waffle maker, slow cooker, immersion blender, kitchen overflow.”
Step 5 — Assign a physical location. Note which shelf and level the bin lives on: “Shelf B, Level 3.”
The result: The next time you need the waffle maker, you search “waffle maker” on your phone, and within three seconds you know exactly where it is — Bin #14, Shelf B, Level 3 — before you even enter the storage room.
This system is the single highest-impact upgrade you can make to any storage room. It converts a physical, analog storage space into a searchable digital database.
The 3 Storage Traps That Derail Every Good System
Even after implementing all of these storage room ideas, certain habits will quietly unravel your progress. Recognize them early.
Trap 1: The “I Might Need This Someday” Fallacy
Every item in your storage room has a carrying cost. It takes up cubic volume, requires maintenance, and adds to your mental load. If you haven’t used something in the last 24 months, you are not storing it — you are hosting its slow decline. Be ruthless. Donate, sell, or discard items that no longer serve an active purpose.
The Rule: If it hasn’t been accessed in 2 years and doesn’t have sentimental or emergency value, it leaves the room.
Trap 2: Skipping the Label
Every single time, we tell ourselves: “I’ll remember what’s in here.” We won’t. Six months from now, that bin looks identical to the twelve other bins on the same shelf. Take thirty extra seconds and write a clear, specific label. Not “Kitchen” — write “Waffle maker, slow cooker, cake pans.” Future-you will be genuinely grateful.
Trap 3: Ignoring Moisture
The most beautifully organized storage room is worthless if it’s damp. Humidity destroys cardboard, warps wood, rusts metal, and creates mold spores that spread through textiles.
- Keep humidity below 50% using a passive chemical dehumidifier (DampRid) or a small electric unit
- Never place any bin, box, or bag directly on a concrete floor — concrete wicks moisture upward. Use wire shelving, a wooden pallet, or plastic risers to create an air gap
How to Organize a Storage Room: A Weekend Action Plan
Ready to put all of these storage tips into action? Here’s a realistic weekend timeline:
Saturday Morning — The Purge (3–4 hours)
Remove every item from the storage room. Sort into four piles: Keep, Donate, Sell, Trash. Be ruthless. Discard anything damaged, duplicate, or unused for more than 2 years.
Saturday Afternoon — The Infrastructure (3–4 hours)
Assemble and install wire shelving units. Mount the pegboard wall. Install ceiling rack if applicable. Add the over-the-door organizer.
Sunday Morning — The System (3–4 hours)
Transfer all “Keep” items from cardboard boxes into clear plastic bins or fabric bins (depending on contents). Apply color-coding for textiles. Implement vertical zone hierarchy.
Sunday Afternoon — The Catalog (2 hours)
Label every bin. Take photos of contents. Set up your digital inventory system. Assign shelf locations and enter everything into Sortly or your preferred app.
Total investment: One focused weekend. Payoff: A storage room you can maintain effortlessly for years.
Key Storage Tips for Long-Term Success
- Think in 3D: Every cubic foot of vertical space above your head is usable. Install shelving all the way to the ceiling.
- See-Through is Non-Negotiable: Clear bins with latching lids eliminate search time and protect contents from pests and moisture.
- Zone Before You Fill: Assign frequency zones before putting a single item back. Daily, monthly, and seasonal items need dedicated regions.
- Catalog Everything: A digital inventory turns your storage room into a searchable database. You should know where every item is before you walk through the door.
- Control the Climate: Humidity is the silent killer of every storage system. Monitor it, manage it, and never let it exceed 50%.
- Run a Seasonal Purge: Set a calendar reminder every 90 days for a 15-minute review. Remove anything that doesn’t belong, discard anything damaged, and donate anything you no longer need.
Organizing a storage room is not a one-time weekend project — it is an ongoing system. But once the infrastructure is in place (shelving, clear bins, zones, labels, digital inventory), maintenance takes minutes rather than hours. The reward is not just a tidy room. It is the ability to find anything you own in under 60 seconds, the peace of mind that comes from knowing your belongings are protected, and the quiet satisfaction of walking into a room that works exactly the way it should.
Frequently Asked Questions
What are the best storage room ideas for a small space?
The best storage room ideas for small spaces are: mount industrial wire shelving all the way to the ceiling, install an overhead ceiling rack for seasonal items, attach a pegboard wall for tools and long-handled items, and use an over-the-door organizer on the back of the door. These four moves alone can triple your usable capacity without expanding the footprint.
How do you organize a storage room from scratch?
To organize a storage room from scratch: 1) Remove everything and purge items not used in two years. 2) Install floor-to-ceiling wire shelving along the perimeter walls. 3) Divide the room into three frequency zones (daily, monthly, seasonal). 4) Transfer all loose items into clear, latching plastic bins. 5) Label every bin with contents and assign a physical location number. 6) Store heavy items at waist level and lightweight seasonal gear at ceiling level.
What are the most useful storage hacks for a cluttered storage room?
The most effective storage hacks include: using tension rods vertically as dividers for flat items like baking sheets, mounting pegboards for geometric items that won't fit in bins, color-coding fabric bins for soft goods by category, hanging an over-the-door pocket organizer for small hardware items, and implementing a QR code inventory system so you can find any item in under 60 seconds without physically entering the room.
What shelving is best for a storage room?
Heavy-duty metal wire shelving is the best choice for a storage room. It allows air circulation to prevent mold, lets dust fall through to the floor, provides visual transparency so you can see bin labels from below, and supports up to 800 pounds per shelf. Solid wood or MDF shelves trap moisture and are prone to sagging under heavy loads in basement environments.
How do I stop my storage room from getting cluttered again?
To maintain a clutter-free storage room long-term: enforce a strict 'one-in-one-out' rule, conduct a 15-minute seasonal purge every 3 months, never allow items to be placed on the floor without a designated shelf location, use a digital inventory system (like Sortly or a Google Sheet with QR codes), and keep a donation box near the entrance so items you're ready to release leave immediately.
Top Picks: Best Entryway Essentials
Editor's shortlist with verified ratings. Prices and availability below — clicking an Amazon link earns us a small commission at no extra cost to you.
| # | Product | Rating | Reviews | Tag | Check Price |
|---|---|---|---|---|---|
| 1 | Vasagle Industrial Entryway Bench | 8,420 | Top Pick | View on Amazon | |
| 2 | Crosley Furniture Seaside Hall Tree | 5,410 | — | View on Amazon | |
| 3 | Seville Classics 12-Pair Shoe Rack | 6,420 | Best Storage | View on Amazon | |
| 4 | Franklin Brass Wall Hooks (5-Pack) | 9,820 | — | View on Amazon | |
| 5 | Simplihome Artisan Solid Wood Bench | 3,127 | Editor's Pick | View on Amazon |
Affiliate disclosure: As an Amazon Associate we earn from qualifying purchases.
Tag: entreyway-20 — change in src/data/topPicks.ts.