Common Assembly Mistakes to Avoid with Entryway Benches with Storage
Master the art of furniture assembly. Learn the critical errors to avoid when building your entryway bench with storage to ensure durability and style.
Feb 4, 2026 - Written by: linda wise

The entryway bench with storage is a quintessential piece of modern home furniture. It marries form and function, offering a welcoming aesthetic while simultaneously tackling the perennial problem of shoe and accessory clutter. However, between the vision of a perfectly organized foyer and the reality of a finished piece lies the often-dreaded task of assembly.
Whether you have purchased a high-end solid wood piece or a budget-friendly flat-pack laminate model, the assembly process is the single most critical factor in determining the longevity and stability of your furniture. A bench that is intended to support the weight of adults sitting to tie their shoes, while housing heavy winter boots or bins of equipment, requires structural integrity that can only be achieved through precise construction.
Unfortunately, many homeowners rush this process, treating it as a hurdle to clear rather than a foundational step in home improvement. The result is often a wobble, a misaligned drawer, or catastrophic failure under load. This guide delves deep into the mechanics of furniture assembly, outlining the sophisticated yet common errors to avoid to ensure your entryway storage solution stands the test of time.
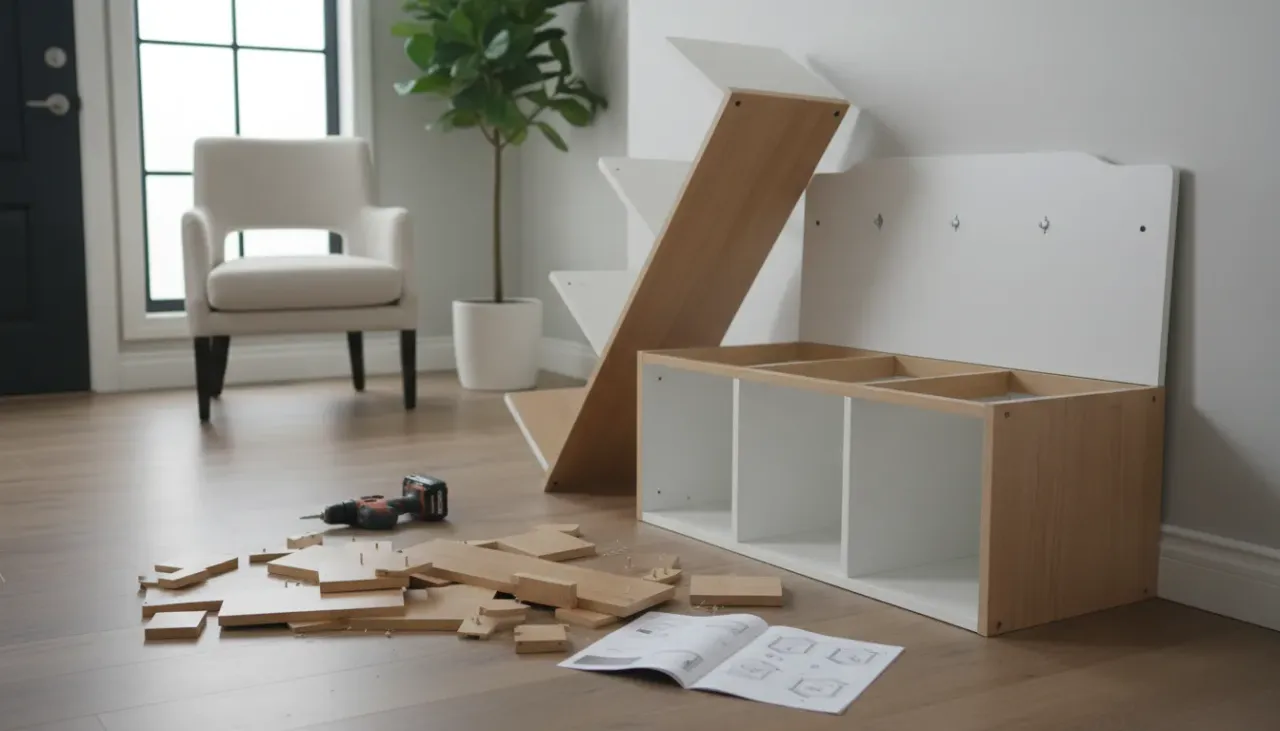
The Pre-Assembly Phase: Where Failures Begin
Most assembly errors occur before a screwdriver is even lifted. The psychological approach to flat-pack furniture often involves impatience. We see the box, we imagine the finished product, and we attempt to bridge that gap as quickly as possible. This haste is the enemy of quality.
Neglecting the Inventory Audit
Upon opening the box, the immediate impulse is to start connecting large pieces. However, manufacturers include a “parts list” or “inventory checklist” for a reason. Shipping logistics are complex, and it is not uncommon for a single bag of cam locks or a specific set of dowels to be missing.
If you discover a missing component halfway through the build, you are forced to stop. This leads to partially assembled furniture sitting in your hallway, collecting dust and subjected to accidental bumps that can stress joints which are not yet fully secured. Before you begin, lay out every board, screw, bolt, and washer. Match them against the manual’s quantity list. This serves a dual purpose: it ensures you have everything needed to finish the job, and it familiarizes you with the subtle differences between similar-looking hardware.
The Workspace Environment
Assembly requires space—significantly more space than the footprint of the finished bench. A common mistake is attempting to build the bench in the exact narrow hallway where it will reside. This restricts your movement, forcing you to assemble components at awkward angles.
Poor ergonomics lead to cross-threading screws and improper torque application. Furthermore, assembling on a hard surface like tile or hardwood without protection is a recipe for disaster. You risk scratching the finish of your new bench or damaging your floors. Always assemble on a carpet or use the flattened cardboard packaging as a protective mat.
Ignoring the “Exploded View” Nuances
Modern instruction manuals rely heavily on visual diagrams, often devoid of text to cater to international markets. These “exploded view” drawings are precise engineering schematics. A common error is glancing at the image rather than studying it.
Pay close attention to the orientation of raw edges versus finished edges in the diagrams. A board installed backward might fit physically, but it will expose unfinished particle board to the front of the unit, ruining the aesthetic. Worse, pre-drilled holes for subsequent steps (like drawer runners or hinges) may end up on the wrong side, forcing you to disassemble the entire unit to correct the mistake.
Hardware Mishaps: The Mechanics of Fasteners
The hardware included with your entryway bench is engineered for specific tolerances. Misusing these fasteners is the leading cause of structural instability.
The Cam Lock Conundrum
If your bench is flat-pack furniture, it almost certainly utilizes a cam lock and cam bolt system. This is an ingenious invention for ready-to-assemble furniture, but it is frequently misunderstood.
The mistake involves two extremes: under-tightening or over-tightening. The cam bolt (the screw-like part) should be seated firmly but not torqued so hard that it cracks the substrate. The cam lock (the circular disc) needs to be inserted with the arrow pointing toward the bolt hole.
The critical error occurs when users do not turn the cam lock a full 180 degrees (or as indicated) to engage the locking mechanism. If the cam does not grab the head of the bolt securely, the joint will remain loose. Over time, the racking motion of people sitting on the bench will cause the joint to separate, potentially leading to collapse. Conversely, forcing the cam lock past its stopping point can shatter the cheap zinc alloy, rendering the connector useless.
The Danger of Power Drills
We live in an era of power tools, and it is tempting to reach for a high-powered 18V impact driver to speed up assembly. For most entryway benches, especially those made of MDF or particle board, this is a fatal mistake.
Particle board is a composite material held together by resin. High-speed drilling generates friction and heat, which can pulverize the wood fibers and melt the resin. Furthermore, the torque from a power drill is often too high, stripping the screw hole instantly. Once a hole is stripped in particle board, the screw will never hold tight again.

For the best results, use a handheld screwdriver or a low-voltage electric screwdriver with an adjustable torque setting. Set the clutch to the lowest setting that drives the screw, ensuring the tool slips before it strips the wood.
- Recommended Tool: Cordless Screwdriver with Torque Control
Mismatched Screw Lengths
Hardware packs often contain screws that differ in length by only a few millimeters. Using a 30mm screw in a hole designed for a 25mm screw is a destructive error. The screw will travel too deep, puncturing the finished veneer on the other side of the panel. This “bubbling” or breakthrough is irreversible and unsightly. Always measure your screws against the manual’s scale (usually printed on the first page) before driving them.
Structural Integrity: Building the Frame
The frame of your entryway bench must withstand significant dynamic loads. As people sit, shift weight, and stand up, the bench endures lateral and vertical stress.
The Role of Wooden Dowels
Wooden dowels are not filler; they provide shear strength, preventing the panels from sliding against each other. A common mistake is inserting them dry. While many manuals do not explicitly call for glue, adding a drop of wood glue to the dowel holes significantly increases the rigidity of the final piece.
However, the error can go the other way—too much glue. If you fill the hole, the hydraulic pressure created when inserting the dowel can split the wood. A small drop is sufficient. Furthermore, ensure the dowel is seated at the correct depth. If a dowel protrudes too far, it will prevent the mating panel from closing the gap, leaving an unsightly seam and a weak joint.
Misalignment of Panels
When joining two panels, there is often a tiny amount of “play” or wiggle room before the screws are tightened. If you tighten the screws while the edges are not perfectly flush, you create a “lip.”
This is not merely an aesthetic issue. If the bench has legs or a base that is slightly uneven due to misalignment, the stress will not be distributed evenly to the floor. Over time, this concentrated stress can cause the joints to fail. Use a carpenter’s square or simply your fingers to feel the joint alignment before applying the final torque to the fasteners.
Moving Parts: Drawers, Hinges, and Lids
Entryway benches with storage usually feature moving components. These are the most technically difficult parts to assemble and the most prone to user error.
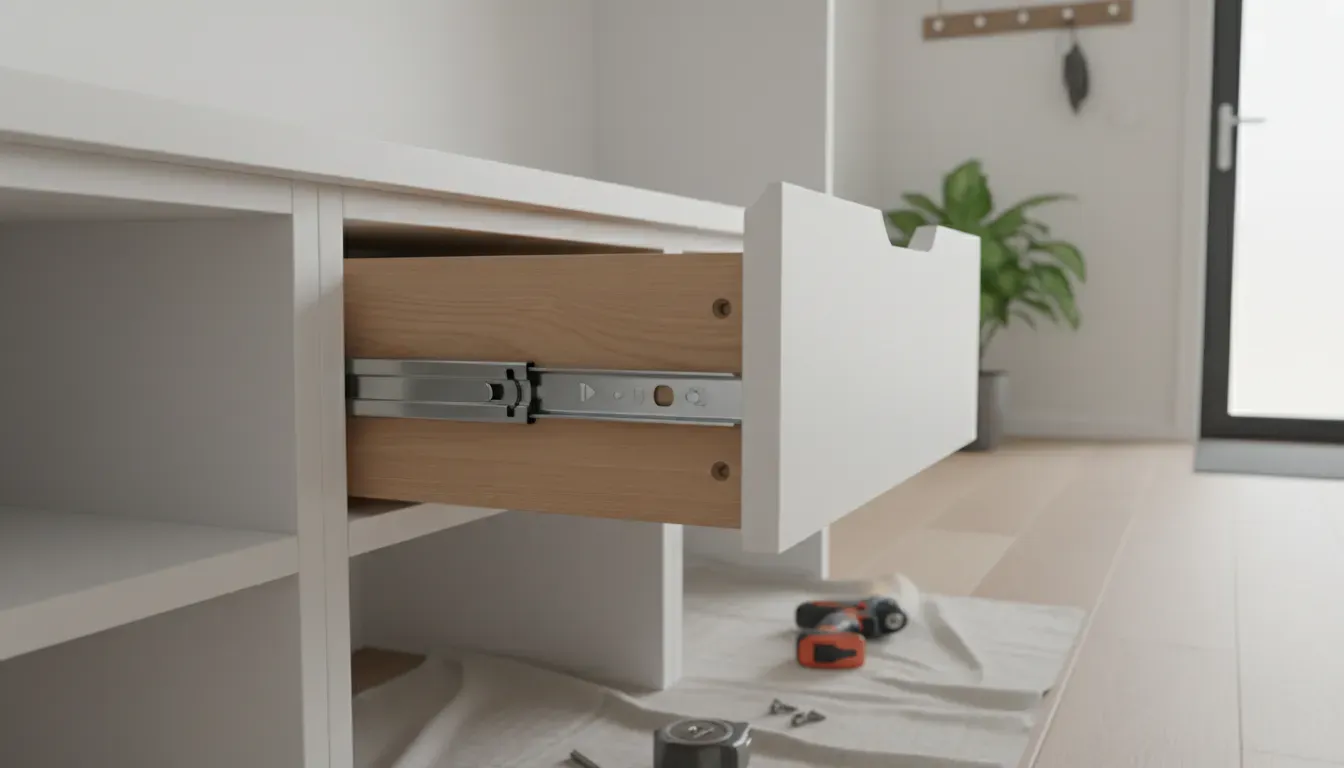
The Nightmare of Drawer Slides
Drawer runners (slides) are directional and come in pairs (left and right). They also separate into two parts: the “cabinet member” (attached to the bench frame) and the “drawer member” (attached to the drawer box).
The most frequent mistake is installing these upside down or backward. If installed backward, the drawer will not stop when pulled out, falling onto your toes. If installed upside down, the drawer simply won’t fit.
Look closely at the screw hole locations in the instructions. Manufacturers align specific holes with pre-drilled pilot holes. If you are forcing a screw into the wood where there is no pilot hole, you have likely aligned the slide incorrectly.
Hinge Adjustment Frustrations
If your bench has cabinet doors, you will likely encounter European-style hinges. These hinges are adjustable in three dimensions: up/down, left/right, and in/out.
A common mistake is assuming the doors should fit perfectly immediately after screwing them on. They almost never do. They will sag, rub against each other, or sit crooked. This is not a defect; it is a calibration requirement.
- Height Adjustment: Usually controlled by the screws mounting the hinge plate to the cabinet wall.
- Depth Adjustment: Controlled by the rear screw on the hinge arm.
- Lateral Adjustment: Controlled by the front screw on the hinge arm.
Failing to adjust these results in doors that scrape the frame, eventually damaging the finish and loosening the screws due to friction.
Lid Support and Soft-Close Mechanisms
For benches with a lift-top lid, the support mechanism is a safety-critical component. Heavy wooden lids can act like guillotines if the support fails.
The mistake here is improper tension adjustment or incorrect installation geometry. Gas struts or spring-loaded supports must be installed at the precise angle indicated. If the angle is off by even a few degrees, the lid may not stay open, or it may snap shut violently. If your bench comes with a standard hinge that allows the lid to slam, consider upgrading immediately to a soft-close support to protect children’s fingers.
- Recommended Upgrade: Soft Close Lid Support Hinge
The Overlooked Importance of the Back Panel
In many flat-pack storage benches, the back panel is a thin sheet of material, often folded in the box. It feels flimsy, leading assemblers to believe it is purely cosmetic. This is a massive misconception.
The Shear Strength Factor
The back panel provides “racking resistance.” Without it, a square box can easily deform into a parallelogram (wobble side-to-side) under load. The back panel squares up the entire unit and locks the geometry in place.
The Nailing Error
Attaching this panel usually involves dozens of tiny nails or small screws. The mistake is rushing this process. If you hammer a nail slightly askew, it misses the edge of the shelf or side panel and bursts through the interior of the storage compartment. This damages the laminate and leaves a sharp nail sticking out inside your storage area—a hazard for whatever you store there.
Take the time to mark the center lines of the shelves on the back of the panel with a pencil before nailing. This guide ensures every nail hits solid wood.
Safety and Anchoring
An entryway bench is often perceived as a low center-of-gravity furniture piece, leading many to skip wall anchoring. However, if the bench has a tall back with coat hooks (a hall tree configuration), it presents a significant tipping hazard.
Ignoring the Anti-Tip Kit
When you load the upper hooks with heavy winter coats and backpacks, the center of gravity shifts upward and forward. If a child climbs on the bench to reach a scarf, the unit can tip.
Discarding the anti-tip hardware included in the box is a negligent error. If your unit did not come with one, or if the included kit seems flimsy (often just a nylon zip tie), purchase a high-quality metal cable or strap system. Anchor the unit to a wall stud, not just the drywall.
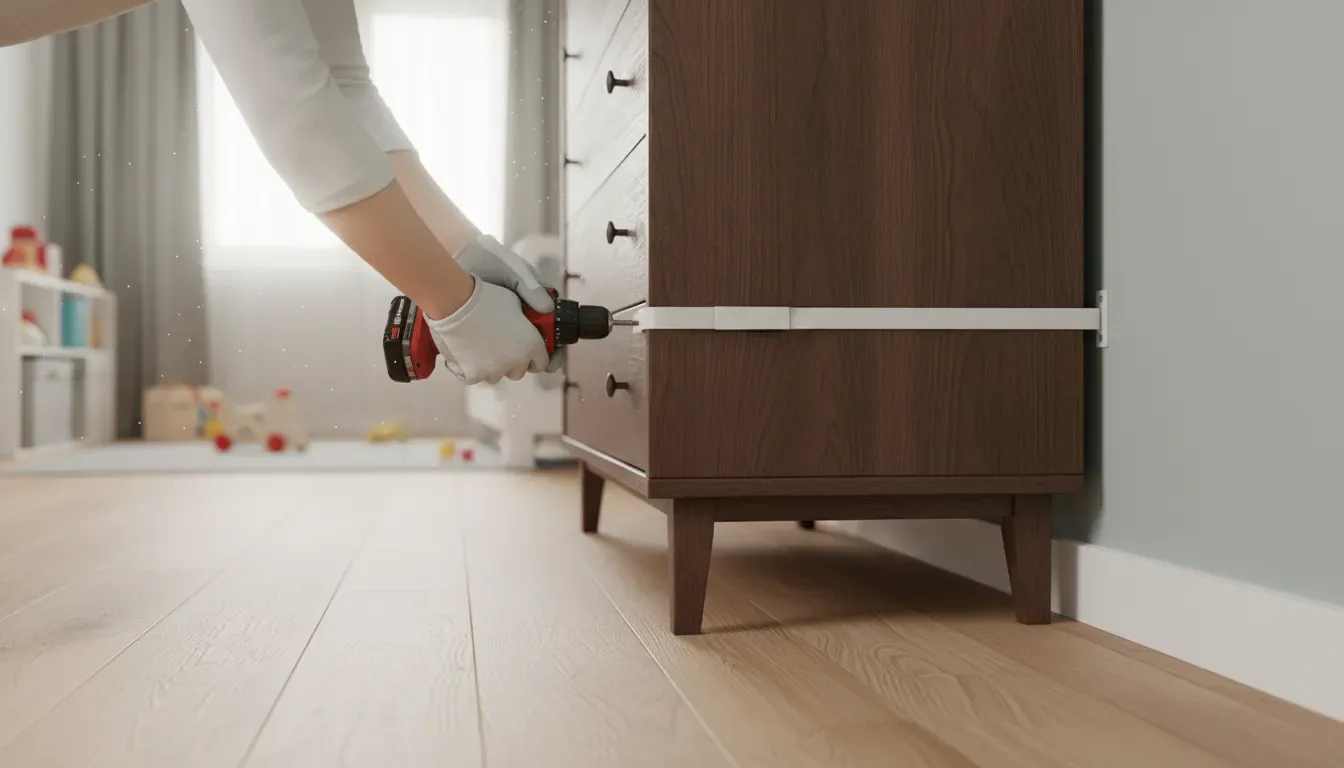
- Safety Essential: Furniture Anti-Tip Kit
Misunderstanding Weight Limits
Assembly instructions always list a maximum static weight load. A common mistake is treating this number as a suggestion rather than a limit. If the limit is 250 lbs, and two adults sit on it simultaneously to put on boots, you are exceeding the design parameters. This can cause the bottom panel to bow or the legs to splay. Respect the engineering limits of the materials.
Post-Assembly: The Break-In Period
You have tightened the last screw and placed the bench in your entryway. You might think the job is done, but there is one final mistake to avoid: neglecting the “settling” period.
The Re-Tightening Schedule
Wood and particle board adjust to humidity and temperature in your home. Additionally, as weight is applied to the bench, joints can settle and compress. Hardware that was tight on day one may be loose by day thirty.
A month after assembly, go through and check the cam locks and main structural bolts. You will likely find they can take another quarter-turn. Making this part of your maintenance routine ensures the bench remains rigid for years.
Protecting the Surface
Entryways are high-traffic zones involving wet coats, muddy boots, and keys being tossed onto surfaces. A common mistake is failing to protect the top surface immediately. If your bench is a painted or laminate finish, standing water from a wet umbrella can cause bubbling within hours.
Consider adding a cushion or a runner to the benchtop. Not only does this add to the aesthetic appeal of your decor, but it also acts as a barrier against moisture and scratches.
Conclusion
Assembling an entryway bench with storage is a project that rewards patience and precision. By avoiding the common pitfalls of rushing the inventory, misusing power tools, and neglecting the nuances of hardware mechanisms, you elevate a box of parts into a durable, functional piece of furniture.
Remember that the quality of the assembly is just as important as the quality of the materials. A budget bench assembled with expert care will often outlast a premium bench assembled haphazardly. Take your time, respect the engineering, and build a foundation for an organized, welcoming home.