How to Install Wall-Mounted Entryway Racks Securely on Drywall (No Studs Needed)
Master the art of hanging heavy coat racks without studs. Learn which anchors actually hold, step-by-step installation methods, and pro safety tips.
Feb 4, 2026 - Written by: linda wise

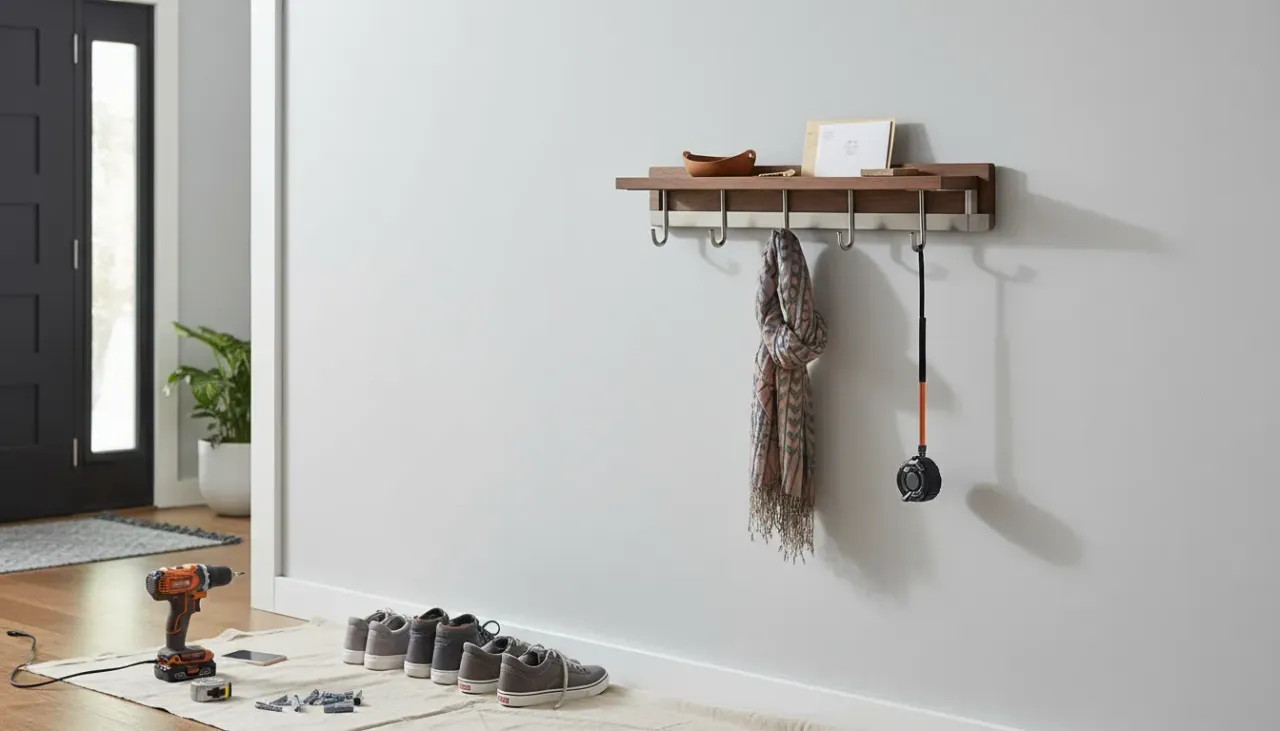
The entryway is the handshake of the home. It is the first space you interact with when you arrive and the last you see when you leave. However, it is also a magnet for clutter. Winter coats, heavy backpacks, dog leashes, and tote bags accumulate rapidly, turning a welcoming foyer into an obstacle course. The most elegant solution is invariably a wall-mounted rack. It utilizes vertical space, keeps floors clear, and adds an aesthetic element to the room.
There is, however, a common source of anxiety that stops many homeowners and renters from installing these fixtures: the location of the studs. It is a pervasive myth in home improvement that heavy items must always be anchored into a wooden stud. While securing a screw into solid lumber is the ideal scenario, the reality of interior design rarely aligns with the architectural spacing of wall framing. The perfect spot for your coat rack—centered above a bench or aligned with the door frame—often sits squarely over a hollow cavity of drywall.
Installing a load-bearing rack into drywall without proper reinforcement is a recipe for disaster. Standard plastic plugs will pull out, leaving unsightly gaping holes and damaged plaster. Yet, with the correct hardware and technique, you can install a heavy-duty entryway rack anywhere on your wall, stud or no stud, with complete confidence.
This comprehensive guide will walk you through the physics of drywall, the selection of high-grade anchors, and a professional installation process that ensures your storage solution stays put for years to come.
Understanding the Physics of Drywall and Dynamic Loads
Before selecting hardware, it is critical to understand what you are fastening into. Drywall, also known as plasterboard or sheetrock, consists of a layer of gypsum plaster pressed between two thick sheets of paper. It is designed to be fire-resistant and provide a smooth surface for paint, but it lacks significant structural integrity on its own.
When you drive a standard screw directly into drywall, the threads merely crumble the gypsum. Any weight applied to that screw acts as a lever. As the coat rack pulls down (shear force) and pulls away from the wall (tension), the screw acts like a knife, slicing through the brittle gypsum core.
Static vs. Dynamic Loads
The challenge with entryway racks is that they endure “dynamic loads.” A picture frame is a static load; it hangs securely and is rarely touched. A coat rack, conversely, is subjected to constant movement. You yank a coat off a hook, children throw heavy backpacks onto it, and wet wool jackets add significant weight.
A standard coat rack might need to support 30 to 50 pounds of static weight, but the force applied when someone hurriedly grabs a jacket can spike much higher. Therefore, the anchoring solution you choose must be rated significantly higher than the actual weight of the items you plan to hang.
Selecting the Right Hardware: Beyond the Plastic Plug
If you purchase a coat rack from a big-box store, it will likely come with a small packet of screws and conical plastic anchors. Discard these immediately. They are intended for light usage and will fail under the weight of outerwear.
To mount securely without studs, you need anchors that expand behind the wall, distributing the weight across a larger surface area of the drywall’s back face.
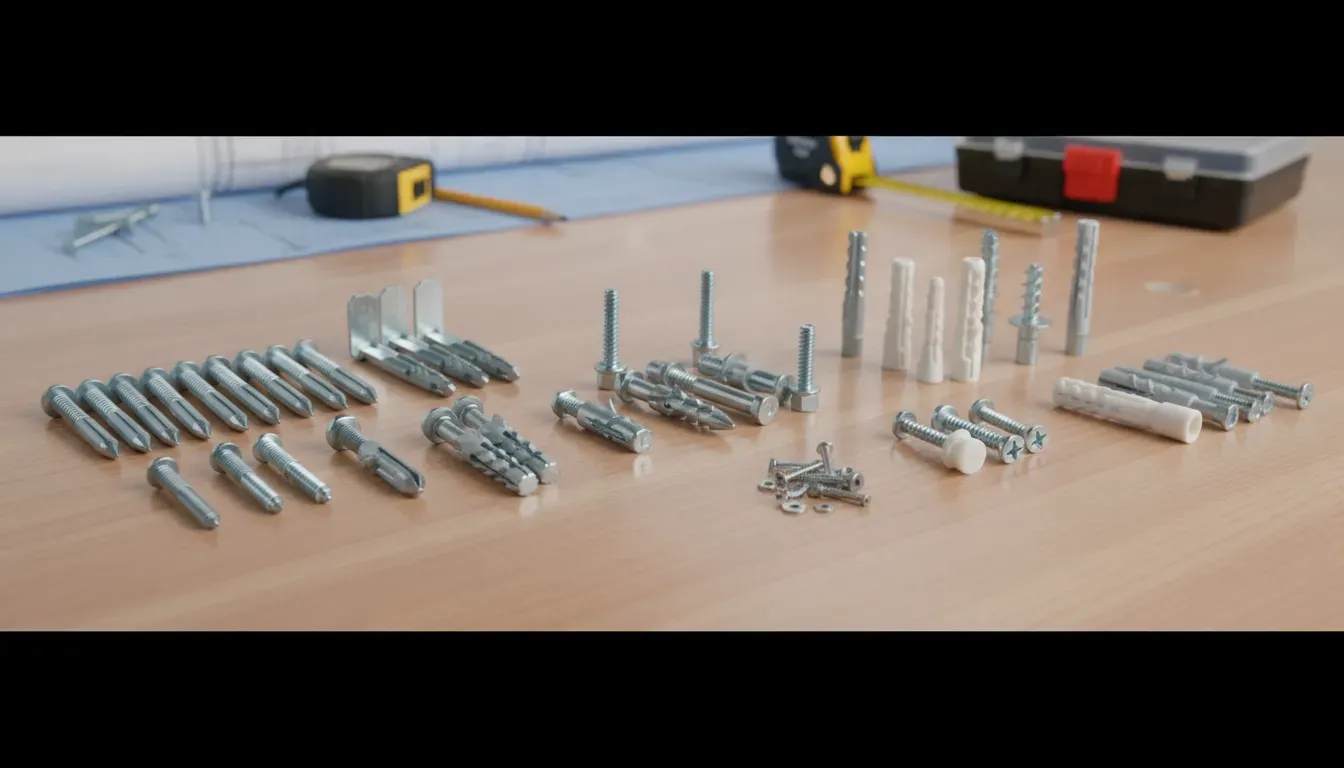
1. Toggle Bolts (The Gold Standard)
For heavy-duty applications, toggle bolts are the superior choice. A traditional toggle bolt consists of a machine screw and a spring-loaded wing nut. You fold the wings, insert them through a pre-drilled hole, and once they clear the drywall, they spring open. As you tighten the bolt, the wings clamp against the back of the wall.
Pros:
- Highest weight capacity (often 50+ lbs per anchor).
- Reliable in older, possibly crumbling drywall or lath and plaster.
Cons:
- Requires a larger pilot hole.
- If you remove the bolt, the wing falls inside the wall.
2. Strap Toggles (Snaptoggles)
These are the modern evolution of the toggle bolt and are highly recommended for DIY novices and pros alike. They feature a solid metal channel that flips perpendicular behind the wall, held in place by plastic straps that you snap off flush with the wall.
Why they are better: Unlike traditional toggle bolts, strap toggles allow you to remove the bolt (to paint or change the rack) without the anchor falling behind the wall. They are incredibly strong and easier to install.
3. Molly Bolts (Hollow Wall Anchors)
Molly bolts are metal sleeves that expand like an umbrella inside the wall as you tighten the screw. They have sharp teeth on the head that grip the drywall surface to prevent spinning.
Pros:
- Permanent installation; the screw can be removed and replaced.
- Moderate to high weight capacity.
Cons:
- Difficult to remove from the wall if you decide to move the rack later.
4. Self-Drilling Threaded Anchors
These look like large, coarse screws made of plastic or zinc. They screw directly into the drywall without a pilot hole, and the mounting screw goes into them.
Verdict: While excellent for moderate weights (like a towel bar), they are often insufficient for a fully loaded family coat rack. Use these only if the rack is small or intended for light items like keys and leashes.
Recommended Tools and Materials
To achieve a professional result, ensure you have the following tools ready. The difference between a failed install and a permanent fixture is often the quality of the preparation.
- Drill/Driver: Essential for creating pilot holes.
- Drill Bits: A set ranging from 1/8 inch to 1/2 inch.
- Level: A 24-inch bubble level is ideal, though a torpedo level works for smaller racks.
- Tape Measure: For precise centering.
- Painter’s Tape: Useful for marking hole locations without marking the wall.
- Hammer: For tapping in molly bolts or strap toggles.
- Stud Finder: Even though we are installing without studs, you need to know where they are to avoid hitting the edge of one, which can deflect your drill bit.
- Pencil: For marking.
- Vacuum: For drywall dust cleanup.
Product Recommendations
To ensure your installation is secure, you need high-quality hardware. Here are the specific components that professionals rely on for hollow-wall installations.
1. The Heavy-Duty Anchor Solution Do not rely on included hardware. Upgrade to a high-tensile toggle system. Link to Togglers
2. A Reliable Wall-Mounted Rack Choose a rack with mounting holes spaced appropriately. Solid wood backings are preferred over particle board for durability. Link to Wall Mounted Coat Rack
3. Precision Leveling Tool For a perfectly straight installation, a laser level frees up your hands for marking and drilling. Link to Laser Level
Step-by-Step Installation Guide
Follow these steps meticulously to ensure your entryway rack can handle the winter coats, backpacks, and daily abuse of a busy household.
Step 1: Planning and Positioning
Before you drill a single hole, you must determine the optimal placement. Visually, the rack should be centered on the wall or aligned with other architectural elements.
Height: The standard height for a coat rack is 60 inches (5 feet) from the floor. This accommodates long coats without them touching the ground while remaining accessible to most adults. If this is for children, consider a lower height (around 36 to 48 inches) or a secondary row of hooks.
Pro Tip: Cut a piece of painter’s tape the exact length of your coat rack. Place this tape on the wall to visualize the position. This allows you to step back and adjust the placement without marking the wall.
Step 2: Mark the Mounting Holes
Hold the rack against the wall at your desired height. Place your level on top of the rack to ensure it is perfectly horizontal. Once leveled, use a pencil to mark the center of the mounting holes directly onto the wall (or through your painter’s tape template).
If the rack has keyhole slots on the back rather than visible holes, you will need to measure the distance between the slots precisely and transfer those measurements to the wall. This is a common source of error; measure twice to avoid drilling unnecessary holes.
Step 3: Check for Obstructions
Use your stud finder to sweep the area. While we are assuming there are no studs for mounting, you need to ensure you aren’t drilling into plumbing pipes or electrical wires. Most stud finders have an AC voltage detection feature—pay attention to it. Additionally, if you hit a stud partially, a toggle bolt will not open. You need a clear cavity behind the drywall.
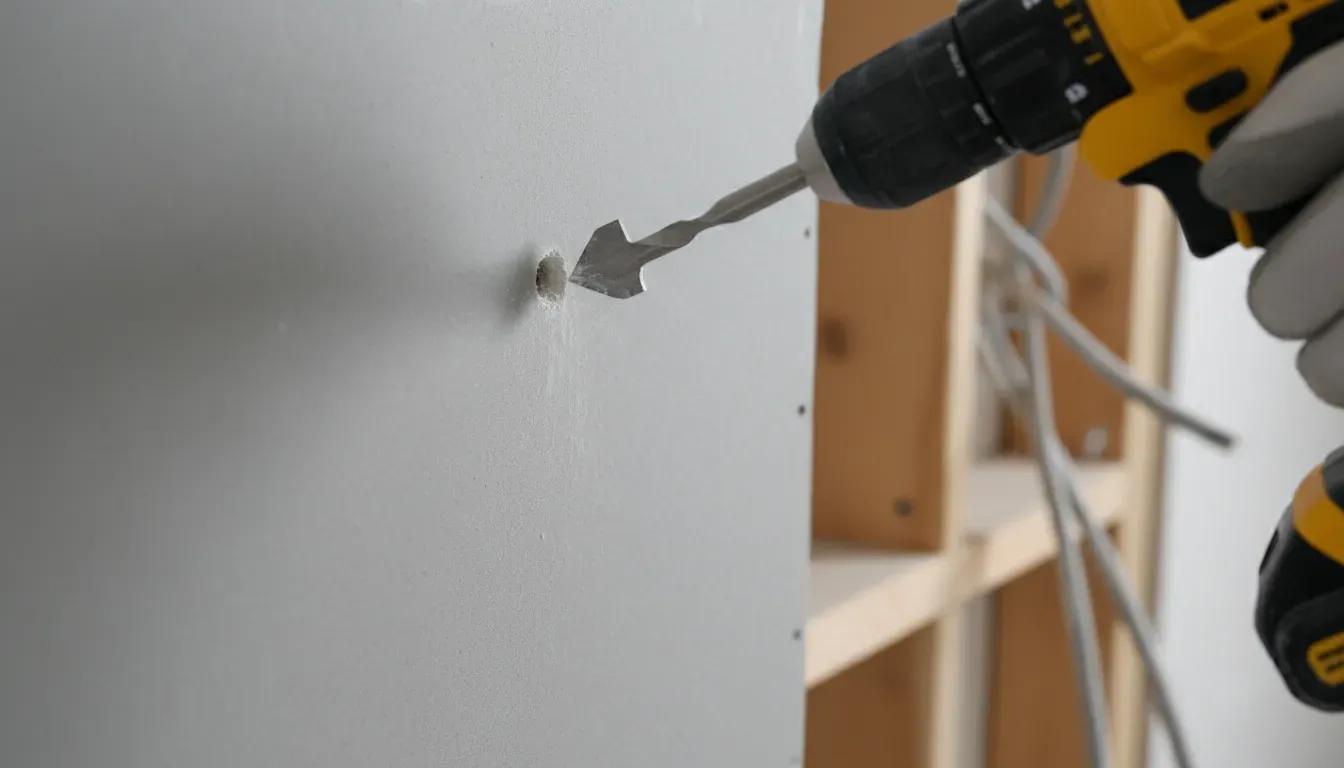
Step 4: Drilling the Pilot Holes
The size of your pilot hole depends entirely on the anchor you chose.
- Toggle Bolts/Snaptoggles: usually require a 1/2-inch hole. This feels aggressive, but the mechanism needs space to pass through.
- Molly Bolts: usually require a slightly smaller hole, often around 5/16 or 3/8 inch.
Drill slowly. Keep the drill perpendicular to the wall. If you drill at an angle, the anchor may not sit flush, causing the rack to wobble.
Step 5: Installing the Anchors
For Snaptoggles:
- Hold the metal channel flat alongside the plastic straps.
- Slide the channel through the hole until it clears the wall on the other side.
- Pull back on the straps so the channel rotates 90 degrees and sits flat against the back of the drywall.
- Slide the plastic cap down the straps until it is tight against the front of the wall.
- Snap off the excess plastic straps. You now have a threaded hole securely mounted behind the drywall.
For Traditional Toggle Bolts:
- Thread the machine screw through the mounting hole of your coat rack first.
- Spin the toggle wing onto the screw just a few turns.
- Push the toggle wing through the hole in the wall. You will hear a distinct “snap” or “click” when the wings open behind the wall.
- Pull back on the rack to create tension, keeping the wings flat against the inner wall, and begin tightening.
Step 6: Mounting and Tightening
If you used Snaptoggles or Molly bolts, simply align your rack with the installed anchors and drive the machine screws in.
Crucial Warning: Do not overtighten. Drywall is compressible. If you torque the screw too hard with a power drill, you can crush the drywall between the rack and the anchor, weakening the hold. Drive the screw until it is snug, then finish the last turn by hand with a screwdriver to ensure a secure fit without damage.
The “Mounting Board” Technique for Heavy Loads
If you have an exceptionally heavy rack or plan to hang items like cast-iron skillets or heavy tools in an entryway mudroom setup, consider the mounting board technique. This is what professional carpenters often do when stud placement doesn’t align with the hardware.
- Purchase a piece of 1x4 or 1x6 finished lumber (oak, maple, or pine) slightly longer than your coat rack.
- Locate the studs in your wall, even if they are off-center relative to where you want the rack.
- Secure the wooden board to the studs using 2.5-inch wood screws. This board is now structurally part of the wall framing.
- Paint or stain the board to match your trim or the coat rack.
- Mount your coat rack onto this wooden board using short wood screws.
This method bridges the gap between studs, allowing you to center your rack perfectly while still relying on the structural framing of the house. For more on optimizing layouts, read our guide on small entryway organization.
Common Installation Mistakes to Avoid
Even with the right tools, small errors can compromise the integrity of the installation.
1. Ignoring the “Working Load” Limit Anchor packaging will list a “maximum load” (e.g., 100 lbs). However, the “safe working load” is usually 1/4 of that. If a box says 100 lbs, treat it as 25 lbs to account for the dynamic force of tossing a coat. Always overestimate your needs.
2. Drill Bit Wandering Drywall is smooth. When you start drilling, the bit can slide, moving your hole off-center. Use a center punch or a nail to make a small indentation at your mark before drilling. This guides the bit and ensures accuracy.
3. Using Wall Plugs for Cantilevered Items Never use the simple plastic plugs that expand slightly for items that stick out from the wall (like a shelf or coat hook). Physics dictates that the leverage will pull them straight out. Those plugs are for flat items like mirrors or pictures where the force is purely vertical shear.
Repairing a Failed Installation
If you found this article because a previous rack has already ripped out of the wall, do not panic. This is fixable.
- Remove the old hardware. If a toggle fell in, let it go. Pull out any plastic plugs.
- Clean the hole. Cut away any loose paper or jagged gypsum.
- Patch or Move.
- Option A (Move): Patch the hole with spackle, sand, and paint. Move the rack up or down by two inches and install new anchors in fresh drywall.
- Option B (Reuse): If you must use the same spot, you need a much larger toggle bolt to bridge the damaged area, or you must repair the drywall using a “California patch” or a mesh repair kit before re-drilling.
Aesthetics and Organization
Once your rack is securely mounted, the focus shifts to utilizing it effectively. A securely mounted rack allows for greater creativity in what you display. In addition to coats, consider hanging woven baskets for mail, a dedicated hook for a dog leash, or even small potted plants to bring life to the area.
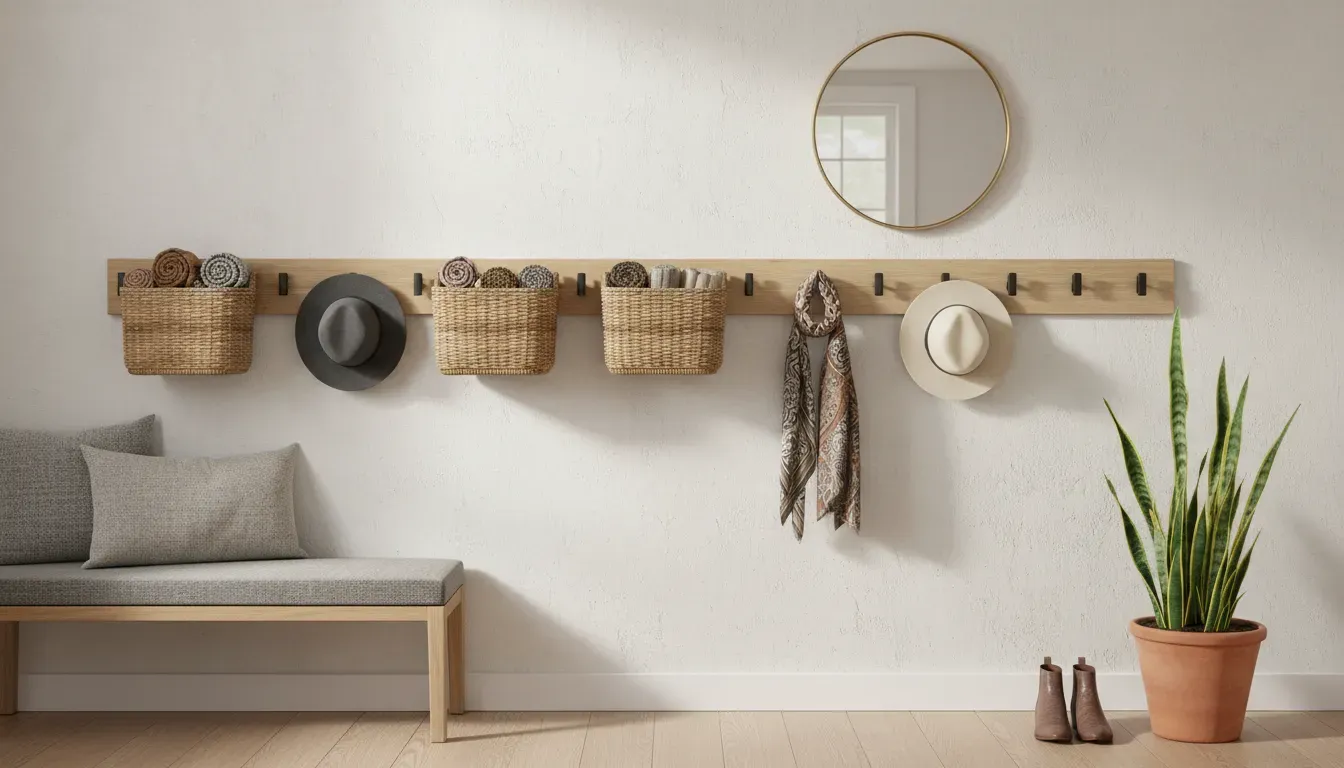
Because you have used heavy-duty toggles, you don’t need to police family members about “being gentle” with the rack. The stability allows the entryway to function as a true mudroom drop zone. For more inspiration on styling this space, check out our post on modern farmhouse entryway decor.
Maintenance and Safety Checks
Seasons change, and so does the weight on your rack. In summer, it may hold light windbreakers; in winter, heavy wool and damp canvas.
Twice a year, perhaps when the clocks change, give your coat rack a quick inspection. Wiggle the hooks. If the rack moves against the wall, the screws may have backed out slightly due to vibration and usage. Hand-tighten them with a screwdriver. If the anchors themselves are moving within the drywall, it is a sign the gypsum is failing, and you may need to move the rack to a new location or upgrade to the mounting board method described earlier.
Conclusion
Installing a wall-mounted entryway rack on drywall without studs is not a gamble—it is a straightforward process governed by physics and the right hardware. By bypassing the cheap plastic plugs and investing in toggle bolts or strap toggles, you transform fragile drywall into a reliable substrate capable of holding your family’s gear.
The freedom to mount your storage exactly where it is visually and functionally best, rather than where the builder placed a 2x4 stud, allows for a more polished and customized home environment. Take your time, measure twice, and drill with confidence. Your entryway is about to get a whole lot more organized.