Small Entryway Storage That Looks Expensive (But Isn't): Budget Upgrades and Styling
Discover how to transform a cramped foyer into a high-end mudroom using budget-friendly storage solutions, strategic styling, and clever hardware hacks.
Feb 3, 2026 - Written by: linda wise

The entryway operates as the prologue to your home’s narrative. It is the first point of contact for guests and the final checkpoint before you step out into the world. Yet, in many homes and apartments, this crucial transitional space is often an afterthought—a cramped corridor defined by piled shoes, scattered mail, and utilitarian hooks.
There is a pervasive misconception in interior design that achieving a polished, high-end aesthetic requires significant square footage and an even larger budget. This is arguably most incorrect when applied to the entryway. Because the footprint is small, minor details have a magnified impact. With strategic furniture selection, clever hardware swaps, and disciplined styling, you can curate a small entryway that functions like a custom mudroom but costs a fraction of the price.
This guide explores how to elevate small entryway storage through budget-friendly upgrades that mimic the look of bespoke cabinetry and professional interior design.
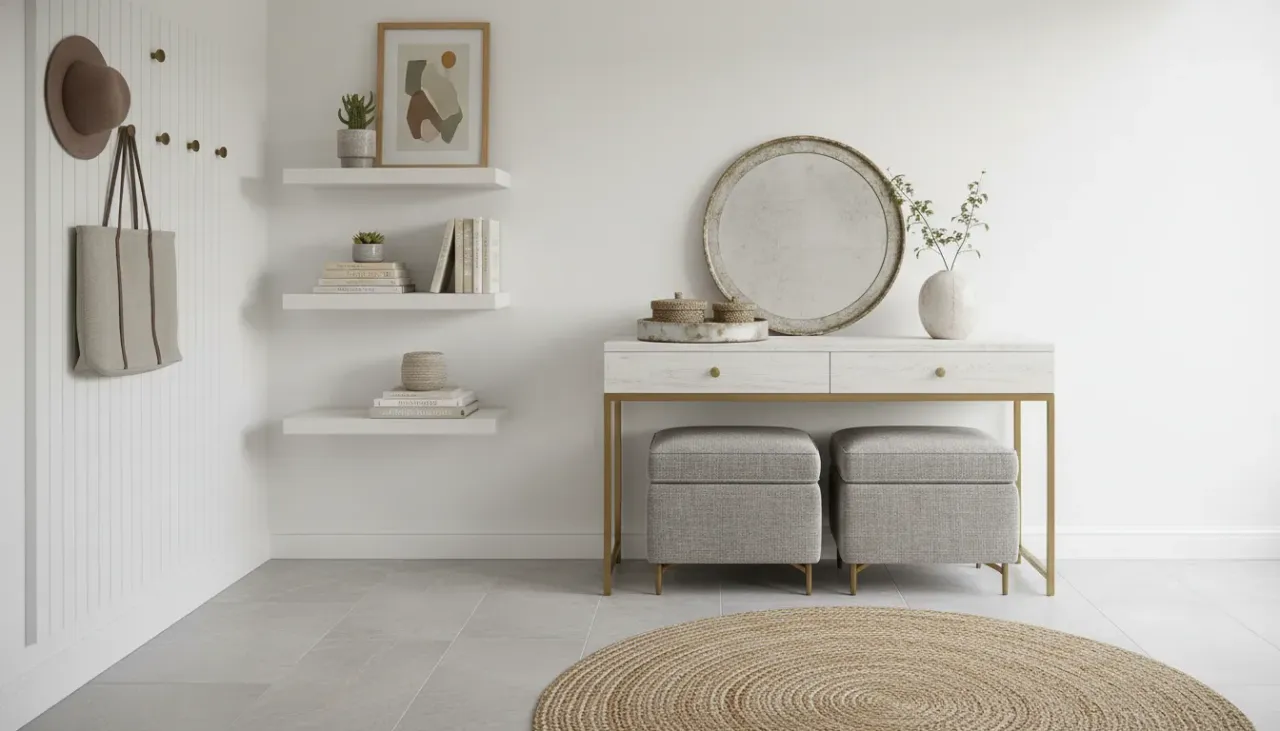
The Foundation: Selecting the Right Furniture Profile
The primary error homeowners make in small entryways is selecting furniture that is disproportionate to the space. Deep console tables or bulky benches encroach on the walking path, creating visual and physical friction. To achieve an expensive look, the flow of traffic must remain unimpeded.
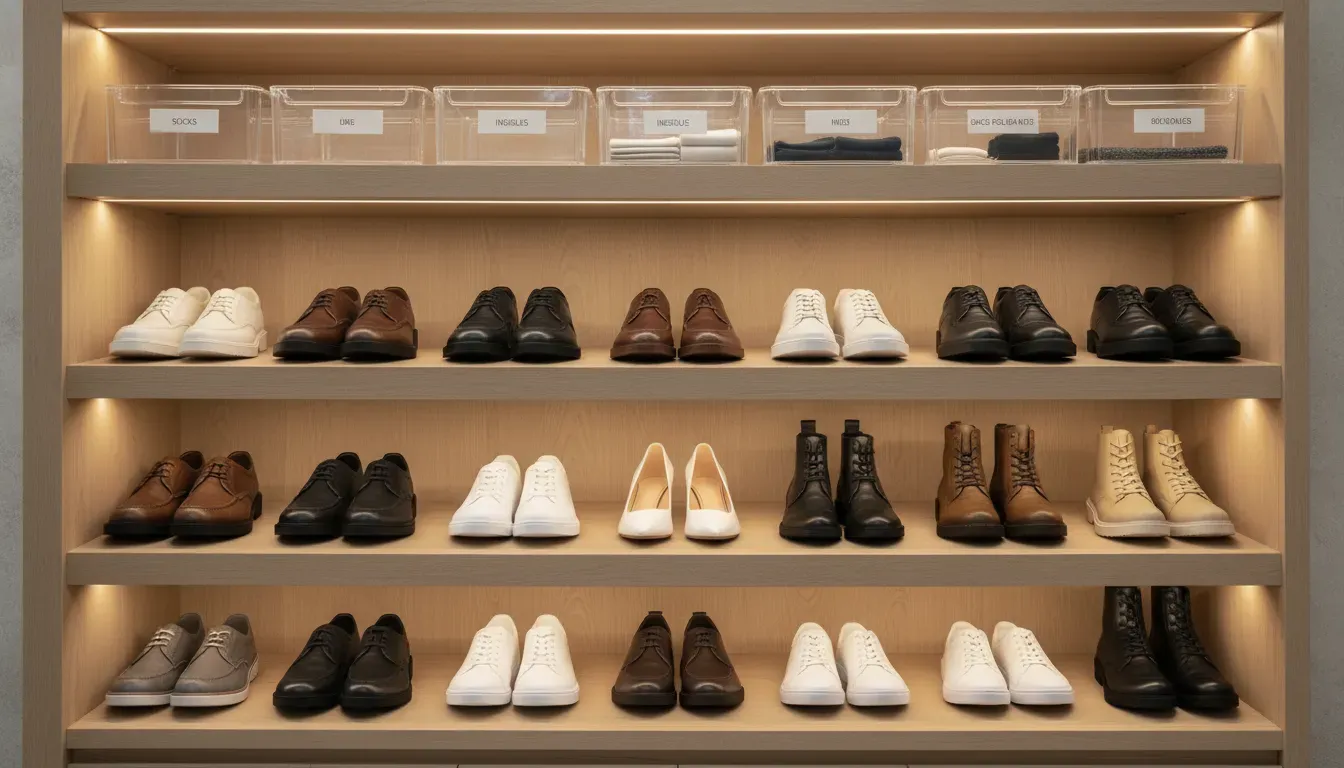
The Power of Slim Shoe Cabinets
Open shoe racks are the enemy of elegance. Regardless of how organized they are, visible footwear creates visual noise. To emulate the clean lines of high-end design, you must prioritize closed storage.
Slim tipping shoe cabinets are the gold standard for narrow hallways. With depths often ranging between 7 and 10 inches, these units hug the wall while swallowing clutter. However, standard flat-pack cabinets can look undeniably cheap. The secret lies in how you treat the piece after purchase.
Opt for a cabinet with a flat front rather than louvers, which can collect dust and look dated. If the laminate finish looks artificial, consider painting the unit the same color as your walls. This technique, known as “built-in simulation,” tricks the eye into thinking the storage is a custom architectural feature rather than a standalone piece of furniture.
If you are in the market for a base piece to customize, look for units with clean lines and minimal ornamentation, as these provide the best canvas for upgrades.
Shop for Slim Entryway Shoe Cabinets on Amazon
The Floating Console
If floor space is at an absolute premium, a floating shelf or wall-mounted console acts as a drop zone without occupying the floor. This increases the perception of floor area, making the room feel wider. High-end design often utilizes negative space; by keeping the floor visible beneath the storage unit, you maintain an airy, uncluttered atmosphere associated with luxury homes.
The “Hardware Hack”: Elevating Standard Furniture
The quickest way to identify budget furniture is often the hardware. Manufacturers of mass-produced furniture cut costs by supplying lightweight, generic pulls and knobs. Replacing these standard fixtures is the highest ROI (Return on Investment) upgrade you can perform.
Choosing the Right Finish
To make a piece look expensive, choose hardware with weight and complexity.
- Unlacquered Brass: offers a timeless, organic look that develops a patina over time.
- Matte Black: provides a modern, graphic contrast, particularly effective against white or light wood cabinets.
- Polished Nickel: delivers a crisp, clean aesthetic that works well in transitional spaces.
Avoid hollow-back handles. When you reach for a drawer pull, the tactile experience of solid metal conveys quality. An inexpensive IKEA cabinet fitted with heavy, solid brass knurled knobs instantly transcends its price point.
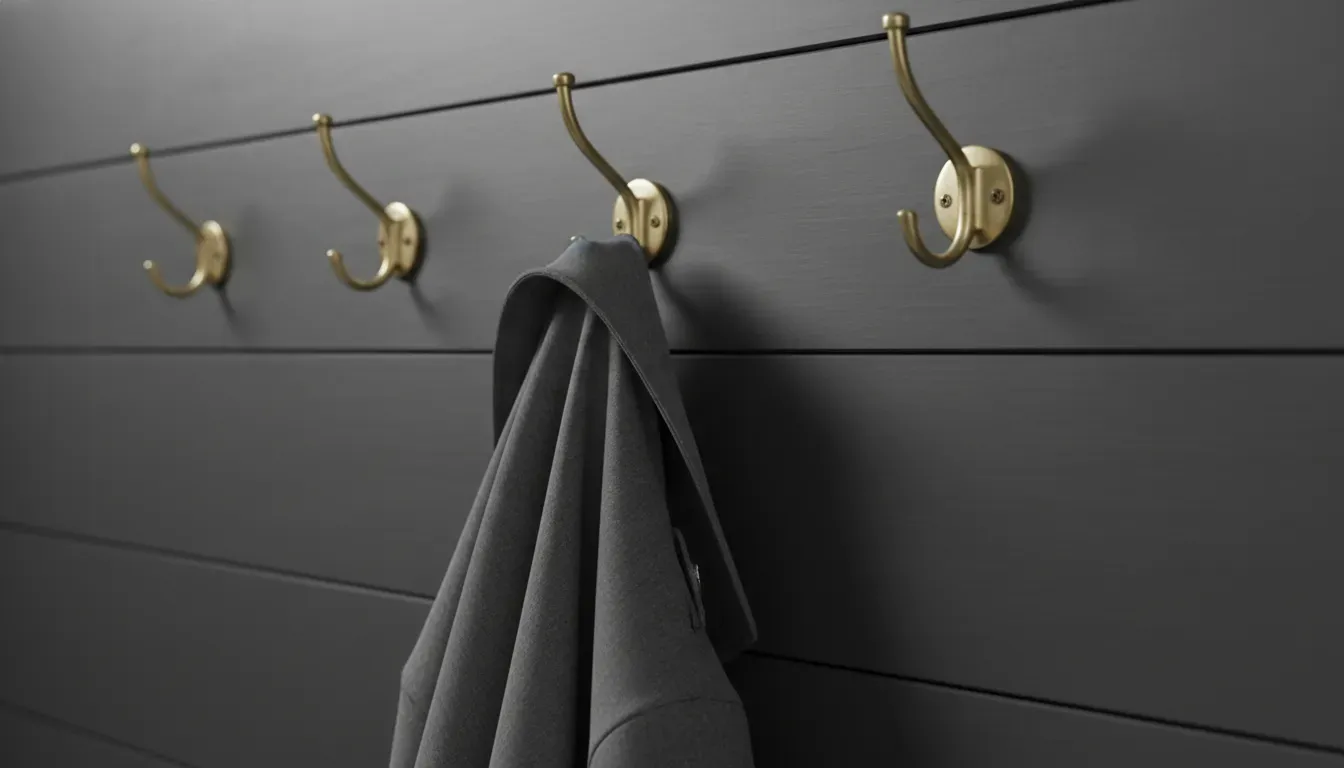
Hook Placement and Style
Coat hooks are essential for small entryways, but they often look cluttered. To elevate the look, move away from the standard rail of hooks. Instead, install individual, high-quality architectural hooks directly into the wall or onto a substantial backing board.
Spacing is critical here. In budget setups, hooks are often crammed together to maximize storage. In luxury design, negative space is prioritized. Space your hooks at least 10 to 12 inches apart. This prevents coats from overlapping messily and allows the hooks themselves to serve as sculptural wall decor when not in use.
Vertical Integration: Utilizing Wall Space
In small footprints, the only way to expand is upward. However, vertical storage must be handled delicately to avoid the “garage storage” aesthetic.
The Mirror Strategy
A large mirror is non-negotiable in a small entryway. It bounces light, doubles the visual depth of the hallway, and allows for a final outfit check. To make the space look expensive, go larger than you think is necessary. A mirror that is too small looks like a postage stamp and breaks the coherence of the wall.
Round or arched mirrors soften the harsh angles of a rectangular hallway. If you have high ceilings, a tall, narrow arch mirror draws the eye up, emphasizing the vertical volume of the space rather than the narrow floor plan.
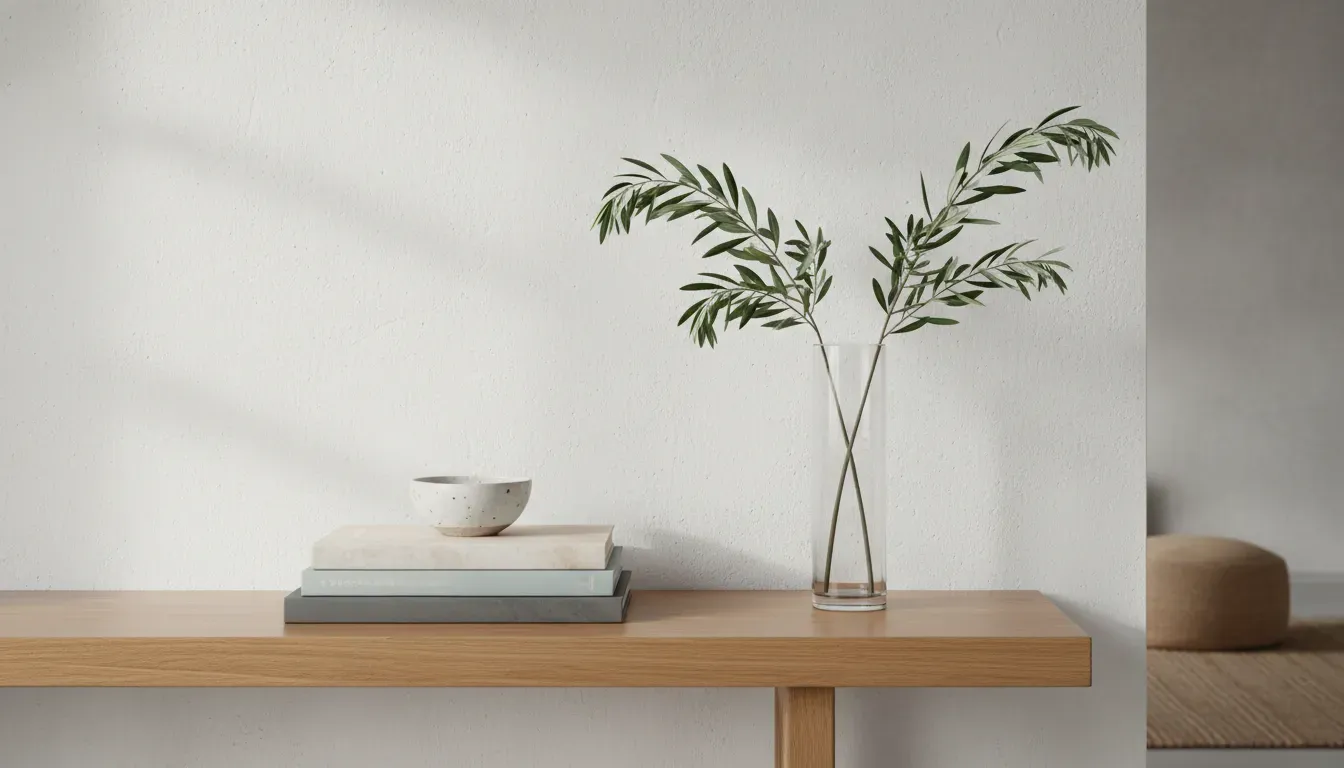
Shelf Styling and Function
If you install a shelf above your coat hooks or console, treat it as a display area first and storage second. This may seem counterintuitive in a small home, but “storage that looks expensive” relies on concealment.
Use the shelf for structured items: a framed print leaning against the wall, a small structured plant, or a singular sculptural bowl. Avoid piling loose papers or mail here. If you must use the shelf for storage, ensure the containers are opaque and uniform.
The Uniformity Rule: Baskets and Bins
Nothing degrades a room’s aesthetic faster than mismatched storage containers. A clear plastic bin next to a cardboard box next to a wire basket creates visual chaos. High-end professional organizers rely on the principle of uniformity to create a sense of calm and order.
Texture and Materiality
For an expensive look, choose natural materials that add warmth and texture. Woven seagrass, water hyacinth, or felt baskets hide the contents completely while adding an organic element to the space.
When selecting baskets for open shelves or beneath a bench, ensure they fit the opening perfectly. Gaps around the baskets can look messy. If you are placing baskets on the floor, choose substantial sizes. Small baskets on the floor look like clutter; large, oversized baskets look like intentional design choices for holding umbrellas, throw blankets, or shoes.
Shop for Woven Storage Baskets on Amazon
Concealing the Ugly
Every entryway needs a place for “ugly” items: dog waste bags, keys, sunglasses, and receipts. Do not leave these loose on a console table. Utilize small, lidded boxes made of leather, marble, or wood. A “catch-all” tray is acceptable, but a lidded box is superior because it physically hides the mess. The less visual data the eye has to process, the more luxurious the space feels.
Lighting: The Invisible luxury
Lighting is often the differentiator between a dorm room and a boutique hotel. Most small entryways rely on a single, harsh overhead “boob light” that casts unflattering shadows.
Layering Light
To create ambiance, you need to layer your lighting. If you have a console table, add a small table lamp. If you lack surface area, install wall sconces.
You do not need to hire an electrician to achieve this. Battery-operated puck lights or rechargeable bulbs can be used inside sconces, eliminating the need for hardwiring. This is an excellent solution for renters.
Choose a warm color temperature (2700K to 3000K). Cool, blue-toned light (4000K+) can make an entryway feel clinical and sterile. Warm light invites you in and makes finishes—wood, brass, paint—look richer.
The Art of the Vignette
Styling is the final layer that bridges the gap between simple organization and sophisticated design. A vignette is a small, curated collection of objects that tells a story.
The Rule of Three
When styling your console or shelf, employ the Rule of Three. Group items in odd numbers, varying their heights and textures. For example:
- Vertical: A tall table lamp or a vase with branches.
- Horizontal: A stack of two coffee table books or a flat decorative tray.
- Sculptural: A small object, such as a paperweight, candle, or stone bowl, placed on the books.
This arrangement guides the eye through the display and feels balanced.
Greenery and Life
Adding a living element instantly elevates a space. In an entryway with no natural light, a high-quality faux branch or preserved eucalyptus is preferable to a dusty, cheap-looking fake plant. Place a tall vase with simple greenery on one side of your console to add height and softness.
Architectural Manipulations: Paint and Molding
If you are willing to engage in minor DIY, architectural changes offer the most dramatic transformation for the lowest cost.
Color Drenching
Painting the walls, trim, and door the same color (color drenching) is a technique used by high-end designers to make small spaces feel larger and more cohesive. It blurs the boundaries of the room.
Dark, moody colors (charcoal, navy, forest green) can make a small entryway feel jewel-box-like and cozy. Alternatively, warm whites and “greige” tones keep it airy. The key is the finish: use a durable eggshell or satin for walls to withstand high traffic, and semi-gloss for the door.
Adding Structure
Wall molding, such as board and batten or shiplap, adds depth and character. In an entryway, a row of board and batten extending two-thirds of the way up the wall serves a dual purpose: it protects the drywall from scuffs and provides a sturdy anchor for coat hooks.
This can be achieved inexpensively using MDF strips and paint. When painted the same color as the wall, it adds a shadow line and architectural weight that suggests a historic or custom home.
Shop for Decorative Arched Wall Mirrors on Amazon
The Discipline of Maintenance
The most expensive-looking entryway is a clean one. No amount of brass hardware or marble styling can compensate for a pile of cardboard boxes or twenty pairs of shoes.
The One-In, One-Out Rule
Small entryways have a finite capacity. Adopt a strict “one-in, one-out” policy for footwear kept in this area. Only the shoes currently in rotation should be in the entryway. Off-season footwear belongs in the bedroom closet or under-bed storage. Learn more about effective seasonal rotations in our guide on closet organization systems.
The Mail System
Paper clutter is the silent killer of design. Establish a system where mail is sorted immediately upon entry. Recycle junk mail instantly, and place action items in a designated, concealed spot. Do not let the entryway become a purgatory for paperwork.
Creating a Faux “Built-In” Bench
If you have a slightly wider niche, you can create the illusion of a custom mudroom bench using standard furniture.
- The Base: Purchase a sturdy, low storage bench or a series of strong low cabinets (like over-fridge cabinets placed on the floor).
- The Top: Instead of using the top provided, cut a piece of plywood or butcher block to span the entire width of the niche, wall-to-wall. Stain or paint this to match your aesthetic.
- The Integration: Fill any gaps between the cabinet and the wall with filler strips. Install baseboard trim across the bottom of the unit to marry it to the existing walls.
This creates a seamless look that appears to be part of the house’s architecture, providing a place to sit and put on shoes while offering hidden storage beneath.
Flooring Solutions
The floor of an entryway takes a beating. If your rental apartment has unsightly tile or damaged hardwood, it drags down the perceived value of the entire space.
Rug Selection
A rug is essential for defining the zone. In a narrow hallway, a runner draws the eye forward. Vintage or vintage-inspired rugs (like Turkish Oushak styles) hide dirt exceptionally well due to their complex patterns and offer a high-end look.
Ensure the rug is the correct size. A common mistake is using a standard 2x3 mat that looks like a postage stamp. A runner should extend the length of the hall, leaving about 4 to 6 inches of floor visible on all sides.
Conclusion
Creating a small entryway that looks expensive is rarely about buying the most expensive items. It is an exercise in curation, proportion, and concealment. It is about choosing a slim cabinet that hides the clutter, swapping generic hardware for pieces with weight, and using lighting to create atmosphere.
By focusing on uniformity, “quiet luxury” materials, and maintaining a disciplined approach to what enters the space, you can transform a chaotic drop zone into a serene, sophisticated welcome that sets the tone for the rest of your home. The goal is not just storage; it is a seamless integration of life and style.
For more ideas on how to maximize tight quarters without sacrificing style, explore our strategies for maximizing vertical storage in apartments.