Troubleshooting Common Entryway Organizer Issues: Squeaks, Rust, and Wall Damage
Master the art of entryway maintenance. Learn how to fix squeaky benches, treat rust on hooks, and repair wall damage caused by heavy organizers.
Feb 5, 2026 - Written by: linda wise

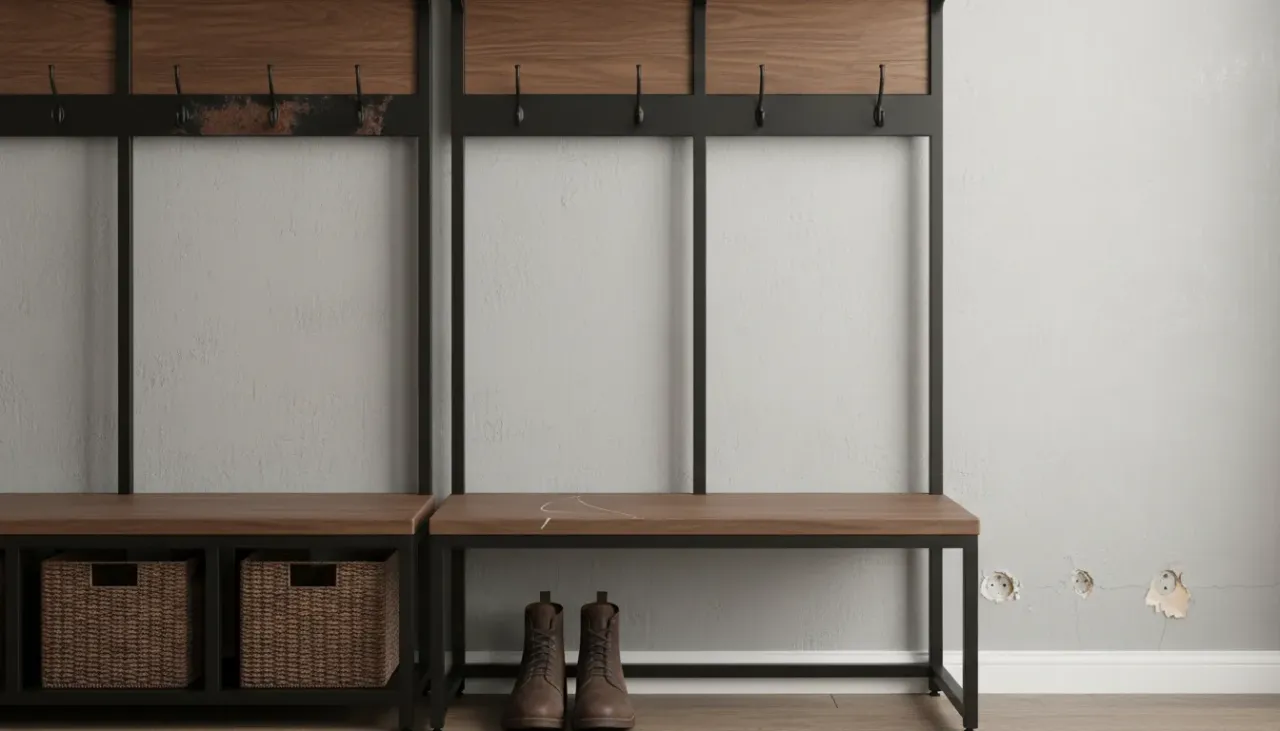
The entryway is arguably the most hardworking square footage in your entire home. It serves as the transitional threshold between the uncontrolled exterior environment and your curated interior sanctuary. Because of this high-traffic designation, the furniture stationed here—specifically hall trees, wall-mounted organizers, benches, and shoe racks—endures a level of stress that other furnishings rarely experience.
While a dining table might see use twice a day, an entryway organizer faces a constant barrage of heavy coats, moisture-laden umbrellas, muddy boots, and the sheer physical impact of family members rushing in and out. Over time, this functional abuse manifests in three distinct, frustrating categories: auditory nuisances like squeaks and creaks, chemical degradation in the form of rust, and structural failures resulting in wall damage.
Ignoring these signs of wear does more than just degrade the aesthetic appeal of your foyer; it can lead to safety hazards and costly repairs. A squeak often signals a loose joint that could collapse under weight. Rust can transfer permanently onto expensive garments. A pulling wall anchor can result in heavy furniture toppling over. This comprehensive guide will walk you through the diagnostic and repair processes for these common issues, ensuring your entryway storage solutions remain both beautiful and structurally sound for years to come.
Diagnosing and Silencing the Squeak
There are few things more grating than the sharp squeak of a bench as you sit down to tie your shoes, or the groan of a coat rack as it accepts a winter parka. Sound is vibration, and in the context of furniture, vibration usually indicates friction between two surfaces that should be static. To silence the noise, you must first identify the material conflict.
The Physics of Friction: Wood on Wood
Wooden entryway benches and hall trees are susceptible to changes in humidity and temperature. Wood is a hygroscopic material, meaning it absorbs and releases moisture from the surrounding air. In humid summer months, wood fibers expand; in dry winter months, they contract. This constant movement can loosen joinery, creating gaps where tenons rub against mortises or where dowels shift within their holes.
When you hear a dry, creaking sound coming from a wooden joint, it is often the sound of dry wood fibers grinding against one another.
The Fix:
- Tighten the Hardware: Before applying any products, check all screws, bolts, and cam locks. If your furniture is flat-pack style (RTA), cam locks frequently loosen over time. A quarter-turn is often all that is needed.
- Lubrication: For stubborn wood-on-wood squeaks, standard oil is not the solution, as it can soften the wood and stain the finish. Instead, use a specialized wax or a silicone-free lubricant. Powdered graphite is excellent for tight joints where liquid cannot penetrate, though it can be messy.
- Glue Injection: If a joint is clearly loose (you can see movement), tightening won’t help permanently. You may need to inject high-quality wood glue into the gap and clamp it until dry.
For general maintenance and eliminating friction in moving parts without attracting dust, a high-quality silicone lubricant is essential for any homeowner’s toolkit.
Buy WD-40 Specialist Silicone Lubricant on Amazon
Metal Fatigue and Hardware Grinding
If your entryway organizer is metal or relies on metal hinges (such as a storage bench with a lifting lid), the squeak is likely metal-on-metal friction. This is often sharper and higher-pitched than wood creaks. This usually occurs when the factory grease has dried out or has been displaced by dust and grit brought in from the outdoors.
The Fix: Clean the joint thoroughly first. Applying lubricant over dirty grease creates an abrasive paste that will wear down the metal faster. Use a degreaser to clean the hinge or joint, wipe it dry, and then apply a white lithium grease or a silicone spray. Open and close the mechanism several times to work the lubricant deep into the pin or pivot point.
Floor Unevenness and Torsion
Sometimes, the organizer itself is perfectly intact, yet it squeaks every time it is touched. This is frequently a leveling issue. Most residential floors are not perfectly flat. If a four-legged hall tree is resting on an uneven surface, one leg may be hovering slightly or bearing less weight. When weight is applied (like sitting on the bench), the structure twists (torque) to find stability. This twisting forces joints to grind against each other.
The Fix: Use adjustable furniture levelers. If your unit didn’t come with them, install screw-in glides on the feet. Adjust them until the unit is rock-solid without any weight applied. By eliminating the ability of the furniture to twist, you eliminate the friction that causes the noise.
Combating Rust and Corrosion
The entryway is the primary defense line against the elements. Consequently, metal components in this area—coat hooks, shoe racks, umbrella stands, and decorative hardware—are subjected to a harsh environment. The combination of moisture from rain and snow, combined with the road salts tracked in during winter, creates a highly corrosive atmosphere.
Understanding the Chemistry of Entryway Rust
Rust is iron oxide, formed by the reaction of iron and oxygen in the presence of water or air moisture. However, the process is significantly accelerated by electrolytes, such as sodium chloride (road salt). When wet coats brush against metal hooks, or salty slush drips onto a metal shoe rack, the protective finish is compromised. Once the barrier (paint, powder coat, or plating) is breached, oxidation begins immediately.
Removing Surface Rust
If you catch rust early, it is purely cosmetic and can be removed without compromising the structural integrity of the hook or rack.
Method 1: Mechanical Removal For light surface rust on wrought iron or durable steel, use fine-grade steel wool (0000 grade) or a wire brush. Scrub gently to remove the flaky orange oxidation. Be careful with chrome or brushed nickel finishes, as abrasive scrubbing can permanently scratch the healthy plating. For delicate finishes, use a ball of aluminum foil dipped in water; aluminum is softer than chrome but harder than rust, making it an excellent customized scraper.
Method 2: Chemical Neutralization For intricate scrolls or hard-to-reach crevices, chemical removal is superior. A paste made of baking soda and water, or a soak in white vinegar, can dissolve rust. However, for entryway furniture that you want to preserve long-term, utilizing a dedicated rust dissolver is often more effective and less labor-intensive.
Restoration and Prevention
Once the rust is removed, the bare metal is now even more susceptible to future corrosion. You must reseal the surface immediately.
- Clear Coat: For metal that you want to keep looking “raw” or industrial, apply a clear matte lacquer or polyurethane spray.
- Paint: If the item was originally painted, use a primer specifically designed for rusty metal (like zinc chromate primer) followed by an enamel topcoat.
- Wax: For decorative hooks that see heavy abrasion from metal coat hangers, paint may chip. A heavy coat of paste wax (like carnauba wax) provides a renewable barrier that sheds water and protects against salt.
For those dealing with severe rust on vintage or expensive hall trees, a chemical rust converter can save the piece. This substance chemically changes rust into a stable black protective coating that can be painted over.
Buy Rust-Oleum Rust Reformer Spray on Amazon
Addressing and Preventing Wall Damage
Perhaps the most anxiety-inducing issue with entryway organizers is wall damage. This ranges from unsightly scuff marks to catastrophic failure where a shelf pulls out of the drywall, potentially causing injury. Understanding the mechanics of load distribution is key to preventing this.
The Anatomy of Anchor Failure
Drywall (plasterboard) is essentially chalk pressed between sheets of paper. It has very little tensile strength. When you mount a heavy coat rack using only the plastic plugs that often come in the box, you are relying on the friction of that plastic against the crumbly gypsum to hold the weight.
Entryway organizers endure “dynamic loading.” A shelf holding books is a static load; it sits still. A coat rack experiences dynamic loading: coats are thrown on, pulled off, and school bags are yanked down. This constant movement wiggles the anchor, enlarging the hole until the friction fails and the rack pulls free.
The Fix for Pulled Anchors: If an anchor has pulled out, you cannot reuse the same hole with the same size anchor.
- Move the Unit: Ideally, shift the unit up or down by two inches to find fresh drywall.
- Toggle Bolts: If you must use the same location, switch to toggle bolts (also known as molly bolts). These have metal wings that expand behind the wall, clamping the drywall between the bolt head and the wings. This relies on the structural strength of the drywall sheet rather than friction in the hole.
- Patching: Fill the old damaged holes with spackle. For holes larger than a dime, use an adhesive mesh patch before spackling to prevent cracking.
The Necessity of Stud Mounting
For any entryway unit that will hold significant weight—specifically hall trees or racks intended for backpacks—mounting into wall studs is non-negotiable. Standard wall studs are spaced 16 inches apart (center-to-center).
If the mounting holes on your organizer do not align with your studs:
- Mount a Backer Board: Screw a piece of 1x4 finished lumber into two or three studs. Then, mount your organizer securely to this wooden board. This distributes the weight across the framing of the house.
- French Cleat System: A French cleat is one of the strongest mounting methods. One angled strip is screwed into the studs; the opposing angled strip is attached to the furniture. They interlock, distributing weight evenly across the entire width of the unit.

Preventing Scuffs and Dents
Even if the unit is secure, the items hanging from it can damage the wall. Heavy zippers on jackets, hard plastic on backpacks, and umbrellas can swing back and gauge the paint or drywall behind the rack.
Protective Measures:
- Wainscoting or Beadboard: Installing wood paneling behind the entryway area is a classic design choice for a reason—it creates a durable surface that withstands impact better than drywall.
- Bumper Pads: Place small, clear silicone bumpers on the back of the lower rail of your coat rack. This pushes the hooks slightly further from the wall, changing the angle at which coats hang and reducing wall contact.
- Paint Grade: Use a high-quality, scrubbable paint in the entryway. A semi-gloss or satin finish is much easier to clean and more resistant to scuffing than flat or eggshell paints.
If you are dealing with a heavy organizer that requires robust mounting hardware that manufacturers rarely include, upgrading to high-performance toggle bolts is the best insurance policy for your walls.
Buy TOGGLER Snaptoggle Drywall Anchors on Amazon
Structural Instability and Wobbling
Beyond the specific issues of squeaks and wall damage, general instability is a common complaint. A wobbly hall tree feels cheap and unsafe. This is distinct from floor unevenness; this is about the rigidity of the unit itself.
The Loose Joint Syndrome
Over time, vibrations from footsteps and door slams can loosen the threaded inserts in particleboard furniture. Once a screw strips the wood particles, tightening it is useless—it just spins.
Repairing Stripped Screw Holes:
- The Toothpick Trick: For minor stripping in wood, dip wooden toothpicks in wood glue and jam them into the hole. Break them off flush. Once dry, this provides new wood for the screw to bite into.
- Epoxy Fill: For particleboard, mix a two-part epoxy putty. Fill the hole, let it cure, and then drill a pilot hole for the screw. This creates a bond stronger than the original board.
Reinforcing the Frame
Many budget-friendly entryway organizers lack cross-bracing, making them susceptible to “racking” (leaning side to side). You can retrofit stability into these pieces discreetly.
- Corner Braces: Install metal L-brackets (corner braces) at the inside corners of the structure.
- Back Panel: If the unit has a flimsy cardboard back, replace it with a sheet of ¼-inch plywood. Nail or screw this plywood into the frame every 4 inches. The back panel acts as a shear wall, providing immense rigidity to the structure.
For more insights on selecting units that are built to last, read our guide on durable materials for high-traffic entryways.
Seasonal Maintenance Routines
Prevention is always superior to repair. Because the entryway is seasonal by nature, your maintenance routine should follow the calendar.
Winterizing the Entryway
Before the first snow or heavy rain:
- Inspect Seals: Check the finish on wooden benches. If water no longer beads up, apply a fresh coat of wax or polyurethane.
- Deploy Rugs: Ensure you have adequate floor protection. A rugged mat should catch the majority of salt and grit before it reaches the furniture legs.
- Lubricate: Pre-lubricate hinges and tighten hooks before the heavy winter coats come out of storage.
Spring Refresh
Once the thaw arrives:
- Salt Removal: Wipe down all legs and lower shelves with a mixture of warm water and a mild detergent to remove salt residue that causes wood to dry out and metal to rust.
- Wall Check: Inspect the wall anchors. If the winter weight has caused any pulling, address it immediately before it fails completely.
- Declutter: Remove heavy winter gear. Reducing the load on the organizer extends its lifespan significantly.
When to Repair vs. When to Replace
Despite our best efforts, there comes a point where an entryway organizer has reached the end of its serviceable life. Recognizing this threshold is important for safety and aesthetics.
Repair if:
- The damage is cosmetic (surface rust, scratches, paint chips).
- The structural wood is solid, but the joints are loose (glue can fix this).
- The piece is a high-quality vintage item or made of solid hardwood.
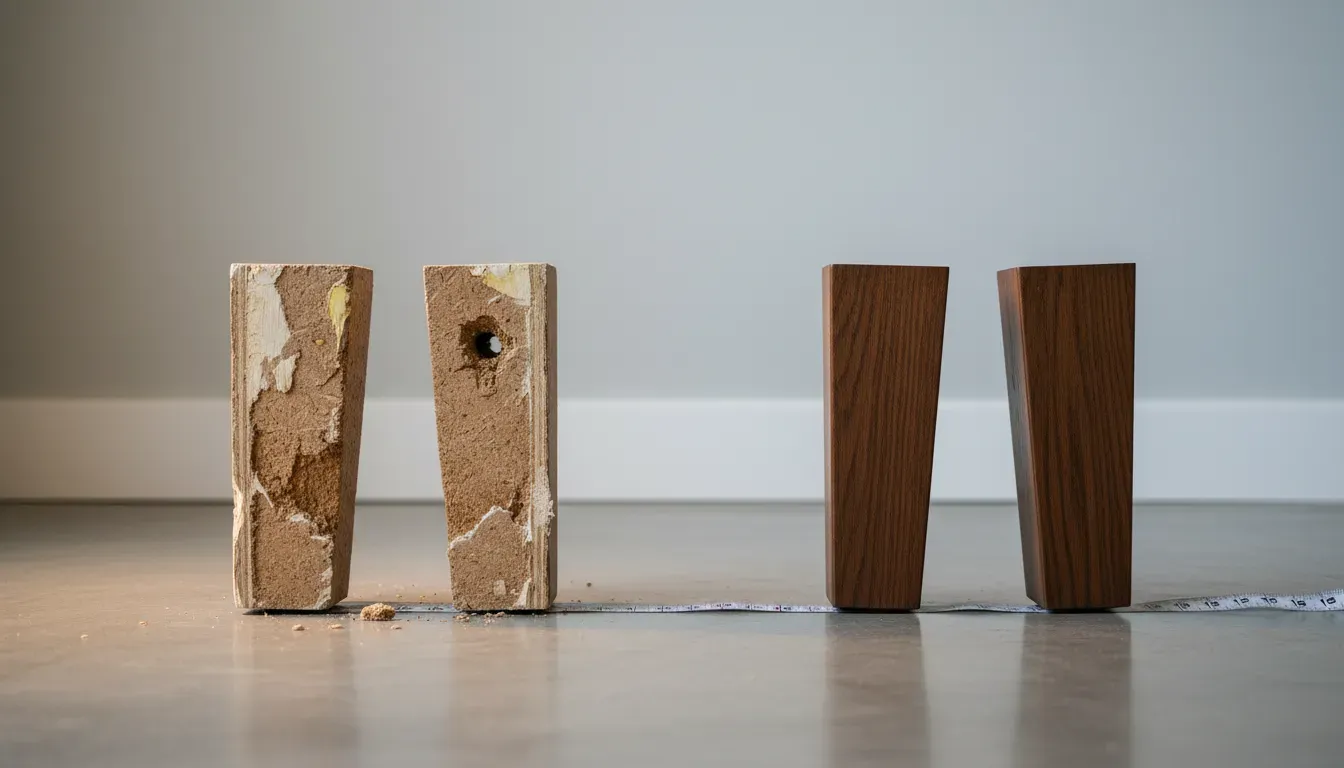
Replace if:
- Particleboard Swelling: Once moisture penetrates particleboard or MDF causing it to swell and bubble, the damage is irreversible. The material has lost its structural integrity and cannot be sanded down.
- Cracked Structural Members: If a main leg or load-bearing support has cracked through, patching is rarely strong enough to support the dynamic loads of an entryway.
- Severe Rust: If rust has eaten through the metal, creating holes or thinning the material significantly, it is a safety hazard.
If you determine it is time to upgrade, consider the specific needs of your space. Do you need more vertical storage? Is a bench essential? Assessing your current failures will help you make a better purchase next time. For assistance in this decision-making process, explore our analysis on hall trees vs. wall hooks.
Preserving the First Impression
Your entryway organizer is more than a utility; it is a component of your home’s architecture that facilitates a smooth transition from the public world to your private life. Squeaks, rust, and wobbly hooks are not just annoyances; they are symptoms of a system under stress.
By diagnosing these issues early—understanding the friction causing the squeak, the chemistry causing the rust, and the physics causing the wall damage—you can apply targeted, effective repairs. Whether it is a simple application of silicone lubricant, a strategic upgrade to toggle bolts, or a seasonal rust-prevention routine, these small interventions protect your investment.
A well-maintained entryway sets a tone of order and calm the moment you walk through the door. It ensures that your home greets you not with a squeak of protest, but with the silent, sturdy support you deserve. Taking the time to troubleshoot these common issues ensures that your entryway remains a welcoming, functional, and safe space for family and guests alike.