The Ultimate Guide to Vertical Entryway Storage Maximization in Small Apartments
Master the art of vertical storage to transform your cramped apartment entryway into a spacious, organized, and stylish foyer without sacrificing floor space.
Feb 1, 2026 - Written by: linda wise

The entryway is the handshake of your home. It creates the first impression for guests and sets the tone for your arrival after a long day. However, in the context of modern urban living, the “foyer” is often a luxury that architects have value-engineered out of existence. Many apartment dwellers find themselves stepping directly into a living room, a kitchen, or a hallway so narrow that two people cannot pass simultaneously.
When square footage is limited, the only direction left to expand is up. Vertical storage maximization is not merely a design trend; it is a spatial necessity for small apartments. By reclaiming the “air rights” of your walls, you can transform a chaotic drop zone into a streamlined, functional, and aesthetically pleasing vestibule.
This comprehensive guide will dissect the mechanics of vertical storage, moving beyond simple hooks to explore architectural strategies, furniture selection, and organizational psychology designed specifically for compact living environments.
The Philosophy of Verticality: Rethinking Volume
To truly master entryway organization in a small footprint, one must stop thinking in two dimensions (floor space) and start thinking in three (volume). The average apartment ceiling height ranges from eight to ten feet. If you are only utilizing the bottom three feet for a shoe rack and a small table, you are wasting approximately 70% of your available storage potential.
The “vertical axis” allows us to segregate items based on frequency of use. High zones are for long-term storage, mid-zones are for daily interactions, and low zones are for heavy, ground-based items like footwear. By adhering to this hierarchy, we clear the floor, which visually expands the room and reduces the tripping hazards that plague cramped apartments.
Assessing Your Spatial Constraints
Before purchasing hardware, you must conduct a rigorous assessment of your entryway. In small apartments, millimeters matter.
- The Swing Radius: Measure the clearance of your front door. Any storage solution placed behind the door must be shallower than the space between the open door and the wall (often less than 4 inches).
- The Traffic Corridor: Ensure that your vertical solutions do not protrude into the walking path to the point of creating a claustrophobic tunnel effect. A minimum walkway width of 36 inches is standard, though 30 inches is passable in tight squeezes.
- Wall Composition: Identify whether your walls are drywall, plaster, or concrete. Vertical storage relies heavily on wall-mounting. Knowing your substrate determines whether you need simple anchors or masonry drill bits.

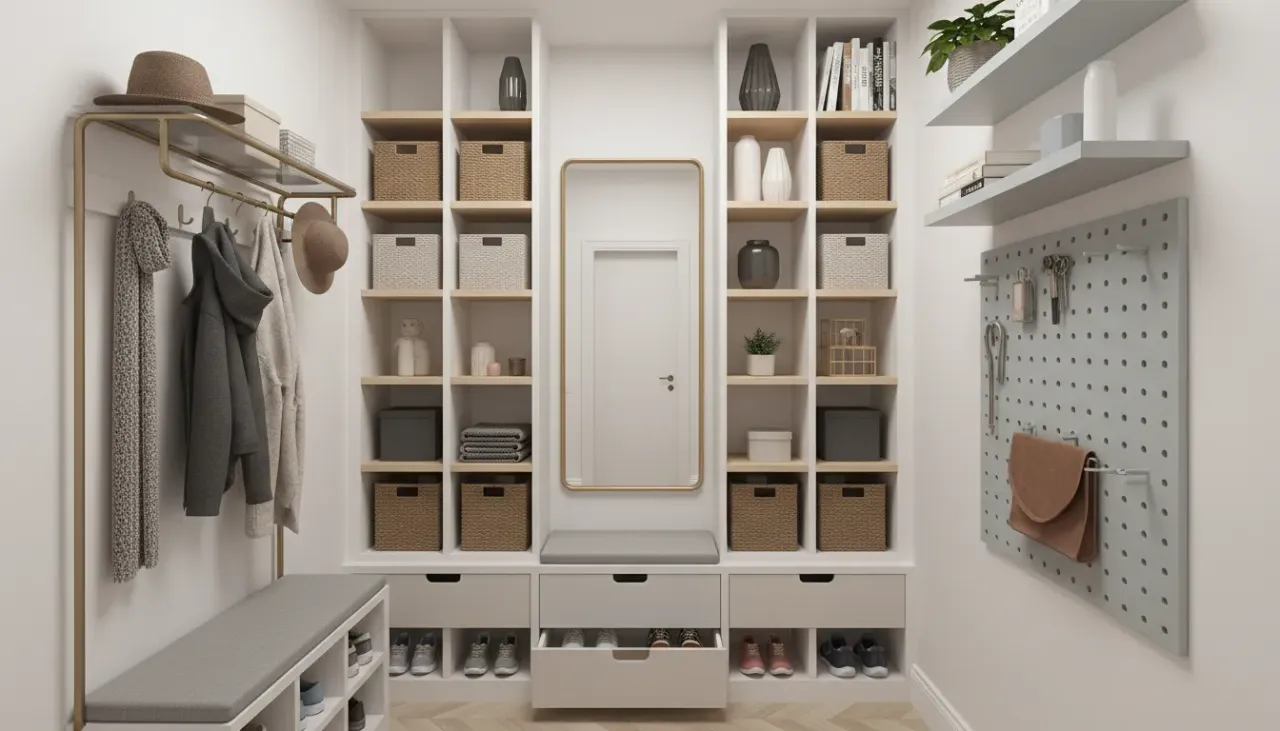
Zone 1: The Upper Stratosphere (Above 6 Feet)
The space above the doorframe and the upper reaches of the wall are the most underutilized areas in any apartment. This constitutes the “Dead Zone.” In a maximized entryway, this area becomes the primary reservoir for seasonal rotation and infrequently used items.
The Over-the-Door Shelf
Installing a shelf directly above the door trim is a classic yet effective maneuver. This shelf should run the full width of the wall if possible, creating an architectural line that draws the eye upward, making the ceiling appear higher.
- What to Store: Out-of-season hats, decorative boxes containing winter scarves (in summer), emergency supplies, or bulky items like bicycle helmets that are not needed daily.
- Visual Weight: To prevent this high shelf from feeling looming or heavy, use brackets that match the wall color or opt for a floating shelf design. Use uniform storage bins—wicker baskets or matching fabric cubes—to hide the clutter. Visual noise at this height can make a small space feel chaotic.
High-Mounted Cabinetry
For a more seamless look, enclosed cabinetry mounted flush to the ceiling provides immense storage without the visual clutter of open shelving. If your budget allows, custom joinery that matches your kitchen cabinets creates a sense of continuity. For renters, modular wall cabinets can achieve a similar effect.
Zone 2: The Action Zone (3 to 6 Feet)
This is the “Daily Drop” zone. It sits at eye and hand level. This area must be engineered for speed and accessibility. The goal here is frictionless organization; if it is difficult to hang up a coat, it will end up on the back of a sofa.
The Evolution of the Coat Rack
In a small apartment, a standing coat rack is a thief of floor space. It occupies a roughly 2x2 foot footprint and often topples under uneven weight. The solution is exclusively wall-mounted.
However, a single row of hooks is often insufficient. To maximize verticality, consider a tiered hook system or a grid structure.
- The Double Row: Install one row of sturdy hooks at 60-65 inches high for long coats and parkas. Install a second row at 40-45 inches for bags, shorter jackets, or umbrellas. This effectively doubles your hanging capacity in the same vertical channel.
- The Wall Grid: Metal grid panels allow for modular configuration. You can attach hooks, small baskets for mail, and clips for reminders.
For those seeking a solution that combines the upper shelf concept with the hanging requirements of the Action Zone, a combination unit is often the most efficient choice.
Check out this Wall Mounted Coat Rack Shelf on Amazon
This type of unit provides a flat surface for display or storage while offering robust hooks for outerwear, effectively consolidating two zones into one fixture.
Vertical Mail and Key Integration
The “landing strip” phenomenon is crucial. When you walk in, you have keys, mail, sunglasses, and a wallet. Without a designated vertical spot, these land on the nearest flat surface.
Utilize shallow, wall-mounted organizers. Magnetic strips for keys (hidden behind a small mirror or artwork) keep them accessible but out of sight. Wall pockets for mail allow you to sort bills from junk immediately, preventing paper piles from forming on your limited counter space.
Zone 3: Ground Control (0 to 3 Feet)
Shoes are the primary antagonist of the small entryway. They occupy significant floor area and are visually “heavy.” Standard horizontal shoe racks are inefficient because they extend outward, encroaching on the walkway.
The Vertical Shoe Tipper
The single most transformative piece of furniture for a narrow entryway is the tipping shoe cabinet. These units are remarkably slim—often less than 10 inches deep—because the shoes are stored vertically at an angle rather than horizontally flat.
A tipping cabinet hugs the wall, leaving the walkway clear. Because the fronts are closed, it hides the visual chaos of multicolored sneakers and boots, contributing to a serene environment. The top of this cabinet often doubles as a console surface for your “Action Zone” items.
Explore Narrow Vertical Shoe Cabinets on Amazon
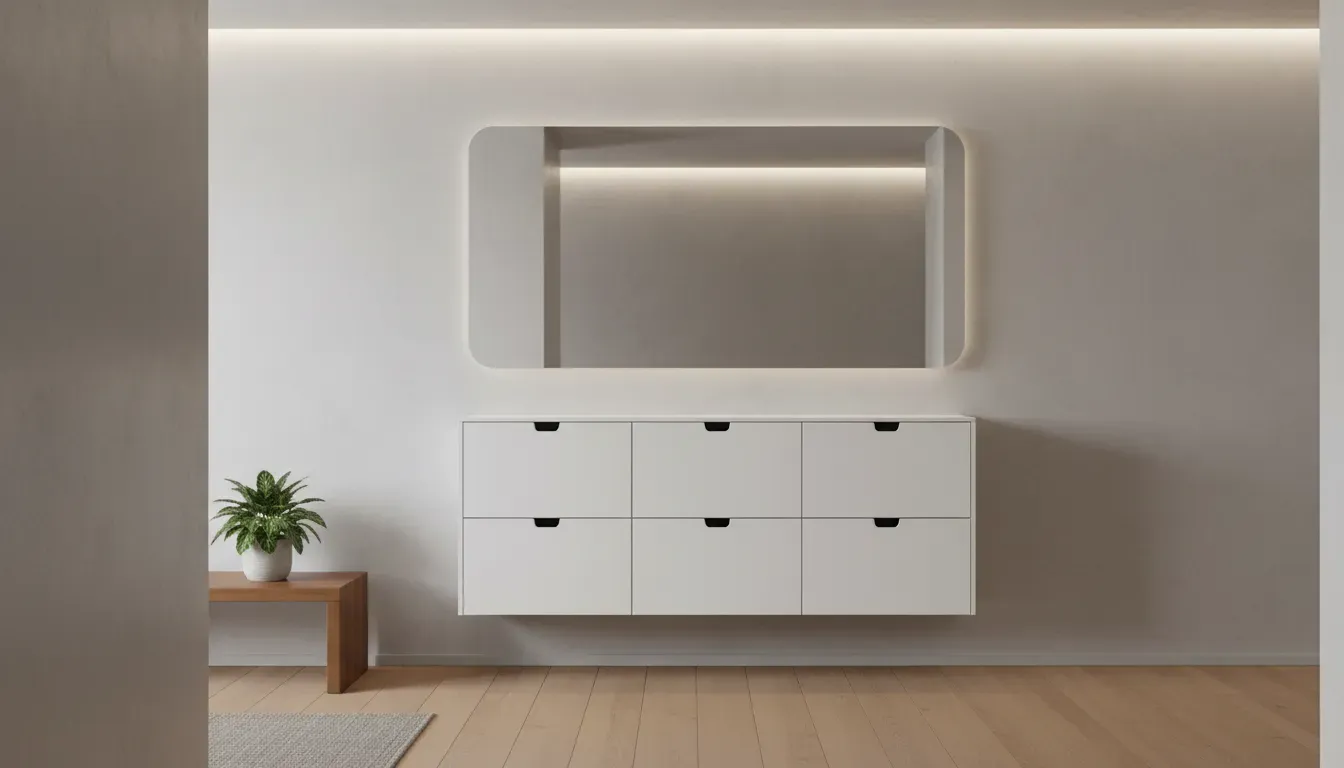
Floating Your Storage
Whenever possible, mount your shoe storage to the wall off the floor. Even a six-inch clearance beneath a cabinet creates the illusion of more floor space. Being able to see the baseboard run continuously along the wall tricks the brain into perceiving the room as larger than it is.
For boots that do not fit in tipping cabinets, consider a tall, narrow vertical cubby system tucked into a corner. Alternatively, utilize the lowest rung of your vertical storage for a boot tray that slides under a floating bench.
Renter-Friendly Vertical Solutions
Many apartment dwellers are restricted by lease agreements that prohibit drilling into walls. This does not mean you must abandon vertical storage; it simply requires different mechanics.
Tension Rod Technology
Tension rods are not just for shower curtains. A heavy-duty floor-to-ceiling tension pole system can serve as a coat rack, bike mount, or shelving unit without a single screw entering the plaster. These systems are highly customizable and can be moved easily upon lease termination.
Over-the-Door Organizers
While often associated with cheap dorm decor, modern over-the-door organizers utilize high-quality materials like steel and canvas. They can be placed on the interior of a coat closet door (if you are lucky enough to have one) or the main entry door itself. This is prime real estate for small items like gloves, lint rollers, and dog leashes.
For more ideas on managing temporary spaces, read our guide on renter-friendly organization hacks.
The “Slim Profile” Aesthetic
In narrow hallways, depth is the enemy. Furniture must be chosen based on its profile. Standard console tables are usually 14 to 18 inches deep. In a three-foot wide hall, this is unacceptable.
Search specifically for “console tables” or “radiator covers” that are 8 to 10 inches deep. You need just enough surface area to place a phone or a small tray. The space beneath a slim console is an excellent location for tucking ottomans (vertical seating storage) or tall baskets for umbrellas.
Find Extra Narrow Console Tables on Amazon
Visual Expansion: Mirrors and Lighting
While not strictly “storage,” the visual management of the entryway affects how the storage is perceived.
The Vertical Mirror
A large, tall mirror is non-negotiable in a small entryway. It serves a functional purpose for final outfit checks, but spatially, it acts as a window, doubling the visual depth of the room.
Place the mirror on the wall opposite your main storage wall if possible. This reflects the open space rather than the coats, preventing the reflection from looking cluttered. Alternatively, mirrored fronts on shoe cabinets or closet doors dissolve the visual weight of the furniture.
Lighting the Vertical Axis
Dark corners shrink a room. In an entryway without natural light, avoid relying solely on a single overhead fixture, which casts shadows downward.
Use wall sconces (plugin options are available for renters) to wash the walls with light. This draws the eye to the perimeter and emphasizes the vertical height. If you have open shelving, installing LED strip lighting under the shelves adds a luxurious touch and helps you locate items in the deep recesses of high storage.
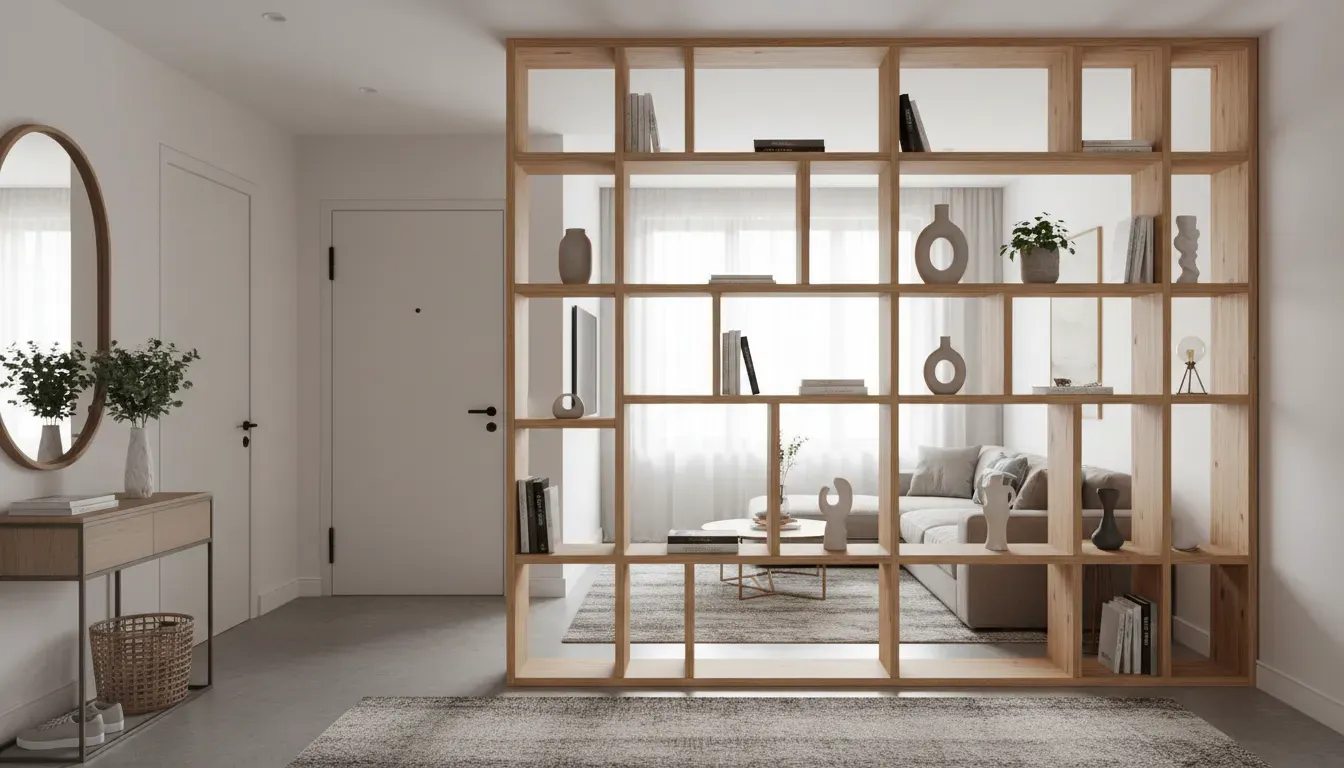
Architectural Hacks for Odd Layouts
Not all apartments have a defined hallway. Some open directly into the living space. In this scenario, you must create a “virtual” entryway using vertical dividers.
The Room Divider Storage
An open shelving unit (like an IKEA Kallax or similar) placed perpendicular to the wall can act as a partition between the “entrance” and the living room. This creates a foyer where there was none. Use the lower cubes for shoes and the upper cubes for decor and mail. This maximizes storage while defining the architectural zones of the apartment.
The Corner Solution
Corners are often dead space. A tall, triangular corner shelf can act as a catch-all tower. While it doesn’t hold as much as a flat wall unit, it utilizes floor space that is otherwise completely wasted.
Systematic Organization: The Habits of Maintenance
The most sophisticated vertical storage system will fail without a behavioral framework. In small spaces, clutter reaches critical mass much faster than in large homes.
The “One In, One Out” Rule
Vertical storage has finite capacity. If you buy a new coat, an old one must be donated or moved to deep storage (under the bed or a remote closet). The entryway is prime real estate; it cannot host your entire wardrobe.
Seasonal Rotation
Treat your vertical entryway storage as a dynamic staging area.
- Summer: The high shelves hold winter boots and heavy wool coats. The easy-access hooks hold light jackets and canvas bags.
- Winter: Swap the positions. The sandals go up high; the heavy coats come down to eye level.
This rotation ensures that the “Action Zone” is never overcrowded with items that are currently useless.
Visual Uniformity
To prevent your vertical storage from looking like a garage sale, strive for uniformity.
- Matching Hangers: If you have an exposed clothing rail, use identical hangers (wood or black velvet). This small detail significantly reduces visual noise.
- Color Coordination: While difficult to enforce strictly, try to group coats by color or length.
- Opaque Containers: Use bins for the high shelves that you cannot see through. Seeing a tangle of wires or old scarves through a clear plastic bin degrades the aesthetic.
Conclusion: Reclaiming the Threshold
Maximizing vertical entryway storage in a small apartment is an exercise in discipline and creativity. It requires looking at a blank wall and seeing a canvas for organization. By segmenting your wall into zones—overhead for storage, eye-level for access, and ground-level for shoes—you create a machine for living that processes your arrival and departure with efficiency.
Remember that the goal is not just to store more stuff; it is to create a sense of calm the moment you cross the threshold. A clear floor and an organized wall signal to the brain that you have entered a sanctuary, leaving the chaos of the outside world behind.
For more insights on optimizing your living space, explore our article on small bedroom storage hacks to continue your journey toward a fully organized home.