Small Hallway, Big Storage: 7 Genius Narrow Corridor Solutions
Transform your cramped hallway into a storage powerhouse. We explore 7 architectural and design-led solutions for narrow corridors that actually work.

Mar 1, 2026 - Written by: Linda Wise
You know the shuffle. We’ve all done it. You turn sideways, suck in your stomach, and shimmy past a pile of coats or a bulky console table just to get from the front door to the living room. It’s the “corridor dance,” and quite frankly, it’s a design failure.
Hallways are the arteries of our homes. When they get clogged, the whole house feels hypertensive. Yet, they are arguably the most neglected spaces when it comes to intelligent design. We tend to treat them as mere thoroughfares rather than potential real estate. In urban apartments or older homes where square footage is a luxury, a narrow corridor isn’t just a hallway; it’s a missed opportunity.
I’ve spent years analyzing floor plans where the hallway width hovers around that frustrating 36-inch mark. Standard furniture doesn’t fit. Shallow shelves become clutter magnets. But here is the kicker: the tighter the constraint, the more creative we have to get with the physics of the space.
This isn’t about just buying smaller furniture. It’s about rethinking the geometry of storage. We need to look at wall cavities, vertical dead zones, and optical illusions. If you are tired of tripping over shoes, we need to talk about strategic approaches to maximizing narrow corridor storage solutions.
Here is my deep dive into seven solutions that turn that claustrophobic tunnel into a storage powerhouse.
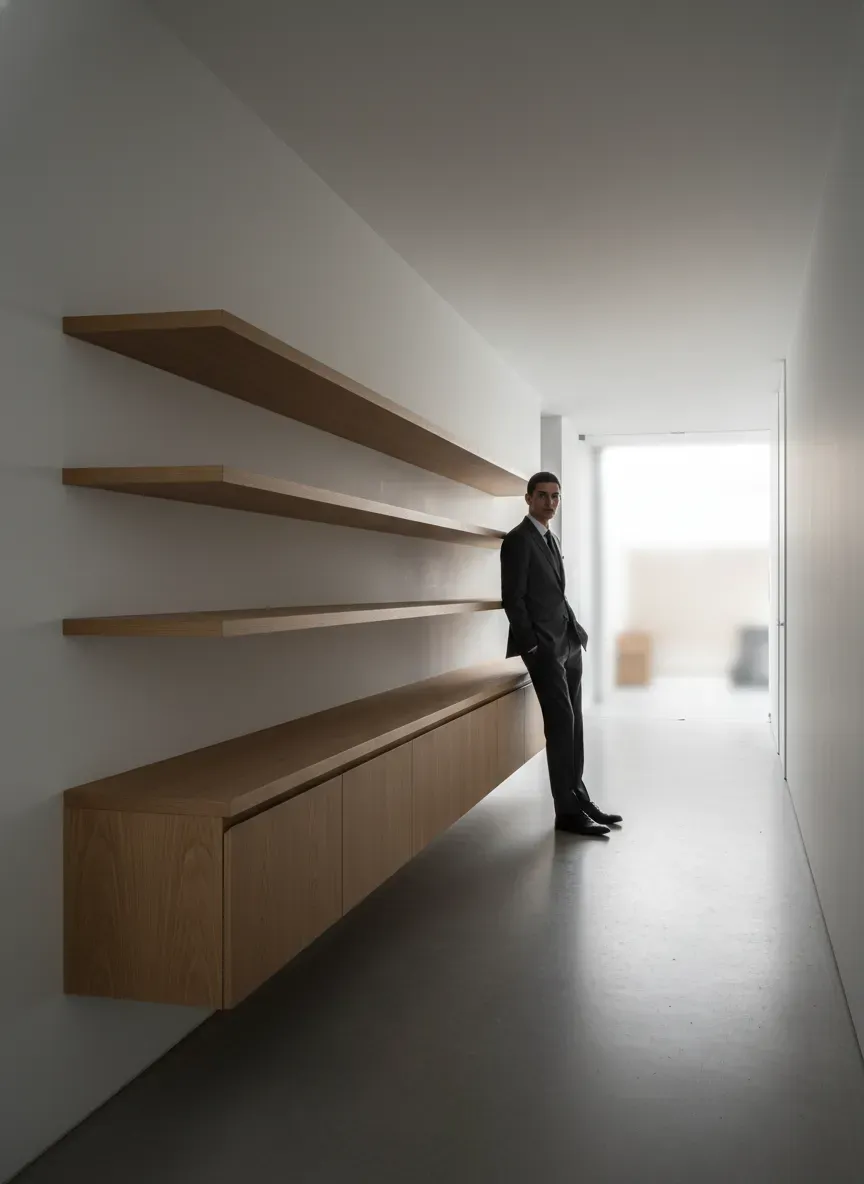
1. The “Floating” Philosophy: Reclaiming Floor Equity
The biggest mistake homeowners make in narrow hallways is sacrificing floor space to legs. Furniture legs, specifically. When you place a cabinet or a bench with bulky legs in a narrow hall, you are visually and physically shrinking the floor plate.
The eye judges the size of a room by how much floor it can see. If you obscure the floor-to-wall junction, the room feels tighter.
Suspension is Key
The solution is cantilevered or wall-mounted storage. By floating your cabinetry 10 to 12 inches off the ground, you maintain the “flow” of the floorboards. It’s a trick of the eye, sure, but it also makes vacuuming easier and prevents that trapped feeling.
I recently worked on a project where we ripped out a standard bookcase and replaced it with a floating credenza that was only 10 inches deep. The difference was visceral. The hallway felt two feet wider.
Pro Tip: When installing floating units in a high-traffic corridor, rounded corners are non-negotiable. Your hips will thank you later. If you are building custom, ask for a “bullnose” edge profile.
The Anchor Issue
Don’t just screw these into the drywall and pray. Hallway storage takes a beating. Coats are heavy; kids hang on things. You need to hit the studs. If your studs don’t align with your mounting holes, use a French Cleat system. It distributes the weight across the entire length of the wall, allowing you to load up that floating shelf with heavy books or decor without fear of it ripping out.
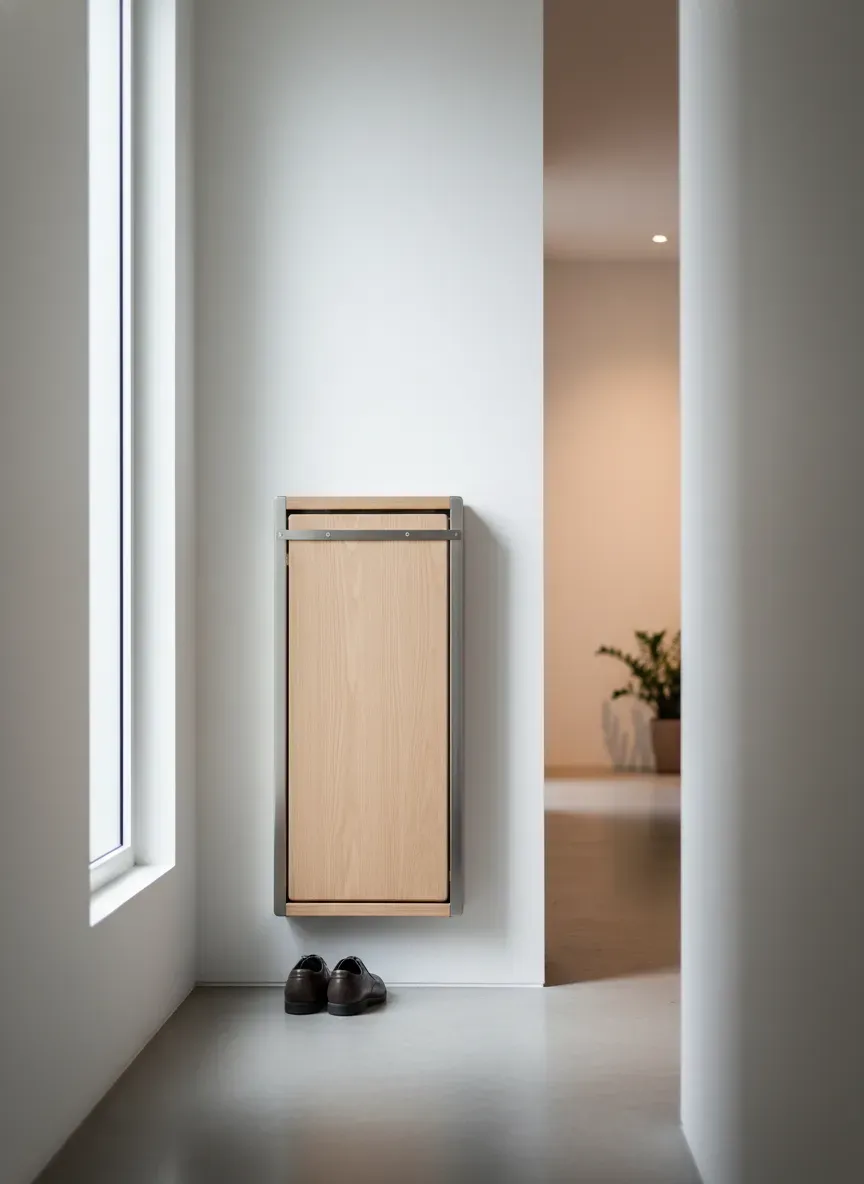
2. The Tilt-Out Revolution: Shoe Storage Geometry
Shoes are the nemesis of the narrow hall. A standard pair of adult sneakers is roughly 11 to 13 inches long. If you place them perpendicular to the wall, you’ve just lost a foot of walking space.
The geometry doesn’t work. Unless you change the angle.
Tilt-out shoe cabinets are perhaps the single greatest invention for tight corridors. By storing the shoes vertically (on a steep angle), you can reduce the cabinet depth to as little as 6 or 7 inches. This is sleek engineering at its finest.
Why It Works
It hides the visual clutter. A pile of shoes, no matter how neatly arranged, looks messy. A closed cabinet looks like architectural intent. The top of the cabinet also serves as a landing strip for keys and mail, doubling its utility.
If you want the best experience, I highly recommend checking out the Baxton Studio Simms Shoe Cabinet. I’ve installed this specific unit in three different client homes because the profile is incredibly slim, but the mechanism is robust enough to handle heavy winter boots without jamming.
Key Takeaways for Tilt-Outs:
- Measure the clearance: Ensure the cabinet doors don’t block the walkway when fully open.
- Ventilation: Look for units with open backs or slats. Enclosed shoes in a tight hallway can lead to odor buildup.
- Capacity: Be realistic. These are for “active” shoes (the ones you wear daily), not your entire collection.
3. Going Intra-Wall: Recessed Niches and Stud Bays
This is where we move from “decorating” to “renovating.” If you have a drywall partition, you have a hidden goldmine of space: the stud bay.
Standard interior walls are built with 2x4 studs, usually spaced 16 inches on center. This creates a cavity that is roughly 3.5 inches deep and 14.5 inches wide between the lumber. That might sound negligible, but 3.5 inches is enough for:
- Spices and pantry overflow (if the hall is near the kitchen).
- Toiletries (near the bath).
- Paperback books.
- Keys, wallets, and sunglasses.
The Surgery
You cut the drywall, frame out the box between the studs, and trim it out. You gain storage without encroaching a single millimeter into the hallway. I’ve seen entire libraries built into hallway walls this way. It’s flush, it’s custom, and it looks expensive.
However, before you start sawing into your walls, you need to understand what’s behind them. Wires, pipes, and ducts love to hide in hallway walls. For a comprehensive guide on checking for obstructions and framing these out, take a look at our deep dive on building built-in storage. It’s critical you don’t nick a Romex wire.
Pro Tip: Use the “back” of the door. If you have a closet door opening into the hallway, replace the solid door with a “Murphy Door” (a bookcase door). It utilizes the depth of the door frame itself for storage.
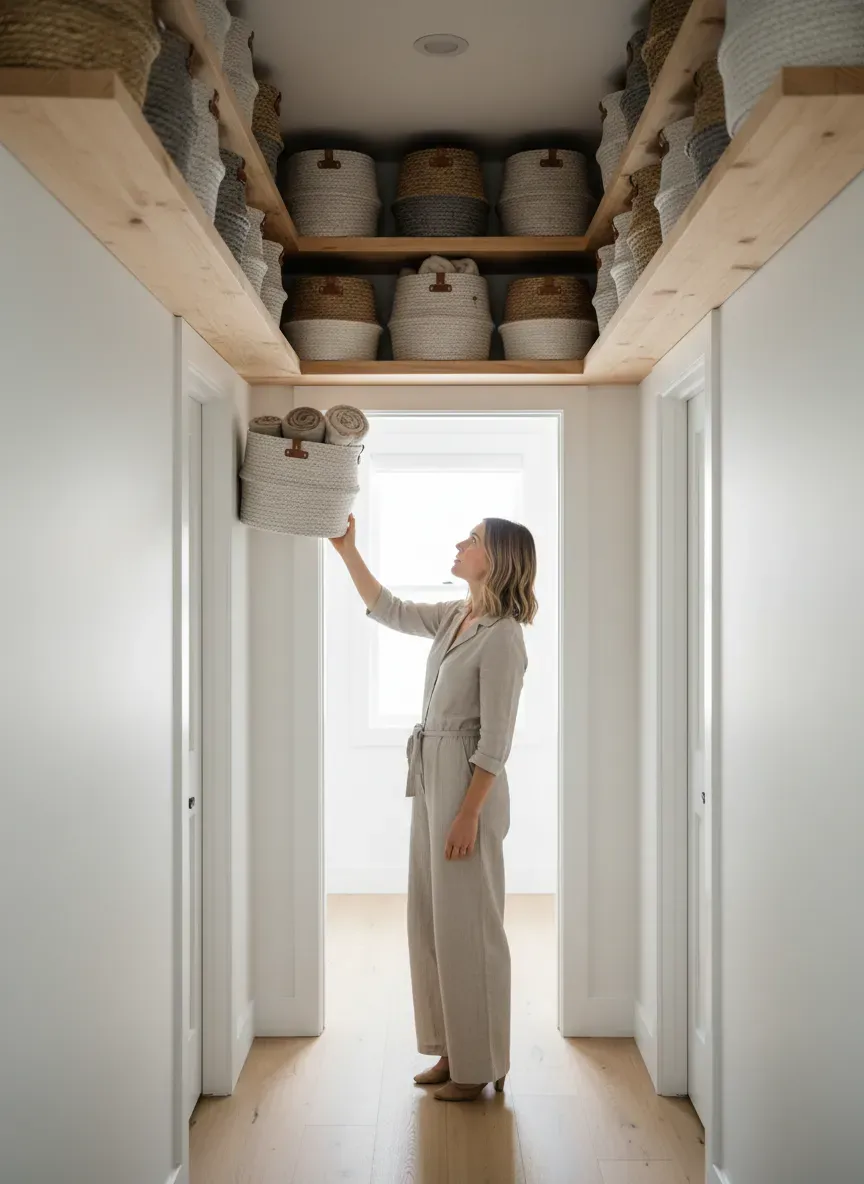
4. The “Dead Zone” Above the Architraves
Look up. Higher. Above the door frames. What do you see? Usually, nothing. Just blank painted drywall gathering dust.
In a narrow corridor with high ceilings (8 feet or higher), the space above the 6’8” door line is prime real estate for long-term storage. This is where you put the things you need once a year: holiday decorations, camping gear, or archives.
The Running Shelf
Install a continuous shelf running the entire length of the hallway, positioned 12 to 18 inches below the ceiling. By painting the underside of the shelf the same color as the walls, it visually disappears.
You can style this with uniform baskets to hide the junk. Uniformity is crucial here. If you put random cardboard boxes up there, it will look like a garage. If you use matching white bins or woven baskets, it looks like a design feature.
Visual Clearance
The beauty of high-altitude storage is that it doesn’t impinge on your “personal space bubble.” We perceive space mostly at eye level and shoulder width. Anything above 7 feet essentially doesn’t exist in our spatial map of the room, meaning you can go deeper—12 or even 14 inches deep—without the hallway feeling smaller.
5. The “Landing Strip” Concept: Managing the Drop Zone
In a massive foyer, you have room for a coat closet. In a narrow hallway, you have a “Landing Strip.” This is a designated, highly organized zone for the transition from outdoors to indoors.
The psychology here is vital. If you don’t have a specific place for mail, keys, and receipts, they end up on the kitchen counter or the dining table. The hallway must act as a filter.
The Peg Rail Solution
Shaker-style peg rails are having a massive resurgence, and for good reason. A continuous rail of wooden pegs running the length of the hall offers infinite flexibility.
- Need to hang a coat? Use a peg.
- Need to store a bag? Use a peg.
- Need to hang a mirror? Hang it from a peg.
- Need a shelf? Hang a specifically designed shelf bracket from two pegs.
It is flat against the wall when not in use. It has zero footprint.
Mail Management
Paper clutter is the silent killer of small spaces. You need a vertical sorter. Don’t let horizontal piles accumulate. I’ve written extensively about key mail management strategies for small entryways, but the gist is this: act on it immediately or file it vertically.
For a sleek, modern take on this, I personally use the Umbra Estique Wall Organizer. It has an integrated tray for mail and phone, plus hooks for keys, all in a very compact, perforated metal design that doesn’t look bulky on the wall.
6. Mirror & Console: The Optical Illusion Pairing
This solution addresses the storage need while simultaneously hacking the visual perception of the space.
A large mirror is a non-negotiable in a narrow hall. It bounces light (especially if you lack windows) and doubles the perceived width. But we can make the mirror work harder.
The Super-Slim Console
Pair a floor-to-ceiling mirror with a super-slim console table (6 to 8 inches deep). The console provides a surface for the “drop zone,” while the mirror behind it makes the console appear to float in the middle of a much larger room.
The Bottom Line: Ensure the console has drawers. An open-top table in a hallway just puts your clutter on display. Drawers hide the chaos.
If you are dealing with a truly dark corridor, consider adding LED strip lighting to the back of the mirror or the underside of the console. This creates a “halo” effect that pushes the walls out visually.
7. Custom Seating: The Necessity of Ergonomics
One of the biggest complaints I hear is, “I have nowhere to sit to put my shoes on.” In a 36-inch hallway, a bench seems impossible.
But is it?
We often forget about ergonomics in entryway benches and storage seating. You don’t need a deep lounge chair to tie a shoelace. You need about 12 inches of depth for a perch.
The Fold-Down Seat
Cinema-style folding seats are a brilliant retro-fit. When not in use, they flip up and sit almost flush with the wall (about 3-4 inches profile). When you need them, they provide a sturdy seat.
The “Nook” Bench
If you are lucky enough to have an alcove or a slightly wider section at the end of the hall, build a bench that spans wall-to-wall. By filling the width completely, it looks like architecture rather than furniture. Use the space underneath for heavy-duty storage drawers.
If you have kids or heavy gear, you might need something more robust than a floating shelf. For families, I often point towards heavy-duty entryway locker systems, but adapted for slim profiles.
If you are looking for a ready-made solution that fits this slim profile perfectly, the VASAGLE Industrial Shoe Bench is a solid contender. It’s narrower than standard benches but incredibly sturdy, bridging the gap between utility and space-saving design.
The Lighting Factor: Don’t Ruin the Storage with Shadows
I have to mention lighting because bad lighting can ruin even the best storage solutions. In a narrow hall, overhead “boob lights” cast shadows that make the walls feel like they are closing in.
When you install these storage solutions—especially the high shelves or the recessed niches—you must plan for lighting.
- Sconces: Direct light upwards to lift the ceiling.
- Puck Lights: Install battery-operated LEDs inside your open cubbies.
- Toe-Kick Lighting: If you install a floating cabinet, put an LED strip underneath. It illuminates the floor, emphasizing the open space we worked so hard to preserve.
Navigating the Traffic Flow
When planning these solutions, you have to map the traffic. Walk your hallway. Where do your shoulders naturally sway? Where do you carry groceries?
The “Hip Check” Test: Before permanently installing anything, tape the outline on the floor or cardboard-mockup the volume on the wall. Walk past it carrying two bags of groceries. If you have to twist your torso, it’s too deep. Reduce the depth.
It is better to have a 6-inch deep shelf that you use comfortably than a 10-inch deep shelf that bruises your hip every Tuesday.
Final Thoughts on the Narrow Corridor
Treating your hallway as a destination rather than a transition is a mindset shift. It turns a cramped annoyance into a functional asset. Whether you are cutting into the studs for a recessed niche or simply installing a smart tilt-out shoe cabinet, the goal is the same: maximize utility without compromising flow.
These spaces require precision. A quarter-inch matters here more than in the living room. But when you get it right, the satisfaction of sliding past a sleek storage unit without breaking your stride is unmatched.
Go measure your hallway width. You have more room than you think.