Removable DIY Entryway Organization Solutions for Renters
Master your rental's drop zone without risking your security deposit. Discover expert-level, damage-free entryway organization systems you can build yourself.
Mar 10, 2026 - Written by: Linda Wise
The moment you sign a lease, you enter a bizarre architectural purgatory. You pay a premium for a living space, yet you are legally bound by a terrifying document that threatens financial ruin if you so much as glance at a power drill. The entryway—that high-traffic, chaotic threshold where the outside world violently collides with your domestic sanctuary—suffers the most under these restrictions.
I’ve personally found that the traditional advice for organizing a foyer relies entirely on permanent fixtures: built-in mudrooms, heavy-duty wall anchors, and floating consoles bolted directly into the studs. But when your landlord considers a thumbtack hole a “material breach of contract,” you have to get creative. You need systems that are robust enough to catch heavy winter coats and dripping boots, yet transient enough to vanish without a trace when your lease expires.
This isn’t about slapping a flimsy plastic hook on the wall and calling it a day. We are engineering high-capacity, damage-free drop zones. By leveraging physics, modularity, and a little bit of structural ingenuity, you can fabricate an entryway that looks entirely bespoke but requires absolutely zero permanent modification to your rental unit.
Quick Comparison: Top Picks
| Product | Rating | Check Price |
|---|---|---|
| Command Heavy-Duty Wall Hooks | ⭐⭐⭐⭐⭐ | View on Amazon |
| Umbra Estique Over-the-Door Organizer | ⭐⭐⭐⭐½ | View on Amazon |
| Freestanding Bamboo Garment Rack | ⭐⭐⭐⭐½ | View on Amazon |
The Psychology of the Threshold
Before we touch a single piece of hardware, we have to understand the behavioral mechanics of coming home. The entryway isn’t just a physical space; it acts as a psychological airlock. It’s where you shed your professional armor and transition into your private life.
When this area is cluttered with a mountain of tangled shoes, overflowing mail, and randomly discarded bags, that chaotic visual noise spikes your cortisol the second you turn the deadbolt. You’ll notice that spatial dysfunction breeds behavioral dysfunction. If there isn’t an immediate, frictionless place to drop your keys, they end up on the kitchen counter. If there isn’t a dedicated slot for yesterday’s mail, it migrates to the dining table.
Creating a functional drop zone in a restrictive environment requires ruthless prioritization. You must audit your daily carry. What actually needs to live at the front door? If you’re dealing with a particularly cramped footprint, I highly recommend rethinking your spatial dynamics by reviewing some clever strategies for optimizing limited square footage and defining traffic flow. The goal is to build an ecosystem that catches your debris naturally, matching your existing habits rather than forcing you to adopt new ones.
The Golden Rule of Renting: Tension and Friction
When screws and nails are off the table, gravity and friction become your best friends. The core philosophy of removable DIY entryway organization hinges on structural independence. Your systems must support their own weight or utilize compressive force against existing surfaces without damaging them.

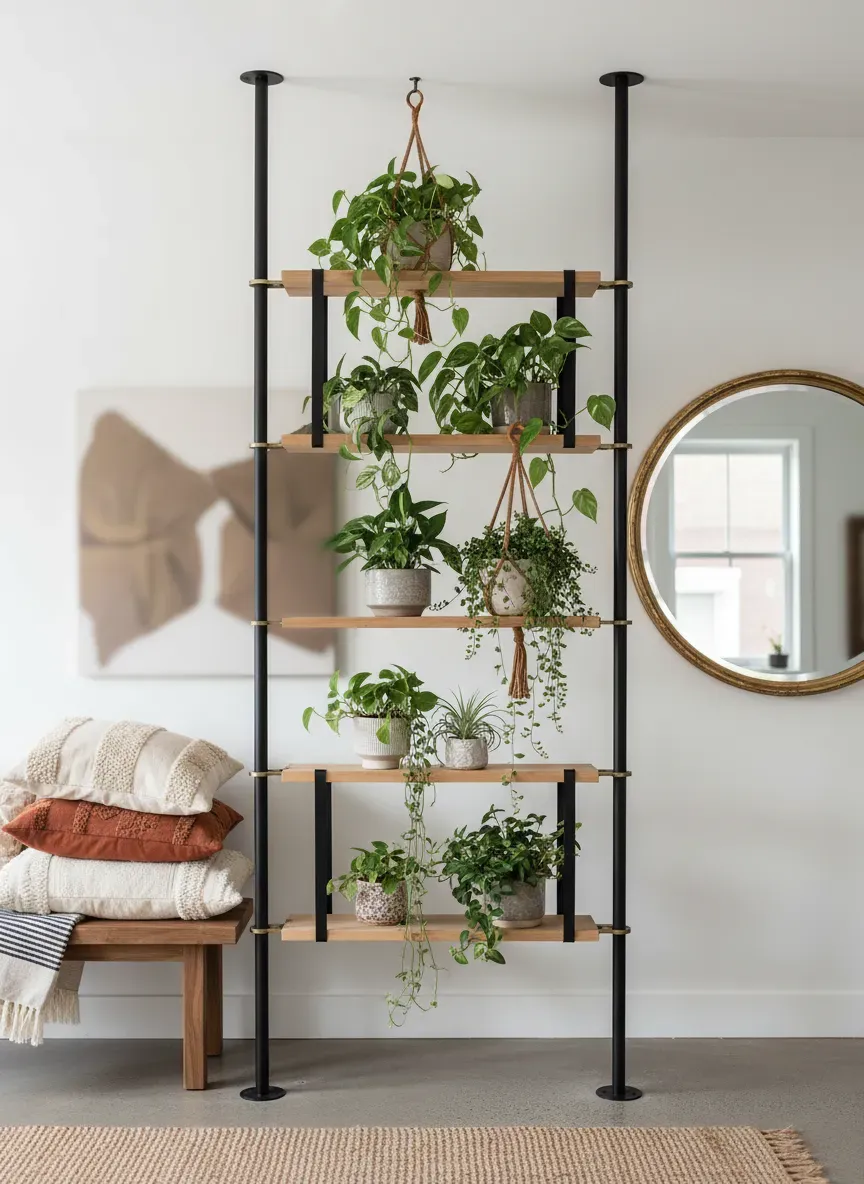
Floor-to-Ceiling Tension Systems
You might associate tension rods with flimsy shower curtains that crash down in the middle of the night. Banish that thought. Commercial-grade tension poles—often used in retail displays or heavy-duty closet systems—are absolute game-changers for renters.
By wedging a pair of heavy-duty steel tension poles between your floor and ceiling, you instantly create a load-bearing vertical frame. From this skeleton, you can mount crossbars for hanging coats, clamp on floating shelves for mail and sunglasses, or even attach wire grids.
Here’s the real kicker: because the force is distributed vertically, these systems can hold a staggering amount of weight. You’re effectively building a false wall right in front of your actual wall. To protect the landlord’s cheap popcorn ceiling and laminate flooring, simply slip high-density EVA foam pads under the contact points. This dampens the compressive force and completely eliminates scuff marks.
The Leaning A-Frame Structure
If you have a bit more floor space but absolutely refuse to risk tension marks on the ceiling, the leaning A-frame is an architectural marvel. Think of a beautifully crafted ladder shelf, but wider and customized for entryway specific tasks.
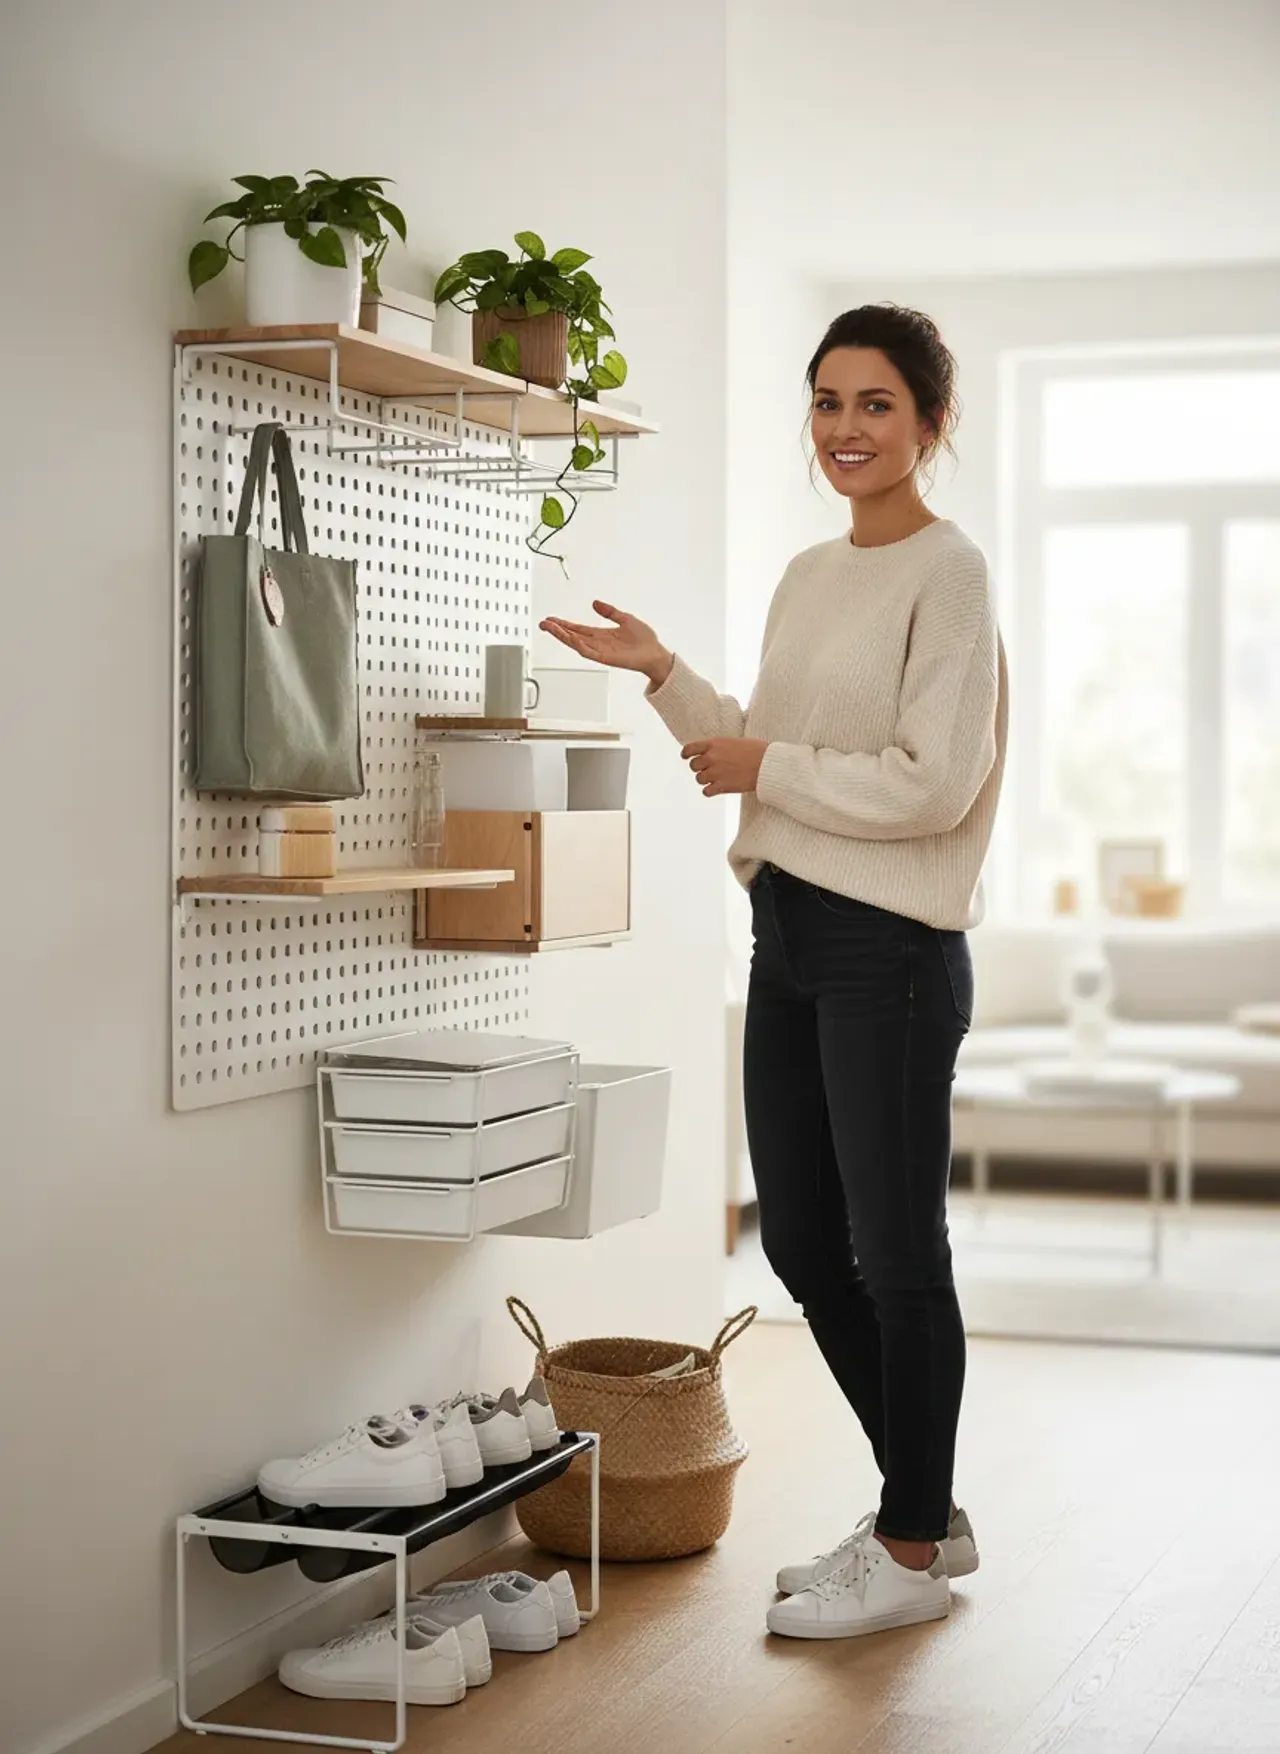
By angling a wooden frame against the wall at a 10-to-15-degree pitch, gravity forces the structure backward, stabilizing it. You can build a custom leaner out of premium pine or oak. Attach a solid plywood backer board to the upper half, drill some holes, and you suddenly have a massive pegboard for custom hook arrangements. The lower half can house angled shelves with a slight lip to catch footwear.
Pro Tip: To prevent a leaning structure from sliding out on slick hardwood floors, adhere thick rubber anti-slip furniture pads to the bottom feet. If you have baseboards, notch the back legs of your A-frame to sit flush against the wall above the trim, locking the whole assembly securely into place.
Advanced Adhesive Engineering
We can’t discuss renter-friendly DIY without addressing the elephant in the room: double-sided adhesive strips. Most people hate them because they either fail catastrophically under load or rip chunks of drywall off upon removal. Both issues stem from user error, not product deficiency.
The Science of the Bond
When you apply a high-capacity adhesive hook—like the Command Heavy-Duty Wall Hooks featured in our top picks—you are relying on a pressure-sensitive polymer.
- Surface Prep is Non-Negotiable: Rental walls are coated in invisible layers of cooking grease, dust, and microscopic debris. Wiping it with a dry paper towel does nothing. You must scrub the target area with 70% isopropyl alcohol and let it flash dry.
- The 24-Hour Cure: This is where 90% of renters fail. You cannot stick a hook to the wall and immediately hang a wet, six-pound wool trench coat on it. The adhesive requires a minimum of 24 hours (ideally 48) to fully wet out and bond with the microscopic pores in the paint.
- Load Distribution: If you need to hang a heavy bag, don’t rely on one giant hook. Mount a sleek wooden backer board to the wall using six evenly spaced heavy-duty strips. Then, screw your beautiful brass or matte black hooks directly into your wooden board. You’ve just distributed the weight across a massive surface area, entirely bypassing the landlord’s drywall restrictions.
Thermal Removal
When moving day arrives, never pull the adhesive strip straight out. Heat the plastic tab gently with a hairdryer on a low setting for thirty seconds. This softens the polymer lattice. Grab the tab and pull it straight down—parallel to the wall—stretching the strip until it voluntarily releases its grip.
Footwear Containment: The Ground-Level Crisis
Shoes are the absolute bane of entryway aesthetics. They drag in moisture, dirt, and visual chaos. A pile of sneakers instantly makes the entire apartment feel dirty, regardless of how clean your living room is.
Building a removable shoe system requires thinking volumetrically. Standard horizontal shoe racks consume massive amounts of precious floor real estate while leaving the vertical space above them completely dead.
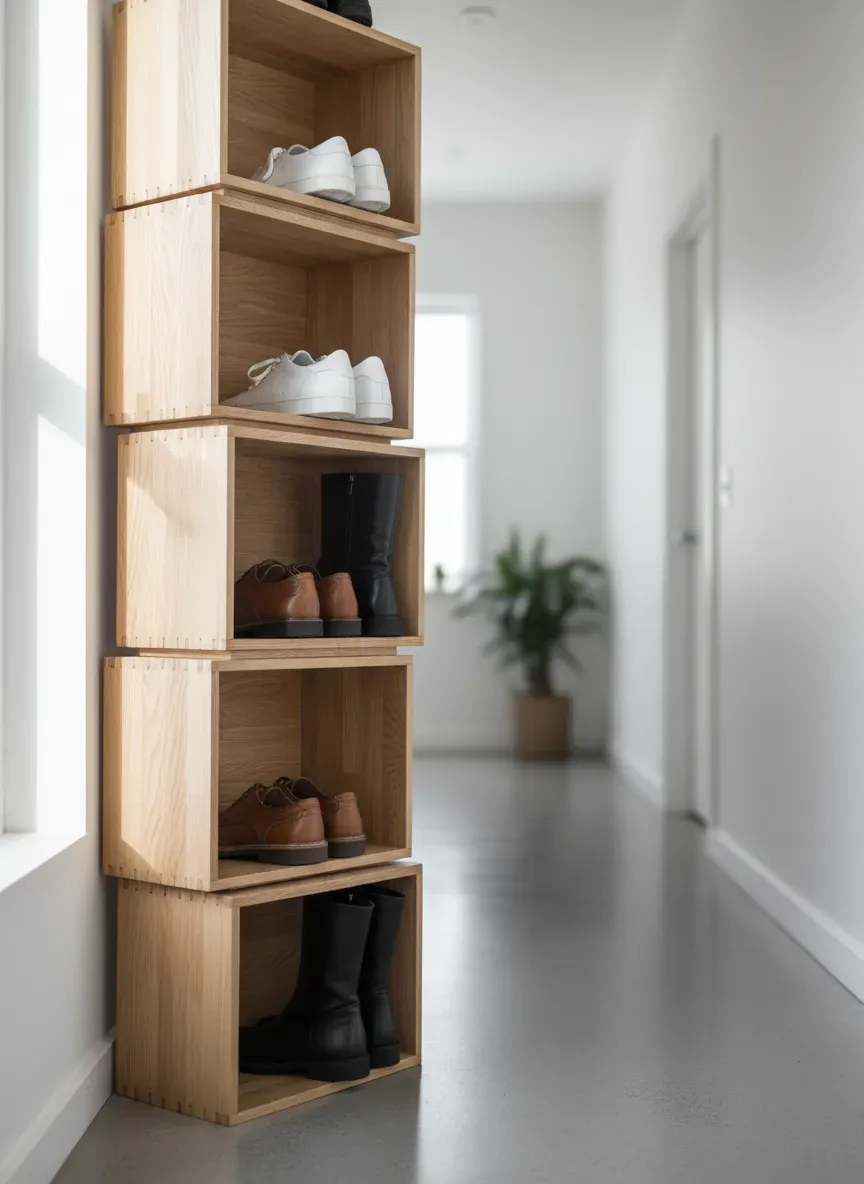
Modular Crate Systems
One of the most visually striking and easily transportable DIY solutions involves vintage or reproduction apple crates. By sourcing six to eight sturdy wooden crates, you can configure a custom geometric storage block.
Stack them vertically. Alternate their orientation—some facing forward to act as deep cubbies for boots, others turned on their sides to create slim shelves for sandals and flats. Binder clips or small, discrete C-clamps can hold the crates together at the rear edges, ensuring the tower doesn’t topple if bumped. When your lease is up, unclamp them, and you instantly have moving boxes ready to go.
The Pseudo Built-In
If you crave the seamless look of bespoke cabinetry but lack the permission to tear out baseboards, you need to explore freestanding, ultra-slim profiles. Many commercial units are designed to mimic built-ins. You can integrate one of these and augment it with your own DIY touches—like adding a custom stained butcher-block top or swapping out the generic hardware for brushed brass pulls. If you’re struggling to find the right profile, diving into the mechanics of high-capacity, low-profile storage dedicated strictly to footwear management can dramatically shift your perspective on what fits into a narrow hallway.
Floating the Dirt
For renters in regions with heavy snow or rain, putting wet boots directly on a wooden shoe rack is a recipe for warped timber and ruined security deposits. Instead, build a floating boot tray.
Purchase a heavy-duty rubber boot mat with a deep lip. Build a simple, low-profile wooden frame on casters that perfectly houses the mat. Now, you have a rolling, waterproof drop zone that sits neatly under your main storage system. It catches the slush, keeps the wet footwear off the rental’s flooring, and can be easily rolled to the bathroom for weekly hosing down.
Exploiting Unconventional Geometry
When you’re forbidden from modifying the walls, you have to look for existing architectural features you can legally hijack.
Over-The-Door Architecture
The back of your front door is prime, untaxed real estate. Most people slap a flimsy wire rack over the hinges and endure the irritating metal-on-metal clanging every time they leave the house. We can do better.
Invest in a rigid, padded system like the Umbra Estique Over-the-Door Organizer. It offers a combination of hooks and a small basket tray. To elevate this from a basic dorm-room fix to a premium organizational tool, use heavy-duty felt tape (the kind used for the bottom of chair legs) on the back of the organizer where it makes contact with the door. This entirely eliminates the rattling noise and prevents the unit from scratching the door’s paint.
The Side-Console Illusions
If your door opens against a wall, leaving a bizarre, 10-inch deep corridor of dead space behind it, capitalize on it. You can build an ultra-skinny console table specifically designed for this void.
Use standard hairpin legs, but only attach two of them to the front corners of a narrow plank of hardwood. For the back edge, rely on heavy-duty adhesive strips or a tightly wedged tension fit against the wall. It looks like a high-end, floating architectural detail, but it’s completely temporary. This surface becomes the dedicated landing pad for your wallet, keys, and incoming mail.
Concealment Tactics for Visual Purity
Organization isn’t just about giving everything a designated home; it’s about managing visual noise. Even if your keys, dog leashes, and reusable grocery bags are neatly hung on a pegboard, seeing all of those disparate colors and textures right at the front door can feel overwhelming.
The Magnetic Drop
Keys are visually messy. Instead of hanging them on exposed hooks, install a concealed magnetic catch. Buy a sleek, hollowed-out wooden block—or hollow one out yourself—and embed rare-earth neodymium magnets along the inside bottom edge. Mount this block to your wall using the heavy-duty adhesive technique mentioned earlier.
When you come home, you simply slap your keychain against the bottom of the wooden block. The hidden magnets catch the metal instantly. It looks like magic. It requires zero precision. And most importantly, it hides the jagged, messy profile of your keys, leaving only a clean geometric wooden form visible to guests.
Fabric and Camouflage
If you are utilizing a Freestanding Bamboo Garment Rack to manage your heavy winter gear, the sheer volume of fabric can make the entryway feel cramped.
You can soften this imposing structure by introducing a fabric screen or a room divider. If you’re handy with a sewing machine, creating a custom linen cover that slides over the back and sides of the garment rack instantly transforms it from an exposed utilitarian pipe into a soft, structured wardrobe. Choose textiles that match your wall color. By color-matching the fabric to the paint, the bulky storage unit visually recedes into the background, tricking the eye into perceiving more open space.
Scaling Up: The Pseudo-Mudroom
Sometimes, a renter lands a jackpot: a townhouse or an older home with a spacious foyer, but the landlord is still aggressively strict about modifications. When you have the square footage but lack the structural permissions, you can scale these removable techniques to construct a massive, highly convincing faux-mudroom.
This requires combining several freestanding elements into a cohesive monolithic unit. Start with a heavy, low bench—ideally one with deep internal storage. Flank this bench with two tall, freestanding bookshelf towers. Bridge the gap between the two towers by securing a solid piece of lumber across their tops (using C-clamps or discrete brackets that screw only into your furniture, not the walls).
Suddenly, you have an architectural alcove. You can adhere beadboard or removable wallpaper to a large sheet of thin hardboard, and wedge that hardboard behind your new bench and tower setup to create a custom backing. Add your adhesive hooks to this backing board.
The result is a stunning, wrap-around storage bay that looks like custom carpentry but is entirely held together by gravity, friction, and clever furniture placement. If you’re looking to execute this at a larger scale, breaking down the exact dimensions and material requirements for fabricating a highly efficient, contained drop zone from scratch will ensure your proportions remain elegant and structurally sound.
Managing the Unwieldy: Umbrellas, Leashes, and Bags
The true test of any entryway system isn’t how it handles a neatly folded scarf; it’s how it manages oddly shaped, kinetic items.
The Umbrella Conundrum
Wet umbrellas destroy hardwood floors. Instead of a bulky, freestanding umbrella stand that gets kicked over every Tuesday, build a magnetic drip-catch. Use a slim, cylindrical PVC pipe. Paint it matte black or wrap it in a high-quality faux-wood vinyl veneer. Attach heavy-duty magnets to the side of the pipe, and snap it directly onto the side of your metal door frame (most apartment door frames are steel to comply with fire codes). Drop a small sponge at the bottom of the tube to absorb runoff. It’s completely off the floor, perfectly secure, and requires zero tools to install or remove.
Dynamic Bag Storage
Tote bags and backpacks are heavy and incredibly bulky. Hanging them on flat walls causes them to protrude awkwardly into your walking path.
The solution is perpendicular hanging. If you are using an A-frame leaner or a tension-pole system, attach heavy-duty S-hooks to the sides of the structure, rather than the front face. This forces the bags to hang parallel to the wall, instantly recovering a foot of navigational space in your hallway.
Pro Tip: Keep your entryway system highly seasonal. A common pitfall for renters is trying to store twelve months of outerwear in a space designed for three. When the temperature shifts, vacuum-seal your winter coats and heavy boots, and banish them to the back of your bedroom closet or under the bed. Your entryway drop zone should only contain the items you need for the current 90-day weather cycle.
Key Takeaways
- Rely on physics, not hardware: Gravity, friction, and tension are the foundational forces of a renter-friendly entryway.
- Adhesives require patience: High-capacity strips only work if you prep the surface with alcohol and allow a full 24-hour cure time before applying a load.
- Go vertical to save floor space: Utilize floor-to-ceiling tension poles and over-the-door organizers to exploit dead vertical real estate.
- Distribute weight strategically: Mount a wooden backer board to the wall using multiple adhesive strips, then attach heavy hardware to the board to bypass drywall weight limits.
- Manage visual noise: Conceal keys with hidden magnets and use unified, modular crates for shoes to keep the threshold looking serene.
Final Walkthrough
You don’t need a sledgehammer, a box of drywall anchors, or a forgiving landlord to create a masterful drop zone. The constraints of a rental agreement shouldn’t condemn you to a life of tripping over sneakers and desperately searching for your keys every morning.
By shifting your perspective—treating your entryway not as a wall to be drilled into, but as a three-dimensional volume to be cleverly occupied—you unlock entirely new structural possibilities. Tension frames, leaning architecture, distributed adhesive weight, and perpendicular storage are all high-level engineering concepts disguised as weekend DIY projects.
The Bottom Line: Your home begins the second you cross the threshold. Build a system that respects your security deposit, catches the chaos of the outside world, and gives you the peace of mind you actually pay rent for. Assemble it with precision, use the right materials, and when the time comes to pack up and move on, leave the walls exactly as you found them.