7 DIY Mudroom Locker Ideas: From Narrow Halls to Grand Entries
Transform your chaotic entryway into a functional masterpiece. Discover seven custom mudroom locker builds, from ultra-narrow hallway hacks to grand architectural entries.

Mar 9, 2026 - Written by: Linda Wise
You step through the front door, arms loaded with groceries, and immediately trip over a rogue pair of cleats. Sound familiar?
If you are living with a chaotic drop zone, the prospect of dropping five to eight thousand dollars on custom architectural cabinetry likely feels like a punch to the gut. The alternative? Building it yourself.
I’ve personally found that tackling a mudroom storage project isn’t just about hammering some wood together; it’s an exercise in behavioral psychology. You are physically designing a system that forces your family to stay organized. Whether you have a palatial foyer with soaring ceilings or a cramped, claustrophobic hallway that barely fits a console table, there is a distinct structural solution waiting to be built.
Before diving into the exact blueprints and stylistic approaches for the ultimate 7 diy mudroom locker ideas: from narrow halls to grand entries, you need the right arsenal. A successful build relies heavily on the caliber of your tools and finishing materials.
Quick Comparison: Top Picks
| Product | Rating | Check Price |
|---|---|---|
| Kreg Pocket-Hole Jig 720PRO | ⭐⭐⭐⭐⭐ | View on Amazon |
| DEWALT 20V MAX Cordless Brad Nailer | ⭐⭐⭐⭐½ | View on Amazon |
| Zinsser B-I-N Shellac-Base Primer | ⭐⭐⭐⭐⭐ | View on Amazon |
Anatomy of a High-Functioning Drop Zone
Before you cut a single sheet of MDF or plywood, you need a master plan. The biggest mistake amateur carpenters make is failing to account for the anomalies of their specific space. Drywall is never perfectly flat. Floors are rarely level. Baseboards and crown molding will fight your installation every step of the way.
To execute a seamless, built-in aesthetic, you must strip the installation wall down to the studs—at least visually. Remove the existing baseboards. Trust me on this. Attempting to scribe a heavy cabinet around existing colonial trim is a nightmare that rarely yields professional results.
Pro Tip: Always map your studs using a high-quality magnetic stud finder before finalizing your locker widths. Securing a 200-pound cabinet filled with winter coats directly to drywall anchors is a guaranteed recipe for structural failure.
You also need to understand human ergonomics. A bench seat that is too high will cut off circulation to the back of your thighs; one that is too low will make standing back up a chore. Referencing a comprehensive guide on standard depth height measurements ensures your bench lands perfectly in that 18-inch high sweet spot, providing maximum comfort and utility.
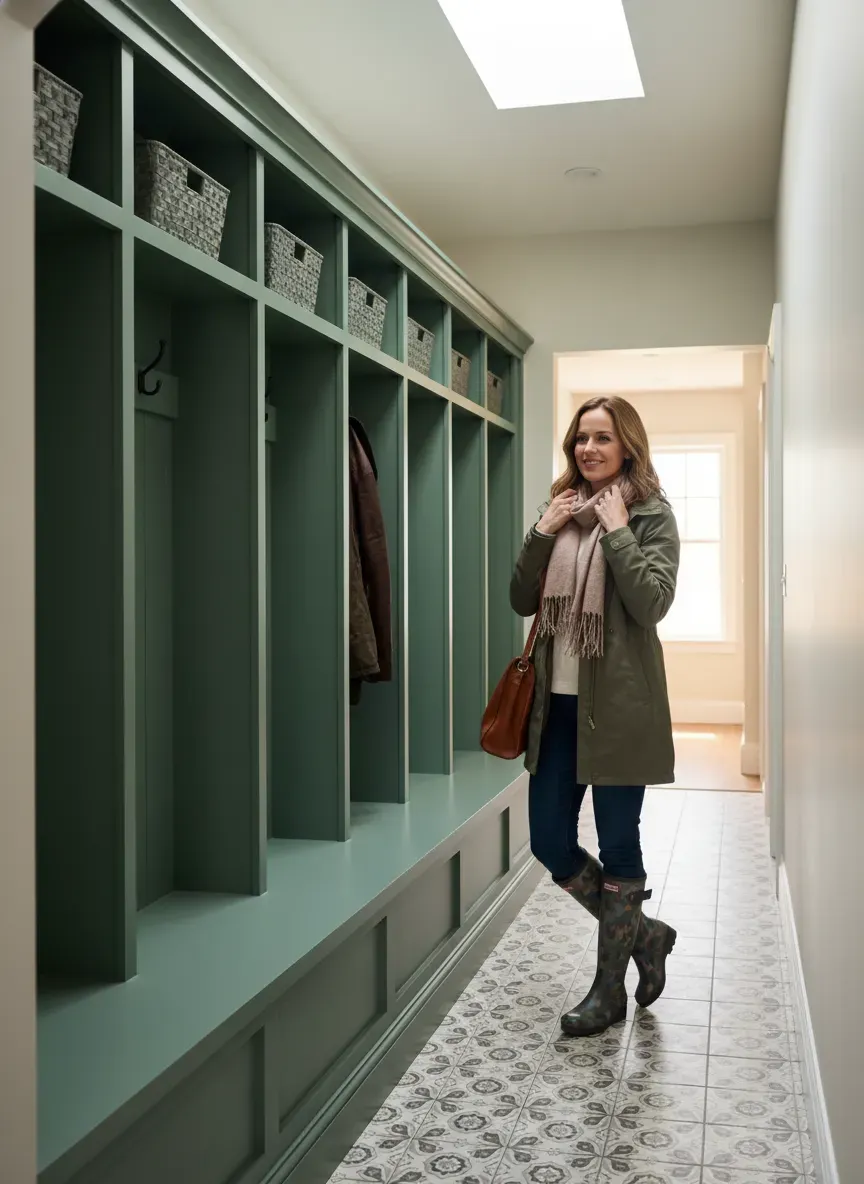
Idea 1: The Ultra-Narrow Hallway Hack
Not everyone has the luxury of a dedicated mudroom. Sometimes, your “entryway” is just a 36-inch wide hallway that funnels directly into the kitchen. Building deep, cavernous lockers here will strangle your traffic flow.
For tight corridors, the strategy shifts from deep cubbies to vertical, shallow-profile board-and-batten systems. You’ll notice that by limiting the lower bench depth to a mere 12 to 14 inches, you preserve walking space while still providing a functional drop zone.
Here’s the real kicker: you don’t actually need full-depth partitions between every coat hook. Instead, create visual lockers using 1x3 vertical trim boards secured flat against the drywall. Run a sturdy 1x6 header horizontally across the top, capping it with a modest 2-inch picture ledge. This creates the illusion of individualized lockers without eating up precious square footage.
Consulting a specialized mudroom locker depth guide will help you pinpoint exactly how shallow you can go before a bench becomes useless for adult-sized shoes. Paint the entire assembly—trim, bench, and the drywall trapped in between—a singular, dramatic color like a deep navy or forest green. This monochromatic drenching tricks the eye, making the flat trim look like heavy, expensive custom cabinetry.
Idea 2: The Prefab Hybrid (The IKEA Hack Revival)
Building cabinet carcasses from scratch requires precision, massive clamps, and a perfectly calibrated table saw. If your garage lacks a professional woodworking setup, the prefab hybrid method is your golden ticket.
By utilizing flat-pack furniture (think IKEA Havsta, Pax, or even standard kitchen pantry cabinets), you bypass the most tedious part of the build: constructing square, structurally sound boxes.
The secret to making cheap particle board look like a bespoke, architect-designed installation lies in the trim. You must frame the modular units out.
- Base: Build a custom 2x4 plinth base. Lift the prefab cabinets off the floor and set them on this base, then wrap the bottom in real wood baseboards that match your home’s existing trim.
- Spacing: Leave a 2-inch gap between each cabinet tower. Fill this void with a solid wood face frame.
- Ceiling: Run the cabinets as high as they go, then build a custom fascia board that connects the top of the units to the ceiling, capping it with crown molding.
The resulting aesthetic completely obscures the modular origins of the units. You get the speed of flat-pack assembly combined with the permanence of a custom build. Just remember to prime laminate surfaces with a heavy-duty shellac primer before applying your cabinet enamel, or your paint will peel off within a month of heavy use.
Idea 3: The Freestanding Bench and Cubby Combo
Renters and homeowners averse to ripping up their drywall, listen closely. You can achieve massive storage capacity without permanently modifying your architecture.
A freestanding unit relies on rigid box construction. Since it isn’t anchored into the framing of the house (aside from a necessary anti-tip bracket at the top), the joinery has to be bulletproof. I highly recommend using 3/4-inch birch plywood for the entire carcass. Assemble the joints using a combination of high-grade wood glue and pocket hole screws.
To hide the raw, layered edges of the plywood, apply iron-on wood veneer edge banding. It takes a little patience with a household iron and an edge trimming tool, but it elevates the piece from “dorm room DIY” to “premium furniture.”
Design the bottom third as an open bench with heavy-duty wicker baskets slid into the lower cubbies. The upper section should feature vertical dividers. Leave the back open if you want your wall color to push through, or staple a sheet of beadboard to the rear for added lateral stability and a classic, farmhouse aesthetic.
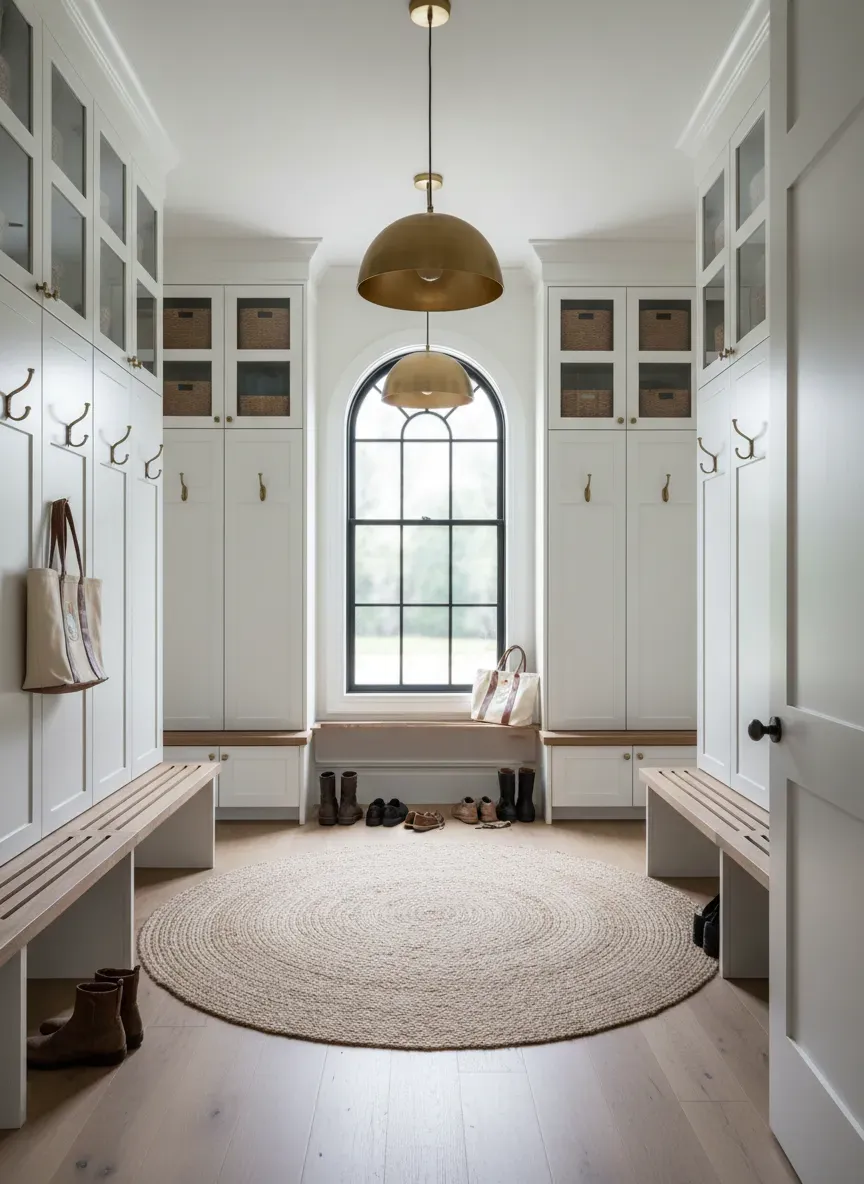
Idea 4: The Grand Entryway Built-In Architecture
When you have a massive, soaring entryway, a tiny bench looks comically out of place. Grand spaces demand heavy visual weight and architectural symmetry.
For this application, we scale up. We are talking floor-to-ceiling towers, thick 1.5-inch face frames, and integrated lighting. Start by flanking the space with two massive, closed-door pantry-style cabinets. These act as the anchor points. In the center, construct a sprawling, 6-foot wide bench built from solid white oak, sealed with a matte polyurethane.
Above the oak bench, install rich, tongue-and-groove paneling. The spacing of your hardware here is paramount to the luxury feel. Understanding the ideal spacing far apart for heavy-duty brass coat hooks ensures bulky winter jackets don’t overlap and create a messy visual clump.
To truly push this into the realm of high-end design, hardwire brass wall sconces directly into the header above the cubbies. The warm wash of light cascading down the wood tones creates a stunning focal point as soon as guests walk through your front door.
Idea 5: The Corner Carousel (Maximizing Awkward Angles)
L-shaped drop zones are notoriously difficult to design. If you simply run a bench straight into a corner, you create a “blind spot”—a deep, dark cavern where shoes disappear and dust bunnies multiply.
To conquer the corner, you must build on a 45-degree angle. Instead of two benches meeting at a harsh 90-degree joint, construct a dedicated, pentagonal corner unit. This angled transition piece acts as the fulcrum for the rest of the lockers.
- The Lower Section: Implement a heavy-duty lazy Susan mechanism inside the corner bench. This allows you to rotate the interior shelf, instantly bringing hidden shoes to the front.
- The Upper Section: Use the angled corner space to house taller, bulkier items that don’t fit in standard lockers—think hockey sticks, umbrellas, or tall riding boots.
Building on an angle requires a compound miter saw and a solid grasp of geometry. Your cuts must be dead-on. A one-degree variance at the back of the cabinet will compound into a massive, unfillable gap at the front face frame. Take your time, cut scrap wood test pieces, and use generous amounts of construction adhesive.
Idea 6: The Garage Mudroom Transitional Zone
Sometimes the best place for a mudroom isn’t inside the house at all. If your primary point of entry is through an attached garage, intercepting the dirt before it crosses the threshold is a brilliant tactical move.
Garage builds face a unique set of environmental challenges. They endure wild temperature fluctuations, high humidity, and the occasional blast of road salt. Standard MDF (Medium Density Fiberboard) will absorb ambient moisture, swell up like a sponge, and crumble within a year.
You must use exterior-grade plywood or a moisture-resistant substrate. Keep the lockers elevated on sturdy, adjustable leveling feet made of galvanized steel. Wrap the bottom plinth in a waterproof PVC trim board instead of wood.
Because aesthetics are slightly less critical in a garage, lean into raw, industrial utility. Swap out delicate shaker pegs for heavy-duty, rubber-coated utility hooks capable of holding power tools and heavy backpacks. Integrate a slatted wall system (slatwall) on the back panel so you can endlessly reconfigure the layout of wire baskets and hooks depending on the season.
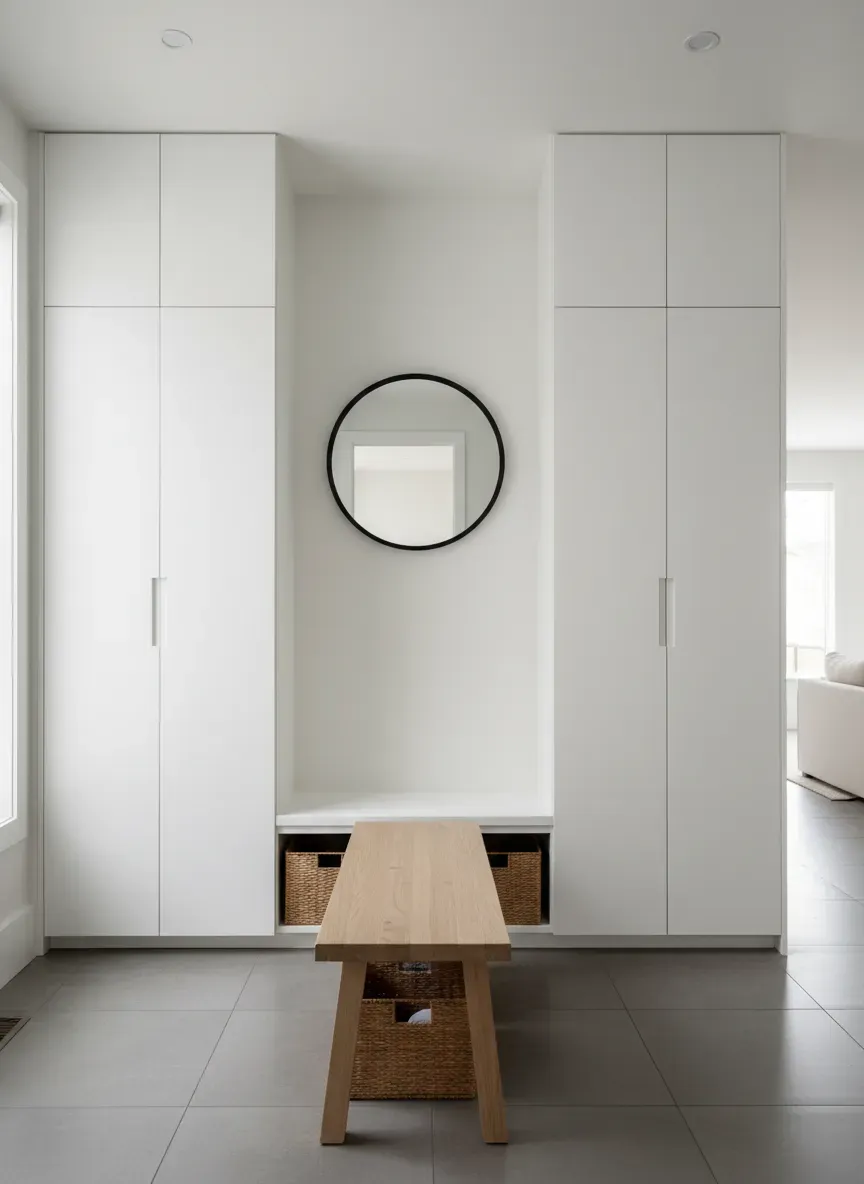
Idea 7: The Hidden-Door Minimalist Approach
Open cubbies are beautiful on Pinterest. In reality, they are often a vibrant, chaotic display of neon backpacks, dirty sneakers, and mismatched scarves. If you crave a serene, minimalist aesthetic, you need doors.
Designing closed lockers introduces the complex world of cabinetry hardware. You have two primary choices:
- Overlay Doors: The doors sit on top of the face frame. This is highly forgiving for DIYers.
- Inset Doors: The doors sit flush inside the frame. This looks incredibly expensive and high-end but requires absolute millimeter precision.
If you opt for inset, invest in specialized European hinges with 3-way adjustability. These mechanical marvels allow you to tweak the door up, down, left, right, in, and out with a simple turn of a screwdriver, ensuring perfectly uniform gaps (reveals) around the entire door.
Ditch the bulky handles entirely. Install magnetic push-to-open latches. When the doors are closed, the lockers simply look like a smooth, paneled architectural wall. Push gently on the wood, and the door springs open to reveal the hidden coats and shoes inside.
Construction Masterclass: Tools, Materials, and Avoiding Catastrophe
You have the blueprint. You know the style you want. Now, let’s talk about execution, because the difference between a project that looks professionally built and one that screams “weekend amateur” lies entirely in the finishing details.
The Substrate War: MDF vs. Plywood
MDF is heavy, creates toxic dust when cut, and absolutely hates water. Why use it? Because it is dimensionally stable and takes paint like a dream. It has no grain pattern, meaning your finished painted surface will be glass-smooth. Plywood is lighter, structurally stronger, and holds screws much better. However, even high-grade birch plywood has a subtle grain that can telegraph through your paint.
- The Solution: Use 3/4-inch plywood for the structural boxes and benches. Use MDF for the decorative face frames, doors, and trim pieces.
Scribing to Crooked Walls
Your walls are not straight. If you push a perfectly square cabinet against a wavy drywall surface, you will be left with ugly, inconsistent gaps. You must learn to scribe. Bring the cabinet close to the wall. Take a standard compass (like the one from high school geometry), set the point against the drywall, and the pencil against your cabinet trim. Run the compass down the wall. The pencil will transfer the exact topographical waves of the drywall onto your wood. Cut along that pencil line with a jigsaw, and your cabinet will fit against the wall tighter than a jigsaw puzzle.
The Holy Trinity of Finishing
Wood glue and brad nails hold the piece together. But wood filler, caulk, and primer make it beautiful.
- Wood Filler: Use a shrinking, sandable wood filler for all nail holes on flat wooden surfaces. Overfill the hole slightly, let it dry hard, and sand it perfectly flush with 220-grit paper.
- Acrylic Caulk: Never use wood filler in interior 90-degree corners (like where your face frame meets the wall, or where the bench meets the vertical dividers). Houses shift. Wood filler will crack. Run a thin bead of highly flexible, paintable acrylic caulk in all corners.
- Leveling Paint: Do not use standard latex wall paint on custom cabinetry. It remains slightly tacky and will peel under the abrasion of sliding baskets. Invest in a premium Waterborne Alkyd Enamel. It sprays or rolls on like a water-based paint but cures to a hard, durable, plastic-like shell.
Key Takeaways
- Always anchor your units directly into the structural wall studs, never just the drywall.
- Match the depth of your build to the physical constraints of your room to protect traffic flow.
- Combine plywood for structural integrity with MDF for a flawless painted finish.
- Scribe your trim pieces to the wall to eliminate unsightly gaps and shadow lines.
- Use a high-quality alkyd enamel paint to withstand the daily abuse of shoes, bags, and coats.
The Bottom Line: Transforming your entryway isn’t an insurmountable architectural feat reserved only for elite contractors. By selecting the right structural approach for your specific space, utilizing smart modular hacks when necessary, and refusing to cut corners during the crucial priming and caulking phases, you can build a massive, high-end drop zone. Grab your tape measure, fire up the miter saw, and reclaim your floor space.