Integrating Pet Gear Storage into Your Built-In Entryway Organization
Master the art of interspecies design with this guide on seamlessly integrating pet gear into your entryway joinery. Functional, stylish, and chaos-free.

Feb 28, 2026 - Written by: Linda Wise

The moment you walk through the door, reality hits. Usually, it hits you in the shins in the form of an ecstatic Golden Retriever or a hungry tabby weaving between your legs. But once the greeting is over, you’re left holding a wet leash, stepping over a stray chew toy, and wondering where to put a 40-pound bag of kibble that doesn’t ruin the aesthetic of your carefully curated foyer.
We spend thousands on custom millwork for our coats and boots, yet our four-legged family members are often relegated to a plastic bin in the corner. That ends now. Integrating pet gear storage into your built-in entryway organization isn’t just about hiding the clutter; it’s about elevating your lifestyle and recognizing that the “mudroom” is, quite often, the “dog room.”
I’ve spent years designing transition spaces, and I can tell you that the difference between a chaotic entryway and a serene one usually comes down to whether the dog’s leash has a dedicated hook or if it lives on the bench.
The Audit: Understanding Your Pet’s Footprint
Before you even look at a blueprint or a cabinet catalog, you need to conduct a gear audit. You might think you just need a drawer for treats, but once you start piling up the winter coats, the booties (for those who live in salt-heavy snowy regions), the grooming wipes, and the backup collars, the volume is surprising.
When planning built-ins, we usually obsess over human dimensions—coat lengths and shoe sizes. However, you need to apply that same rigor to your pet’s inventory.
Pro Tip: Measure your largest bag of food. Most standard base cabinets are 24 inches deep, but oversized kibble bags can be deceptively wide when laid flat or tall when standing upright. Ensure your pull-outs are sized for the bulk buy, not just the weekly refill.
If you are in the planning phase, you should verify you are adhering to standard depth height measurements for the structural integrity of the unit, but don’t be afraid to customize the internal cavities to fit a crate or a specific food container.
Zoning: The “Paw Level” Principle
The most successful integrated storage follows a vertical hierarchy. Humans operate from the waist up; pets operate from the knee down. This natural separation allows us to integrate storage without cross-contamination (nobody wants dog hair on their cashmere scarf).
The Low Zone (0” - 24”)
This is prime real estate for the heavy, dirty, and daily items.
- Kibble Drawers: Toe-kick drawers or bottom-tier pull-outs are ideal here.
- Water Bowls: Recessed niches prevents tripping.
- The “Mud” Bunker: A dedicated cubby for dirty towels and paw wipes.
The Mid Zone (24” - 60”)
This is the transition space. It’s where the leash grab happens.
- Leash Hooks: Accessible without bending down, but low enough that they don’t tangle with human coats.
- Treat Jars: On open shelving or shallow drawers.
The High Zone (60”+)
This is for overflow and seasonal storage.
- Travel Crates: Bulky items that are used infrequently.
- Medical Records/Spare Meds: Keep these out of reach of children and pets.
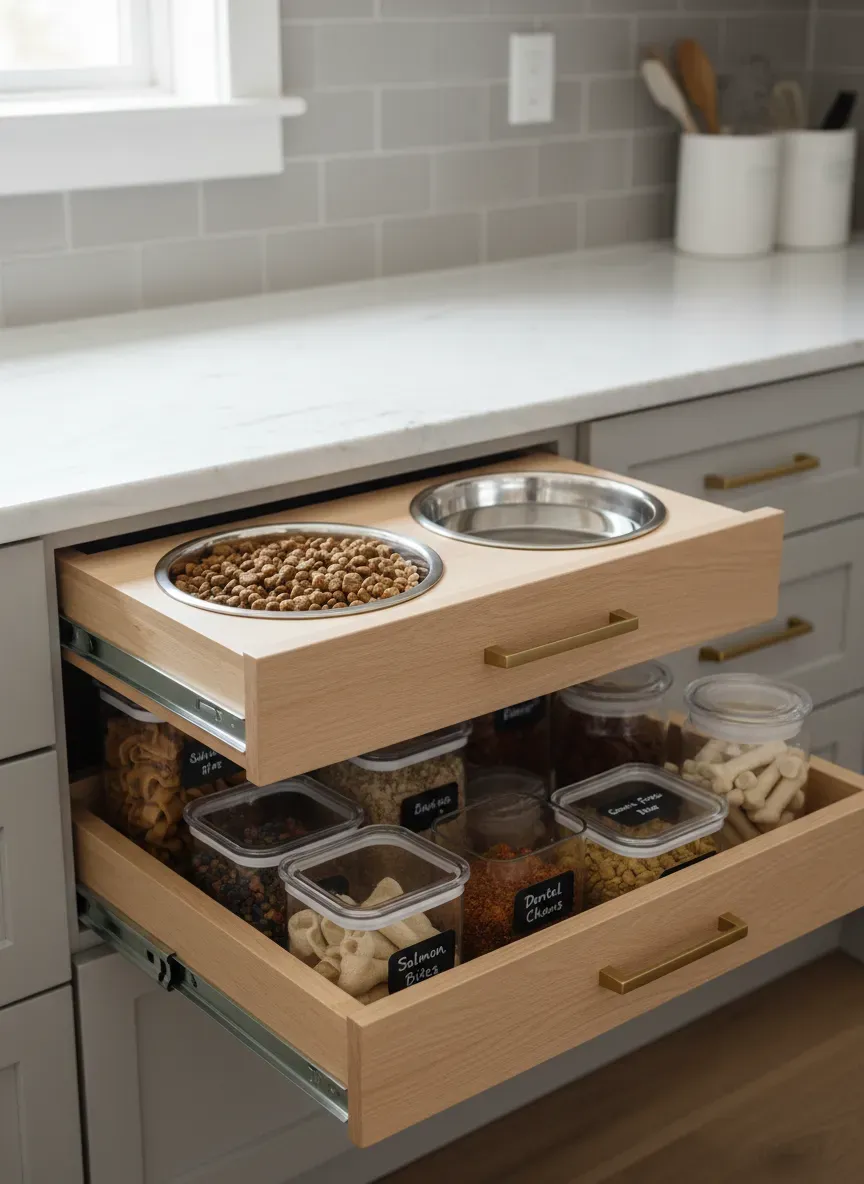
The Kibble Conundrum: Built-In Feeding Solutions
Let’s talk about the elephant—or the Great Dane—in the room: food storage. The ugly plastic tub has to go. Integrating feeding stations into your millwork is one of the highest-ROI upgrades you can make for daily convenience.
The Tilt-Out Bin
Similar to a trash pull-out, a tilt-out bin concealed behind a cabinet door keeps food accessible but invisible. However, wood absorbs oils. If you dump kibble directly into a wooden drawer, it will eventually go rancid and smell.
You absolutely must use a liner. I recommend sourcing a high-quality, air-tight container that fits inside the pull-out. If you want the best experience, I highly recommend checking out the Iris Airtight Pet Food Container. It’s slim enough to fit into custom joinery but robust enough to seal in odors.
The Toe-Kick Drawer
For smaller pets or treats, the wasted space behind the plinth (baseboard) is gold. A touch-latch drawer here can hold canned food or backup leashes. It’s a stealth storage solution that utilizes dead space.
When designing these lower sections, you are essentially determining the best depth mudroom lockers ensuring that you can close the cabinet door even if the food bag bulges slightly. Always add two inches of clearance to your measurements.
Managing the Leash and Harness Tangle
Leashes are the wire hangers of the entryway world; they multiply and tangle when you aren’t looking. The standard single hook is insufficient for a multi-dog household or for owners who have different leashes for running, walking, and training.
The Hidden slide-out
My favorite integration is the vertical slide-out—similar to a spice rack pull-out in a kitchen—specifically for leashes. You install hooks on the internal board of the pull-out. This keeps the visual clutter completely hidden.
If you opt for exposed hooks, placement is critical. If hooks are too close, bulky harnesses will overlap, creating a frustrating morning wrestling match. You must calculate the ideal spacing far apart enough to accommodate the width of a padded harness, not just the thin strap of a leash.
The “Drying” Loop
Leashes get wet. If you toss a wet nylon leash into a closed drawer, it mildews. I always suggest integrating a small, discreet knob or hook on the exterior side of the cabinet or under the bench lip specifically for drying damp gear before it gets packed away.
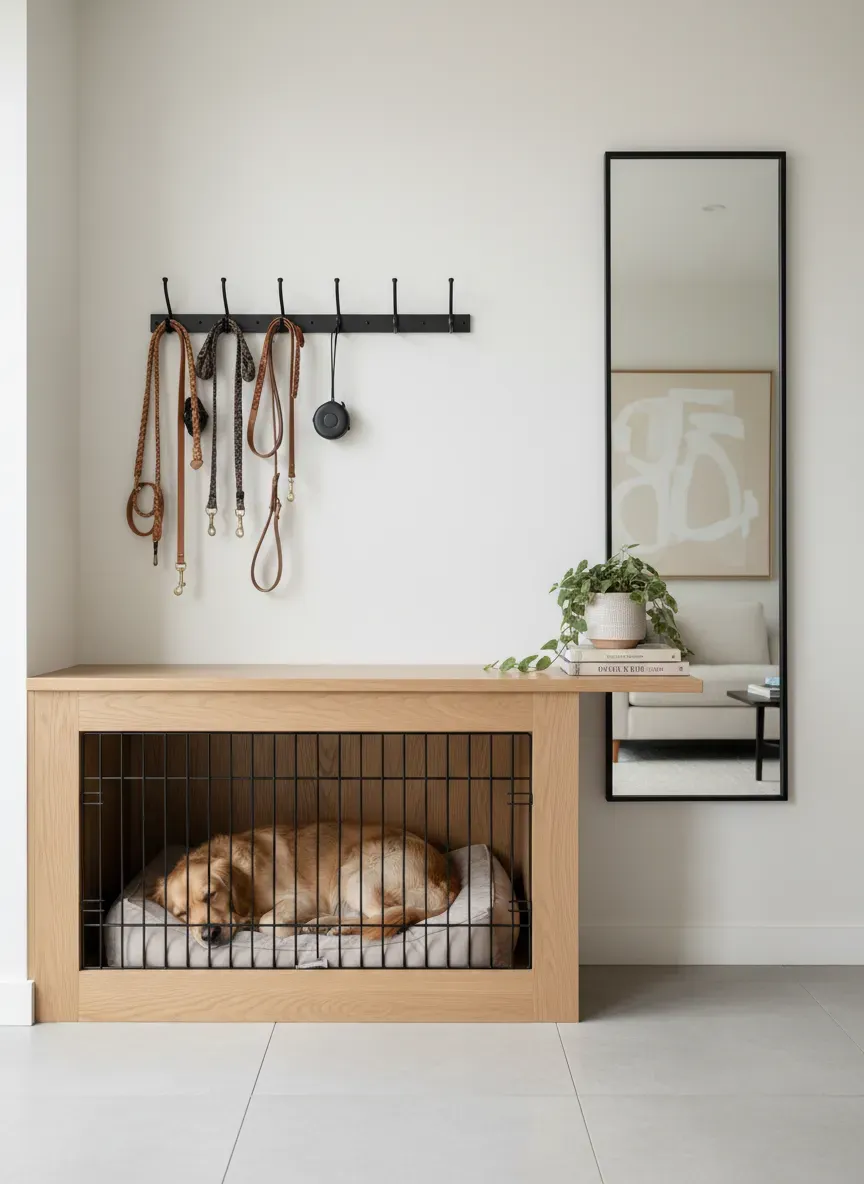
The Integrated Crate: A controversial but brilliant move
The wire crate is an eyesore. There is no way around it. However, your dog sees it as a safe haven. Integrating the crate into the cabinetry is a game-changer.
This usually involves building a mesh-fronted cabinet into the lower section of a mudroom locker unit.
Critical Considerations for Built-in Crates:
- Ventilation: You cannot use solid doors. You need metal grilles or decorative laser-cut wood panels that allow significant airflow.
- Cleanability: The floor of this cabinet cannot be wood. It must be tiled or lined with a waterproof laminate. Accidents happen.
- Removability: Do not build the crate permanently into the structure if you can avoid it. Instead, build a “garage” that fits a standard high-quality crate. This allows you to remove the crate for deep cleaning or replacement.
If you are going the custom route, ensure the latch mechanism is robust. Dogs are escape artists.
Materiality: Durability Meets Design
Dogs have claws. They have wet fur. They shake mud onto walls. If you use a soft pine for your entryway bench or a flat matte paint, you will regret it within a month.
Surfaces
For the bench seat where the dog might jump up to be leashed, avoid soft woods. Oak, maple, or even a high-quality quartz composite are superior. If you paint your built-ins, use a high-performance enamel or lacquer. These finishes harden to a shell that resists scratching and wipes clean easily.
Hardware
Avoid low-hanging loop pulls that a collar could get snagged on. Flush pulls or recessed hardware are safer for lower drawers. This aligns with the safety protocols used when child-proofing your entryway benches; sharp edges and protruding metal are hazards at dog-eye level.
The Wash Station Integration
If you have the plumbing and the space, a dog wash station integrated into the mudroom cabinetry is the ultimate luxury. However, you don’t need a full shower to have a “cleaning station.”
A deep drawer equipped with a dedicated “mud buster” kit is sufficient for most. Keep a stack of microfiber towels in an open cubby right at the door.
For the active dog owner, having a specific spot for paw cleaning tools is essential. I personally use and love the Dexas MudBuster Portable Dog Paw Cleaner. Having a dedicated circular cutout in a shelf to hold this upright (so the dirty water doesn’t spill) is a detail that screams “custom.”
Key Takeaways for Pet-Centric Joinery
- Ventilation is Non-Negotiable: Whether it’s food or damp coats, air must circulate to prevent mold and stale odors.
- Hard Surfaces Low, Soft Surfaces High: Keep the delicate materials out of the “shake zone.”
- Future-Proofing: Design crate spaces that can be converted into standard storage if you no longer have a pet (or if you get a bigger dog).
- The “Yuck” Factor: dedicated bins for waste bags and dirty toys should be removable and washable.
Aesthetic Cohesion: Keeping it Stylish
The goal is to make these features invisible to the untrained eye. A pull-out food bin should look exactly like the drawer next to it that holds your winter scarves.
Use consistent hardware. Carry the crown molding across the top. If you use metal mesh for a crate door, match the finish to your cabinet handles (e.g., brushed brass mesh with brass pulls).
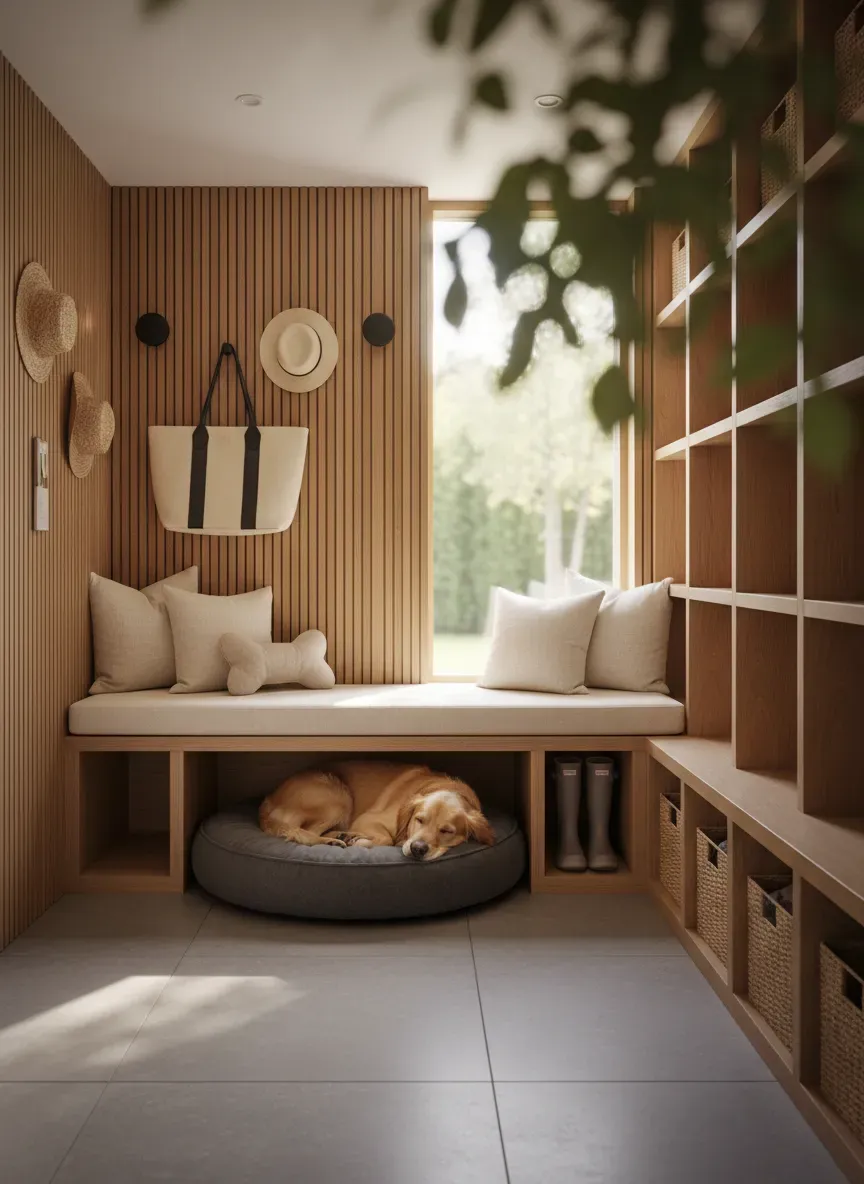
Pro Tip: If you have an open bench area, use the space underneath for a custom upholstered dog bed that matches your entryway runner or window treatments. It ties the room together and gives the dog a designated “place” command spot while you get your shoes on.
The “Go-Bag” Hooks
Just as you have a spot for your keys, you need a spot for the “adventure kit.” This is the harness, the collapsible bowl, and the long-line leash used for weekend hikes.
I recommend installing a heavy-duty double hook on the interior of a tall cabinet door. It utilizes dead space and keeps the bulky weekend gear separate from the daily walking gear.
For organizing the small items inside that cabinet—poop bags, clickers, whistles—a hanging organizer is brilliant. The Over The Door Pantry Organizer is surprisingly effective for pet gear because the clear pockets let you see exactly where the spare roll of bags is when you’re rushing out the door.
The Bottom Line
Integrating pet gear isn’t about compromising your design; it’s about acknowledging the occupants of your home.
A built-in entryway that ignores the dog is a failed design. It forces you to bring in ugly aftermarket solutions that clutter your walkway. By planning for the kibble, the crate, and the muddy paws from the very beginning, you create a space that functions seamlessly.
The joy of a custom entryway is that everything has a place. When you drop your keys, kick off your boots, and hang up the leash in one smooth motion, you’ll realize that the extra planning wasn’t just for the dog—it was for your own peace of mind.