Selecting the Right Hardware: A Guide to Heavy-Duty Hooks for Entryway Organization
Stop replacing broken coat racks. We analyze the metallurgy, installation physics, and design strategies behind selecting true heavy-duty entryway hardware.
Feb 28, 2026 - Written by: Linda Wise

There is a distinct, sickening sound a coat rack makes right before it rips out of the drywall. It’s a crunch, followed by a thud. I’ve heard it more times than I care to admit, usually caused by a teenager’s backpack loaded with enough textbooks to sink a small boat.
If you are redesigning a mudroom or simply trying to organize a chaotic front hall, the hardware you choose is not merely jewelry for your walls; it is the structural engine of the space. Most people treat hooks as an afterthought, grabbing a multi-pack from the hardware store bin without a second glance at the load rating or the metal composition. This is a mistake.
True organization requires hardware that can withstand dynamic loads, wet wool coats, and the sheer negligence of a rush-hour exit. We are going to dissect exactly what makes a hook “heavy-duty,” how to install them so they outlast the house, and which specific models actually live up to the hype.
The Physics of Failure: Why Hooks Break
Before we buy anything, we have to understand why the old ones failed. It usually boils down to two factors: Tensile Strength and Shear Force.
When you hang a coat, gravity pulls it down (shear). When you hang a backpack that sticks out four inches from the wall, you create a lever arm that pulls the top screw outward (tension). Cheap hardware is often made of die-cast zinc, a porous metal that is easy to mold but brittle under tension.
I’ve personally found that the “heavy-duty” label on packaging is often marketing fluff. A hook rated for 35 pounds might hold a 35-pound static weight in a laboratory setting. But when your kid throws a 15-pound bag onto it from two feet away, the dynamic force—the shock load—can easily exceed that rating.
Material Composition matters
You want forged iron, steel, or high-grade aluminum.
- Die-Cast Zinc: Common, cheap, breaks with a snap. Avoid for heavy loads.
- Extruded Aluminum: Lightweight but surprisingly strong. Good for modern aesthetics.
- Forged Steel/Iron: The gold standard. If you drop it on your foot, it should hurt.
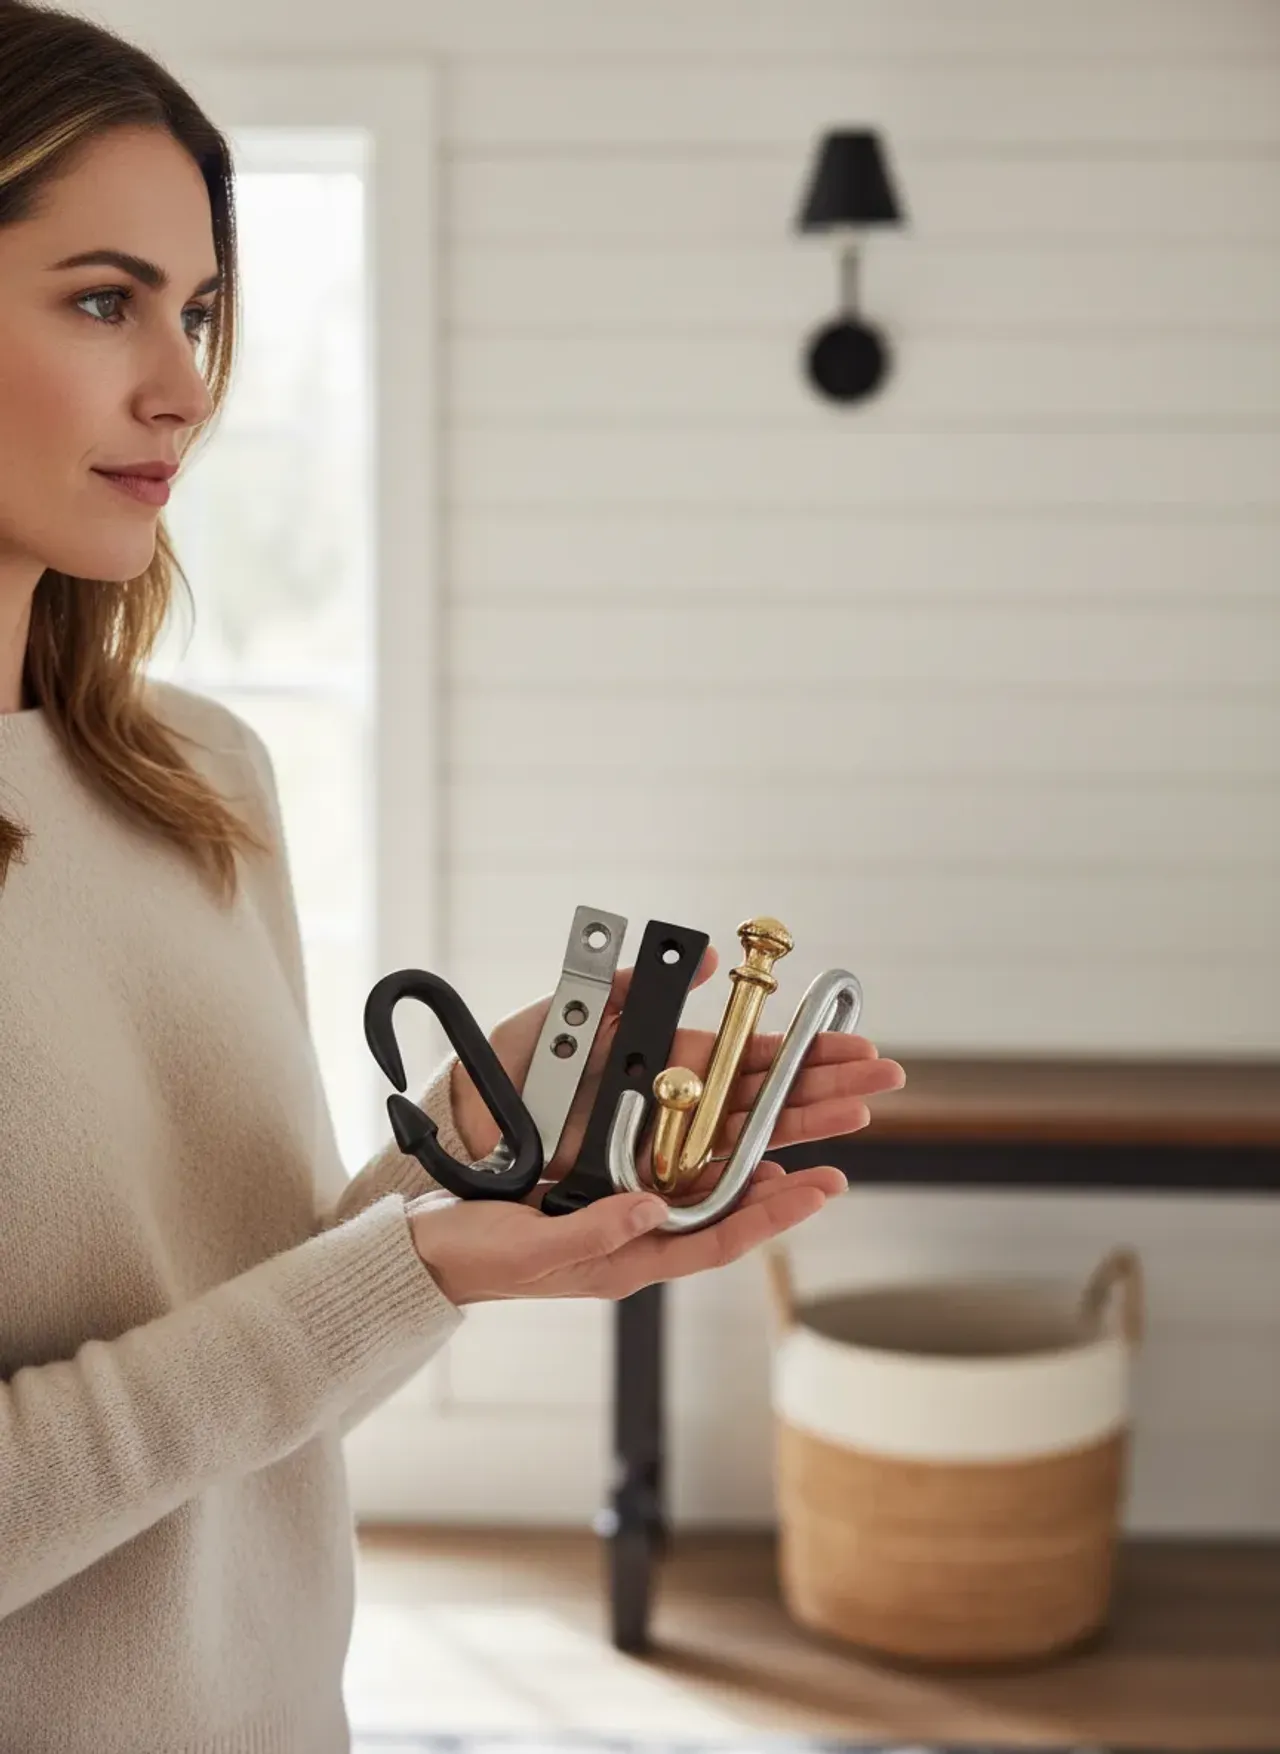
The Anatomy of the Perfect Hook
Not all silhouettes are created equal. The geometry of the hardware dictates its utility.
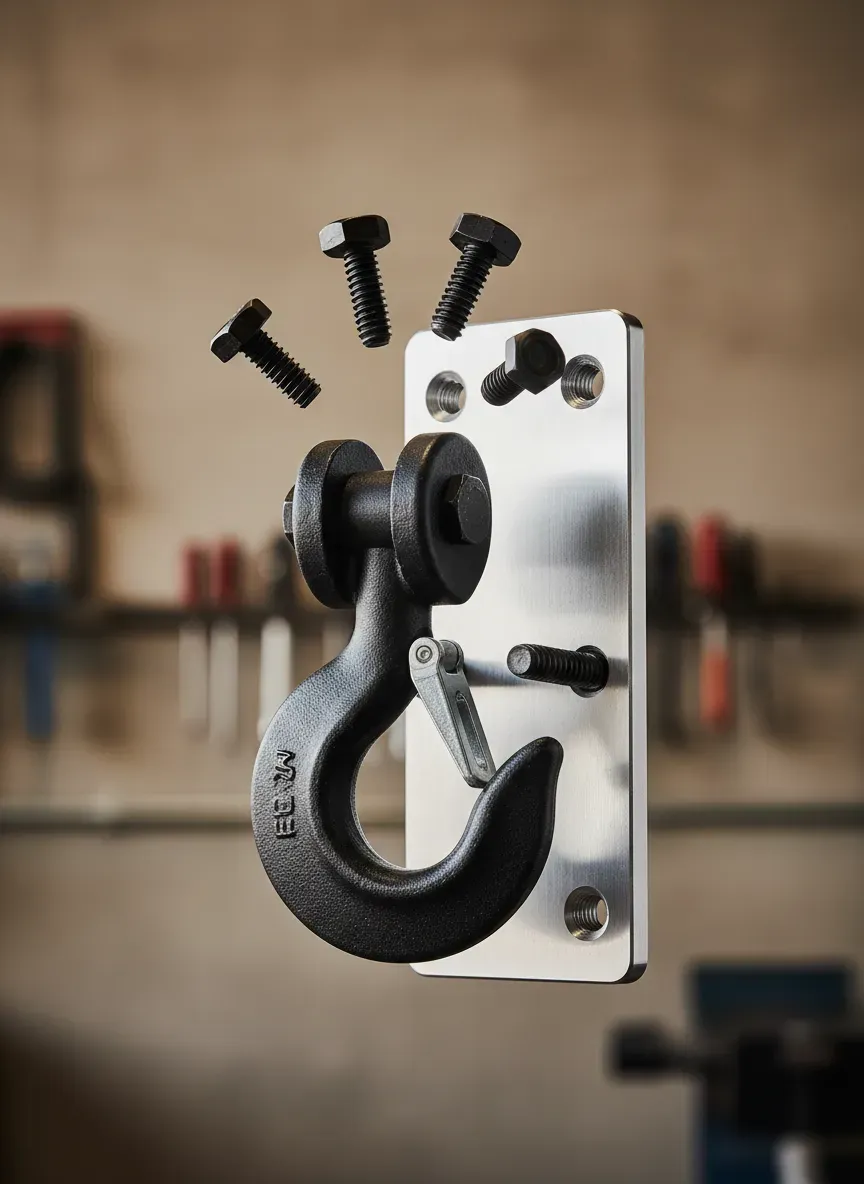
The Backplate
This is the unsung hero. A tiny backplate concentrates all the force on a small area of the wall. You want a wide, tall backplate. This distributes the leverage over a larger surface area, reducing the chance of the hook crushing the drywall or tearing out the screws.
The Throat and Projection
The “throat” is the curve where the item rests. A shallow throat means coats slide off. A throat that is too deep creates excessive leverage. You need to find the sweet spot.
If you are looking for a classic aesthetic that balances a wide backplate with a deep, secure throat, I highly recommend checking out the Franklin Brass Heavy Duty Coat and Hat Hook. The geometry on this specific model is excellent for holding heavy winter gear without the fabric slipping, and the screw holes are spaced vertically to maximize hold on a stud.
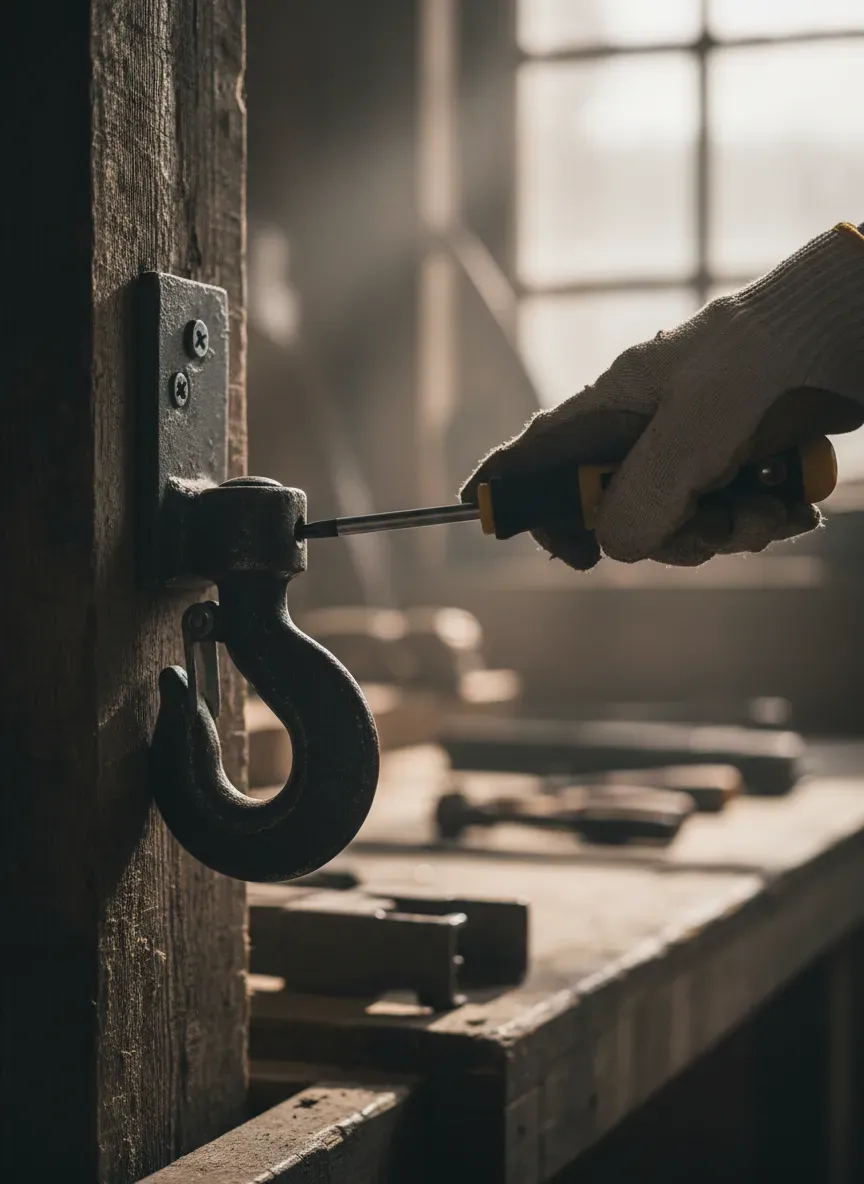
Installation: The Substrate Strategy
You can buy the strongest hook in the world, but if you screw it into half-inch drywall with a plastic anchor, it will fail. Period.
The Golden Rule: Heavy-duty hooks must bite into wood.
If your hook placement aligns with your wall studs (usually 16 inches apart), you are golden. But design rarely aligns with framing. This is where the Backer Board Method becomes non-negotiable.
The Backer Board Method
Instead of fighting to find studs for every single hook, install a 1x4 or 1x6 hardwood board horizontally across the wall. Screw this board into every stud it crosses. Now, you can mount your hooks anywhere along that board. The board acts as a bridge, transferring the load from the hooks to the structural framing of the house.
Pro Tip: If you are building a recessed mudroom locker system, you need to calculate the total depth of the unit including the hooks. Failing to account for the protrusion of the hardware can prevent cabinet doors from closing or impede walkway traffic. I break down the math on this in my guide to standard depth and height measurements, which is essential reading before you cut any wood.
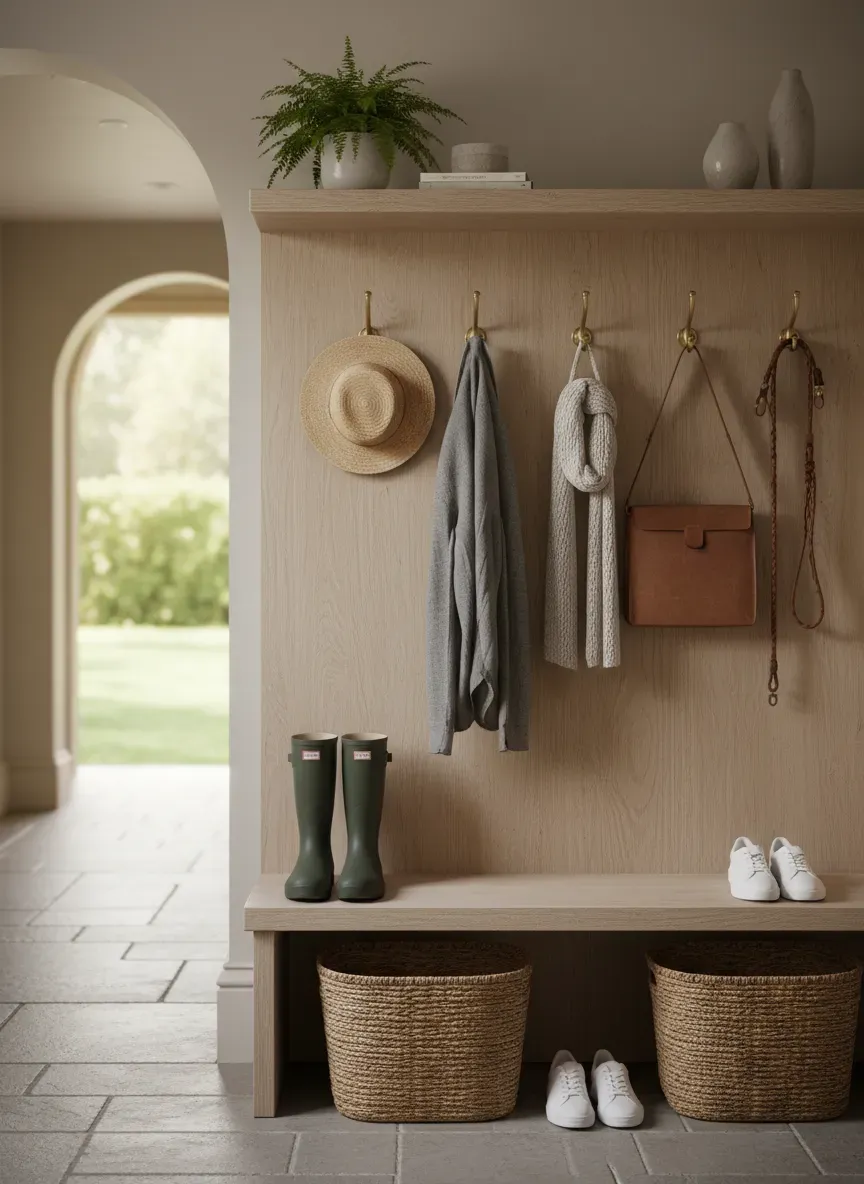
Spacing and Ergonomics
One of the most common errors I see in DIY entryways is “crowding.” It looks great when the hooks are empty, but the moment you hang three winter parkas, it becomes a claustrophobic mess.
The “Breathe” Factor
Hooks need negative space. If they are too close, you can’t see what’s on them, and items get buried. For heavy winter gear, you generally want 8 to 12 inches of separation between centers.
However, spacing isn’t just about lateral distance; it’s about vertical staggering too. By placing hooks at alternating heights, you can double your storage density without creating bulk. To get the specific numbers right, look into the ideal spacing to keep hooks far enough apart. It saves you from drilling unnecessary holes that you’ll just have to patch later.
Accessibility for All Ages
If you have children, a single row of hooks at 60 inches high is useless. They will drop their bags on the floor because they physically cannot reach the storage.
I typically design a “high line” for adults (60-66 inches) and a “low line” for kids (36-42 inches). The low line requires hardware that isn’t too sharp. You don’t want a child running into a jagged cast-iron prong.
For a more modern, child-friendly, yet incredibly robust option, take a look at the Brainerd Heavy Duty Coat and Hat Hook. The edges are often softer and more rounded than rustic iron hooks, making them safer for lower installations while still boasting a significant weight capacity.
Integrating Hooks into Mudroom Lockers
When we move from open walls to built-in cabinetry, the rules change slightly. In a locker cubby, you are confined by the width of the unit.
A standard locker might be 12 to 15 inches wide. If you use a hook with a 4-inch projection, you are eating up a massive amount of internal volume.
Side-Mount vs. Back-Mount:
- Back-Mount: The classic position. Best for backpacks.
- Side-Mount: Installing hooks on the interior side walls of the locker. This is brilliant for maximizing vertical space for things like scarves or smaller bags.
However, you must consider the depth of the locker itself. If the locker is too shallow, a bulky hook will prevent a backpack from hanging naturally. For a detailed breakdown on dimensioning these spaces, refer to my analysis on the best depth for mudroom lockers.
Style Profiles: Matching Hardware to Architecture
Function comes first, but form is a close second. The hardware defines the vibe of the entryway.
The Industrial / Farmhouse Look
This is currently dominating the market. Think matte black, oil-rubbed bronze, and exposed screw heads. The aesthetic is “utilitarian chic.”
If this is your target, you want hardware that looks like it was salvaged from a 1920s factory but manufactured with modern tolerances. The Liberty Hardware Ruavista Coat and Hat Hook is a personal favorite for this. It has a distinctive architectural flair that adds character to plain shiplap or beadboard, and the finish quality is generally superior to generic bulk packs.
The Modern / Minimalist Look
Here, you want brushed nickel, satin brass, or chrome. The shapes should be geometric—cylinders or squared-off angles. The challenge with modern hooks is that they often lack the “lip” at the end of the prong, meaning slick raincoats slide off. Always check for an upward angle or a knurled texture to provide grip.
Safety Considerations: The Overlooked Variable
We touched on this briefly with height, but let’s go deeper. In a narrow hallway, a protruding hook at eye level is a hazard. I have seen nasty injuries from people rushing out the door and clipping a sharp coat hook.
Collapsible Hooks: For very tight spaces, consider piano-style hooks that fold flat against the wall when not in use. They aren’t as strong as fixed rigid hooks, but they save space and prevent bruises.
Bench Integration: Many people install hooks directly above a bench. This is efficient, but you must ensure the hooks are high enough that a person sitting on the bench doesn’t lean back into them. This is a crucial aspect of child-proofing your entryway benches, ensuring that the zone is safe for frantic mornings.
Troubleshooting Common Hardware Issues
Even the best hardware can develop issues over time. Here is how to fix them without replacing the whole unit.
The “Spinner”
This is when the screw turns but doesn’t tighten. It means the wood fibers are stripped.
- The Fix: Remove the screw. Dip a wooden toothpick in wood glue and jam it into the hole. Break it off flush. Let it dry. You have now rebuilt the wood structure. Re-drive the screw.
The Wobbly Hook
The hook pivots left and right.
- The Fix: This usually happens with single-screw hooks. Always buy hooks with at least two mounting holes. If you are stuck with a single-hole hook, put a dab of construction adhesive or clear silicone on the backplate before screwing it in. It acts as a gasket and prevents rotation.
Finish Failure
The black paint is chipping off.
- The Fix: Don’t throw it out. Remove the hook, scuff it with steel wool, and hit it with a high-quality spray enamel (like Rust-Oleum). It will look better than new and likely last longer.
The Bottom Line
You don’t need to spend a fortune to get good hardware, but you cannot scrape the bottom of the barrel. Investing $6 per hook instead of $1.50 is the difference between a lifetime of service and a yearly repair job.
Focus on the substrate. A $50 artisan hook will fall out of drywall just as fast as a cheap one if it isn’t anchored to wood. Plan your spacing, account for the bulk of winter coats, and choose a material that can handle the shock of a heavy backpack.
When you hold the right hardware in your hand, it feels substantial. It has weight. It promises that it won’t let you down when you are rushing in from the rain with groceries in one hand and a dog leash in the other. That assurance is what you are really buying.