The Weekend Warrior’s Guide to Building Custom Mudroom Lockers
Transform your chaotic entryway with this comprehensive, step-by-step masterclass on building custom mudroom lockers over a single weekend.

Mar 9, 2026 - Written by: Linda Wise
Walk into almost any active household, and you’ll instantly spot the drop zone. It’s that chaotic corner by the door where backpacks, muddy boots, stray mittens, and junk mail go to multiply. If you’re tired of tripping over this daily avalanche of domestic life, you’re not alone. I’ve personally found that the absolute best way to wrangle this mess isn’t buying another flimsy wire rack. It’s building a dedicated, built-in mudroom locker system.
You might look at those stunning, floor-to-ceiling entryway builds on architectural blogs and think you need to hire a custom cabinet maker for ten grand. You don’t. With a free weekend, some moderate DIY chops, and a strategic approach to materials, you can engineer a bulletproof, high-end locker system that looks like it came with the house.
Here’s the real kicker: custom cabinetry isn’t magic. It’s just boxes attached to other boxes, trimmed out to hide the seams. Once you grasp the fundamental anatomy of a mudroom build, the intimidation factor vanishes.
Before we start ripping down sheets of plywood, you need the right gear. I’ve compiled a shortlist of the absolute non-negotiables that will save you hours of frustration and elevate your build from “homemade” to “professional.”
Quick Comparison: Top Picks
| Product | Rating | Check Price |
|---|---|---|
| Kreg Jig K4 Pocket Hole System | ⭐⭐⭐⭐⭐ | View on Amazon |
| DeWalt 20V MAX Cordless Brad Nailer | ⭐⭐⭐⭐½ | View on Amazon |
| INSL-X Stix Waterborne Bonding Primer | ⭐⭐⭐⭐⭐ | View on Amazon |
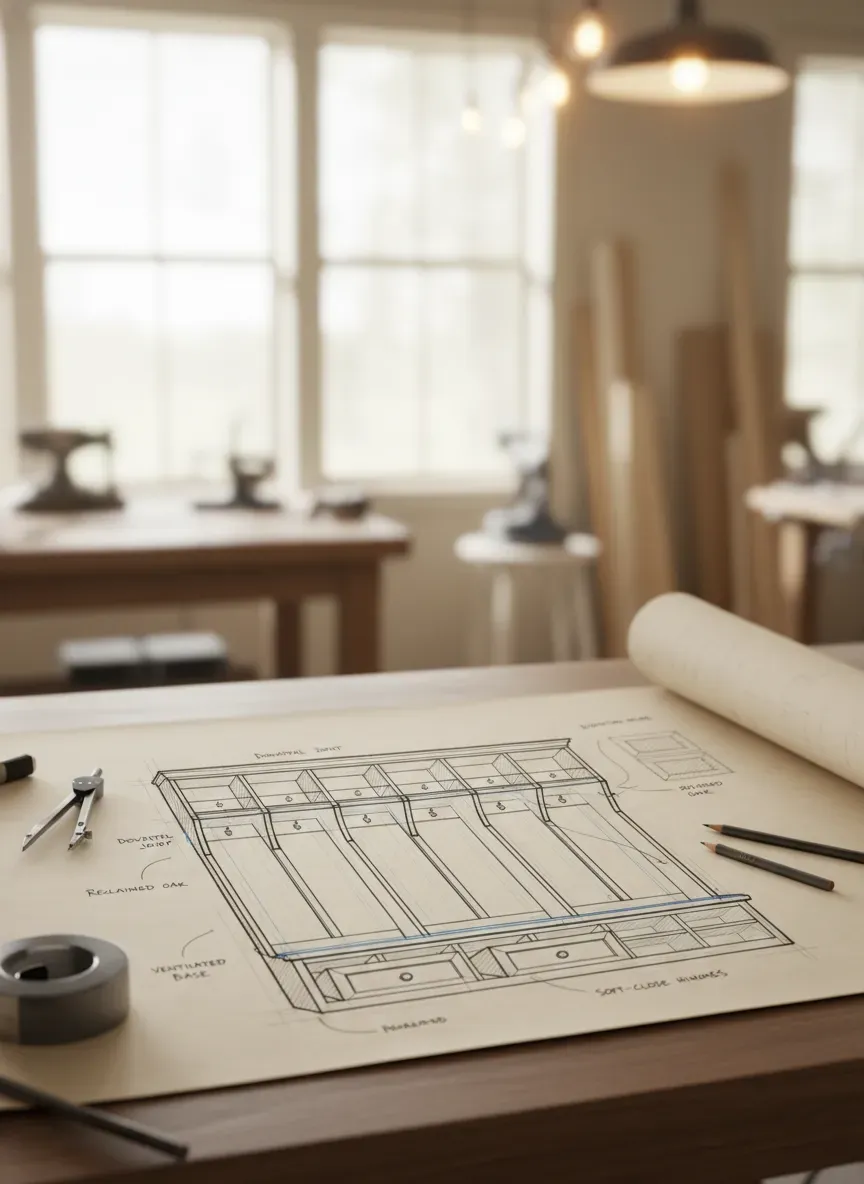
Phase 1: The Blueprint and Anatomy of a Mudroom Locker
Every successful weekend project is won or lost during the planning phase. You cannot wing a built-in. If your measurements are off by a quarter of an inch at the base, that discrepancy will compound into a massive headache by the time you reach the ceiling crown molding.
A traditional mudroom locker consists of four main distinct zones:
- The Plinth (Base): The structural foundation that raises the unit off the floor, usually wrapped in baseboard to match the room.
- The Bench Seat: The horizontal landing pad for putting on shoes.
- The Vertical Carcass (Lockers): The individual bays separated by vertical dividers.
- The Upper Cubbies: Overhead storage for out-of-season gear.
Dialing in the Proportions
A locker system that looks too skinny feels cramped; one that is too deep swallows your shoes into a dark void. It’s all about hitting the sweet spot. When framing out your initial sketch, you’ll want to adhere closely to the standard depth and height measurements for entryway build-outs.
Typically, the bench should sit about 18 inches off the finished floor. This provides an ergonomic height for sitting while lacing up boots. The depth of the lower bench section usually hovers between 18 and 20 inches. For the upper lockers, you want to step the depth back. If the upper section is as deep as the bench, you’ll constantly bang the back of your head when sitting down. Stepping the upper carcass back to 14 or 15 inches deep is the industry standard. If you’re constrained by tight hallways or unusual floor plans, spending time consulting a comprehensive mudroom locker depth guide will help you adapt these dimensions without ruining the functionality.
Pro Tip: Always measure your walls in three places: bottom, middle, and top. Drywall is never perfectly flat, and corners are rarely a true 90 degrees. Build your boxes based on the narrowest measurement, and plan to use scribe molding or caulk to bridge the gaps.
Phase 2: Sourcing Materials Like a Pro
The lumber aisle at the big box store can be a minefield of warped wood and overpriced trim. To get a professional finish, you need to select materials that paint well and resist warping.
Plywood vs. MDF
For the main vertical dividers and boxes (the carcass), you have two primary choices: 3/4-inch Cabinet Grade Plywood (like Birch or Maple) or 3/4-inch MDF (Medium Density Fiberboard).
I highly recommend 3/4-inch Birch Plywood for the bench seat and the base structure because of its superior structural rigidity and screw-holding power. However, for the vertical dividers, MDF is a highly viable alternative if you intend to paint the unit. MDF takes paint flawlessly, leaving a glassy smooth finish without the prominent wood grain that plywood sometimes telegraphs through the topcoat.
The Face Frame Lumber
The raw edges of plywood and MDF are ugly. They soak up paint and look distinctly unfinished. To hide these edges, we apply a “face frame” to the front of the boxes.
For your face frames, skip the cheap pine. Pine is too soft; a heavy backpack buckle will dent it instantly. Instead, buy 1x2 and 1x3 Poplar boards. Poplar is a hardwood, but it’s relatively inexpensive and machines beautifully. It holds a crisp edge and paints like an absolute dream.
Key Takeaways for the Lumber Run:
- Buy 3/4-inch Birch Plywood for structural bases and benches.
- Use 3/4-inch MDF or Birch Plywood for vertical dividers.
- Source 1x2 and 1x3 Poplar for all face framing.
- Pick up a sheet of 1/4-inch beadboard or smooth hardboard for the backer panel.
- Don’t forget wood glue, 1.25-inch pocket hole screws, and heavy-duty shims.
Phase 3: Day One – Demolition, Base, and Carcass Construction
Friday evening or early Saturday morning is demolition time. Pull off the existing baseboards in the area where your lockers will sit. Use a utility knife to score the top edge of the baseboard caulk first; otherwise, you’ll rip the drywall paper straight off the wall.
Building the Plinth
Your floor is not level. Trust me on this. If you simply rest your beautiful plywood cabinets on the floor, they will lean. We counteract this by building an independent, perfectly level base out of 2x4s.
Construct a ladder-like frame out of 2x4s that is exactly the width of your intended unit, and roughly 3 inches shallower than your bench depth. Set this frame on the floor. Grab a high-quality 4-foot level. Slide cedar shims underneath the 2x4s until the bubble is dead center in every direction. Once it’s perfectly level, screw this base directly into the wall studs using 3-inch construction screws. You now have a bulletproof foundation.
Ripping the Carcass
Now we bring out the track saw (or a circular saw with a straight-edge guide). Cut your 3/4-inch plywood or MDF into the required panels. You will need a bottom panel (to sit on the plinth), two outer side panels, and however many internal vertical dividers you planned for.

This is where your joinery method comes into play. You could cut dado grooves to slide the dividers into, but for a weekend build, pocket hole joinery is the undisputed king. Using a Kreg Jig K4 Pocket Hole System, drill pocket holes along the top and bottom edges of your vertical dividers.
Apply a bead of high-quality wood glue to the edge, clamp it in place, and drive in your pocket screws. The glue is what actually provides the long-term strength; the screws just act as internal clamps while the glue dries. Assemble the entire lower bench box, hoist it onto your perfectly leveled 2x4 plinth, and secure it to the wall studs.
Repeat this exact process for the upper locker carcass, resting it on top of the bench.
Pro Tip: Cut a notch at the back bottom corner of your vertical dividers to allow for a continuous 1x4 “nailer board” to run horizontally across the back of the unit. This gives you a solid piece of wood to drive screws through to hit the wall studs, securing the towering unit safely to the wall.
Phase 4: Day Two – Face Frames and Bench Tops
By Sunday morning, you should be staring at a rather ugly collection of raw-edged wooden boxes firmly attached to your wall. It’s time to dress them up.
Mastering the Face Frame
Measure the vertical stiles (the sides of the boxes) and cut your 1x2 poplar to length. Attach these to the front edges of your plywood/MDF carcass.
Here is where the DeWalt 20V MAX Cordless Brad Nailer earns its keep. Apply a thin bead of wood glue to the raw edge of the plywood carcass, line up your poplar face frame flush with the inside edge of the box, and shoot an 18-gauge brad nail every 8 inches to hold it in place.
Once the vertical stiles are up, measure the horizontal gaps between them and cut your horizontal rails. Pocket hole the back of these rails and screw them directly into the vertical stiles for a seamless, tight joint. Suddenly, your raw boxes look like high-end custom cabinetry.
Installing the Bench Top
For the seating surface, you have an aesthetic choice. Some prefer a natural stained wood bench to break up a fully painted locker system. If you go this route, buy a project panel of edge-glued pine, oak, or maple from the hardware store. Cut it to fit, sand it, and stain it before installing.
If you prefer a fully seamless painted look, use a double-thick layer of 3/4-inch MDF with a rounded-over front edge. Whatever material you choose, attach it from underneath. Drive screws up through the top of your lower carcass directly into the underside of the bench seat. This hides all the fasteners, leaving a pristine top surface.
Phase 5: Sanding, Painting, and Finishing Touches
I’ll be brutally honest: the difference between a DIY eyesore and a professional build is entirely in the prep work.
Filling, Sanding, and Caulking
Take a tub of high-quality wood filler and over-fill every single brad nail hole and pocket hole. Once it’s dry, sand it completely flush using 120-grit sandpaper on a random orbital sander, followed by a hand-sanding pass with 220-grit. Run your hand over the filled holes with your eyes closed. If you can feel the hole, you need more filler. Paint hides nothing; it actually highlights imperfections.
Next, grab a tube of paintable acrylic latex caulk. Run a tiny bead along every internal 90-degree corner where two pieces of wood meet, and where the unit meets the drywall. Smooth it with a wet finger. This closes up those hairline shadow gaps and makes the lockers look monolithic.
The Chemistry of Paint
Raw wood, and especially MDF, acts like a sponge. If you slap standard wall paint on it, the grain will raise, the finish will feel like sandpaper, and it will chip within a week.
You must prime the unit. I highly recommend using the INSL-X Stix Waterborne Bonding Primer. It sticks to absolutely anything and creates an impenetrable seal over MDF edges. Let the primer cure fully, then lightly scuff sand it with 320-grit paper to knock down any dust nibs.
For the topcoat, do not use wall paint. You need a Urethane Alkyd Enamel. This is a specialized cabinet paint that applies like a water-based product but cures as hard as an oil-based enamel. It levels out beautifully, hiding brush marks and providing a shell-like finish that can withstand dragging backpacks and wet coats.
Hardware Installation
Once the paint has cured for a few days (don’t rush this, or the paint will peel), it’s time for the jewelry. Install your coat hooks, drawer pulls, and any decorative hardware.
Getting the hook placement right is surprisingly tricky. You need enough vertical drop for winter coats, but you also want staggered hooks for kids’ items. Taking a few minutes to map out the ideal spacing and how far apart hooks should be will prevent you from drilling unnecessary holes into your pristine paint job.
Avoiding the “Amateur Hour” Mistakes
Even the most meticulous weekend warriors can fall into a few common traps when building built-ins. Here are the pitfalls I see most often, and how to dodge them entirely.
- Ignoring Baseboard Outlets: Mudroom walls often have electrical outlets near the floor. If your new locker base covers an outlet, you cannot simply bury it. That is a massive fire code violation. You must use an electrical box extender and bring the outlet forward into the new plinth base, cutting a clean hole in your baseboard trim for access.
- Skipping the Scribe: Walls are never straight. When your rigid, perfectly square cabinet butts up against a wavy drywall wall, there will be a gap. Don’t just pump it full of a massive bead of caulk. Use a piece of thin scribe molding (a tiny piece of trim) to elegantly cover the gap between the cabinet side and the wall.
- Trapping the HVAC: If there is a floor vent where your lockers are going, you need to route the air. Build a sealed channel under your plinth and install a toe-kick register plate on the front of your baseboard.
- Painting the Bench Seat: If you choose to paint the horizontal bench seat rather than using stained hardwood, be aware that urethane enamel takes up to 30 days to fully cure and reach maximum hardness. If you drop a heavy metal toolbox on it on day three, it will dent the paint. Treat it gently for the first month.
The Bottom Line: Building a custom mudroom locker system is an entirely manageable weekend project if you break it down into systematic phases. By focusing heavily on a level foundation, utilizing pocket hole joinery for speed and strength, and refusing to cut corners on primer and paint, you can construct a high-impact, architectural feature that transforms how your family enters the home. Put on the safety glasses, fire up the track saw, and reclaim your entryway.