
Best Containers for Refrigerator Organization
Pick refrigerator containers that keep food fresh and visible: material, seal type, stackability, and the shelf-zone layout that stops food disappearing.
Published · Linda Wise
8 min readLast updated: November 8, 2026 | Reviewed by: Linda Wise, managing editor
A refrigerator is a visibility problem disguised as a space problem. Most fridges are not full; they are full of things you cannot see, stacked behind things you forgot about.
The containers you choose determine whether that changes. Opaque takeout tubs and mismatched lids create a fridge where food goes in and never comes out. Clear, square, gasketed containers in a small number of sizes create a fridge you can read at a glance.
This guide covers what actually matters in a container, how to match material and shape to each fridge zone, and the layout that keeps food moving.
The Five Features That Decide Whether a Container Works
Judge every container on these, in this order.
- Clarity. You need to see the contents without opening the lid. Fully clear is best; a clear body with an opaque lid is fine; fully opaque is a container that hides food.
- A real seal. A continuous silicone or rubber gasket compressed by locking tabs or a fitted snap lid. This is what keeps greens crisp and stops strong odors migrating into butter.
- Straight sides and square footprints. Rounded containers waste the corners of a rectangular shelf. Square or rectangular containers with straight walls use nearly all the available volume.
- Stackability with a stable lid. The lid should have a recess or a flat top that holds the container above it. A domed lid stacks nothing.
- A consistent lid system. One lid design across the whole set means you never hunt for a match. This is the most underrated feature and the one people regret ignoring.
Everything else — color, brand, whether it has a bamboo lid — is preference. Handles and pour spouts are useful for specific contents, not for general organization.
Glass vs. Plastic: Match It to the Job
| Factor | Glass | Plastic |
|---|---|---|
| Visibility | Excellent, stays clear | Good when new, clouds with age and staining |
| Odor and stain resistance | Excellent | Fair; tomato and turmeric stain permanently |
| Reheating | Safe in oven and microwave, if labeled for it | Microwave-safe only if labeled; not for ovens |
| Freezer use | Only if labeled freezer-safe, with headroom | Generally good |
| Weight | Heavy, especially in large sizes | Light |
| Breakage risk | Chips and cracks on impact or thermal shock | Cracks at corners over time |
| Typical price band | Higher, roughly double plastic for the same size | Lower |
| Best for | Leftovers, sauces, meal prep, acidic foods | Freezer portions, lunch bags, kids, bulk dry goods |
The practical answer for most kitchens is a mixed set with one shared lid system. Glass for the shelf where leftovers live, plastic for the freezer and the lunch bag. Buying an all-glass set and then discovering you cannot send it to school is a common and avoidable mistake.
If you are stocking a pantry alongside the fridge, our guide to the best pantry and countertop containers covers the dry-goods side, where airtightness matters more than visibility.
Map the Fridge Before You Buy
Refrigerators have temperature zones, and containers should follow them. This is the part most organization guides skip.
- Top shelf: the most temperature-stable area in most fridges. Good for ready-to-eat foods, leftovers, drinks, and anything you do not want dripping onto other food.
- Middle shelves: the general-purpose zone. Meal prep containers, dairy, cooked proteins.
- Bottom shelf: the coldest area, and the correct place for raw meat and fish, always in a container or on a rimmed tray so drips cannot reach food below.
- Door: the warmest, most temperature-fluctuating zone. Condiments, butter, and drinks only. Never milk or eggs, despite what the molded-in door bins suggest.
- Crisper drawers: high humidity for vegetables, lower humidity for fruit. Containers here should be ventilated or open, not sealed, or you trap ethylene and moisture.
- Drawers and deli bins: cheese, cured meats, and small items that get lost on shelves.
Once you know the zones, container sizes follow. Tall containers for the door, shallow wide ones for the top shelf, deep ones for the bottom, and small stackable ones for the deli drawer.
The Layout Rule That Stops Food Disappearing
The single most effective habit is a strict front-to-back rotation with a designated “eat first” zone.
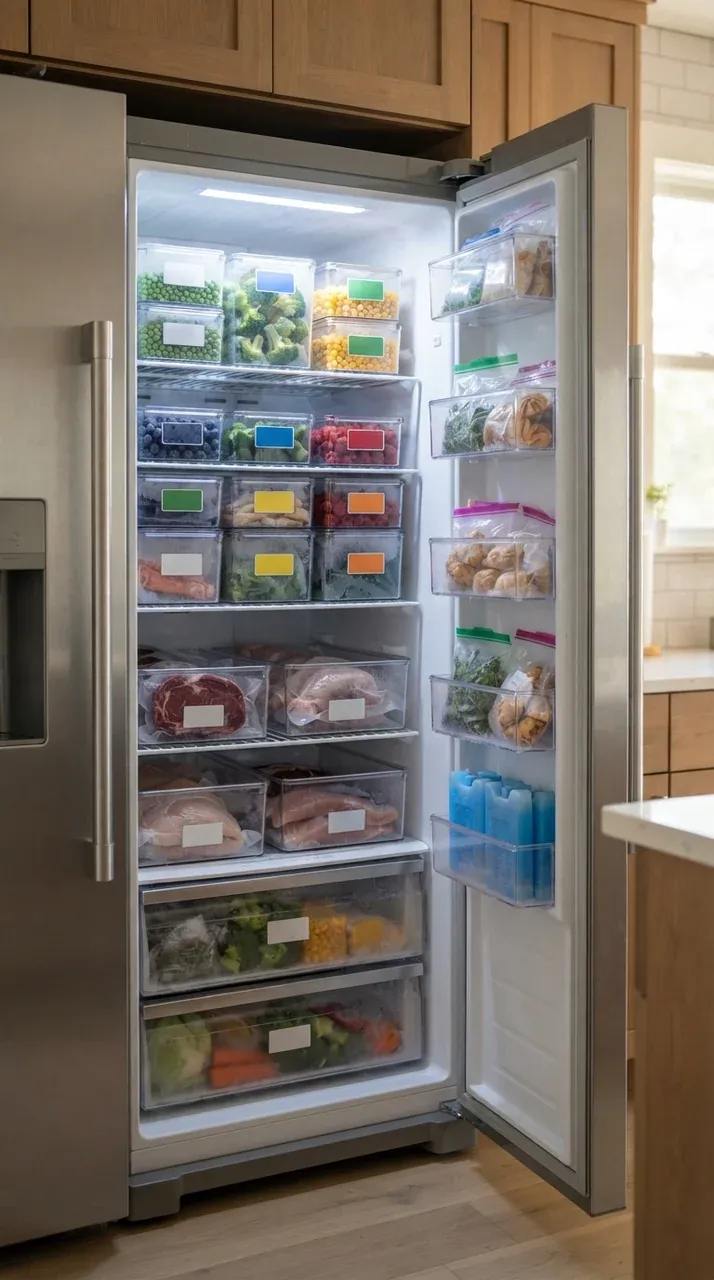
- Create an eat-first shelf at eye level. Anything with a short remaining life goes there, in a clear container, unstacked.
- Load from the back, pull from the front. New groceries go behind old ones, always.
- Never stack more than two high on the eat-first shelf. A third layer is a hiding place.
- Use one container shape per shelf. Mixed shapes create gaps and unstable stacks.
- Label with a date, not a name. You know what it is; you do not know when you made it. A strip of masking tape and a marker is enough.
That routine takes about thirty seconds per grocery run and prevents most of the food waste that container sets are marketed to solve.
Sizes Worth Owning
A container collection that works is smaller than most people expect. Aim for two or three sizes and buy multiples.
- Small, shallow (around 1 to 2 cups): dips, cut fruit, leftovers for one, small portions. The most-used size in most kitchens.
- Medium, square (around 4 to 6 cups): the workhorse. Single servings of leftovers, meal prep, chopped vegetables.
- Large, rectangular (around 8 to 12 cups): batch cooking, a whole roast chicken, a big salad, marinating.
- Tall and narrow: door bins, sauces, dressings, cut herbs in water.
- One or two very large bins: crisper overflow, bulk produce, a whole watermelon in summer.
Resist the urge to buy a 20-piece set in six sizes. You will use three of them and store the rest. Buy multiples of the sizes you actually reach for, and add sizes only when a specific need appears.
Care, Staining, and Longevity
Containers last longer with three habits:
- Never put a hot container straight into a cold fridge. Let food cool to room temperature first, both for food safety and to avoid thermal stress on glass.
- Soak lids separately. Gaskets trap food and odors, and a gasket that is not cleaned will smell. Most are removable; check before buying.
- Retire stained plastic. A permanently stained container is a container you will avoid using, and avoidance is how food gets lost.
For freezer organization specifically, our guide to the easiest freezer type to organize covers the upright-versus-chest trade-off and how containers behave at low temperature.
Three Container Types Worth Skipping
Not every container earns shelf space. These are the ones that tend to end up at the back of a cabinet.
- Round containers with narrow mouths. They waste the corners of a rectangular shelf and you cannot get a spatula into them. Round is fine for liquids and for the door, poor for everything else.
- Nesting sets with graduated sizes and no shared lid. The nesting looks efficient in the store and becomes a lid-matching puzzle in the drawer. If the lids do not interchange across the set, skip it.
- Containers with a domed or handled lid. They stack nothing, which means they consume the vertical space above them. Reserve these for a single specific use, like a salad spinner or a pitcher.
- Very large single containers. A 20-cup tub of soup is a commitment. Unless you are feeding a crowd or freezing in portions, it will sit half-full until it is thrown out.
The common thread: each one either wastes volume or defeats visibility. Both are the exact problems containers are supposed to solve.
A Two-Week Reset Plan
If the fridge is already a disaster, work through it in stages rather than all at once.
- Empty one shelf at a time. Not the whole fridge. A full teardown is why people abandon the project halfway.
- Triage as you go. Keep, eat this week, and toss. Check dates and trust your nose.
- Wipe the shelf and let it dry before reloading. A damp shelf fogs containers and grows odors.
- Reload by zone, with the eat-first shelf at eye level and raw meat on the bottom.
- Note what you threw out. Three wasted bunches of cilantro in a row is a signal to buy less, not to buy a better container.
Two weeks of that routine, one shelf per evening, and the fridge reorganizes itself around what you actually eat. If you are also rethinking the small organizers on your counters and shelves, our Miniso vs. Muji comparison covers where the cheap acrylic bins are worth it and where they are not.
A budget-friendly supplement
Costway’s storage and organization range includes stackable bins, foldable baskets, and closet organizers at factory-direct prices. Affiliate link: we may earn a commission at no extra cost to you. Measure first, and buy one sample before committing to a matching set.
What to Spend
Expect to pay in the $15-$40 range for a set of glass containers with locking lids, depending on size and count, and roughly $10-$25 for a comparable plastic set. Individual large glass pieces run higher. Premium brands with borosilicate glass and silicone-sealed lids sit at the top of those bands.
Two buying notes that save money:
- Buy one set, live with it for two weeks, then expand. You will discover which sizes you actually use, and it is rarely the ones you expected.
- Measure your shelf height before buying tall containers. A container that does not fit under the shelf above it is a container that lives on the counter.
Bottom Line
Buy clear, straight-sided containers with a genuine gasket, in two or three sizes, sharing one lid system. Glass for leftovers and anything acidic, plastic for the freezer and lunch bags.
Then do the part that no product solves: map the zones, create an eat-first shelf at eye level, and load new groceries behind old ones. In our assessment, that combination keeps food fresh and visible far more reliably than any particular brand, because visibility is a layout decision and freshness is a seal decision. Pick containers that serve both, and stop accepting mismatched takeout tubs.
Shop Entryway Furniture & Storage Deals on Costway
Factory-direct pricing on entryway benches, shoe cabinets, hall trees, and organizers with fast, free US delivery.
* Affiliate disclosure: We may earn a commission if you shop through this link at no added cost to you.
Check Costway Entryway DealsFrequently Asked Questions
Is glass or plastic better for fridge storage?
Glass is better for anything you will reheat, anything acidic or staining like tomato sauce and turmeric, and anything stored more than a few days, because it does not hold odors or stain. Plastic is lighter, cheaper, freezer-friendly, and better for lunch bags and kids. Most kitchens end up with both, sharing one lid system.
What makes a refrigerator container actually airtight?
A continuous silicone or rubber gasket compressed by four locking tabs or a well-fitted snap lid. A lid that simply rests on the rim, or clicks on without a gasket, is not airtight. For anything that needs to stay crisp or keep its aroma in, the gasket is the feature that matters.
Why does food disappear in my fridge?
Because it is opaque, stacked, or in the wrong zone. Food in the crisper drawer behind other food, or in an opaque takeout container at the back of a shelf, is out of sight and therefore out of mind. Clear containers plus a strict front-to-back rotation rule solve most of it.
How do I stop containers from taking over the fridge?
Standardize. Choose two or three sizes that nest, use one lid system across the whole set, and stop accepting mismatched takeout containers. A fridge with eight identical containers stacks predictably; a fridge with twenty random ones wastes vertical space and hides food.
Can I put glass containers in the freezer?
Only if the glass is labeled freezer-safe, and even then you must leave headroom for expansion and avoid moving a frozen glass container straight to a hot surface. Sudden temperature change, not cold alone, is what cracks glass. Tempered glass designed for freezer-to-oven use is the safe choice.